• Skip to main content
  • Skip to primary sidebar
  • HOME
  • SKIN CARE
  • HAIR CARE
  • HEALTH AND WELLNESS
  • CONTACT US

Sharvayoni

Unearth Nature's Magic - Your Path to Herbal Radiance and Wellnes

Skin Care

skin-care-Slider1

Managing Acne During Pregnancy: Neem and Thulasi Remedy

January 7, 2024 by sharvayonibeauty Leave a Comment

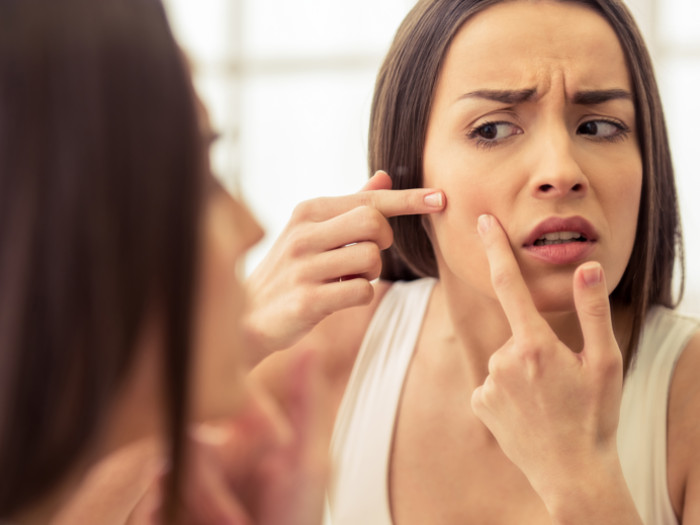
Acne problems can be quite common during pregnancy, affecting about 2 out of 3 pregnant women. Hormonal fluctuations during pregnancy can lead to skin changes, and in some cases, acne may become severe. Unlike the acne experienced during teenage years, pregnancy-induced acne is unique and requires specific care and attention.

Causes of Acne During Pregnancy

The primary cause of acne during pregnancy is the fluctuation in hormone levels. The first trimester is particularly susceptible to these changes, leading to the development of acne. The higher levels of hormones in the body trigger increased sebum production, leading to blocked pores and the accumulation of dirt, resulting in acne breakouts. However, it’s challenging to predict who will experience acne during pregnancy, and in most cases, acne tends to subside by the third trimester or after delivery.

Treating Acne During Pregnancy

It’s essential to avoid chemical treatments or medications for acne during pregnancy, as they may have adverse effects on the developing fetus. Instead, opting for natural and home remedies is a safer and more effective approach to managing pregnancy-induced acne without any harm to the baby.

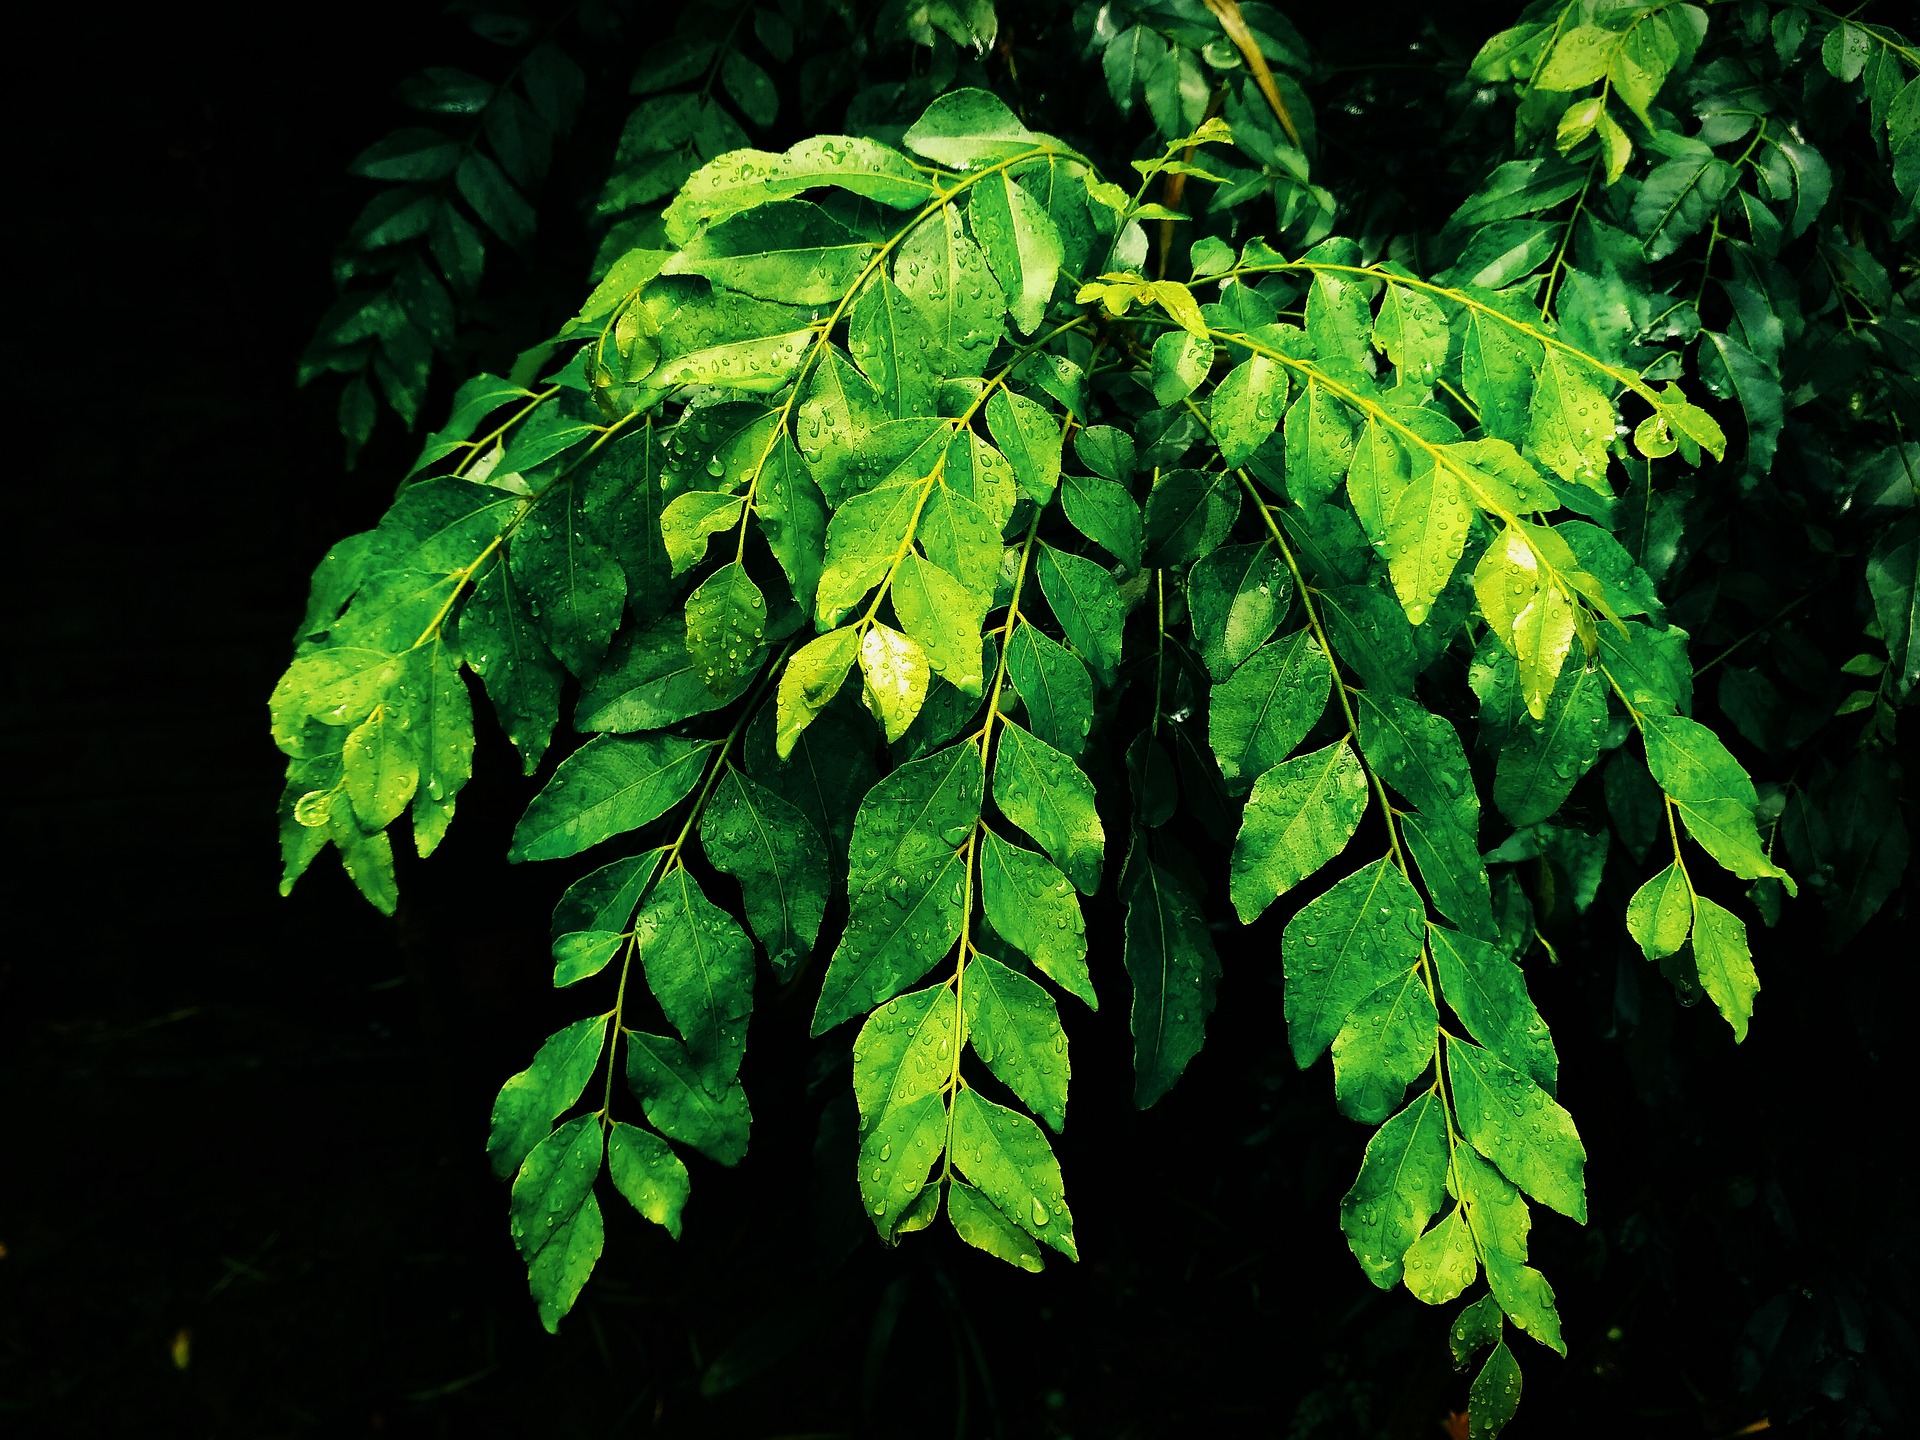
Using Neem and Thulasi (Holy Basil)

Things Required:

  • One small cup of Neem Leaves
  • One small cup of Thulasi Leaves (Holy Basil)
  • One spoon of Sandalwood Powder
  • One spoon of Rose Water (You can use Cucumber Juice if you don’t have rose water)

How to Prepare and Apply:

  1. Blend the Neem and Thulasi Leaves into a paste.
  2. Add the Sandalwood powder and rose water to the mixture.
  3. Mix well to form a smooth paste.
  4. Apply this mixture evenly on your face and neck.
  5. Let it dry for 20 minutes.
  6. Wash thoroughly with cold water.
  7. Repeat this treatment thrice a week, before shower.

Why it Works:

Neem and Thulasi possess powerful antibacterial properties that help eliminate acne-causing microbes and reduce inflammation. The cleansing properties of Thulasi gently purify the skin, unclog pores, and remove impurities, promoting a clearer complexion. The combination of Sandalwood powder and rose water provides nourishment to the skin, promoting an even and healthy appearance.

Conclusion

Acne problems during pregnancy can be challenging, but with the right approach and natural remedies like Neem and Thulasi, you can manage and alleviate these skin concerns effectively. Embracing natural remedies ensures the safety of both the mother and the developing baby, allowing you to achieve flawless and radiant skin during this beautiful phase of life.

Filed Under: Skin Care Tagged With: acne during pregnancy, flawless skin during pregnancy, managing acne during pregnancy, natural remedies for acne, Neem and Thulasi for acne, pregnancy acne, pregnancy care, pregnancy skincare, safe acne remedies, skin care

Treating Cuts, Burns, or Skin Problems with Curry Leaves

January 7, 2024 by sharvayonibeauty Leave a Comment

Dealing with cuts, burns, or various skin problems can be both painful and concerning. While there are numerous over-the-counter remedies available, nature provides us with simple and effective solutions. In this article, we will explore the use of curry leaves as a natural remedy for treating cuts, burns, or skin issues. Discover how the antibacterial and anti-inflammatory properties of curry leaves can aid in healing and preventing the spread of skin problems.

Things Needed

To create the Curry Leaves Healing Paste, you will only need one ingredient:

  • One cup of fresh curry leaves

Steps to Prepare

Preparing the Curry Leaves Healing Paste is a straightforward process. Follow these simple steps to harness the natural healing power of curry leaves:

1. Start by gathering fresh curry leaves. Ensure that they are clean and free from any dirt or impurities.

2. Smash the curry leaves to create a smooth and consistent paste. You can use a mortar and pestle or any suitable method for this.

3. Once you have obtained a paste-like consistency, you are ready to apply it to the affected parts of your skin.

4. Gently apply the curry leaves paste to the cuts, burns, or skin problems. Be thorough but gentle in your application to avoid further irritation.

5. Allow the paste to sit on the affected areas for a reasonable amount of time. This will vary depending on the severity of the issue, but leaving it for at least 10-15 minutes is typically effective.

6. After the designated time has passed, gently rinse off the paste with lukewarm water. It’s advisable to avoid using soap or harsh cleansers to prevent further irritation.

Benefits

The Curry Leaves Healing Paste offers several benefits for addressing cuts, burns, and skin problems:

  • Antibacterial Properties: Curry leaves contain natural antibacterial properties that can help prevent infection in cuts and burns, promoting faster healing.
  • Anti-Inflammatory Effects: The anti-inflammatory properties of curry leaves can reduce swelling and discomfort associated with skin problems.
  • Preventative Action: Applying this paste not only aids in healing but also helps prevent the issue from spreading or worsening.
  • Natural and Chemical-Free: This remedy relies on a single natural ingredient, making it a gentle and chemical-free solution for skin issues.

Conclusion

Treating cuts, burns, or skin problems with curry leaves is a time-tested natural remedy that harnesses the antibacterial and anti-inflammatory properties of this incredible herb. Nature provides us with simple yet effective solutions for our skincare needs, and curry leaves are no exception. By incorporating the Curry Leaves Healing Paste into your skincare routine when needed, you can promote faster healing and prevent the spread of skin problems. Embrace the power of nature and keep this gentle and chemical-free remedy in your toolkit for addressing common skin issues.

Filed Under: Skin Care Tagged With: anti-inflammatory, antibacterial properties, beauty tips, chemical-free skincare, curry leaves, Cuts and burns, DIY skincare, faster healing, healing paste, Natural remedy, skin care, skin care routine, skin problems

Rejuvenate Your Skin with an Orange Peel Face Pack: A Natural Radiance Booster

August 20, 2023 by sharvayonibeauty Leave a Comment

Explore the world of natural skincare with the enchanting orange peel face pack. Laden with vitamins, antioxidants, and exfoliating agents, this blend offers a gateway to radiant and rejuvenated skin. Delve into this guide to learn how to concoct and apply this natural elixir for optimal results.

The Essence of Vibrance: Oranges, Yogurt, and Honey

Ingredients Required:

  • 2 fresh oranges
  • 1 tablespoon of yogurt
  • 1 teaspoon of honey

Crafting the Orange Peel Face Pack:

  1. Sun-Kissed Peels: Peel three fresh oranges and set aside the skins. Cut the peels into small pieces and rinse them thoroughly. Leave the peels to dry in the sun for approximately three days until they are completely dehydrated.
  2. Sun-Dried Magic: Once dried, gently blend the peels to create a fine powder. This orange peel powder can be stored in a clean, dry container for future use.
  3. Pack Preparation: For the face pack, combine 2 teaspoons of orange peel powder with the rejuvenating goodness of yogurt and the nourishing touch of honey. Mix these ingredients thoroughly until a consistent paste is formed.

Application of the Orange Peel Face Pack

  1. Cleansing Ritual: Initiate your skincare routine by cleansing your face to remove any impurities. Pat your skin dry gently with a clean towel.
  2. Even Layer Application: With clean fingers or a brush, evenly spread the orange peel face pack on your face and neck. Steer clear of the delicate areas around your eyes and lips.
  3. Time for Nourishment: Allow the face pack to settle on your skin for about 20 minutes. During this time, the active agents from the orange peel, yogurt, and honey work their magic.
  4. Cleansing Ritual: As the 20 minutes elapse, rinse off the face pack with cool water. Ensure that all traces of the pack are gently removed. Pat your skin dry with a soft towel.

Unveiling the Benefits

Orange Radiance: Oranges are laden with vitamin C, known for its role in enhancing collagen production. The natural exfoliating agents in orange peels aid in removing dead skin cells, unveiling a brighter complexion.

Yogurt’s Embrace: Yogurt is brimming with probiotics and lactic acid, which work in tandem to soothe and nourish the skin while gently exfoliating.

Honey’s Tender Touch: Honey’s humectant properties provide deep hydration to the skin, leaving it soft and supple. Its antibacterial traits contribute to a clearer complexion.

Adapting the Orange Peel Face Pack

For Sensitive Skin: If you have sensitive skin, consider reducing the frequency of application to avoid overstimulation. Also, perform a patch test before applying the pack to your entire face.

Embracing the Vibrance

Application Frequency: Incorporate the orange peel face pack into your skincare regimen once a week. Observe your skin’s response and adjust the frequency if needed.

Post-Pack Pampering: Following the face pack, moisturize your skin with a lightweight, non-comedogenic moisturizer to lock in the benefits.

Blossoming into Natural Radiance

Experience Nature’s Bliss: Elevate your skincare ritual with the enchanting orange peel face pack. Immerse yourself in the fusion of oranges, yogurt, and honey as they infuse your skin with vitality, leaving it radiant and renewed.

Filed Under: Skin Care Tagged With: beauty tips, glowing skin, homemade remedies, honey, natural skincare, orange peel face pack, skin care, skincare routine, yogurt

Tomato Face Pack: Harnessing the Power of Tomatoes for Glowing Skin

August 15, 2023 by sharvayonibeauty Leave a Comment

Revitalize your skincare regimen with the vibrancy of a tomato face pack. Bursting with antioxidants, vitamins, and natural acids, this concoction offers a rejuvenating escape to pamper your skin. Dive into this guide to explore the secrets behind creating and applying this refreshing blend.

The Radiant Trio: Tomatoes, Oatmeal, and Yogurt

Ingredients You’ll Need:

  • 1 ripe tomato
  • 1 tablespoon of oatmeal
  • 1 teaspoon of yogurt

Crafting the Tomato Face Pack:

  1. Tomato Elixir: Begin by blending a ripe tomato into a smooth, pulpy consistency. Tomatoes are rich in lycopene, a powerful antioxidant that helps in protecting the skin from environmental damage.
  2. Oatmeal Inclusion: Incorporate a tablespoon of oatmeal to the tomato blend. Oatmeal’s gentle exfoliating properties aid in removing dead skin cells and unclogging pores, revealing a fresher complexion.
  3. Yogurt Indulgence: Add a teaspoon of yogurt to the mixture. Yogurt contains probiotics and lactic acid, which help in soothing and hydrating the skin while promoting a healthy skin barrier.
  4. Blending Alchemy: Blend the tomato, oatmeal, and yogurt until they form a cohesive mixture. The resulting blend should be a fragrant and textured paste ready for application.

Applying the Tomato Face Pack

  1. Prep and Cleanse: Ensure your skin is cleansed and free from impurities before applying the face pack. Gently cleanse your face and pat it dry.
  2. Even Layer: With clean fingers or a brush, generously apply the tomato face pack on your face and neck. Avoid the sensitive skin around your eyes and lips.
  3. Rejuvenation Time: Let the face pack rest on your skin for about 10 minutes. During this time, the tomato’s antioxidants and nutrients seep into your skin, bestowing their benefits.
  4. Gentle Cleansing: As the 10 minutes conclude, gently wash off the face pack with cool water. Gently pat your skin dry with a soft towel.

Embracing the Benefits

Tomato Brilliance: Tomatoes are rich in vitamins A and C, which contribute to a brighter complexion. Their natural acids help in controlling excess oil and reducing the appearance of blemishes.

Oatmeal’s Nurturing: Oatmeal’s gentle exfoliation helps in removing dead skin cells, revealing a smoother texture. Its anti-inflammatory properties soothe irritated skin, making it an excellent choice for sensitive skin types.

Yogurt’s Caress: Yogurt’s probiotics maintain the skin’s natural balance while lactic acid gently exfoliates, revealing a fresh and rejuvenated complexion.

Customizing the Tomato Face Pack

For Dry Skin: To cater to dry skin, consider substituting yogurt with honey. Honey’s moisturizing properties provide deep hydration, leaving your skin nourished.

For Sensitive Skin: Sensitive skin types can replace yogurt with aloe vera gel. Aloe vera’s soothing properties are gentle on sensitive skin, reducing redness and irritation.

Integrating the Tomato Ritual

Usage Frequency: Incorporate the tomato face pack into your skincare routine once a week. Assess your skin’s response and adjust the frequency as needed.

Patch Test: Before applying the pack to your entire face, perform a patch test on a small area of your skin to ensure compatibility and prevent potential reactions.

Post-Pack Care: After rinsing off the face pack, follow up with a lightweight moisturizer to retain the benefits and maintain your skin’s hydration levels.

Revealing Your Revitalized Radiance

Indulge in Nature’s Goodness: Elevate your skincare journey with the natural marvels of a tomato face pack. Immerse yourself in the blend of tomatoes, oatmeal, and yogurt as they breathe life into your skin, leaving it vibrant and renewed.

Filed Under: Skin Care Tagged With: beauty tips, glowing skin, natural skincare, oatmeal, skin care, skincare routine, tomato benefits, tomato face pack, yogurt

Bananas for Beauty: Unleash the Magic of the Banana Face Pack

August 14, 2023 by sharvayonibeauty Leave a Comment

Enhance your skincare regimen with the tropical allure of a banana face pack. Bursting with vitamins, minerals, and natural enzymes, this blend offers a refreshing escape to rejuvenate and pamper your skin. Dive into this guide to unravel the secrets of creating and applying this lush concoction.

Unveiling the Banana Face Pack

Ingredients You’ll Need:

  • 1/2 ripe banana
  • 1/2 teaspoon of honey
  • 1 teaspoon of lemon juice

Crafting the Banana Face Pack:

  1. Banana Mash: Begin by mashing half a ripe banana in a bowl. Ensure that the banana is well-mashed to create a smooth base for the face pack.
  2. Sweet Addition: Add half a teaspoon of honey to the mashed banana. Honey, renowned for its antibacterial and moisturizing properties, infuses the pack with its skin-loving benefits.
  3. Zest of Lemon: Introduce a teaspoon of freshly squeezed lemon juice to the mixture. Lemon juice, rich in vitamin C, contributes its brightening and exfoliating qualities to the face pack.
  4. Blending Harmony: Gently mix the banana, honey, and lemon juice until they amalgamate into a cohesive blend. The result should be a fragrant and smooth paste that’s ready for application.

Applying the Banana Face Pack

  1. Cleanse and Prepare: Before applying the face pack, ensure your skin is clean and free of any makeup or impurities. Gently cleanse your face and pat it dry.
  2. Even Application: Using clean fingers or a brush, evenly spread the banana face pack on your face and neck. Avoid the delicate skin around your eyes and lips.
  3. Relaxation Time: Allow the face pack to rest on your skin for approximately 20 minutes. During this time, the nutrients from the banana, honey, and lemon juice penetrate your skin, bestowing their goodness.
  4. Rinsing Off: As the 20 minutes draw to a close, rinse off the face pack with cool water. Gently pat your skin dry with a soft towel.

Embracing the Benefits

Banana Brilliance: Bananas are a rich source of vitamins A, B, and E, which nourish and moisturize the skin. They also contain natural enzymes that exfoliate and promote a healthy complexion.

Honey’s Touch: Honey’s humectant properties lock in moisture, making it an ideal ingredient for hydration. It also helps soothe inflamed or irritated skin, promoting a calm and balanced complexion.

Lemon’s Radiance: Lemon juice’s high vitamin C content brightens and revitalizes the skin. Its natural exfoliating properties assist in sloughing off dead skin cells, revealing a smoother texture.

Tailoring the Banana Face Pack

For Dry Skin: To cater to dry skin, consider adding a teaspoon of yogurt to the banana blend. Yogurt’s lactic acid gently exfoliates while providing an extra dose of hydration.

For Sensitive Skin: Sensitive skin types can omit lemon juice and replace it with rose water. Rose water’s soothing properties help maintain your skin’s delicate balance.

Integrating the Banana Ritual

Usage Frequency: Incorporate the banana face pack into your skincare routine 1-2 times a week. Observe your skin’s response and adjust the frequency as needed.

Patch Test: Before applying the pack to your entire face, perform a patch test on a small area of your skin to ensure compatibility and prevent potential reactions.

Post-Pack Pampering: After rinsing off the face pack, follow up with your favorite moisturizer to seal in the benefits and maintain your skin’s hydration levels.

Revealing the Radiance

Indulge in Nature’s Goodness: Elevate your skincare journey with the natural wonders of a banana face pack. Experience the luscious fusion of banana, honey, and lemon juice as they transform your skin into a canvas of radiance and vitality.

Filed Under: Skin Care Tagged With: banana face pack, beauty regimen, beauty tips, natural skincare, Rejuvenation, skin care, skin nourishment

  • « Go to Previous Page
  • Page 1
  • Page 2
  • Page 3
  • Page 4
  • Interim pages omitted …
  • Page 45
  • Go to Next Page »

Primary Sidebar

Looking for something?

Connect with us online

  • Email
  • Facebook

Popular Posts!

Hair Care Magic: DIY Green Tea and Aloe Vera Hair Treatment

Herbal Essence: Crafting a Natural Shampoo with Essential Oils

Reduce Pores and Acne Scars with Facial Massage using Soybean and Neem Oil

A Refreshing Twist: The Berry-Parsley Smoothie Guide

Harnessing the Power of Stinging Nettle for Hair Growth

Categories

  • Hair Care
  • Health and Wellness
  • Skin Care

Tags

beauty benefits beauty tips Chemical-Free Hair Care coconut oil curd curry leaves dark circles DIY Hair Care egg exfoliation eye care glowing skin hair care Hair Care Routine hair care tips hair growth Hair health Hair Health Improvement hair loss Hair Nourishment Hair Strengthening health and wellness honey hydration lemon lemon juice milk natural beauty natural conditioner natural face mask Natural hair care Natural Hair Growth Natural Hair Remedies natural ingredients natural remedies Natural remedy natural skincare olive oil radiant complexion radiant skin scalp health Scalp Nourishment skin care skincare skincare routine

© 2026 · Sharvayoni · Privacy Policy · Disclaimer