• Skip to main content
  • Skip to primary sidebar
  • HOME
  • SKIN CARE
  • HAIR CARE
  • HEALTH AND WELLNESS
  • CONTACT US

Sharvayoni

Unearth Nature's Magic - Your Path to Herbal Radiance and Wellnes

beauty tips

The Blissful Retreat: Creating Your Own Soaking Bath Salts

June 27, 2023 by sharvayonibeauty Leave a Comment

Indulging in a luxurious bath is a cherished ritual for many. It’s a time to relax, unwind, and rejuvenate both the body and mind. One way to enhance this tranquil experience is by using soaking bath salts. While there are numerous options available in the market, creating your own bath salts allows you to customize the ingredients and scents according to your preferences. In this post, we will guide you through a simple and delightful recipe for homemade soaking bath salts, turning your bath time into a blissful retreat.

Gathering the Ingredients

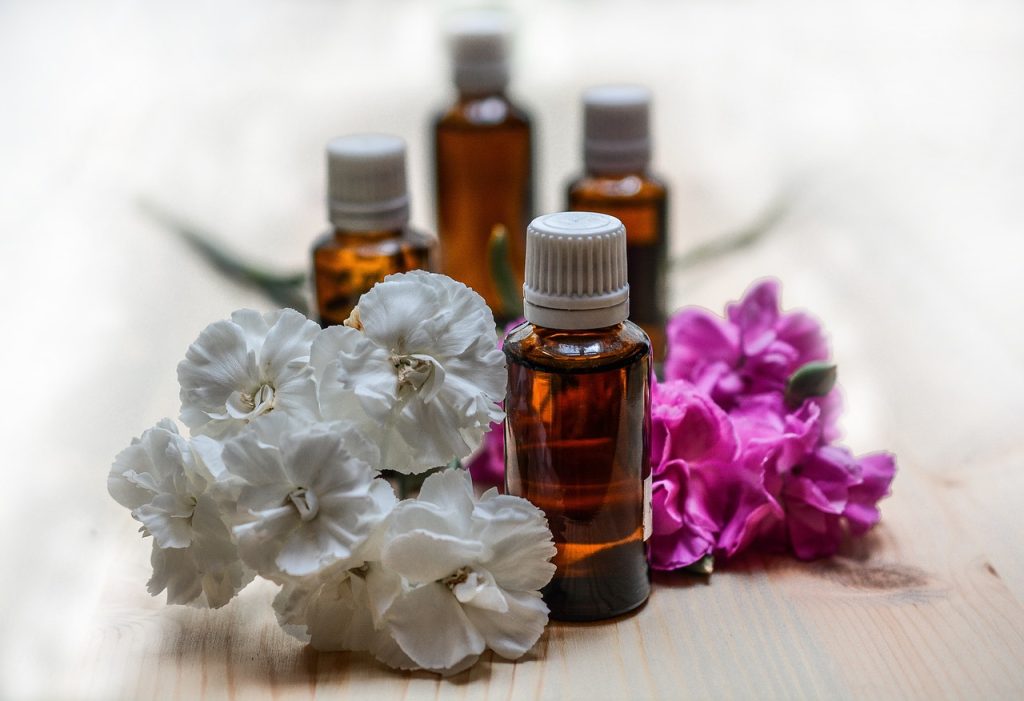
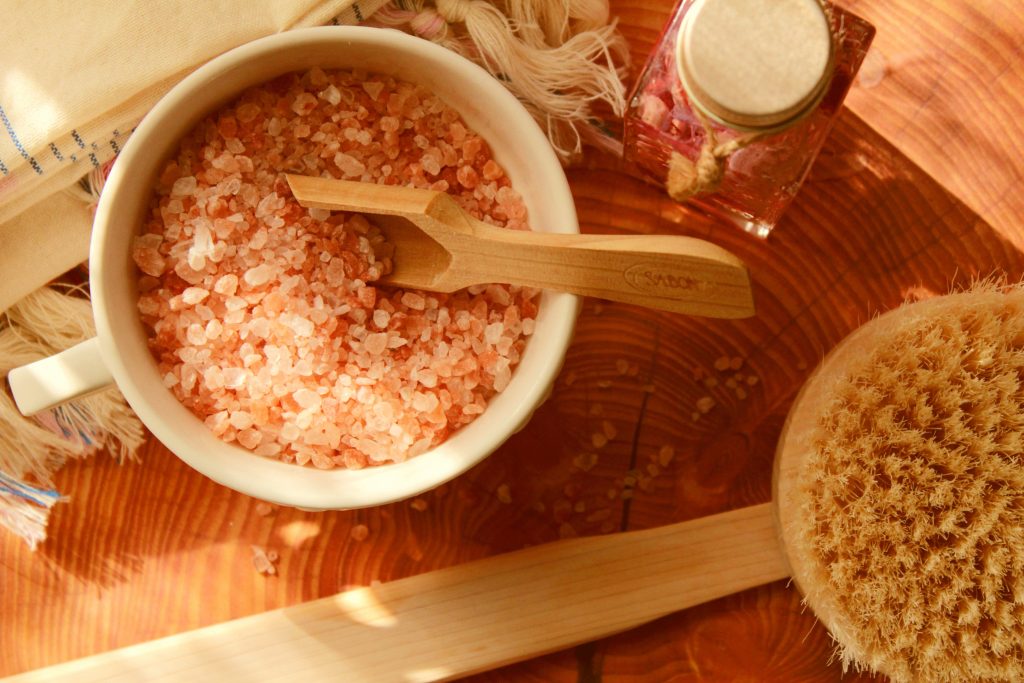
Before we dive into the recipe, let’s gather the ingredients you’ll need. The star ingredient is Epsom salt, renowned for its therapeutic properties. You can easily find Epsom salt in your local store or order it online. Additionally, you’ll need a .5-ounce bottle of your preferred skin-friendly oil, commonly found in candle stores, bath shops, or craft markets. To add a delightful aroma and visual appeal, consider incorporating dried flowers of your choice. Lastly, if you desire extra nourishment for your skin, dried milk can be a wonderful addition to your blend.

Step 1: Mixing the Salts

Begin by combining a bottle of Epsom salts with the .5-ounce of skin-friendly oil. You can use a deep ceramic roasting pan to ensure thorough mixing. Gently stir the mixture until the oil is evenly distributed among the salts. This will infuse the salts with the aromatic and moisturizing properties of the oil, making your bath experience even more delightful.

Step 2: Incorporating Dried Flowers

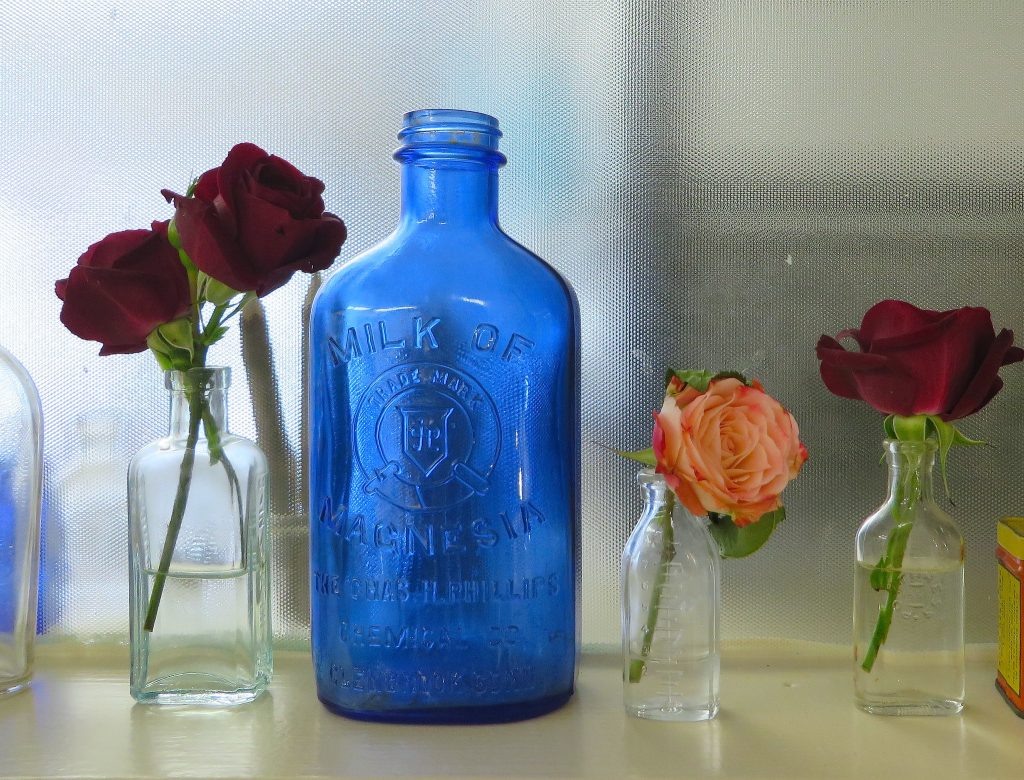
To elevate the visual appeal and add a touch of nature’s beauty to your bath salts, consider including dried flowers. Take the dried flowers of your choice, ensuring they are free from any mold or mildew. If necessary, you can gently dry them in a warm oven. For a soothing and aromatic blend, whole herbs, roses, and carnations work exceptionally well. Remove the stems and petals from the flowers, and if you’re using roses, remember to include the rosehips as well. As you mix the dried flowers with the salts, they will impart their subtle fragrance and create a visually pleasing bath experience.

Step 3: Optional Addition of Dried Milk

For an extra touch of luxury and skin-nourishing properties, you can incorporate dried milk into your bath salt blend. Dried milk has long been known for its soothing effects on the skin. It will leave your skin feeling soft, supple, and moisturized after your bath. Gently mix the dried milk with the salts and flowers, ensuring an even distribution of all the ingredients.

Step 4: Packaging and Storage

Once you have thoroughly mixed all the ingredients, allow the bath salts to dry for several hours before packaging them. Quarter glass bottles are an ideal option for storing the bath salts, as they are convenient to use and display. The attractive combination of colors and textures will make these bottles a beautiful addition to your bathroom decor.

Creating a Relaxing Ambiance

To fully immerse yourself in the tranquil ambiance of your bath time retreat, it’s essential to set the mood. Dim the lights and opt for the soft glow of candles. Choose your favorite calming scents, such as lavender, chamomile, or jasmine, and light scented candles throughout your bathroom. The flickering candlelight and soothing aromas will create an atmosphere of serenity, enhancing the overall experience.

Conclusion

By following this simple recipe, you can create your own personalized soaking bath salts, tailored to your preferences and needs. These homemade bath salts offer a multitude of benefits, from relaxation to nourishment for your skin. Allow yourself the luxury of a blissful retreat in your own bathroom, where you can unwind, rejuvenate, and indulge in the soothing and aromatic experience of a homemade bath. Treat yourself to a little self-care and create your own oasis of tranquility with these delightful soaking bath salts.

Filed Under: Skin Care Tagged With: bath salt, bath time ritual, beauty tips, DIY bath salts, dried flowers, epsom salt, homemade bath salts, homemade beauty products, relaxation, self-care, skin care, skin-friendly oils, soaking bath salts, tranquility

Revitalize Your Skin with a Peppermint-Honey Almond Body Wash

June 26, 2023 by sharvayonibeauty Leave a Comment

Are you searching for a rejuvenating body wash that will leave your skin feeling clean and smooth? Look no further! In this article, we’ll introduce you to an amazing Share Ambrosia remedy known as the Peppermint-Honey Almond body wash. This delightful treatment not only exfoliates your skin but also nourishes it, leaving you with a refreshed and revitalized feeling. Say goodbye to dull and rough skin and hello to a luxurious bathing experience.

Gather Your Ingredients

To create this invigorating body wash, you’ll need the following ingredients:

  • 4 teaspoons of almond oil
  • 2 teaspoons of Jojoba oil
  • 4 tablespoons of honey
  • 5 drops of Peppermint essential oil
  • A 4 oz cobalt or amber glass container (preferably)

Let’s Get Started

Step 1: Combine the Oils

Begin by adding 4 teaspoons of almond oil and 2 teaspoons of Jojoba oil into your glass container. These oils provide excellent moisturizing properties and help to nourish and soften your skin.

Step 2: Add the Honey and Peppermint Essential Oil

Next, incorporate 4 tablespoons of honey into the container. Honey is a natural humectant that helps to lock in moisture, leaving your skin hydrated and supple. Then, add 5 drops of Peppermint essential oil for a refreshing and invigorating aroma. Peppermint oil also has soothing and cooling properties that can provide a pleasant sensation on your skin.

Step 3: Blend Thoroughly

Mix all the ingredients together in the container until they are well combined. Ensure that the honey is evenly distributed throughout the oils, creating a cohesive mixture. The resulting blend will have a delightful almond and peppermint fragrance.

How to Use the Body Wash

Now that your Peppermint-Honey Almond body wash is ready, here’s how to incorporate it into your bathing routine:

Step 1: Cleanse Your Skin

Start by cleansing your body using your regular soap or cleanser. This will remove any surface impurities and prepare your skin for the exfoliating treatment.

Step 2: Apply the Body Wash

Take about a tablespoon of the body wash and apply it to wet skin. Gently massage the scrub onto your body using circular motions. Be mindful not to apply excessive pressure, as this could harm the delicate capillaries in your skin. Focus on one area at a time, excluding the delicate eye tissue.

Step 3: Rinse and Reveal Smooth Skin

Once you’ve thoroughly scrubbed your body, rinse off the almond meal scrub with warm water. As you rinse, you’ll notice how the almond meal exfoliates and polishes your skin, leaving it smoother and brighter. Make sure to remove all traces of the scrub, and pat your skin dry with a clean towel.

Step 4: Tone and Moisturize

To complete your skincare routine, apply a toner or hydrosol to your skin using a cotton pad. This will help remove any remaining residue and balance your skin’s pH levels. Finally, apply your favorite moisturizer to lock in hydration and keep your skin soft and supple.

Frequency and Benefits

For optimal results, use this Peppermint-Honey Almond body wash once a week. Regular exfoliation helps to remove dead skin cells, improve circulation, and promote cell turnover, resulting in smoother and healthier-looking skin. Additionally, the combination of almond oil, Jojoba oil, honey, and Peppermint essential oil provides nourishment, hydration, and a refreshing sensation to your skin.

Experience the Delight of Refreshed Skin

Indulge in the luxurious experience of the Peppermint-Honey Almond body wash and transform your bathing routine into a spa-like escape. With the natural goodness of almond oil, Jojoba oil, honey, and Peppermint essential oil, your skin will feel revitalized and rejuvenated. Say goodbye to dry, rough skin and hello to a smoother, more radiant complexion. Treat yourself to this delightful body wash and enjoy the amazing benefits it brings to your skincare regimen.

Filed Under: Skin Care Tagged With: almond oil, almonds, beauty tips, DIY skincare, Exfoliating body wash, honey, Jojoba oil, Natural body wash recipe, Nourishing ingredients, peppermint, Peppermint essential oil, Peppermint-Honey Almond body wash, Revitalize skin, skin care

Nourish and Revitalize Your Hair with a Honey and Rosemary Herbal Conditioner

June 25, 2023 by sharvayonibeauty Leave a Comment

During the winter months, our hair can suffer from the harsh extremes of heat and cold, leaving it looking dull, lifeless, and prone to damage. If you’re seeking a natural solution to promote hair growth and restore shine and moisture, look no further than a homemade herbal conditioner. This revitalizing conditioner combines the goodness of honey, olive oil, and Rosemary essential oil to provide the nourishment your hair needs. In this article, we will explore the benefits of each ingredient and guide you through the process of creating and using this herbal conditioner for healthier, shinier, and more vibrant hair.

The Ingredients:

Honey:

Honey is a natural humectant that helps lock in moisture, making it an excellent ingredient for hydrating dry and damaged hair. It also contains antioxidants that promote a healthy scalp and stimulate hair growth.

Rosemary Essential Oil:

Rosemary essential oil has been used for centuries for its hair care benefits. It helps improve blood circulation to the scalp, promoting hair growth and preventing hair loss. Rosemary oil also has antibacterial properties that help maintain a clean and healthy scalp.

Olive Oil:

Olive oil is rich in essential fatty acids and antioxidants that nourish and hydrate the hair. It helps smooth frizz, repair damage, and add shine to the hair. Olive oil is suitable for all hair types, but those with fine or oily hair should use it in moderation.

The Recipe:

  1. In a bowl, combine 1/2 cup of honey, 1/4 cup of warmed Rosemary essential oil, and four drops of olive oil (use 2 tablespoons for fine to oily hair).
  2. Blend the ingredients thoroughly, ensuring they are well combined.
  3. If desired, add a small amount of xanthan gum (available in health food stores) to thicken the conditioner. This step is optional but can help create a more luxurious texture.
  4. Transfer the mixture to a clean plastic container with a close-fitting stopper or lid.

Application and Usage:

  1. Begin by lightly dampening your hair.
  2. Take a minimal amount of the herbal conditioner and apply it to your hair, starting from the roots and working your way down to the ends. Massage your scalp and hair to ensure even distribution of the conditioner.
  3. Once applied, cover your hair with a moist towel or a shower cap. The moisture will help enhance the conditioning properties of the herbal mixture.
  4. Leave the conditioner on for approximately 30 minutes to allow the ingredients to nourish and penetrate the hair shaft.
  5. After the recommended time has elapsed, remove the towel or shower cap and rinse your hair thoroughly with cold water. Cold water helps seal the hair cuticles and adds an extra shine to your locks.
  6. Proceed to dry your hair as usual. You will notice a significant improvement in the texture, shine, and overall health of your hair.

Additional Tips:

  1. For best results, use this herbal conditioner once a week or as needed, depending on the condition of your hair.
  2. Consider complementing the conditioning treatment with a few drops of Rose oil and honey. Rose oil provides a pleasant aroma while further enhancing the conditioning properties, and honey adds extra moisture and shine.
  3. Store the leftover conditioner in a cool, dry place. It can be used for up to two weeks if kept properly.

Conclusion:

By incorporating this homemade honey and Rosemary herbal conditioner into your hair care routine, you can revitalize your hair and promote healthy growth. The combination of honey’s moisturizing properties, Rosemary essential oil’s scalp-stimulating benefits, and the nourishing effects of olive oil will transform your hair into a shining crown of beauty. Say goodbye to dull, damaged hair and hello to vibrant, luscious locks with this natural and effective herbal conditioner. Embrace the power of nature and enjoy the beautiful results.

Filed Under: Hair Care Tagged With: beauty tips, hair care, hair growth, herbal conditioner, honey, moisturize hair, natural hair treatment, restore shine, rosemary, Rosemary essential oil

Nourish and Hydrate: Moisturize Dry Skin with Essential Oils

June 24, 2023 by sharvayonibeauty Leave a Comment

Dry skin can be a common challenge, causing discomfort and dullness. However, with the right skincare routine and ingredients, you can effectively combat dryness and restore hydration to your skin. One powerful solution is to incorporate essential oils into your moisturizing routine. In this article, we will explore the benefits of using essential oils to moisturize dry skin and provide a step-by-step guide on how to create a rejuvenating essential oil blend. Say goodbye to dryness and hello to a hydrated and radiant complexion.

Understanding Essential Oils for Dry Skin:

  1. The Role of Essential Oils: Essential oils are natural extracts derived from plants and possess various therapeutic properties. When it comes to dry skin, certain essential oils can help replenish moisture, nourish the skin, and promote a healthier complexion.
  2. Astringent Properties: Juniper, cypress, mandarin, and grapefruit essential oils are particularly beneficial for dry skin. These oils possess astringent properties that help tighten the skin, reducing the appearance of fine lines and wrinkles while giving your skin a firmer and more toned look.

Creating Your Essential Oil Blend:

  1. Choosing the Right Carrier Oil: If your skin is extra dry, it’s recommended to dilute the essential oils with a carrier oil to enhance their moisturizing effects. Mineral oil is a popular choice as a carrier oil due to its ability to deeply penetrate the skin and lock in moisture.
  2. The Perfect Essential Oil Blend: To create your moisturizing essential oil blend, combine a few drops of juniper, cypress, mandarin, and grapefruit essential oils with a teaspoon of carrier oil (mineral oil). This blend will provide a potent combination of hydration and astringent properties.

Enhancing Moisturization:

  1. Adding Milk: For an added boost of moisturization, consider mixing your essential oil blend with ¼ cup of milk. Milk contains proteins, fats, and lactic acid, which help soothe and hydrate dry skin, leaving it feeling soft and supple.
  2. Incorporating Honey: Alternatively, you can add a tablespoon of honey to your essential oil blend. Honey is a natural humectant that attracts and retains moisture, making it an excellent ingredient for dry skin. It will provide additional hydration and nourishment, leaving your skin glowing and revitalized.

Application and Results:

  1. Applying the Essential Oil Blend: Gently massage the essential oil blend onto clean, dry skin. Focus on areas that are particularly dry or prone to tightness. The oils will penetrate deep into the skin, replenishing moisture and restoring vitality.
  2. Enjoying the Benefits: Allow the essential oil blend to absorb into your skin for optimal results. The astringent properties of the oils will help tighten the skin, while the added moisture from milk or honey will provide long-lasting hydration. Over time, you will notice your skin becoming smoother, plumper, and more radiant.

Conclusion:

Moisturizing dry skin is essential for maintaining a healthy complexion. By incorporating essential oils into your skincare routine, you can nourish and hydrate your skin effectively. The combination of juniper, cypress, mandarin, and grapefruit essential oils will provide astringent properties and leave your skin feeling tighter. Don’t forget to enhance the moisturizing benefits by adding milk or honey to your essential oil blend. Embrace this natural and rejuvenating skincare solution, and enjoy the transformation of your dry skin into a glowing, hydrated, and revitalized canvas.

Filed Under: Skin Care Tagged With: astringent properties, beauty tips, carrier oil, cypress essential oil, essential oils, grapefruit essential oil, honey, hydration, juniper essential oil, mandarin essential oil, milk, mineral oil, moisturize dry skin, nourishment, skin care, skincare routine

Discover the Beauty Benefits of Milk of Magnesia: A Natural Facial Treatment

June 23, 2023 by sharvayonibeauty Leave a Comment

In the quest for radiant and healthy skin, we often turn to various skincare products and treatments. However, sometimes the best solutions can be found in simple and unexpected places. One such hidden gem is milk of magnesia, a commonly used over-the-counter medication for digestive issues. But did you know that milk of magnesia can also be a fantastic addition to your skincare routine? In this article, we will explore the beauty benefits of milk of magnesia and how to use it for a refreshing and rejuvenating facial treatment.

Understanding Milk of Magnesia:

Milk of magnesia, also known as magnesium hydroxide, is an alkaline solution that is commonly used to relieve constipation and indigestion. It works by drawing water into the intestines, softening the stool and promoting bowel movements. However, its benefits extend beyond digestive health and can be utilized for skincare purposes as well.

The Beauty Benefits of Milk of Magnesia:

Milk of magnesia has several properties that make it beneficial for the skin. Let’s explore some of its key beauty benefits:

  1. Oil Control: Milk of magnesia has the ability to absorb excess oil from the skin, making it an excellent choice for those with oily or combination skin types. By reducing oiliness, it helps prevent clogged pores and the formation of acne and blackheads.
  2. pH Balancing: The alkaline nature of milk of magnesia helps balance the pH levels of the skin. When the skin’s pH is balanced, it is better equipped to fight off bacteria and maintain its natural protective barrier.
  3. Soothing and Calming: Milk of magnesia has a soothing effect on the skin, making it ideal for individuals with sensitive or irritated skin. It can help calm redness, inflammation, and itchiness, providing relief and promoting a healthier complexion.

Using Milk of Magnesia as a Facial Treatment:

Now that we understand the beauty benefits of milk of magnesia, let’s delve into how to incorporate it into your skincare routine as a facial treatment. Follow these steps for a refreshing and rejuvenating experience:

Step 1: Cleanse your face: Start by thoroughly cleansing your face with a gentle cleanser to remove any dirt, makeup, or impurities.

Step 2: Apply milk of magnesia: Shake the bottle of milk of magnesia well and pour a small amount onto a cotton pad or your fingertips. Apply it evenly to your face, focusing on areas that tend to be oily or problematic. Avoid the eye area.

Step 3: Let it sit: Allow the milk of magnesia to sit on your skin for about 5 to 10 minutes. During this time, it will absorb excess oil and impurities.

Step 4: Rinse off: After the designated time, rinse your face with warm water to remove the milk of magnesia. Gently pat your skin dry with a clean towel.

Step 5: Moisturize: Finish off your facial treatment by applying a lightweight moisturizer to hydrate and nourish your skin.

Tips and Precautions:

  • It’s important to perform a patch test before using milk of magnesia on your face, especially if you have sensitive skin, to ensure you don’t have any adverse reactions.
  • Avoid using milk of magnesia as a facial treatment too frequently, as it may disrupt the natural balance of your skin.
  • If you experience any discomfort or irritation while using milk of magnesia, discontinue use and consult a dermatologist.

Conclusion:

Embrace the surprising beauty benefits of milk of magnesia and indulge in a refreshing and rejuvenating facial treatment. Its oil-controlling, pH-balancing, and soothing properties make it a versatile addition to your skincare routine. With proper usage and a gentle approach, milk of magnesia can help you achieve a healthier and more radiant complexion. Give it a try and experience the natural wonders of this unexpected skincare gem.

Filed Under: Skin Care Tagged With: beauty tips, milk of magnesia, skin care, soothing properties

  • « Go to Previous Page
  • Page 1
  • Interim pages omitted …
  • Page 43
  • Page 44
  • Page 45
  • Page 46
  • Page 47
  • Interim pages omitted …
  • Page 102
  • Go to Next Page »

Primary Sidebar

Looking for something?

Connect with us online

  • Email
  • Facebook

Popular Posts!

Teeth whitening with Amla

Natural Oil Control Face Pack Using Coconuts

Achieve Whiter Teeth Naturally with Aloe Vera: A Comprehensive Guide

Wild Cumin Seed and Coconut Oil: A Natural Solution for Head Lice

Brighten Your Smile Naturally: Apple Cider Vinegar for Teeth Whitening

Categories

  • Hair Care
  • Health and Wellness
  • Skin Care

Tags

beauty benefits beauty tips Chemical-Free Hair Care coconut oil curd curry leaves dark circles DIY Hair Care egg exfoliation eye care glowing skin hair care Hair Care Routine hair care tips hair growth Hair health Hair Health Improvement hair loss Hair Nourishment Hair Strengthening health and wellness honey hydration lemon lemon juice milk natural beauty natural conditioner natural face mask Natural hair care Natural Hair Growth Natural Hair Remedies natural ingredients natural remedies Natural remedy natural skincare olive oil radiant complexion radiant skin scalp health Scalp Nourishment skin care skincare skincare routine

© 2026 · Sharvayoni · Privacy Policy · Disclaimer