• Skip to main content
  • Skip to primary sidebar
  • HOME
  • SKIN CARE
  • HAIR CARE
  • HEALTH AND WELLNESS
  • CONTACT US

Sharvayoni

Unearth Nature's Magic - Your Path to Herbal Radiance and Wellnes

DIY skincare

Homemade Shaving Cream: Pamper Your Skin Naturally

March 18, 2024 by sharvayonibeauty Leave a Comment

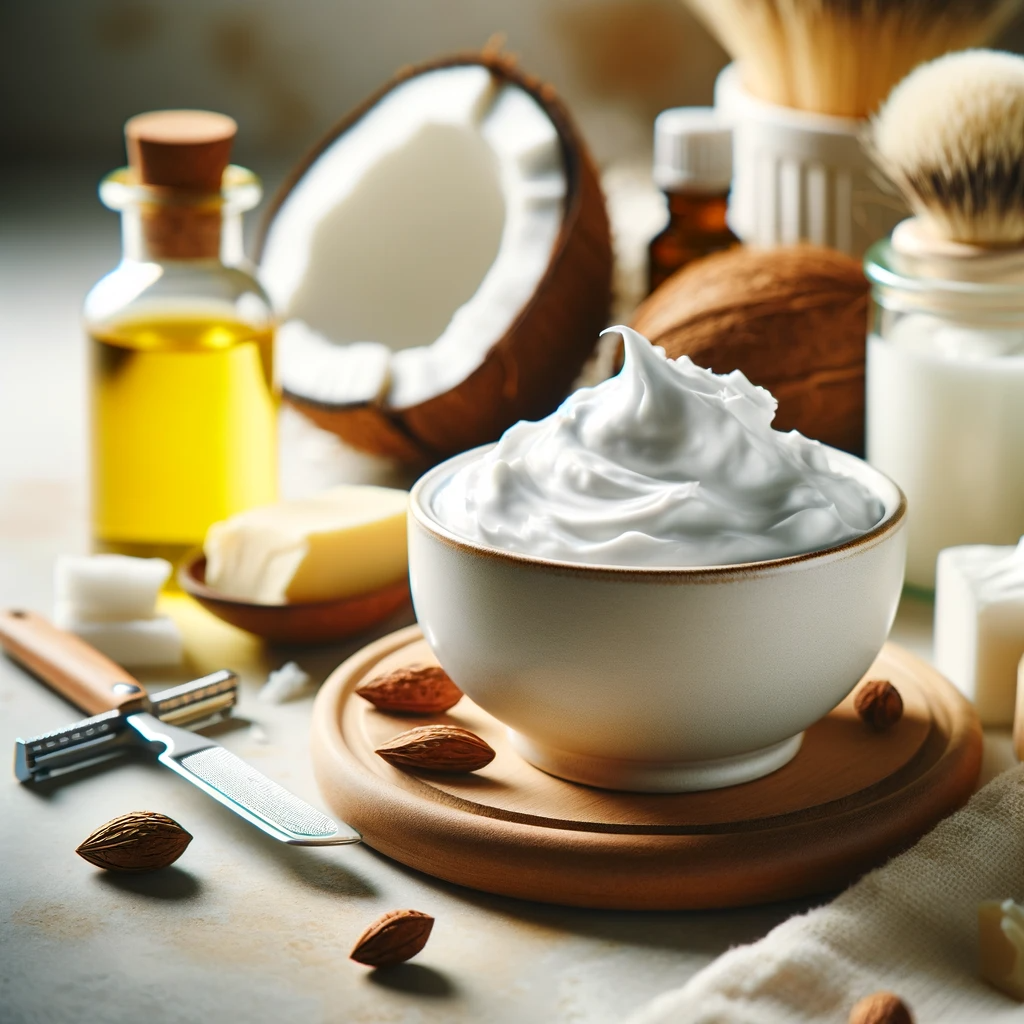
Achieving a close and comfortable shave without irritation is a top priority for many individuals. Commercial shaving creams often contain chemicals and fragrances that can be harsh on sensitive skin. What if you could create a luxurious and skin-friendly shaving cream at home? This Homemade Shaving Cream recipe is the perfect solution. With natural ingredients like shea butter, coconut oil, and sweet almond oil, this cream not only provides a smooth shave but also pampers your skin, making it an excellent choice for those with sensitive skin. In this article, we will guide you through the process of creating this soothing shaving cream, exploring the ingredients, steps, and the numerous benefits it offers for your skin.

Things Needed

Before we delve into creating your Homemade Shaving Cream, let’s gather all the necessary ingredients and tools:

  • 4 tablespoons of solid shea butter
  • 3 tablespoons of coconut oil
  • 2 tablespoons of sweet almond oil
  • 10-12 drops of pure lavender essential oil (optional, for fragrance)
  • Double boiler or a heatproof bowl and saucepan
  • Stirring utensil
  • Bowl for mixing
  • Electric mixer or stand mixer
  • A well-covered jar or container for storage

Steps to Prepare

Creating this homemade shaving cream is a straightforward process. Follow these steps to pamper your skin naturally:

1. Begin by mixing 4 tablespoons of solid shea butter and 3 tablespoons of coconut oil together in a bowl.

2. Transfer the shea butter and coconut oil mixture into a double boiler over very low heat. If you don’t have a double boiler, you can use a heatproof bowl placed on top of a saucepan filled with water.

3. As the mixture melts, stir it from time to time to ensure even melting. Once the mixture has completely melted, remove it from heat.

4. Measure in 2 tablespoons of sweet almond oil and, if desired, add 10-12 drops of pure lavender essential oil for a delightful fragrance. Stir to incorporate the oils well.

5. Pour the mixture into a bowl and place it in the refrigerator to allow the mixture to solidify. This can take a few hours.

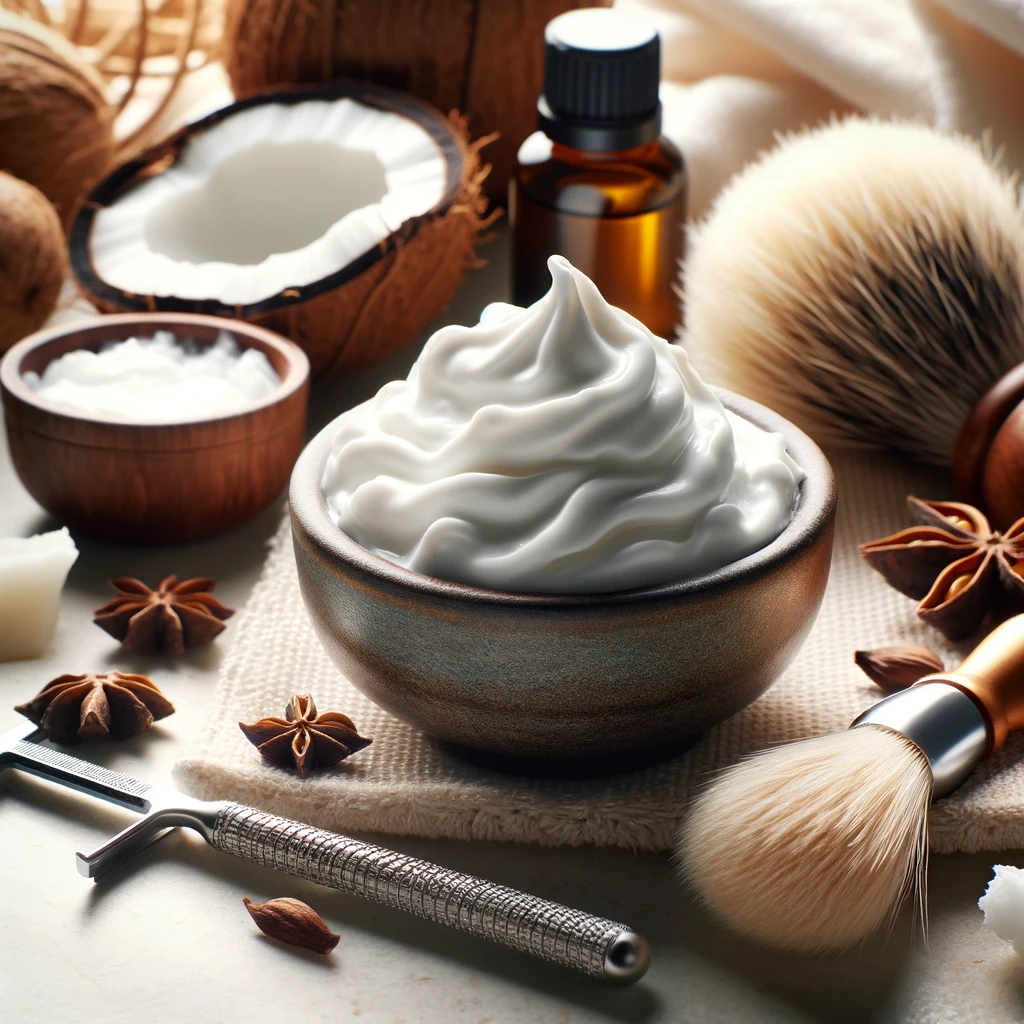
6. Once the mixture has solidified, whip the shaving cream using an electric mixer or a stand mixer until it reaches a creamy and fluffy consistency.

7. Set the whipped shaving cream aside before transferring it into a well-covered jar or container for storage.

Tip: It’s recommended not to use the shaving cream beyond a month to ensure its freshness and effectiveness.

Benefits

The Homemade Shaving Cream offers numerous benefits for your shaving routine and skin care:

  • Gentle on Sensitive Skin: Natural ingredients like shea butter and coconut oil make this cream an excellent choice for individuals with sensitive skin, reducing the risk of irritation and redness.
  • Smooth and Close Shave: The creamy texture of this shaving cream provides a smooth glide for your razor, ensuring a close and comfortable shave.
  • Moisturizing Effect: Shea butter and sweet almond oil provide essential moisture, leaving your skin feeling soft and hydrated.
  • Optional Fragrance: The addition of lavender essential oil adds a delightful fragrance to enhance your shaving experience.
  • Chemical-Free: By making your shaving cream at home, you avoid the chemicals and fragrances often found in commercial products.

Conclusion

Homemade Shaving Cream is the perfect way to pamper your skin while achieving a smooth and comfortable shave. By utilizing natural ingredients and a simple DIY process, you can take control of what goes on your skin, especially if you have sensitive skin that requires gentle care. Say goodbye to commercial shaving creams filled with chemicals and hello to the soothing and moisturizing benefits of Homemade Shaving Cream. Your skin will thank you for the natural and luxurious treatment it deserves.

Filed Under: Hair Care Tagged With: beauty tips, chemical-free skincare, coconut oil, DIY skincare, gentle shave, hair care, Homemade Shaving Cream, moisturizing, natural ingredients, pampering skincare, sensitive skin, shaving cream, shea butter, smooth shave

DIY Shaving Cream: A Smooth and Natural Solution

March 17, 2024 by sharvayonibeauty Leave a Comment

Shaving is a common grooming ritual for many, but it often comes with the need for a good quality shaving cream. Commercial shaving creams may contain chemicals and fragrances that can be harsh on the skin. What if you could create your own shaving cream at home, using natural ingredients that nourish your skin while providing a smooth shave? This DIY Shaving Cream recipe is the answer. Made with simple and wholesome ingredients like coconut oil, shea butter, and eucalyptus essential oil, this shaving cream offers a luxurious shaving experience that’s gentle on the skin. In this article, we’ll guide you through creating this homemade shaving cream, discussing the ingredients, steps, and the numerous benefits it offers for your shaving routine.

Things Needed

Before we dive into creating your DIY Shaving Cream, let’s gather all the necessary ingredients and tools:

  • 1/2 (4-ounce) cup of coconut oil
  • 1/4 cup of olive oil
  • 1/2 (4-ounce) cup of shea butter
  • 20-25 drops of eucalyptus essential oil
  • Mixing bowl
  • Double boiler or a heatproof bowl and saucepan
  • Stirring utensil
  • Hand mixer or standing mixer
  • Well-covered jar for storage

Steps to Prepare

Creating this homemade shaving cream is a simple and rewarding process. Follow these steps to make your own natural shaving cream:

1. Start by combining 1/2 cup of shea butter and 1/2 cup of coconut oil in a mixing bowl.

2. Transfer the mixture from the bowl into a double boiler over medium-low heat, allowing it to melt gently. If you don’t have a double boiler, you can use a heatproof bowl placed on top of a saucepan filled with water.

3. Once the shea butter and coconut oil have melted and combined, remove the mixture from the heat and transfer it back into a bowl.

4. Measure 1/4 cup of olive oil and add it to the mixture. Stir well to incorporate the olive oil into the mixture.

5. Place the bowl with the mixture in the refrigerator and allow it to cool and solidify. This can take a few hours.

6. Once the mixture has solidified, remove it from the refrigerator.

7. Using either a hand mixer or a standing mixer, whip the mixture until stiff peaks are formed. This typically takes about 3 minutes.

8. While whipping the mixture, measure in 20-25 drops of eucalyptus essential oil. Continue to whip until the essential oil is fully incorporated.

9. Transfer the whipped shaving cream into a well-covered jar or container for storage.

Benefits

Creating your own DIY Shaving Cream offers various benefits for your shaving routine and skincare:

  • Natural Ingredients: With ingredients like coconut oil, shea butter, and olive oil, this shaving cream is free from harsh chemicals and fragrances, making it suitable for sensitive skin.
  • Smooth Shave: The creamy texture of this shaving cream provides a smooth glide for your razor, ensuring a comfortable and close shave.
  • Moisturizing Effect: Shea butter and olive oil offer essential moisture to your skin, leaving it soft and hydrated.
  • Eucalyptus Essential Oil: The addition of eucalyptus essential oil provides a refreshing scent and may have soothing properties for the skin.
  • Customizable: You can experiment with different essential oils to customize the fragrance of your shaving cream.

Conclusion

DIY Shaving Cream is a fantastic way to create a natural and skin-friendly solution for your shaving needs. By using simple and wholesome ingredients, you can ensure a smooth and comfortable shave without the use of harsh chemicals or artificial fragrances. Say goodbye to commercial shaving creams and hello to the luxury of homemade shaving cream that pampers your skin. Enjoy a more natural and enjoyable shaving experience with the benefits of this DIY creation.

Filed Under: Hair Care Tagged With: beauty tips, chemical-free skincare, coconut oil, DIY skincare, eucalyptus essential oil, gentle shave, hair care, Homemade Shaving Cream, luxurious shaving, moisturizing, natural ingredients, shaving cream, shea butter, smooth shave

Treating Cuts, Burns, or Skin Problems with Curry Leaves

January 7, 2024 by sharvayonibeauty Leave a Comment

Dealing with cuts, burns, or various skin problems can be both painful and concerning. While there are numerous over-the-counter remedies available, nature provides us with simple and effective solutions. In this article, we will explore the use of curry leaves as a natural remedy for treating cuts, burns, or skin issues. Discover how the antibacterial and anti-inflammatory properties of curry leaves can aid in healing and preventing the spread of skin problems.

Things Needed

To create the Curry Leaves Healing Paste, you will only need one ingredient:

  • One cup of fresh curry leaves

Steps to Prepare

Preparing the Curry Leaves Healing Paste is a straightforward process. Follow these simple steps to harness the natural healing power of curry leaves:

1. Start by gathering fresh curry leaves. Ensure that they are clean and free from any dirt or impurities.

2. Smash the curry leaves to create a smooth and consistent paste. You can use a mortar and pestle or any suitable method for this.

3. Once you have obtained a paste-like consistency, you are ready to apply it to the affected parts of your skin.

4. Gently apply the curry leaves paste to the cuts, burns, or skin problems. Be thorough but gentle in your application to avoid further irritation.

5. Allow the paste to sit on the affected areas for a reasonable amount of time. This will vary depending on the severity of the issue, but leaving it for at least 10-15 minutes is typically effective.

6. After the designated time has passed, gently rinse off the paste with lukewarm water. It’s advisable to avoid using soap or harsh cleansers to prevent further irritation.

Benefits

The Curry Leaves Healing Paste offers several benefits for addressing cuts, burns, and skin problems:

  • Antibacterial Properties: Curry leaves contain natural antibacterial properties that can help prevent infection in cuts and burns, promoting faster healing.
  • Anti-Inflammatory Effects: The anti-inflammatory properties of curry leaves can reduce swelling and discomfort associated with skin problems.
  • Preventative Action: Applying this paste not only aids in healing but also helps prevent the issue from spreading or worsening.
  • Natural and Chemical-Free: This remedy relies on a single natural ingredient, making it a gentle and chemical-free solution for skin issues.

Conclusion

Treating cuts, burns, or skin problems with curry leaves is a time-tested natural remedy that harnesses the antibacterial and anti-inflammatory properties of this incredible herb. Nature provides us with simple yet effective solutions for our skincare needs, and curry leaves are no exception. By incorporating the Curry Leaves Healing Paste into your skincare routine when needed, you can promote faster healing and prevent the spread of skin problems. Embrace the power of nature and keep this gentle and chemical-free remedy in your toolkit for addressing common skin issues.

Filed Under: Skin Care Tagged With: anti-inflammatory, antibacterial properties, beauty tips, chemical-free skincare, curry leaves, Cuts and burns, DIY skincare, faster healing, healing paste, Natural remedy, skin care, skin care routine, skin problems

Rejuvenate Your Skin with a Luxurious Rose Petals Face Pack

August 7, 2023 by sharvayonibeauty Leave a Comment

In the realm of natural skincare remedies, few ingredients offer the same level of elegance and effectiveness as rose petals. These delicate blooms, revered for their enchanting fragrance and potent skincare properties, have been cherished for centuries. One of the most delightful ways to harness the benefits of roses is through a rose petals face pack. In this article, we will explore the rejuvenating qualities of a rose petals face pack and learn how to create this luxurious treatment in the comfort of your home.

The Enchanting Allure of Rose Petals

Roses have held a special place in history, symbolizing love, beauty, and luxury. But beyond their romantic symbolism, rose petals offer a myriad of skincare benefits. Packed with antioxidants, vitamins, and natural oils, roses help nourish, hydrate, and revitalize the skin. Incorporating rose petals into your skincare routine can lead to a complexion that radiates health and vitality.

Creating Your Rose Petals Face Pack

The rose petals face pack is a simple yet indulgent way to pamper your skin. To craft this rejuvenating treatment, you’ll need the following ingredients:

  • 2 tablespoons of sandalwood powder
  • 2 tablespoons of milk
  • A few fresh rose petals

Let’s dive into the steps of creating and applying this luxurious face pack:

  1. Gathering the Ingredients

Begin by collecting high-quality sandalwood powder, fresh rose petals, and milk. The sandalwood powder enhances the face pack’s cooling and soothing effects, while milk contributes its natural moisturizing properties. The rose petals infuse the pack with their enchanting fragrance and beneficial compounds.

  1. Preparing the Rose Petals

Gently rinse the rose petals to remove any dirt or impurities. Pat them dry with a soft cloth, ensuring they are clean and ready for use. Fresh rose petals provide a burst of natural goodness that works wonders for the skin.

  1. Creating the Face Pack

In a bowl, combine the sandalwood powder and milk. Gradually mix the ingredients to form a smooth paste. The sandalwood powder acts as a natural exfoliant and skin brightener, while milk adds hydration and a creamy texture to the pack.

  1. Adding the Rose Petals

As the sandalwood-milk mixture comes together, delicately add the fresh rose petals. Gently blend the petals into the mixture, allowing their essence to infuse into the pack. The petals not only enhance the pack’s aroma but also contribute their beneficial compounds to the blend.

  1. Application Process

With your rose petals face pack ready, it’s time to apply it to your skin. Here’s how:

  • Begin by cleansing your face to ensure it’s free from dirt and makeup.
  • Using your fingertips or a brush, evenly apply the rose petals face pack to your face and neck. Avoid the sensitive area around the eyes.
  • As you apply the pack, take a moment to inhale the soothing aroma of the rose petals. Let their fragrance calm your senses as the pack works its magic.
  • Relax and allow the pack to dry for about 15 to 20 minutes. During this time, the pack will gently exfoliate, hydrate, and rejuvenate your skin.
  • Once the pack is dry, rinse it off with cool water. Gently massage your skin in circular motions as you remove the pack, allowing the rose petals to provide a gentle exfoliation.
  1. Post-Pack Care

After rinsing off the face pack, pat your skin dry with a clean towel. You’ll likely notice an immediate difference in your skin’s texture and appearance. To seal in the benefits, consider applying a light moisturizer or a few drops of rose water to your skin.

Frequency of Use

For optimal results, incorporate the rose petals face pack into your skincare routine twice a week. Regular use will help maintain the health and radiance of your skin.

Conclusion

Embrace the luxurious beauty of rose petals with this rejuvenating face pack. With its blend of sandalwood powder, milk, and the magic of fresh rose petals, this treatment offers a holistic approach to skincare. As you indulge in the enchanting aroma and experience the transformative effects, you’ll find that the rose petals face pack becomes an essential element of your self-care ritual. Elevate your skincare journey and discover the timeless allure of roses for a complexion that glows with natural radiance.

Filed Under: Skin Care Tagged With: beauty tips, DIY skincare, fresh rose petals, homemade face pack, milk, natural beauty, nourishing skincare, radiant complexion, rejuvenating skincare, rose petals face pack, rose-infused treatment, sandalwood powder, skin care

Nourishing Oatmeal and Sandalwood Face Pack for Glowing Skin

August 5, 2023 by sharvayonibeauty Leave a Comment

Oatmeal has long been known for its numerous health benefits, but did you know that it can work wonders for your skin as well? This humble ingredient can be used to create an effective and nourishing face pack that will leave your skin glowing and radiant. In this post, we will explore the benefits of using an oatmeal face pack and learn how to make and apply it for the best results.

The Power of Oatmeal for Skin

Oatmeal is a natural exfoliant that can gently remove dead skin cells, dirt, and impurities from the skin’s surface. Its soothing properties make it ideal for those with sensitive or irritated skin. Oatmeal also contains antioxidants that help protect the skin from free radical damage and promote a youthful appearance.

The Benefits of Sandalwood Powder

Sandalwood powder is another fantastic ingredient for skincare. It has antimicrobial properties that can help treat acne and prevent further breakouts. Sandalwood also has a cooling effect on the skin, making it great for soothing sunburns and skin irritation. Additionally, its natural astringent properties can help tighten the skin and reduce the appearance of pores.

The Nourishing Oatmeal and Sandalwood Face Pack Recipe

Ingredients:

  • 2 tablespoons oatmeal
  • 1 tablespoon sandalwood powder
  • Few drops of rose water

Instructions:

  1. In a bowl, mix the oatmeal and sandalwood powder until well combined.
  2. Add a few drops of rose water to the dry mixture and stir until you achieve a thick paste-like consistency.

Applying the Oatmeal Face Pack

Before applying the face pack, make sure your face is clean and free from any makeup or impurities. Follow these steps for the best application and results:

  1. Gently cleanse your face with a mild cleanser and pat it dry.
  2. Using clean fingers or a face pack applicator, apply the oatmeal and sandalwood paste evenly to your face, avoiding the eye area.
  3. Allow the face pack to sit on your skin for 15 minutes, giving it time to work its magic.
  4. After 15 minutes, gently scrub the face pack off in an upward motion. This will help exfoliate the skin and remove dead skin cells.
  5. Wash your face with lukewarm water to ensure all the face pack is removed.
  6. Finally, splash your face with cold water to close the pores and tighten the skin.

The Ideal Frequency

To experience the full benefits of the oatmeal and sandalwood face pack, it is recommended to use it twice a week. Regular use will ensure that your skin remains nourished, rejuvenated, and free from impurities.

Additional Tips for Glowing Skin

  1. Stay Hydrated: Drink plenty of water to keep your skin hydrated and healthy.
  2. Follow a Healthy Diet: Consume a balanced diet rich in fruits, vegetables, and antioxidants to promote skin health.
  3. Protect Your Skin: Wear sunscreen when stepping out in the sun to shield your skin from harmful UV rays.
  4. Get Adequate Sleep: Ensure you get enough sleep to allow your skin to rejuvenate and repair itself.

Achieving Radiant Skin with Oatmeal and Sandalwood

The combination of oatmeal and sandalwood in a face pack is a natural and effective way to achieve radiant and glowing skin. The exfoliating properties of oatmeal, coupled with the soothing benefits of sandalwood, make this face pack a powerful skincare solution. By incorporating this simple DIY face pack into your regular skincare routine, you can experience the nourishing effects and embrace your naturally radiant skin.

Filed Under: Skin Care Tagged With: beauty tips, DIY skincare, glowing skin, homemade face pack, natural skincare, nourishing face mask, oatmeal and sandalwood benefits, oatmeal face pack, radiant skin, sandalwood face pack, skin care, skincare routine

  • Page 1
  • Page 2
  • Page 3
  • Go to Next Page »

Primary Sidebar

Looking for something?

Connect with us online

  • Email
  • Facebook

Popular Posts!

Red Clay Face Pack: A Natural Beauty Elixir

dark-circles

Causes for the Dark Circles around the Eyes

Revitalizing Aloe Vera and Oil Hair Spray: A Homemade Solution

Anti-Dandruff Honey Mask: A Natural Scalp Treatment

Getting rid of pimples and acne with Onions

Categories

  • Hair Care
  • Health and Wellness
  • Skin Care

Tags

beauty benefits beauty tips Chemical-Free Hair Care coconut oil curd curry leaves dark circles DIY Hair Care egg exfoliation eye care glowing skin hair care Hair Care Routine hair care tips hair growth Hair health Hair Health Improvement hair loss Hair Nourishment Hair Strengthening health and wellness honey hydration lemon lemon juice milk natural beauty natural conditioner natural face mask Natural hair care Natural Hair Growth Natural Hair Remedies natural ingredients natural remedies Natural remedy natural skincare olive oil radiant complexion radiant skin scalp health Scalp Nourishment skin care skincare skincare routine

© 2026 · Sharvayoni · Privacy Policy · Disclaimer