• Skip to main content
  • Skip to primary sidebar
  • HOME
  • SKIN CARE
  • HAIR CARE
  • HEALTH AND WELLNESS
  • CONTACT US

Sharvayoni

Unearth Nature's Magic - Your Path to Herbal Radiance and Wellnes

sharvayonibeauty

Homemade Herbal Hair Conditioner: A Customized Treat for Your Locks

January 22, 2024 by sharvayonibeauty Leave a Comment

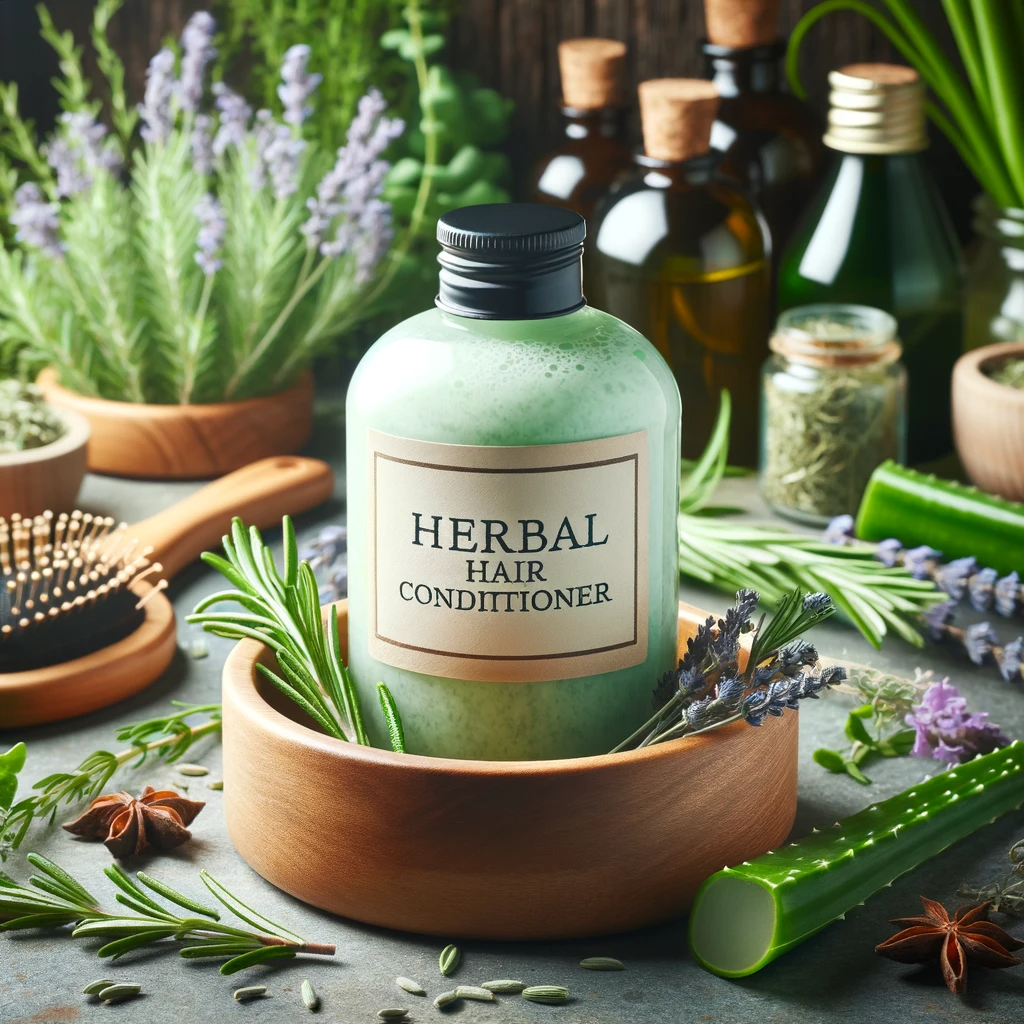
Taking care of your hair with natural, homemade products is not only eco-friendly but also ensures that you are using ingredients that are best suited for your hair type. This homemade herbal hair conditioner recipe is designed to be adaptable for different hair types, using specific carrier oils and essential oils that cater to your hair’s unique needs. The combination of emulsifying wax, vegetable glycerin, and vitamin E creates a nourishing base, while the herbal infusion adds a personalized touch to this hair care essential.

Things Needed

Before you begin, gather the following materials for your conditioner:

  1. Herbal Infusion or Distilled Water: ½ cup, customized to your hair type.
  2. Carrier Oil: 1 tsp, selected based on your hair type (refer to the provided table).
  3. Emulsifying Wax: 1 tbsp (8g), to bind oil and water.
  4. Essential Oils: Tailored for your hair type.
  5. Vitamin E: ½ teaspoon, as a natural antioxidant.
  6. Pure Grape Seed Extract (GSE): 5 drops, for preservation.
  7. Vegetable Glycerin: 1 tsp, for added moisture.
  8. Small Bowl: For mixing ingredients.
  9. Glass Jar: To melt the mixture.
  10. Pot: For a water bath to melt the wax.
  11. Whisk: For stirring.
  12. Dark Bottle (8 oz): For storing the conditioner.
  13. Measuring Tools: For precise ingredient portions.

Steps to Prepare

Follow these steps to create your conditioner:

  1. Combine Base Ingredients: In a small bowl, mix together glycerin, emulsifying wax, and your chosen carrier oil.
  2. Melt the Mixture: Place the glass jar with the mixture into a pot partly filled with water. Melt the mixture over low heat, stirring occasionally.
  3. Add Vitamin E: Once the wax is completely melted, remove from heat. Stir in the vitamin E.
  4. Warm the Herbal Infusion: In a separate pot or in a microwave, warm your herbal infusion or distilled water until lukewarm. This step is crucial for achieving the right consistency in your conditioner.
  5. Combine with Wax Mixture: Slowly pour the lukewarm herbal infusion into the wax mixture, continuously stirring with a whisk. Aim for a thick, smooth, and creamy consistency.
  6. Cool the Mixture: Set the mixture aside to cool. It will thicken as it cools.
  7. Add GSE and Essential Oils: Once the mixture is cool, stir in the pure GSE and your blend of essential oils.
  8. Transfer to Bottle: Pour the conditioner into an 8 oz dark bottle. Do not cover immediately.
  9. Shake During Cooling: As the mixture cools, occasionally shake the bottle to prevent ingredient separation.
  10. Store Properly: Keep the conditioner in a dark, dry, cool place.

Benefits

This homemade herbal hair conditioner offers various benefits:

  1. Customized Care: Tailoring the conditioner to your hair type ensures that your hair receives the specific nourishment it needs.
  2. Moisturizing: Vegetable glycerin and carrier oils provide deep hydration, leaving your hair soft and smooth.
  3. Strengthening: Vitamin E and essential oils contribute to hair strength and health.
  4. Natural Preservatives: Grape seed extract extends the shelf life of your conditioner naturally.
  5. Chemical-Free: Free from synthetic chemicals, this conditioner is gentle on your hair and scalp.
  6. Eco-Friendly: Homemade conditioners reduce plastic waste and are more environmentally sustainable.

Note

  • If your hair feels greasy after using the conditioner, reduce the amount of carrier oil or opt for a lighter oil like grapeseed oil.
  • Remember to shake the bottle during cooling to prevent separation.
  • The conditioner should be stored in a cool, dark place to preserve its freshness.

Conclusion

Crafting your own herbal hair conditioner is a rewarding way to take control of your hair care routine. This personalized approach ensures that your hair gets the specific treatment it needs, using natural, nourishing ingredients. Embrace this homemade conditioner and enjoy healthier, more vibrant hair.

Filed Under: Hair Care Tagged With: beauty tips, Carrier Oils for Hair, Customizable Conditioner, DIY Hair Conditioner, Emulsifying Wax in Hair Products, Essential Oils for Hair, Grape Seed Extract, hair care, Homemade Herbal Conditioner, Moisturizing Hair Conditioner, Natural hair care, Vitamin E for Hair

Natural Herbal Hair Conditioner: Tailored for Every Hair Color

January 21, 2024 by sharvayonibeauty Leave a Comment

Embracing natural beauty solutions is a delightful way to care for your hair, and making your own herbal hair conditioner is a perfect example of this. This recipe is not just about conditioning your hair; it’s about enhancing its natural color and improving its overall health. Whether you have blonde, dark, red, or gray hair, there’s a special blend of herbs tailored just for you. Each blend is designed to brighten and enhance your natural hair color while providing the nourishment your hair needs.

Things Needed

To create your customized herbal hair conditioner, you will need:

  1. Herbs: Depending on your hair color (calendula, chamomile, lemon peel for blonde hair; black tea, rosemary, cloves for dark hair; calendula, hibiscus, cinnamon bark for red hair; sage, rosemary, thyme for gray hair).
  2. Distilled Water: ¼ cup, to infuse with the herbs.
  3. Mixing Bowl: For combining herbs and water.
  4. Pot: For boiling the herbal mixture.
  5. Mesh Strainer or Cheesecloth: For straining the herbal infusion.
  6. Storage Container: To store the herbal infusion.
  7. Measuring Tools: To accurately measure herbs and water.

Steps to Prepare

Follow these steps to prepare your herbal hair conditioner:

  1. Herb Selection: Choose and combine three tablespoons of the appropriate herb blend based on your hair color in a mixing bowl.
  2. Add Water: Pour ¼ cup of distilled water into the bowl with the herbs.
  3. Heat the Mixture: Transfer the herb and water mixture to a pot. Bring it to a boil over medium heat.
  4. Steep the Herbs: After boiling, remove the pot from heat. Let the mixture sit for about 60 minutes to allow the herbs to release their flavors and properties.
  5. Strain the Infusion: Use a mesh strainer or cheesecloth to strain out the herbs. Preserve the herbal-infused liquid; this will be your hair conditioner.
  6. Store the Infusion: Transfer the herbal infusion to a storage container. If you’re not using it immediately, keep it in a cool, dry place.

Benefits

Each herbal blend offers unique benefits for different hair colors:

For Blonde Hair

  • Calendula, Chamomile, Lemon Peel: These herbs are known for their lightening properties, making them ideal for brightening blonde hair. Chamomile, in particular, adds shine and softness.

For Dark Hair

  • Black Tea, Rosemary, Cloves: Black tea enhances darker tones, while rosemary and cloves stimulate the scalp and add depth to dark hair colors.

For Red Hair

  • Calendula, Hibiscus, Cinnamon Bark: This blend enhances red tones and adds vibrancy. Hibiscus, especially, is known for its color-boosting properties.

For Gray Hair

  • Sage, Rosemary, Thyme: These herbs are excellent for maintaining the health and shine of gray hair. Sage can help in reducing the appearance of gray strands.

Note

The herbal infusion for gray hair has a strong herbal scent, but its benefits are significant, especially with consistent use over a few weeks. The natural properties of these herbs work together to enhance the health and appearance of your hair.

Conclusion

Creating a natural herbal hair conditioner tailored to your hair color is not only a step towards healthier hair but also a way to embrace the beauty of nature’s gifts. This conditioner offers a chemical-free, personalized approach to hair care, ensuring that your hair not only looks its best but is also nourished and strengthened. Regular use of this herbal infusion will reveal the true potential of your hair, making it worth every effort.

Filed Under: Hair Care Tagged With: beauty tips, Blonde Hair Herbs, Dark Hair Herbs, DIY Herbal Conditioner, Eco-Friendly Hair Care, Gray Hair Herbs, hair care, Hair Color Enhancement, Herbal Remedies for Hair, Homemade Hair Conditioner, Natural hair care, Red Hair Herbs

Royal Aroma Shampoo: A Luxurious Blend of Coconut and Vanilla

January 20, 2024 by sharvayonibeauty Leave a Comment

Indulge in the luxurious experience of a homemade shampoo crafted for queens. This Royal Aroma Shampoo recipe combines the enticing fragrances of coconut and vanilla with the nourishing properties of jojoba oil, creating a shampoo that not only cleanses but also delights the senses. Perfect for those who adore rich, exotic scents and natural hair care, this shampoo is a treat for both your hair and your olfactory experience.

Things Needed

Before you start, gather the following materials to create your Royal Aroma Shampoo:

  1. Liquid Castile Soap: ¼ cup, as a natural and gentle cleansing base.
  2. Distilled Water: ¼ cup, to ensure purity and consistency.
  3. Coconut Fragrance Oil: 10 drops, for a tropical, refreshing scent.
  4. Jojoba Oil: 2 teaspoons, for its moisturizing benefits.
  5. Vanilla Essential Oil: 10 drops, adding a sweet, luxurious fragrance.
  6. Flip Cap or Foaming Bottles: For easy storage and application.
  7. Mixing Bowl: To blend the ingredients.
  8. Stirring Tool: Such as a spoon or whisk.
  9. Funnel: To help transfer the shampoo into the bottle.

Steps to Prepare

Creating this sumptuous shampoo is simple and enjoyable:

  1. Combine Base Ingredients: In the mixing bowl, pour in ¼ cup of liquid Castile soap. Add 2 teaspoons of jojoba oil and ¼ cup of distilled water. These form the base of your shampoo.
  2. Add Fragrances: Carefully measure and add 10 drops of coconut fragrance oil and 10 drops of vanilla essential oil to the mixture. These oils provide the shampoo with its regal, inviting aroma.
  3. Mix Thoroughly: Stir the ingredients together until well combined. Ensure that the oils are evenly distributed throughout the mixture for a consistent scent and texture.
  4. Transfer to Bottle: Using a funnel, pour the shampoo mixture into a flip cap or foaming bottle. This will make the application of the shampoo easier and more convenient.
  5. Usage: Use this shampoo as you would any regular shampoo. The rich scent of coconut and vanilla will envelop your hair, creating a luxurious washing experience.
  6. Rinse and Dry: After massaging the shampoo into your scalp and hair, rinse thoroughly and pat your hair dry.

Benefits

This homemade Royal Aroma Shampoo offers numerous benefits:

  1. Luxurious Scent: The combination of coconut and vanilla oils creates an exotic, indulgent fragrance, transforming your hair washing routine into a spa-like experience.
  2. Gentle Cleansing: Liquid Castile soap provides a gentle yet effective clean, making the shampoo suitable for all hair types.
  3. Moisturizing Properties: Jojoba oil is known for its ability to moisturize the hair and scalp, leaving your hair soft and nourished.
  4. Natural Ingredients: By using natural oils and Castile soap, this shampoo avoids harsh chemicals, making it a healthier choice for your hair and scalp.
  5. Customizable: You can adjust the amount of fragrance or essential oil based on your scent preference.
  6. Eco-Friendly: Homemade shampoos reduce plastic waste and are better for the environment compared to commercial shampoos.
  7. Cost-Effective: Creating your own shampoo can be more economical in the long run.

Conclusion

Embrace the essence of royalty with this homemade Royal Aroma Shampoo. Its enchanting blend of coconut and vanilla not only offers a sensory delight but also ensures your hair receives the gentle, nourishing care it deserves. This shampoo is perfect for those who appreciate the finer things in life and are passionate about natural hair care. Enjoy the luxurious, fragrant journey that this shampoo offers with each wash.

Filed Under: Hair Care Tagged With: beauty tips, Coconut Fragrance Oil, DIY Royal Aroma Shampoo, Gentle Cleansing, hair care, Homemade Shampoo, Jojoba Oil Benefits, Liquid Castile Soap, Luxurious Hair Care, Natural hair care, Scented Shampoo, Vanilla Essential Oil

Natural Oatmeal and Lavender Hair Cleanser: A Gentle, Soothing Scalp Treatment

January 19, 2024 by sharvayonibeauty Leave a Comment

In an era where natural and chemical-free beauty solutions are increasingly sought after, creating your own hair cleanser can be a rewarding and health-conscious choice. This homemade oatmeal and lavender hair cleanser recipe offers a gentle yet effective way to cleanse and soothe your scalp. Ideal for those with sensitive scalps or anyone looking to reduce their chemical exposure, this cleanser combines the soothing properties of oatmeal and lavender for a refreshing and nourishing scalp treatment.

Things Needed

Before you start, make sure you have the following items:

  1. Baking Soda: 1 teaspoon, for its cleansing properties.
  2. Oatmeal: ¼ cup, preferably unflavored and unsweetened.
  3. Lavender or Other Fragrant Herb: 1 teaspoon, crushed, for a soothing fragrance.
  4. Small Mixing Bowl: To combine the ingredients.
  5. Grinder or Mortar and Pestle: To grind the oatmeal mixture.
  6. Container: For storing the hair cleanser.
  7. Brush: For applying and removing the cleanser from hair.
  8. Measuring Spoons: For accurate measurements.

Steps to Prepare

Creating your oatmeal and lavender hair cleanser is a straightforward process:

  1. Mix Ingredients: In the small mixing bowl, combine 1 teaspoon of baking soda, ¼ cup of oatmeal, and 1 teaspoon of crushed lavender or your chosen herb.
  2. Grind the Mixture: Transfer the oatmeal mixture into a grinder or use a mortar and pestle. Grind until the mixture is thoroughly ground and the ingredients are well combined.
  3. Transfer to Container: Pour the ground mixture into a container for easy application and storage.
  4. Application: To apply, sprinkle the mixture evenly to cover your scalp. Gently use your hands to rub the mixture into your scalp for about 5 minutes. This helps in exfoliating and cleansing the scalp.
  5. Remove the Cleanser: After the massage, use a brush to gently brush out the mixture from your hair.
  6. Storage: Store any remaining cleanser in a cool, dry place for future use.

Benefits

This homemade oatmeal and lavender hair cleanser offers several advantages:

  1. Gentle Cleansing: Baking soda and oatmeal gently cleanse the scalp, removing dirt and buildup without harsh chemicals.
  2. Soothing for the Scalp: Oatmeal has natural soothing properties, making this cleanser ideal for those with sensitive or irritated scalps.
  3. Natural Fragrance: Lavender or other herbs add a pleasant, calming scent to the cleanser, enhancing the cleansing experience.
  4. Exfoliating: The texture of ground oatmeal helps in exfoliating the scalp, promoting healthy hair growth.
  5. Chemical-Free: This cleanser is free from sulfates, parabens, and synthetic fragrances, making it a healthier choice for your hair and the environment.
  6. Customizable: You can adjust the ratios of the ingredients or add other herbs based on your preferences and scalp needs.
  7. Economical: Homemade cleansers can be more cost-effective than buying commercial scalp treatments.
  8. Eco-Friendly: By making your own hair cleanser, you reduce plastic waste and the environmental impact of commercial hair care products.

Note

Feel free to tweak the ingredient ratios or produce larger quantities based on your needs. The cleanser can be tailored to suit individual preferences and hair types.

Conclusion

Creating your own oatmeal and lavender hair cleanser is not only a step towards embracing a more natural beauty routine but also a way to provide gentle, effective care for your scalp. This simple, eco-friendly recipe offers a soothing, nourishing treatment for your hair, free from harsh chemicals and synthetic ingredients. Embrace this natural approach to hair care and enjoy the calming, refreshing benefits it brings to your scalp and hair.

Filed Under: Hair Care Tagged With: beauty tips, Chemical-Free Hair Care, DIY Hair Cleanser, Eco-Friendly Hair Products, Gentle Hair Exfoliation, hair care, Homemade Hair Care, Lavender Hair Treatment, Natural Scalp Care, Oatmeal for Hair, Soothing Scalp Treatment, Sulfate-Free Cleanser

Natural Anti-Dandruff Shampoo with Apple Cider Vinegar and Cloves

January 18, 2024 by sharvayonibeauty Leave a Comment

Dandruff and a flaky scalp can be persistent issues that many people struggle with. Turning to natural remedies can often provide a gentle yet effective solution. This homemade shampoo recipe is crafted to address flaky scalp issues and promote a healthy scalp environment. Featuring apple cider vinegar, light vegetable oils, and ground cloves, this shampoo offers a refreshing and natural approach to scalp care. The inclusion of apple cider vinegar and cloves provides both antibacterial and antifungal benefits, making it an ideal choice for those seeking a natural flaky scalp remedy.

Things Needed

To prepare this natural anti-dandruff shampoo, ensure you have:

  1. Distilled Water: ¼ cup, for purity in the mixture.
  2. Apple Cider Vinegar: 1 tablespoon, known for its scalp health benefits.
  3. Liquid Castile Soap: ¼ cup, as a gentle cleansing base.
  4. Grapeseed, Jojoba, or Other Light Vegetable Oil: ½ teaspoon, for moisturizing.
  5. Ground Cloves: 6 cloves, finely ground for their antifungal properties.
  6. Apple Juice: 3 tablespoons, to enhance the shampoo’s effectiveness and scent.
  7. Flip Cap or Foaming Bottles: For storing and dispensing the shampoo.
  8. Mixing Bowl: To combine the ingredients.
  9. Electric Blender or Small Grinder: For blending the mixture.
  10. Refrigerator: To store the remaining shampoo.

Steps to Prepare

Follow these steps to create your anti-dandruff shampoo:

  1. Combine Ingredients: In a mixing bowl, combine 1 tablespoon of apple cider vinegar, ¼ cup of liquid Castile soap, ½ teaspoon of your chosen light vegetable oil, ¼ cup of distilled water, the finely ground cloves, and 3 tablespoons of apple juice.
  2. Blend the Mixture: Transfer the mixture into an electric blender or small grinder. Blend for about 30 seconds to ensure all ingredients are thoroughly mixed.
  3. Transfer to Bottles: Pour the blended shampoo into flip cap or foaming bottles using a funnel for easy application.
  4. Application: Before using the shampoo, wet your hair with warm water. Apply the shampoo as you would any regular product, focusing on the scalp. Gently massage and rinse thoroughly.
  5. Storage: Refrigerate any remaining shampoo. This is important as the natural ingredients have a limited shelf life.
  6. Shelf Life: Note that this shampoo should be used within 3 days due to its fresh ingredients.

Benefits

This homemade anti-dandruff shampoo offers multiple benefits:

  1. Natural Dandruff Treatment: The combination of apple cider vinegar and cloves works effectively against dandruff-causing fungi and bacteria.
  2. Scalp Health: Apple cider vinegar helps balance the pH of the scalp, reducing flakiness and itchiness.
  3. Moisturizing: Light vegetable oils like grapeseed or jojoba provide necessary moisture to the scalp and hair, preventing dryness.
  4. Gentle Cleansing: Liquid Castile soap offers a gentle cleansing action, making the shampoo suitable for frequent use and all hair types.
  5. Antioxidant Properties: Cloves are rich in antioxidants, which can promote a healthy scalp.
  6. Refreshing Scent: The combination of apple juice and cloves gives the shampoo a pleasant and refreshing scent.
  7. Chemical-Free: This recipe is free from harsh chemicals and synthetic fragrances, making it a healthier choice for your hair and the environment.
  8. Cost-Effective: Homemade shampoos can be more economical in the long run compared to buying specialty dandruff treatments.

Conclusion

Creating your own natural anti-dandruff shampoo can be a rewarding way to tackle scalp issues while embracing a more holistic approach to hair care. This simple recipe, with its blend of apple cider vinegar, cloves, and gentle moisturizing agents, offers an effective and natural solution to flaky scalp problems. Remember to store the shampoo in the refrigerator and use it within three days to enjoy its maximum benefits. Embrace this natural remedy and enjoy a healthier, dandruff-free scalp.

Filed Under: Hair Care Tagged With: Apple Cider Vinegar for Hair, beauty tips, Clove Benefits, DIY Anti-Dandruff Shampoo, Eco-Friendly Hair Care, flaky scalp remedy, Gentle Hair Cleansing, hair care, Homemade Shampoo, Liquid Castile Soap, Natural Hair Products, Natural Scalp Care

  • « Go to Previous Page
  • Page 1
  • Interim pages omitted …
  • Page 27
  • Page 28
  • Page 29
  • Page 30
  • Page 31
  • Interim pages omitted …
  • Page 111
  • Go to Next Page »

Primary Sidebar

Looking for something?

Connect with us online

  • Email
  • Facebook

Popular Posts!

DIY Leave-in Conditioner: Nourish Your Hair Naturally

Get Strong Hair Naturally using Curd and Green Gram Powder

Rejuvenate Your Skin with an Orange Peel Face Pack: A Natural Radiance Booster

Strengthen Your Nails Naturally: A Guide to Healthier and Stronger Nails

Bathing Powder

How to Prepare Bathing Powder Naturally at Home

Categories

  • Hair Care
  • Health and Wellness
  • Skin Care

Tags

beauty benefits beauty tips Chemical-Free Hair Care coconut oil curd curry leaves dark circles DIY Hair Care egg exfoliation eye care glowing skin hair care Hair Care Routine hair care tips hair growth Hair health Hair Health Improvement hair loss Hair Nourishment Hair Strengthening health and wellness honey hydration lemon lemon juice milk natural beauty natural conditioner natural face mask Natural hair care Natural Hair Growth Natural Hair Remedies natural ingredients natural remedies Natural remedy natural skincare olive oil radiant complexion radiant skin scalp health Scalp Nourishment skin care skincare skincare routine

© 2026 · Sharvayoni · Privacy Policy · Disclaimer