• Skip to main content
  • Skip to primary sidebar
  • HOME
  • SKIN CARE
  • HAIR CARE
  • HEALTH AND WELLNESS
  • CONTACT US

Sharvayoni

Unearth Nature's Magic - Your Path to Herbal Radiance and Wellnes

sharvayonibeauty

Rush to the Peas: A Quick Fix for Eye Swelling

July 16, 2023 by sharvayonibeauty Leave a Comment

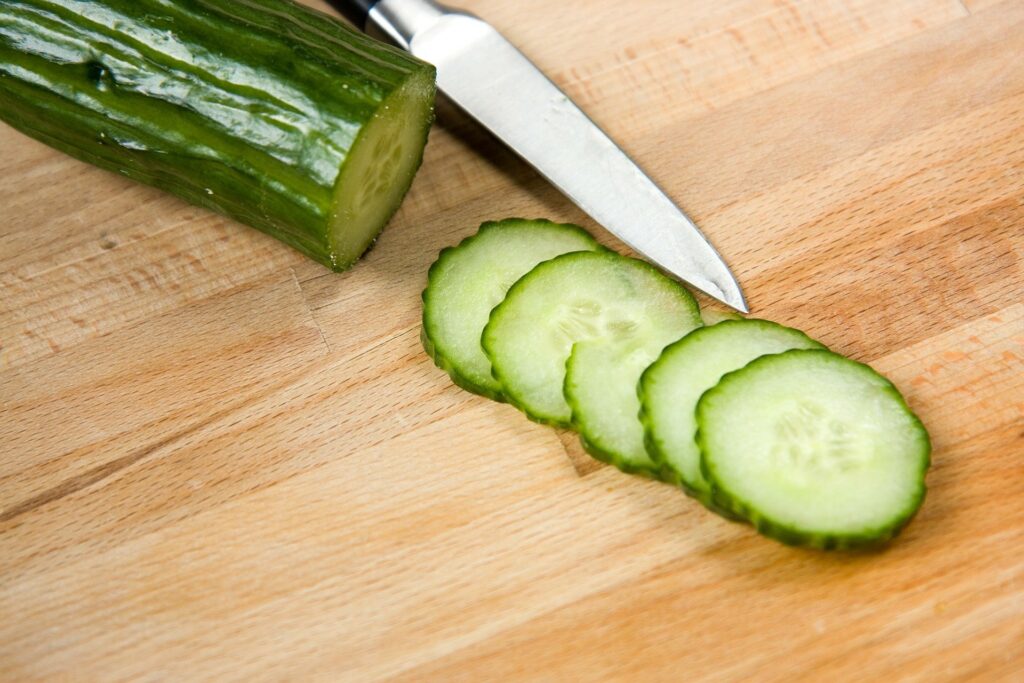
When it comes to reducing eye swelling, cucumbers are often hailed as the go-to remedy. However, what if you find yourself without cucumbers in your kitchen? Don’t worry, there’s a simple and readily available alternative – peas! Frozen peas, commonly found in every freezer, can provide a quick and effective solution for reducing eye swelling. In this article, we will explore how chilled pea packs can be used to soothe and eliminate eye swelling in a matter of minutes. So, rush to the peas and discover the cooling power they hold!

The Convenience of Frozen Peas

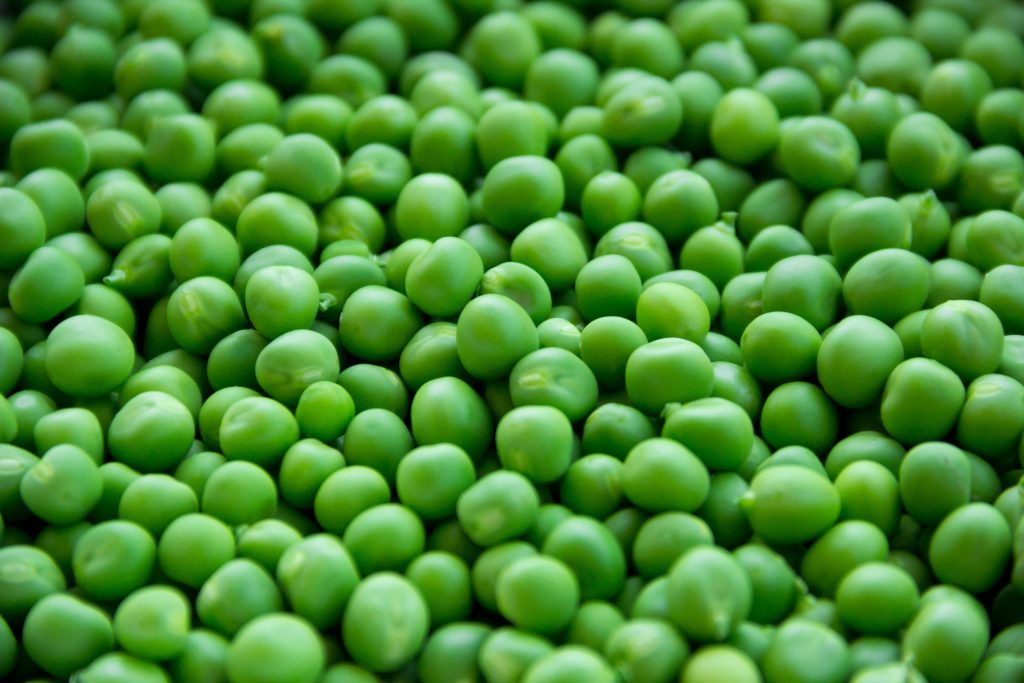
Frozen peas are a staple in many households, providing a convenient and accessible option for various culinary needs. Apart from their culinary versatility, frozen peas can also serve as a valuable tool in your skincare routine, specifically for reducing eye swelling. Their small, round shape makes them ideal for contouring around the eye area, delivering a soothing and cooling effect.

Preparing and Using Chilled Pea Packs

To utilize frozen peas as a remedy for eye swelling, follow these simple steps:

  1. Take a pack of frozen peas from your freezer. Ensure that the pack is securely sealed and free from any damage.
  2. Place a soft cloth or clean towel around the package of frozen peas. This acts as a protective barrier between the icy surface and your skin, preventing any discomfort or potential injury.
  3. Gently press the chilled pea pack against the affected eye area. Make sure the pack is in direct contact with the swollen area.
  4. Hold the pack in place for approximately 5 to 15 minutes. During this time, the cold temperature of the peas will help constrict the blood vessels and reduce inflammation, thereby alleviating eye swelling.
  5. After the recommended time, remove the chilled pea pack from your eyes and discard it or return it to the freezer for future use.

The Benefits of Cold Therapy for Eye Swelling

Cold therapy has long been recognized as an effective method for reducing swelling and inflammation. When applied to the affected area, the cold temperature causes vasoconstriction, which narrows the blood vessels and reduces blood flow to the area. This constriction helps alleviate puffiness and minimize the appearance of eye swelling. The cold sensation also provides a soothing and refreshing feeling, which can help relieve discomfort and fatigue around the eyes.

Incorporating Chilled Pea Packs into Your Skincare Routine

To make the most of chilled pea packs and incorporate them into your skincare routine, consider the following tips:

  1. Keep a bag of frozen peas reserved specifically for skincare purposes. This ensures that the peas are clean and free from any potential contaminants.
  2. Prioritize hygiene by placing a soft cloth or towel around the pack of peas to maintain a clean and safe contact with your skin.
  3. Use chilled pea packs as needed whenever you experience eye swelling. They can be a quick and effective solution for reducing puffiness, especially after a long day or when waking up with swollen eyes.
  4. Combine chilled pea packs with other soothing practices, such as relaxation techniques or applying a gentle eye cream afterward, to enhance the overall benefits and promote a calming effect on the eyes.

Conclusion

While cucumbers are often the go-to remedy for reducing eye swelling, frozen peas offer a convenient and accessible alternative. With their small, round shape and cooling properties, chilled pea packs can effectively alleviate eye swelling in a matter of minutes. Remember to protect your skin with a soft cloth or towel to ensure a safe and comfortable experience. Incorporate this quick and simple remedy into your skincare routine whenever eye swelling occurs, and enjoy the soothing and refreshing benefits that frozen peas have to offer. So, the next time you find yourself without cucumbers in the kitchen, don’t panic—rush to the peas and let their cooling power work wonders on your eyes!

Filed Under: Skin Care Tagged With: alternative remedy, beauty tips, chilled pea packs, eye swelling, frozen peas, quick relief, reduce puffiness, refreshing sensation, skin care, skincare routine, soothe tired eyes

Cucumber Slices on the Eyes: A Refreshing and Rejuvenating Beauty Ritual

July 15, 2023 by sharvayonibeauty Leave a Comment

Cucumber slices on the eyes have long been a popular beauty hack, known for their refreshing and rejuvenating effects. While dermatologists are still exploring the exact mechanisms behind the anti-inflammatory properties of cucumbers, it is believed that this humble vegetable contains mild natural acids that may help prevent water retention. Additionally, beauty experts suggest that chilled cucumber slices work best due to their high water content, acting like mini ice packs to reduce puffiness and provide a soothing sensation. In this article, we will delve into the benefits of using cucumber slices on the eyes and explore how to incorporate this simple yet effective beauty ritual into your skincare routine.

Understanding the Benefits of Cucumbers for the Eyes

Cucumbers have long been celebrated for their hydrating and soothing properties. Here are some reasons why cucumber slices on the eyes are beneficial:

  1. Anti-Inflammatory Effect: Cucumbers may possess anti-inflammatory properties that can help reduce puffiness and calm irritated skin around the eyes. This effect is particularly useful for combating tiredness and alleviating morning eye puffiness.
  2. Hydration: Cucumbers have a high water content of approximately 90%, making them excellent natural moisturizers for the delicate skin around the eyes. Hydrated skin appears plumper and more youthful.
  3. Cooling Sensation: The coolness of chilled cucumber slices provides an instant refreshing and soothing sensation, which can help relax the eye area and relieve fatigue.

Preparing Cucumber Slices for Eye Treatment

To experience the benefits of cucumber slices on the eyes, follow these simple steps:

  1. Start by selecting a fresh cucumber from your local grocery store or farmer’s market. Look for cucumbers that are firm, vibrant in color, and free from any signs of spoilage.
  2. Rinse the cucumber thoroughly under cool water to remove any dirt or impurities. Pat it dry with a clean towel.
  3. Slice the cucumber into thin, circular pieces. Aim for slices that are approximately 1/4 to 1/2 inch thick. If desired, you can peel the cucumber before slicing for a smoother texture.
  4. Place the cucumber slices in the refrigerator for at least 15 minutes to chill. Chilled slices offer a more invigorating and soothing experience.

Applying Cucumber Slices on the Eyes

Once the cucumber slices are chilled and ready, follow these steps to apply them to your eyes:

  1. Find a comfortable place to relax, such as a comfortable chair or bed.
  2. Gently close your eyes and lie down, allowing your facial muscles to relax.
  3. Take the chilled cucumber slices out of the refrigerator and place them directly on your closed eyelids. Ensure that the slices cover the entire eye area, including the under-eye area.
  4. Allow the cucumber slices to rest on your eyes for about 10 to 15 minutes. During this time, you can focus on deep breathing or listen to calming music to enhance the relaxation experience.
  5. After the recommended time, gently remove the cucumber slices from your eyes. You can discard them or use them for other beauty treatments.

Incorporating Cucumber Eye Treatment into Your Skincare Routine

To make the most of cucumber slices on the eyes, consider incorporating this treatment into your regular skincare routine:

  1. Schedule Cucumber Eye Treatments: Aim to include cucumber eye treatments once or twice a week or as needed, depending on your skin’s condition and your desired level of relaxation.
  2. Enhance the Experience: Make the treatment more indulgent by dimming the lights, playing soft music, or applying a face mask while the cucumber slices work their magic on your eyes.
  3. Complement with Other Skincare Practices: Cucumber slices on the eyes are a fantastic addition to your existing skincare routine. Use them in conjunction with gentle cleansers, moisturizers, and sun protection to maintain overall skin health.

Conclusion

Cucumber slices on the eyes offer a refreshing and rejuvenating beauty ritual that can help reduce puffiness, soothe tired eyes, and provide a hydrating sensation. With their natural anti-inflammatory properties and high water content, cucumbers make an ideal choice for revitalizing the delicate skin around the eyes. By incorporating this simple yet effective treatment into your skincare routine, you can enjoy a moment of relaxation and give your eyes the care they deserve. So, the next time you need a quick pick-me-up or want to unwind after a long day, reach for a chilled cucumber slice and let nature work its magic on your eyes.

Filed Under: Skin Care Tagged With: anti-inflammatory, beauty ritual, beauty tips, chilled, cucumber slices, eyes, high water content, puffiness, Rejuvenation, skin care, skincare routine, soothing

Home Remedies for Pimples and Acne: Healing Clay and Oatmeal Mask

July 14, 2023 by sharvayonibeauty Leave a Comment

Dealing with pimples and acne can be frustrating, but fortunately, there are effective home remedies that can help alleviate these skin concerns. In this article, we will explore two popular remedies: the healing clay mask and the oatmeal mask. These natural treatments possess cleansing, healing, and drying properties that can assist in reducing the appearance of pimples and acne. By incorporating these remedies into your skincare routine, you can take proactive steps towards achieving clearer and healthier skin.

Understanding Pimples and Acne

Before we delve into the home remedies, let’s briefly understand the nature of pimples and acne. Pimples, also known as zits or blemishes, are small inflammations that occur when pores become clogged with oil, dead skin cells, and bacteria. Acne is a more severe form of skin condition that involves the presence of multiple pimples, blackheads, and whiteheads. These skin concerns can be influenced by various factors, including hormonal changes, genetics, diet, and skincare habits.

Healing Clay Mask for Pimples and Acne

Healing clay, also known as bentonite clay or French green clay, is a natural substance that has been used for centuries to draw out impurities and toxins from the skin. Here’s how you can create and use a healing clay mask for pimples and acne:

  1. Obtain a handful of healing clay from a trusted source. Make sure it is free of additives or chemicals.
  2. In a clean bowl, mix the clay with warm water to form a smooth paste. Use a non-metallic utensil to avoid any reactions.
  3. Ensure that your face is cleansed and free from any makeup or dirt.
  4. Apply the clay mask to your face, focusing on areas with pimples or acne.
  5. Leave the mask on for approximately 15 minutes, or until it dries completely.
  6. Gently rinse off the mask with cool or warm water, using circular motions to exfoliate the skin.
  7. Pat your face dry and follow up with a light moisturizer suitable for acne-prone skin.

Oatmeal Mask for Pimples and Acne

Oatmeal is a soothing and gentle ingredient that can help calm inflamed skin and absorb excess oil. Here’s how you can prepare and use an oatmeal mask for pimples and acne:

  1. Take a handful of plain oatmeal and grind it into a fine powder using a blender or food processor.
  2. In a clean bowl, mix the powdered oatmeal with warm water to create a paste-like consistency.
  3. Ensure that your face is clean before applying the mask.
  4. Apply the oatmeal mask to your face, focusing on areas with pimples or acne.
  5. Leave the mask on for approximately 15 minutes to allow the oatmeal to absorb excess oil and soothe the skin.
  6. Rinse off the mask with cool or warm water, using gentle circular motions.
  7. Gently pat your face dry and apply a lightweight, non-comedogenic moisturizer.

Incorporating Home Remedies into Your Skincare Routine

To maximize the effectiveness of these home remedies, it is important to incorporate them into a consistent skincare routine. Here are some tips:

  1. Cleanse your face twice a day with a gentle, non-comedogenic cleanser.
  2. Follow up with the healing clay or oatmeal mask once or twice a week, depending on your skin’s needs.
  3. Use oil-free and non-comedogenic moisturizers to hydrate your skin without clogging the pores.
  4. Avoid picking or popping pimples, as this can lead to further inflammation and scarring.
  5. Maintain a healthy diet rich in fruits, vegetables, and whole grains to support overall skin health.
  6. Protect your skin from excessive sun exposure by using sunscreen with at least SPF 30.

Conclusion

Home remedies, such as the healing clay mask and oatmeal mask, can provide effective solutions for treating pimples and acne. By incorporating these remedies into your skincare routine and adopting healthy lifestyle habits, you can take proactive steps towards achieving clearer and healthier skin. However, if your acne persists or worsens, it is recommended to consult a dermatologist for further evaluation and guidance. Remember to be consistent and patient with your skincare efforts, as results may take time to become noticeable. With proper care and diligence, you can achieve the complexion you desire and regain your confidence.

Filed Under: Skin Care Tagged With: acne, beauty tips, blemishes, clearer skin, healing clay mask, healthier skin, home remedies, natural treatments, oatmeal mask, pimples, skin care, skincare routine

Gentle Indian Facial Massage: A Soothing Journey to Relaxation and Rejuvenation

July 13, 2023 by sharvayonibeauty Leave a Comment

Gentle Indian facial massage is a wonderfully relaxing and rejuvenating practice that can be performed in just a few minutes. Whether it’s in the morning, afternoon, or evening, this massage technique can help relieve stress and promote the regeneration of the skin. Using high-quality oils like grapeseed or sesame oil enhances the sliding of the hands, ensuring a smooth and nourishing experience. In this article, we will explore a step-by-step guide to performing a gentle Indian facial massage, focusing on specific areas of the face to promote relaxation and rejuvenation.

Relieving Forehead Wrinkles

One of the areas where stress tends to manifest is the forehead, often in the form of wrinkles. To “open up” this area and promote relaxation, follow these steps:

  1. Place your hands horizontally across the forehead, with the forefinger and middle finger positioned directly above the eyebrows.
  2. Slowly and gently pull your hands outwards, applying gentle pressure. Repeat this motion several times to release tension and promote relaxation.

Stimulating the Third Eye and Eyebrows

The third eye, located between the eyebrows, is a significant energy center in Ayurvedic medicine. To stimulate this area and promote relaxation, follow these steps:

  1. Position your index finger and middle finger on the third eye point between the eyebrows.
  2. With gentle pressure, stroke from the center of the eyebrows outward, following the entire length of the eyebrows.
  3. When reaching the outer point of the eyebrows, increase the pressure slightly and finish with a few circular movements.

Nourishing the Cheeks

The cheeks are an essential area to focus on during a facial massage. To nourish and revitalize the cheeks, follow these steps:

  1. Place both hands horizontally on the cheeks, with all eight fingers facing inward.
  2. Slowly and gently pull your hands toward the cheekbones, applying gentle pressure. Repeat this motion to stimulate circulation and promote relaxation.

Uplifting the Mouth and Chin

The mouth and chin area can hold tension and stress. To uplift and relax this area, follow these steps:

  1. Position your index finger and middle finger horizontally on the corners of your mouth.
  2. Gently pull the skin outward and upward, creating a smiling mouth shape.
  3. Continue the movement towards the ears, gently pulling the earlobes in various directions.
  4. Finally, massage the earlobes with circular movements, starting from the bottom and moving upward.

Releasing Tension in the Chin

The chin area can often accumulate tension. To release tension and promote relaxation in the chin, follow these steps:

  1. Place your fingers on your chin, with the forefinger and middle finger positioned above the chin and the remaining fingers, including the thumb, underneath.
  2. With gentle pressure, pull the fingers outward towards the earlobes.
  3. Finish this movement by covering your eyes with the palm of your hands, allowing yourself to relax and feel the energy.

Conclusion

A gentle Indian facial massage is a simple yet effective way to relieve stress, promote relaxation, and rejuvenate the skin. By focusing on specific areas of the face, such as the forehead, eyebrows, cheeks, mouth, chin, and ears, you can release tension and nourish the skin. Remember to use high-quality oils for a smooth sliding experience. Incorporate this relaxing practice into your daily skincare routine and embrace the rejuvenating benefits it offers. Take a few moments each day to treat yourself to a gentle Indian facial massage and experience the serenity and radiance it brings to both your body and mind.

Filed Under: Skin Care Tagged With: beauty tips, gentle Indian facial massage, high-quality oils, nourish skin, promote circulation, Rejuvenation, relaxation, serenity, skin care, skincare routine, specific areas, step-by-step guide, stress relief

Delaying Wrinkles with Proper Skincare: The Power of Cream and Honey Face Mask

July 12, 2023 by sharvayonibeauty Leave a Comment

Wrinkles are a natural part of the aging process, and while it’s impossible to prevent them completely, there are ways to delay their appearance and maintain youthful-looking skin. In this article, we will explore a simple yet effective skincare remedy using two common household ingredients: cream and honey. By incorporating a cream and honey face mask into your skincare routine, you can provide your skin with the nourishment and care it needs to stay supple and radiant.

Understanding Wrinkles and Skincare

Wrinkles are the result of various factors, including age, genetics, sun exposure, and lifestyle choices. While we cannot halt the aging process, we can adopt a skincare regimen that helps minimize the signs of aging and delay the formation of wrinkles. Adequate and consistent care is essential to maintain the health and appearance of our skin.

The Power of Cream in Skincare

Cream is a rich and moisturizing skincare ingredient that can provide numerous benefits to the skin. It helps hydrate and nourish the skin, improve its elasticity, and reduce the appearance of fine lines and wrinkles. The emollient properties of cream help create a protective barrier, preventing moisture loss and keeping the skin supple and smooth.

The Benefits of Honey for Skin

Honey is a natural ingredient known for its various skincare benefits. It has moisturizing properties that help retain the skin’s moisture and improve its texture. Honey is also rich in antioxidants, which can help fight against free radicals and reduce oxidative stress on the skin. Additionally, honey has antibacterial properties that can promote a healthy complexion and prevent acne breakouts.

Creating the Cream and Honey Face Mask

To create a simple yet effective cream and honey face mask, you will need one tablespoon of cream and one tablespoon of honey. Ensure that you use high-quality, organic ingredients for the best results.

  1. Start by combining the cream and honey in a clean bowl. Mix them well until they form a smooth and consistent mixture.
  2. Before applying the face mask, cleanse your face thoroughly to remove any impurities and makeup residue. This will allow the mask to penetrate the skin more effectively.
  3. Using clean fingertips or a clean brush, apply the cream and honey mixture evenly to your face, avoiding the delicate eye area. Gently massage the mask into your skin using circular motions, ensuring that it covers all areas.
  4. Allow the mask to sit on your skin for approximately 20 minutes. During this time, the cream and honey will work their magic, providing hydration, nourishment, and potential anti-aging benefits.
  5. After 20 minutes, rinse off the mask with lukewarm water. Pat your face dry with a clean towel.
  6. Follow up with your favorite moisturizer to seal in the moisture and further enhance the benefits of the mask.

Incorporating the Cream and Honey Face Mask into Your Skincare Routine

For optimal results, incorporate the cream and honey face mask into your skincare routine once or twice a week. It is important to be consistent with your skincare practices to see lasting effects. Consider setting aside a specific time each week to pamper your skin and give it the care it deserves.

Conclusion

While it is impossible to prevent wrinkles altogether, taking proactive steps and implementing a consistent skincare routine can delay their appearance and maintain youthful-looking skin. The cream and honey face mask offers a simple and cost-effective solution for nourishing and caring for your skin. By harnessing the hydrating and anti-aging properties of cream and the moisturizing and antioxidant benefits of honey, you can give your skin the love it needs. Embrace this natural skincare remedy and enjoy the potential long-term benefits of a healthier, more radiant complexion. Remember, your skin is unique, so listen to its needs and adjust your skincare routine accordingly for the best results.

Filed Under: Skin Care Tagged With: aging process, anti-aging, antioxidants, beauty tips, cream, delay wrinkles, face mask, fine lines, honey, hydration, moisturizing, natural skincare, radiant skin, skin care, skincare, skincare routine, wrinkles

  • « Go to Previous Page
  • Page 1
  • Interim pages omitted …
  • Page 39
  • Page 40
  • Page 41
  • Page 42
  • Page 43
  • Interim pages omitted …
  • Page 111
  • Go to Next Page »

Primary Sidebar

Looking for something?

Connect with us online

  • Email
  • Facebook

Popular Posts!

Get rid of dandruff using Thulasi and Shikakai

Delaying Wrinkles with Vitamin E and Glycerin: An Effective Skincare Routine

Natural Remedy for Dandruff: Coconut Milk, Lemon Juice, and Fenugreek Seeds

How to Naturally Care for Your Skin: Unlocking the Secrets of a Brighter Complexion

Gentle Indian Facial Massage: A Soothing Journey to Relaxation and Rejuvenation

Categories

  • Hair Care
  • Health and Wellness
  • Skin Care

Tags

beauty benefits beauty tips Chemical-Free Hair Care coconut oil curd curry leaves dark circles DIY Hair Care egg exfoliation eye care glowing skin hair care Hair Care Routine hair care tips hair growth Hair health Hair Health Improvement hair loss Hair Nourishment Hair Strengthening health and wellness honey hydration lemon lemon juice milk natural beauty natural conditioner natural face mask Natural hair care Natural Hair Growth Natural Hair Remedies natural ingredients natural remedies Natural remedy natural skincare olive oil radiant complexion radiant skin scalp health Scalp Nourishment skin care skincare skincare routine

© 2026 · Sharvayoni · Privacy Policy · Disclaimer