
Dark Circles are the dark and rather persistent rings beneath your eyes that torment your look. Though Dark Circles are not a serious health issue many people feel that dark circles under their eyes make them look tired, older, or unhealthy.
If you are struggling with dark circles, worry not, there are many home remedies for dark circles. These remedies not only remove dark circles but also nourishes your skin making them look young and supple.
Why do I have dark circles under my eyes?
These dark circles can be caused due to many reasons. Some of them are given below.
- Sleep deprivation and constant fatigue
- Improper food intake
- Unhealthy habits
- Unprotected sun exposure
- Hormonal Imbalance
- Rubbing the eyes
- Low iron levels
- Prolonged, systematic dehydration
- The natural aging process
- Genetic ‘predisposition’
- Medications
- Eye strain
Check out Causes for Dark Circles for a detailed explanation for the Cause of Dark Circles.
Natural Vs Artificial Treatments
The skin below the eyes is very sensitive and 10 times thinner than normal skin. This allows us to have various facial expressions using our eyes.
Artificial treatments tend to moisturize the skin around the eyes making them soft and supple thus reducing the dark circles. But the chemicals present in the artificial creams can affect the eyes and the eyesight.
Also, the Artificial cream treats the symptoms of dark circles rather than the cause of the dark circles. This makes the dark circles return when you stop using the artificial creams. It makes you dependent on the creams and you get stuck to using creams for most of your lives.
On the other hand, Natural Treatments treats the causes for the dark circles without any side effects. It gently works on the sensitive skin around the eyes thus reducing the dark color and puffiness in and around the eyes.
A word of caution before we begin:
Reducing the dark circles naturally requires a significant amount of beauty discipline. The remedies given here should be followed religiously for the given amount of period for the remedies to work.
Best Home Remedies for Dark Circles
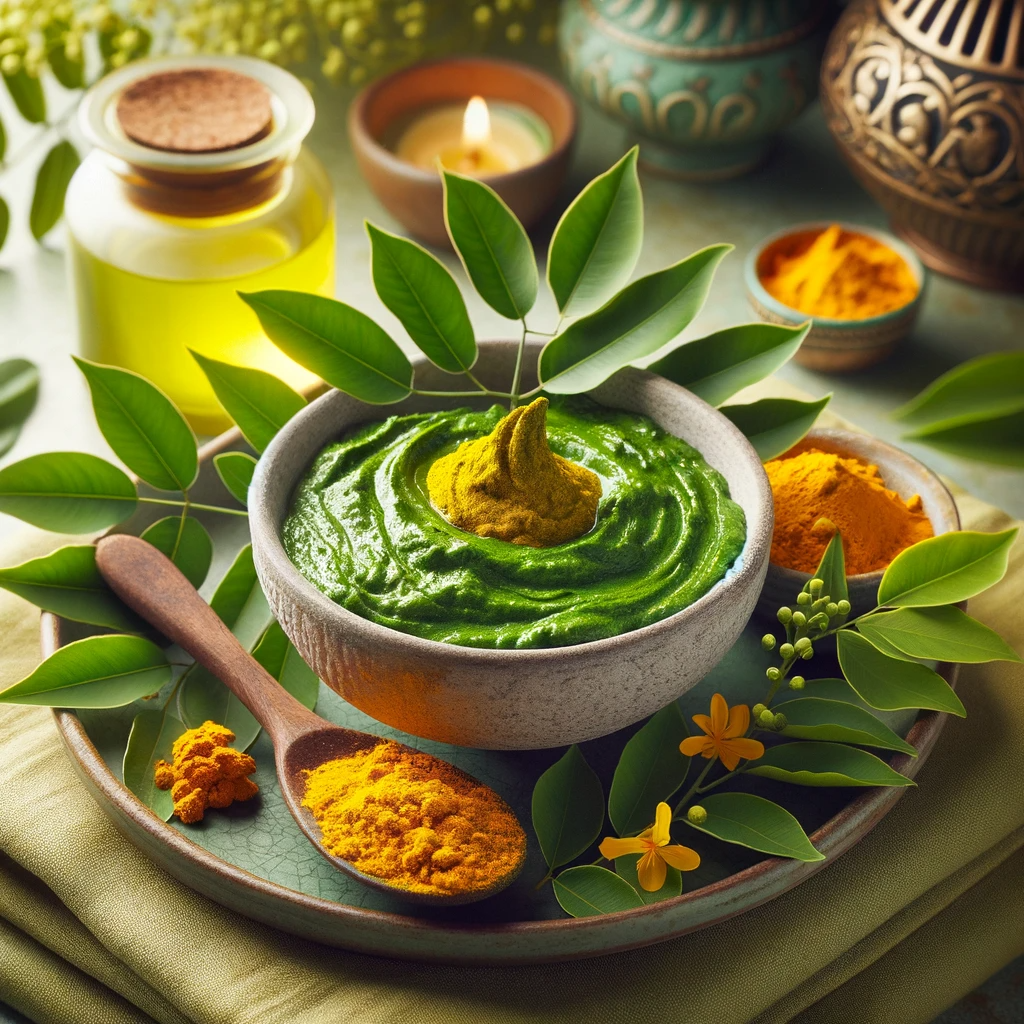
Are you struggling with acne and looking for a natural remedy to achieve clear and healthy skin? Look no further than the goodness of curry leaves and turmeric. This homemade face pack combines the power of these natural ingredients to combat acne and promote radiant skin. In this article, we will delve into the simplicity and effectiveness of the Curry Leaves and Turmeric Face Pack. Discover how this natural remedy can help you achieve a clearer complexion and healthier skin.
Things Needed
To create this acne-fighting face pack, you will need just two main ingredients:
- One cup of fresh curry leaves
- Half a teaspoon of turmeric powder
Steps to Prepare
Creating the Curry Leaves and Turmeric Face Pack is a straightforward process. Follow these simple steps to harness the power of these natural ingredients for your skin:
1. Begin by smashing the fresh curry leaves to form a smooth paste. You can use a mortar and pestle or any suitable method to achieve this.
2. Once the curry leaves have been transformed into a paste, add half a teaspoon of turmeric powder to the mixture.
3. Mix the curry leaves paste and turmeric powder thoroughly until they are well combined. You should have a consistent, smooth mixture.
4. Before applying the face pack, make sure your face is clean and free of any makeup or impurities.
5. Apply this pack evenly all over your face, focusing on areas prone to acne or breakouts.
6. Allow the face pack to dry naturally for approximately one hour. During this time, you may feel a mild tingling sensation, which is normal.
7. Once the face pack has completely dried, gently wash it off with lukewarm water. Avoid using any soap or harsh cleansers.
Benefits
The use of the Curry Leaves and Turmeric Face Pack offers numerous benefits for your skin and overall skincare routine:
- Acne-Fighting Properties: Curry leaves are known for their antibacterial properties, making them effective in fighting acne-causing microbes and promoting clearer skin.
- Deep Cleansing: This face pack helps cleanse dirt and impurities from skin pores, reducing acne-related issues and improving overall skin health.
- Turmeric’s Antibacterial Boost: The addition of turmeric powder enhances the antibacterial properties of the curry leaves, making this remedy even more effective against acne.
- Natural and Chemical-Free: This face pack relies on natural ingredients, making it a safe and chemical-free solution for your skincare routine.
- Radiant Skin: Regular use of this face pack can help you achieve a clearer complexion and healthier, radiant skin.
Conclusion
The Curry Leaves and Turmeric Face Pack is a simple yet highly effective way to combat acne and promote clearer and healthier skin. This natural remedy harnesses the power of curry leaves and turmeric to provide a soothing and rejuvenating treatment for your skin. By incorporating this face pack into your skincare routine regularly, you can expect visible improvements in your complexion and overall skin health. Say goodbye to acne-related woes and hello to the natural goodness of this face pack, and watch your skin flourish with radiance and vitality.
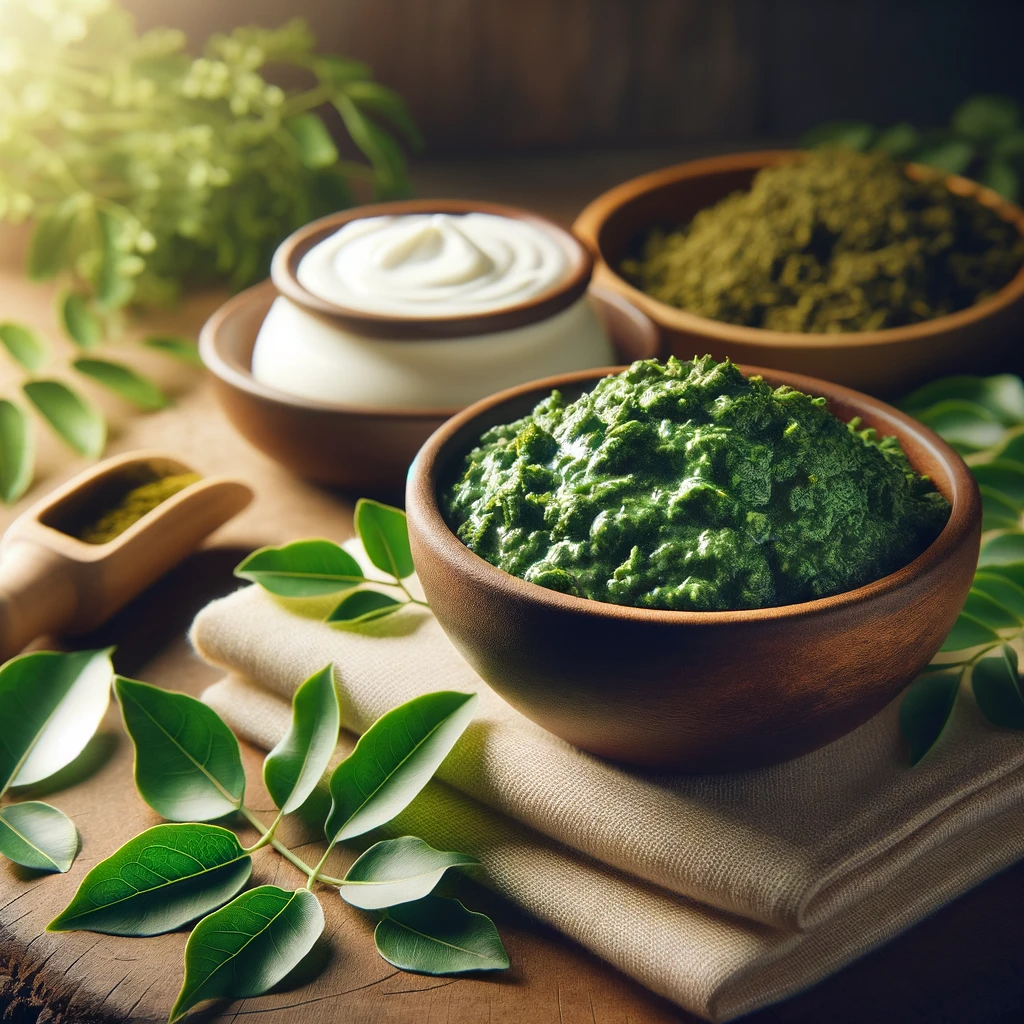
Achieving healthy and radiant skin doesn’t have to involve expensive skincare products or elaborate routines. Nature has provided us with simple yet effective ingredients that can work wonders for our skin. In this article, we’ll explore the goodness of curry leaves and curd to create a homemade face mask that promotes healthy and glowing skin. Discover the natural radiance that can be achieved with the Curry Leaves and Curd face mask.
Things Needed
To create this nourishing face mask, you will need just two main ingredients:
- One cup of fresh curry leaves
- One spoonful of curd (yogurt)
Steps to Prepare
Creating the Curry Leaves and Curd face mask is a straightforward process. Follow these simple steps to harness the power of these natural ingredients for your skin:
1. Start by smashing the fresh curry leaves to create a smooth paste. You can use a mortar and pestle or any suitable method for this.
2. Once you have a paste-like consistency, add one spoonful of curd (yogurt) to the mixture.
3. Mix the curry leaves paste and curd thoroughly until they are well combined. You should have a consistent, smooth mixture.
4. Before applying the face mask, ensure that your face is clean and free of any makeup or impurities.
5. Apply this mixture directly to your face, covering it evenly. Avoid the delicate area around your eyes.
6. Allow the face mask to dry naturally for approximately 30 minutes. During this time, you may feel a slight tightening sensation, which is normal.
7. Once the face mask has completely dried, gently wash it off with lukewarm water. Refrain from using any soap or harsh cleansers.
Benefits
The use of the Curry Leaves and Curd face mask offers several benefits for your skin and overall skincare routine:
- Dead Skin Removal: Curry leaves are known for their exfoliating properties, aiding in the removal of dead skin cells and providing a healthy and radiant complexion.
- Moisturization: The inclusion of curd (yogurt) in the face mask moisturizes the skin, making it soft and supple. This moisturization contributes to a youthful and glowing appearance.
- Natural and Chemical-Free: This face mask relies on natural ingredients, making it a safe and chemical-free solution for your skincare routine.
- Radiant Skin: Regular use of this face mask can help you achieve healthy, glowing, and youthful-looking skin.
Conclusion
The Curry Leaves and Curd face mask offer a simple yet highly effective way to achieve healthy and glowing skin. Nature’s bounty provides us with powerful ingredients that can revitalize our complexion without the need for costly skincare products. By incorporating this face mask into your skincare routine regularly, you can expect visible improvements in the overall health and radiance of your skin. Say goodbye to dull and tired-looking skin and hello to the natural radiance and vitality brought to you by curry leaves and curd.
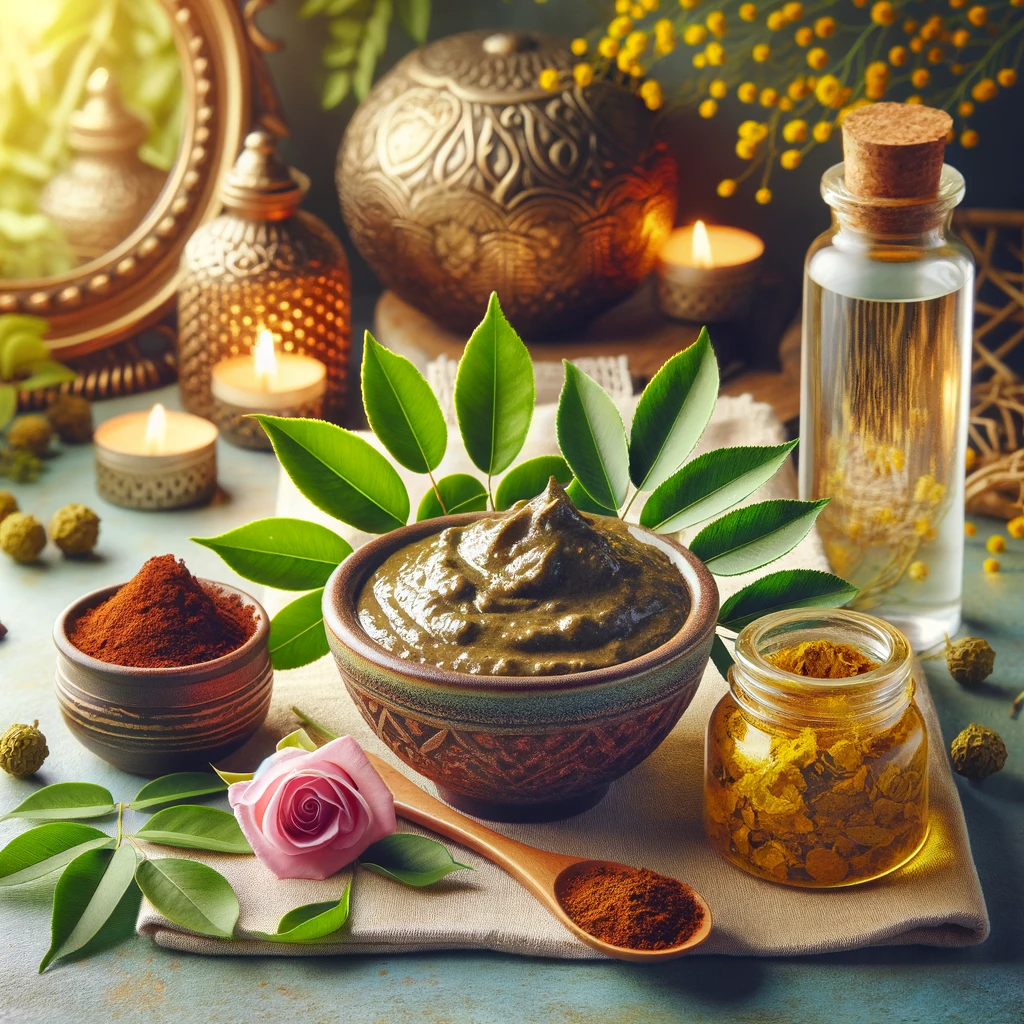
Achieving wrinkle-free, youthful skin is a common desire for many individuals. While there are numerous skincare products on the market claiming to reduce wrinkles, nature offers us an abundance of natural remedies that can work wonders for our skin. In this article, we will explore the potent combination of curry leaves, Multani Mitti (Fuller’s Earth), and rose water to create a homemade face mask that promotes wrinkle-free skin. Discover the natural path to radiant and youthful skin with this effective skincare solution.
Things Needed
To create the Wrinkle-Free Skin face mask, you will require the following ingredients:
- One cup of fresh curry leaves
- One spoon of Multani Mitti (Fuller’s Earth)
- A few drops of rose water
Steps to Prepare
Crafting the Wrinkle-Free Skin face mask is a simple and rewarding process. Follow these straightforward steps to harness the benefits of these natural ingredients for your skin:
1. Begin by smashing the fresh curry leaves to create a smooth paste. You can use a mortar and pestle or any suitable method for this purpose.
2. Once you have achieved a paste-like consistency, add one spoon of Multani Mitti (Fuller’s Earth) to the mixture.
3. Next, incorporate a few drops of rose water into the mixture. Ensure that the rose water is evenly distributed within the mixture.
4. Thoroughly mix the curry leaves paste, Multani Mitti, and rose water until you achieve a uniform, smooth paste.
5. Before applying the face mask, make sure your face and neck are clean and free from makeup or impurities.
6. Apply the mixture generously to your face and neck, ensuring complete coverage. This mask can also be applied to areas where wrinkles are a concern.
7. Allow the face mask to dry naturally for approximately 30 minutes. During this time, you may experience a mild tightening sensation, which is normal.
8. Once the face mask has completely dried, gently wash it off with lukewarm water. Avoid using any soap or harsh cleansers to preserve the natural benefits of the mask.
Benefits
The Wrinkle-Free Skin face mask offers several benefits for your skin and overall skincare routine:
- Free Radical Elimination: Curry leaves possess antioxidant properties that help eliminate free radicals present in the skin, reducing oxidative stress and its effects on premature aging.
- Toning and Firming: The inclusion of rose water imparts a pleasant tone and firmness to the skin, enhancing its overall appearance.
- Oil Absorption and Suppleness: Multani Mitti (Fuller’s Earth) is known for its ability to absorb excess oil and secretions from the skin. This aids in reducing wrinkles and leaves the skin soft, supple, and rejuvenated.
- Natural and Chemical-Free: This face mask relies on natural ingredients, ensuring a safe and chemical-free solution for your skincare regimen.
- Youthful Radiance: Regular use of this face mask can help reduce the appearance of wrinkles, providing your skin with a youthful and radiant glow.
Conclusion
The Wrinkle-Free Skin face mask combines the goodness of curry leaves, Multani Mitti, and rose water to offer a natural and effective solution for achieving wrinkle-free and youthful skin. Nature has bestowed us with potent ingredients that can address our skincare concerns without the need for costly and artificial products. By incorporating this face mask into your skincare routine on a regular basis, you can expect visible improvements in the texture, tone, and radiance of your skin. Bid farewell to premature aging and embrace the natural path to youthful and wrinkle-free skin with this rejuvenating face mask.
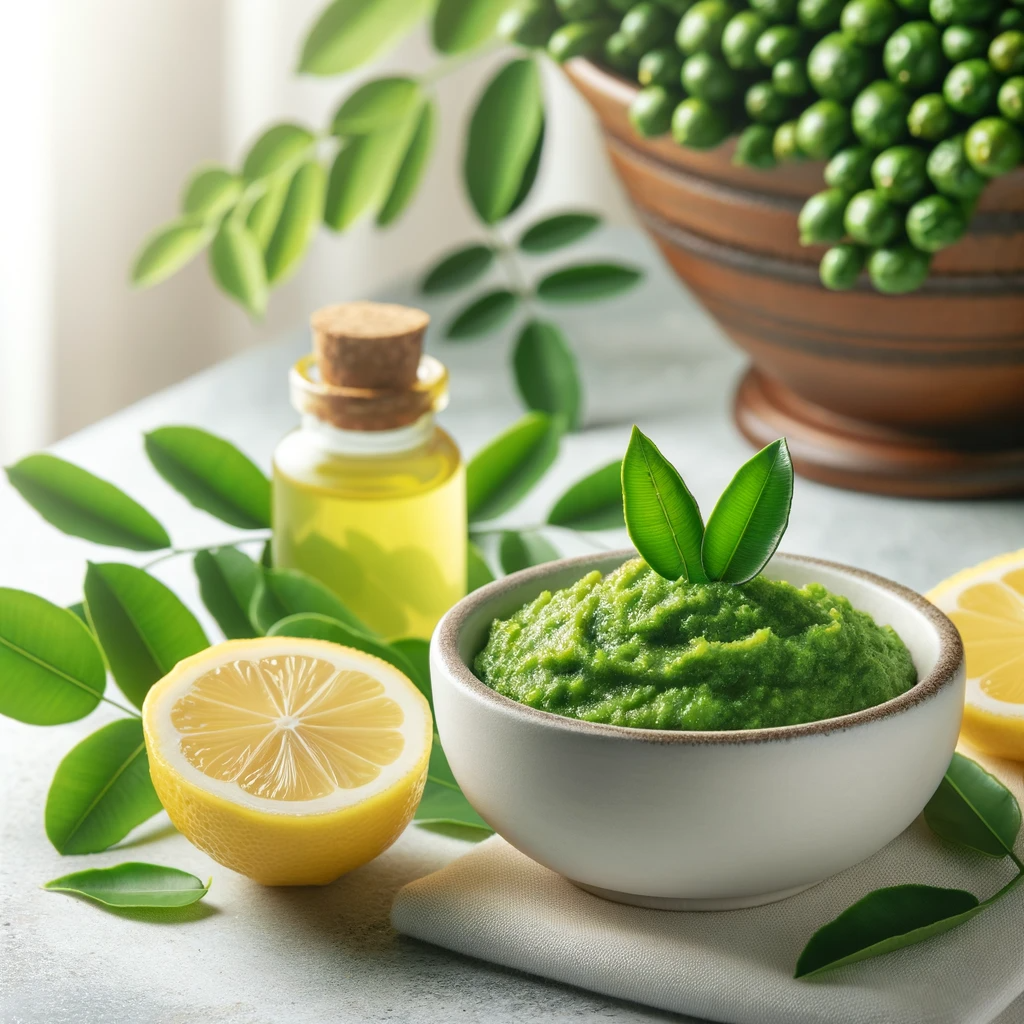
Pimples and pimple scars can be a source of frustration and self-consciousness for many. While there are various commercial products available to combat these issues, sometimes a natural approach can be equally effective without the harsh chemicals. In this article, we will explore a simple yet powerful solution using curry leaves and lemon juice to address pimples and pimple scars. Discover how these natural ingredients can help you achieve clearer and healthier skin.
Things Needed
To create the Pimple-Removing Paste, you will need the following ingredients:
- One cup of fresh curry leaves
- One tablespoon of lemon juice
Steps to Prepare
Creating the Pimple-Removing Paste is a straightforward process. Follow these steps to harness the benefits of curry leaves and lemon juice for your skin:
1. Begin by smashing the fresh curry leaves until you achieve a smooth paste. You can use a mortar and pestle or any suitable method for this.
2. Once you have a paste-like consistency, add one tablespoon of fresh lemon juice to the mixture.
3. Mix the curry leaves paste and lemon juice thoroughly until they are well combined. You should have a consistent, smooth mixture.
4. Before applying the paste, ensure that your face is clean and free from makeup or impurities.
5. Apply the mixture directly to the areas with pimples or pimple scars. You can use your fingers or a clean cotton swab for precise application.
6. Leave the paste on for 10 to 15 minutes. During this time, you may experience a mild tingling sensation, which is normal.
7. After the designated time, thoroughly wash off the paste with lukewarm water. Refrain from using any soap or harsh cleansers.
Benefits
The Pimple-Removing Paste offers several benefits for your skin:
- Antibacterial Properties: Curry leaves contain antibacterial properties that help combat the bacteria responsible for pimple formation. This can assist in reducing the occurrence of new pimples.
- Natural Exfoliation: The application of lemon juice aids in exfoliating the skin, promoting the removal of dead skin cells and helping to fade pimple scars over time.
- Gentle and Chemical-Free: This remedy relies on natural ingredients, making it a gentle and chemical-free solution for addressing pimples and scars.
- Clearer Skin: Regular use of this paste can contribute to clearer and healthier skin, reducing the appearance of pimples and scars.
Conclusion
The Pimple-Removing Paste with curry leaves and lemon juice offers a natural and effective solution for addressing pimples and pimple scars. Nature provides us with potent ingredients that can help us achieve clearer and healthier skin without resorting to harsh chemicals. By incorporating this paste into your skincare routine on a regular basis, you can expect visible improvements in the appearance of pimples and scars. Embrace the natural path to clearer and more confident skin with this gentle and effective remedy.

Dark circles under the eyes can be a common concern, often caused by factors like lack of sleep, stress, or genetics. While there are countless products on the market claiming to banish dark circles, sometimes the best remedies are the simplest ones. In this article, we’ll explore an effective and natural way to reduce dark circles using one readily available ingredient: cucumber.
Things Needed
Before you begin, gather the following items:
- Fresh Cucumber
Steps to Prepare
Here are the steps to prepare and use cucumber slices to combat dark circles:
- Chill the Cucumber: Start by cutting a fresh cucumber into thick slices. Place these slices in the refrigerator for about 30 minutes. The cool temperature of the cucumber will add to the effectiveness of this remedy.
- Apply Cucumber Slices: After the cucumber slices have chilled, take them out and place them on your closed eyes, ensuring that they cover the dark circles. Lie down and relax for about 10 minutes while the cucumber slices work their magic.
- Wash and Repeat: After 10 minutes, remove the cucumber slices from your eyes and wash the area thoroughly with water. Pat your skin dry gently.
- Repeat Twice a Day: To see noticeable results, repeat this process twice a day for one week. Consistency is key when it comes to natural remedies.
Benefits
Here’s why using cucumber slices can be a beneficial natural remedy for dark circles:
- Skin Lightening: Cucumber contains compounds that can help lighten the skin. Regular application of cucumber slices can gradually reduce the appearance of dark circles, giving you a more even complexion.
- Mild Astringent Properties: Cucumber has mild astringent properties, which can help tighten the skin and reduce puffiness around the eyes, making them look brighter and less tired.
- Soothing and Relaxing Effect: Cucumber slices are known for their soothing and relaxing effect on the eyes. They can provide relief from eye strain and help you feel refreshed.
- Moisturization: Cucumber also contains water and nutrients that can moisturize the skin around your eyes. Proper hydration is essential for maintaining healthy skin and minimizing dark circles.
Conclusion
Dark circles under the eyes can be bothersome, but with the natural remedy of cucumber slices, you can take a step toward reducing their appearance and achieving a more refreshed and revitalized look. This simple and cost-effective solution is gentle on the skin and offers additional benefits like skin lightening and hydration. By incorporating cucumber slices into your skincare routine, you can bid farewell to those pesky dark circles and embrace a brighter, more radiant complexion.
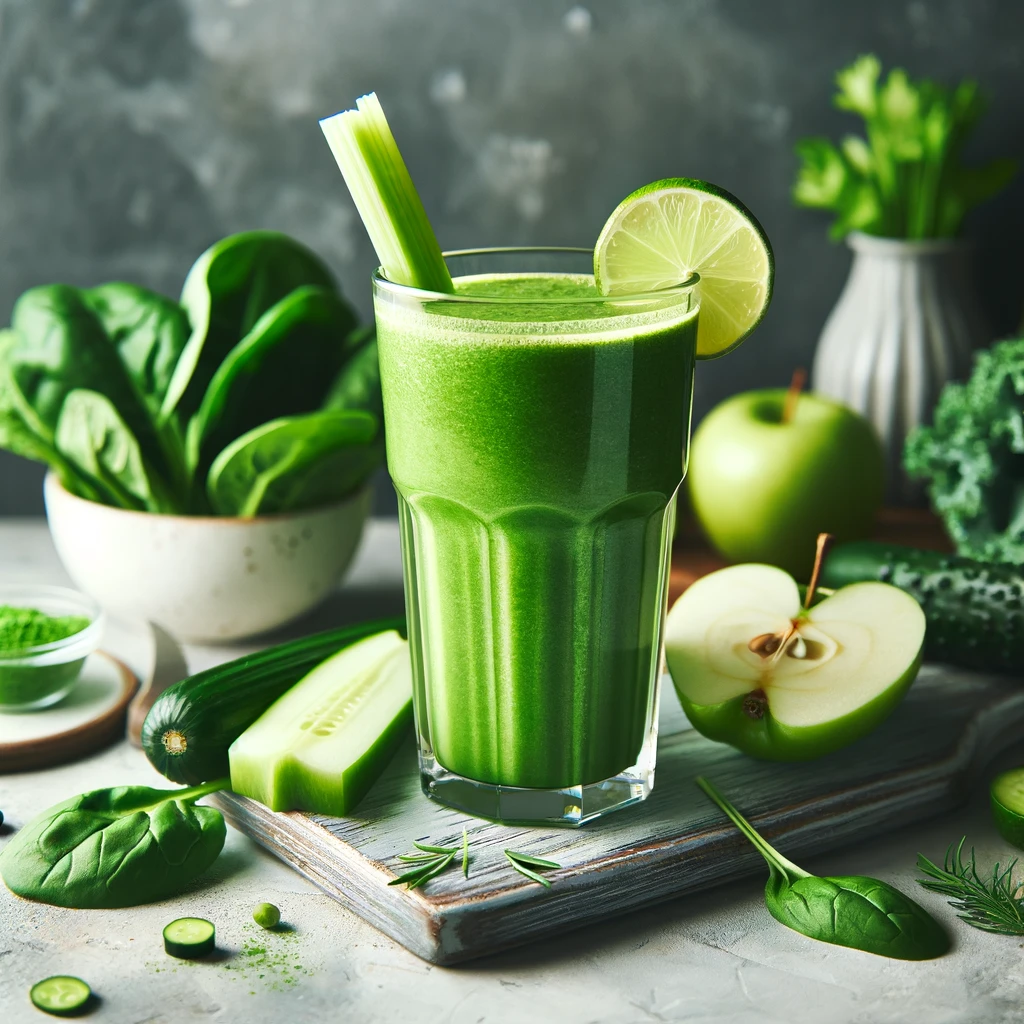
In a world where health and wellness are at the forefront of everyone’s mind, finding delicious and nutritious ways to fuel our bodies is key. Enter the Green Detox Smoothie, a powerful blend of vegetables, fruits, and a hint of ginger, designed to rejuvenate and nourish from the inside out. This guide will take you through the steps to create this vibrant drink, packed with essential nutrients and flavors that delight.
Things Needed
Before we dive into the preparation, ensure you have the following:
- A high-powered blender capable of breaking down fibrous vegetables and fruits.
- Fresh ingredients: 2 small carrots, 1/4 teaspoon grated fresh ginger, 1 cup small broccoli florets, 2 medium oranges, 2 cups chopped kale (stems removed), 2 medium green apples, and sea salt to taste.
- 1 1/2 cups filtered water and 1 cup ice OR an additional 1/2 cup filtered water for blending.
- Garnish: Small broccoli florets.
Steps to Prepare
- Preparation of Ingredients: Begin by thoroughly washing all fresh produce. Peel the carrots and oranges, core the apples, and ensure the broccoli florets are in small, blendable pieces.
- Blending: Place all ingredients, except for the garnish, into your blender. Start at a low speed to combine, then gradually increase to high until the mixture achieves a smooth consistency.
- Garnishing: Add a final touch by topping each glass with a small broccoli floret.
How to Consume
For best results, consume the Green Detox Smoothie immediately after blending. It serves as an excellent breakfast, a refreshing post-workout drink, or a nutritious snack any time of the day.
Benefits
This smoothie is more than just a delightful mixture; it’s a nutrient powerhouse:
- Detoxifying Properties: Ingredients like kale and broccoli help support your body’s detoxification processes.
- Immune Support: Vitamin C-rich oranges and antioxidants present in all the ingredients bolster the immune system.
- Digestive Health: Fiber from apples, carrots, and kale promotes healthy digestion.
Nutritional Information
Each serving delivers a robust nutritional profile:
- Calories: 255
- Carbohydrates: 62g
- Protein: 6g
- Fat: 1g
- Fiber: 13g
- Sodium: 235mg
Variations
To keep your smoothie experience fresh, consider adding a tablespoon of freshly squeezed lime juice for an extra zing or swapping out one of the fruits for a seasonal variant. The possibilities are endless.
Precautions
While this smoothie is beneficial for most, individuals with specific dietary restrictions or allergies should adjust the recipe as needed. For example, those on a low-sugar diet may wish to reduce the amount of fruit.
Tips
- Maximize Nutrients: Use organic produce to reduce exposure to pesticides.
- Texture Preferences: Adjust the amount of water or ice to achieve your desired consistency.
- Flavor Adjustments: Experiment with the amount of ginger and sea salt to suit your taste preferences.
Conclusion
The Green Detox Smoothie stands as a testament to the delicious potential of healthy eating. With its blend of fruits, vegetables, and a hint of ginger, it offers a refreshing way to support your body’s natural detoxification processes, boost immunity, and improve digestive health. Whether you’re looking for a nutritious start to your day or a revitalizing snack, this smoothie is sure to become a staple in your wellness routine.

In the quest for healthful and flavorful beverages, smoothies have become a staple in many diets, appreciated for their versatility and ease of preparation. Among the plethora of smoothie recipes, the Berry-Parsley Smoothie stands out for its unique combination of berries, banana, and herbs, offering a delightful blend of sweet and fresh flavors. This guide delves into preparing this vibrant drink, showcasing its health benefits and variations to cater to your taste.
Things Needed
Before you embark on your smoothie-making journey, ensure you have the following:
- A high-powered blender, capable of pulverizing all ingredients into a smooth texture.
- Fresh ingredients: ½ cup of fresh raspberries, 1 ⅓ cups of fresh strawberries (cored), ½ cup of fresh cranberries, ½ a large banana, ¼ cup of loosely packed fresh parsley leaves, and ¼ cup of loosely packed fresh mint leaves.
- Garnish: Fresh mint sprigs.
Steps to Prepare
- Preparation: Begin by washing all the berries, herbs, and the banana. Core the strawberries if you haven’t already, and loosely pack the parsley and mint leaves to measure.
- Blending: Add all ingredients into the blender, excluding the garnish. Start blending on a low speed to combine, then gradually increase to high until the mixture achieves a smooth consistency.
- Serving: Once blended to perfection, pour the smoothie into glasses and garnish each with a sprig of fresh mint for an added touch of elegance and flavor.
How to Consume
The Berry-Parsley Smoothie is best enjoyed immediately after blending to savor the freshness of the ingredients and benefit from the nutrients. It’s perfect as a morning energy booster, a post-workout refreshment, or even as a nutritious snack throughout the day.
Benefits
This smoothie is not just about tantalizing your taste buds; it’s also packed with health benefits:
- Antioxidants: Berries are rich in antioxidants that help fight oxidative stress and inflammation.
- Vitamins and Minerals: Parsley and mint provide vitamins A, C, and K, along with minerals like iron and magnesium, supporting immune health and bone strength.
- Dietary Fiber: The fiber from the fruits and herbs aids in digestion and helps maintain a healthy gut.
Nutritional Information
Each serving of the Berry-Parsley Smoothie delivers approximately:
- Calories: 116
- Carbohydrates: 29g
- Protein: 2g
- Fat: 1g
- Fiber: 2g
- Sodium: 10mg
This nutritional profile makes it an excellent choice for those seeking a low-fat, nutrient-dense option.
Variations
The beauty of this smoothie lies in its flexibility. Feel free to experiment with different berries based on availability and preference. Mix and match raspberries, blackberries, strawberries, and blueberries to create your own signature version of this delightful drink.
Precautions
While this smoothie is suitable for most, individuals with specific dietary restrictions or allergies to any of the ingredients should exercise caution. Always consult with a healthcare provider if unsure.
Tips
- For a colder, thicker smoothie, use frozen berries instead of fresh ones.
- If the smoothie is too thick, adjust the consistency by adding a little filtered water.
- To enhance the smoothie’s nutritional value, consider adding a scoop of your favorite protein powder.
Conclusion
The Berry-Parsley Smoothie is a testament to the creative possibilities that lie in combining fruits with herbs. This guide not only walks you through the steps of making this nourishing drink but also highlights the health benefits and variations to try. Whether you’re a smoothie aficionado or new to the world of blended drinks, this recipe offers a refreshing twist that’s sure to please. So, grab your blender and get ready to enjoy a glass of healthful indulgence.
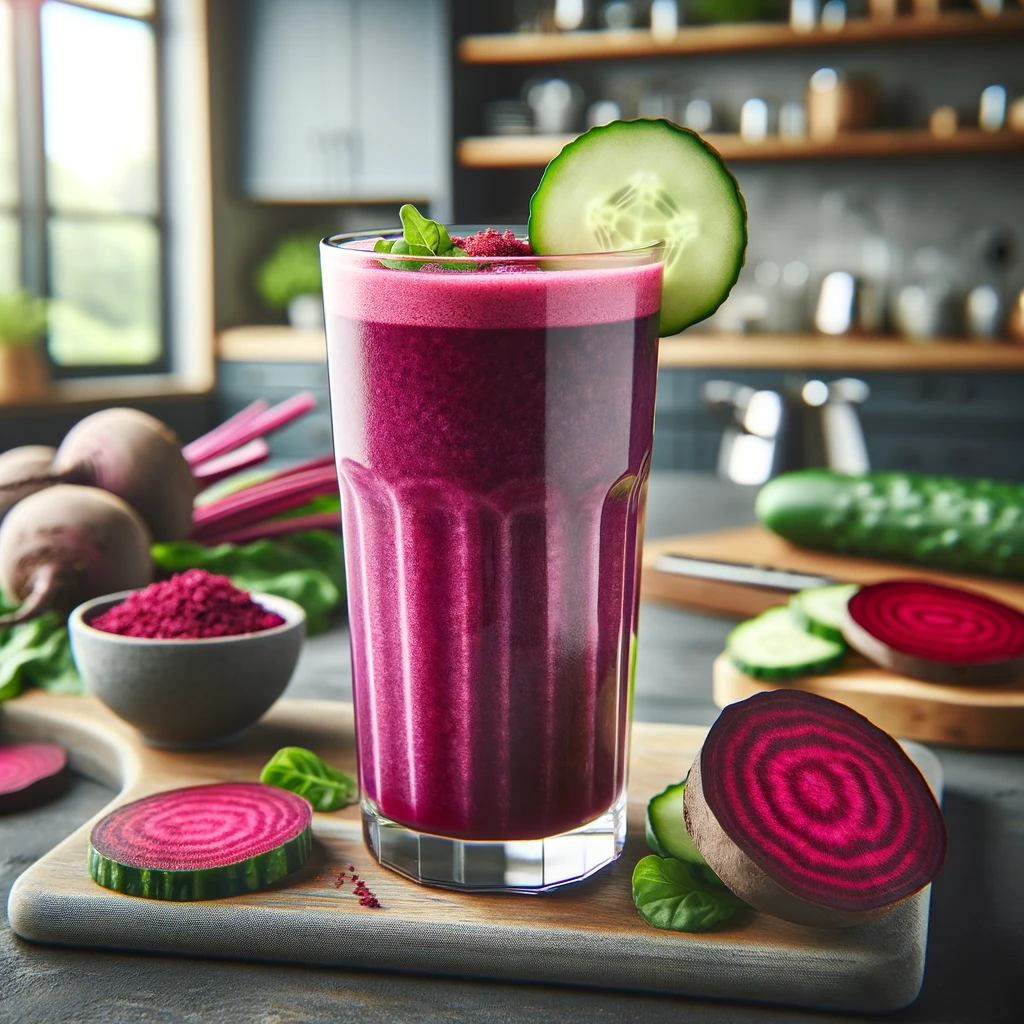
In a world where health-conscious individuals are constantly on the lookout for nutritious and delicious beverage options, the Beet and Cucumber Smoothie stands out as a vibrant, refreshing, and health-boosting choice. This smoothie combines the earthy flavors of fresh beets with the cool crispness of cucumbers, enhanced by the aromatic touch of dill and the zestiness of lemon juice. This guide delves into the preparation of this unique drink, exploring its benefits, nutritional content, and variations, along with useful tips for making your smoothie experience as enjoyable as possible.
Things Needed
Before diving into the preparation process, ensure you have the following items:
- A high-powered blender, capable of blending hard ingredients to a smooth consistency.
- Fresh produce: 1 small beet (peeled), 2 large cucumbers (peeled), and fresh dill for both the smoothie and garnish.
- Fresh lemon juice (1 tablespoon) and ice (3 cups) or filtered water (1 1/2 cups) depending on your preference.
- Garnishes: Additional sprigs of fresh dill and lemon slices to enhance the presentation and flavor.
Steps to Prepare
- Preparation of Ingredients: Begin by thoroughly washing the beet and cucumbers. Peel them to ensure a smooth blend without any bitter skin. Roughly chop the vegetables to make them easier to blend.
- Blending: Place the chopped beet, cucumbers, chopped fresh dill, lemon juice, and your choice of ice or water into the blender. Start blending at a low speed to combine the ingredients, then gradually increase to the highest setting until the mixture achieves a frothy, smooth consistency.
- Garnishing and Serving: Cut a lemon slice for each glass and attach it to the rim. Add a sprig of fresh dill as the final touch before pouring the smoothie into glasses to serve.
How to Consume
This Beet and Cucumber Smoothie is best enjoyed immediately after blending to make the most of its freshness, nutrients, and flavors. It serves as an excellent start to your day, a refreshing post-workout drink, or a midday energy booster.
Benefits
The ingredients in this smoothie are not just chosen for their flavors but also for their health benefits. Beets are known for their ability to improve blood flow, reduce blood pressure, and enhance athletic performance. Cucumbers offer hydration and are a good source of vitamins K and C. Dill contributes with its antibacterial properties and a unique flavor profile, while lemon juice adds vitamin C and aids in digestion.
Nutritional Information
A single serving of this smoothie offers a light calorie count of 67, with 16g of carbohydrates, 3g of protein, 0g of fat, 3g of fiber, and 45mg of sodium. This makes it an excellent option for those monitoring their calorie intake without sacrificing nutritional value.
Variations
For a twist on the traditional recipe, try substituting dill with fresh mint leaves. Mint offers a fresh, cool flavor that pairs wonderfully with beet and cucumber, giving the smoothie a different but equally delightful taste profile.
Precautions
Individuals with kidney issues should be cautious with beet intake due to their high oxalate content, which can contribute to kidney stone formation in susceptible individuals. Always consult with a healthcare provider if you have any health concerns regarding the ingredients.
Tips
- For a colder smoothie, use frozen beets or add more ice. This not only chills the drink but also gives it a thicker consistency.
- If the earthiness of the beets is too strong, a little more lemon juice or the addition of a natural sweetener like honey can help balance the flavors.
- To make this smoothie even more nutritious, consider adding a scoop of your favorite protein powder or a handful of spinach for an extra dose of protein and iron.
Conclusion
The Beet and Cucumber Smoothie is more than just a drink; it’s a nutrient-rich, flavorful journey that promotes wellness and refreshment. Whether you’re seeking a vibrant start to your day, a quick nutritional boost, or a novel smoothie experience, this blend offers a perfect combination of health benefits and delightful flavors. With simple ingredients and easy preparation, it invites smoothie lovers and health enthusiasts alike to explore the richer side of natural ingredients. So, grab your blender and embark on a refreshing adventure with every sip.

In the world of health and wellness, the quest for the perfect smoothie is ongoing. The ideal blend is not only delicious but also packed with nutrients that support a healthy lifestyle. Enter the Pineapple-Collard Green Smoothie: a unique concoction that marries the sweetness of pineapple with the nutrient-rich profile of collard greens, complemented by the creaminess of avocado and the freshness of cilantro. This guide will walk you through everything you need to know to prepare this vibrant and healthful drink.
Things Needed
To embark on your smoothie-making adventure, ensure you have the following items ready:
- A high-powered blender capable of processing all ingredients into a smooth consistency.
- Fresh ingredients: 2 cups of fresh pineapple chunks, 1 large collard green leaf, 1 small avocado, ¾ cup of loosely packed cilantro leaves.
- 1/3 cup of water, 2 tablespoons of freshly squeezed lime juice, and 1 cup of ice OR ½ cup of filtered water for blending.
- Garnish: Extra pineapple chunks and toothpicks.
Steps to Prepare
- Preparation of Ingredients: Start by preparing your fresh produce. Wash the collard green leaf thoroughly, pit the avocado, and measure out the cilantro leaves. Squeeze enough limes to make two tablespoons of juice.
- Blending: Place all ingredients, except for the garnish, in the blender. Start blending on a low setting to combine, then gradually increase to high speed until the mixture is completely smooth.
- Garnishing: Skewer a few pineapple chunks onto two toothpicks. Garnish each glass with these pineapple-topped toothpicks to add an extra touch of freshness and appeal.
How to Consume
Enjoy this smoothie fresh out of the blender, ideally immediately after preparation to benefit from the full spectrum of nutrients and flavors. It’s perfect as a refreshing morning drink, a mid-day energy booster, or a post-workout replenishment.
Benefits
The Pineapple-Collard Green Smoothie is not just a treat for the taste buds but also a boon for your health. Pineapple is a source of bromelain, an enzyme that aids in digestion and has anti-inflammatory properties. Collard greens are rich in vitamins A, C, and K, as well as calcium and iron, supporting bone health and the immune system. Avocado adds heart-healthy monounsaturated fats and fiber, while cilantro can help detoxify the body. Together, these ingredients create a powerhouse of nutritional benefits.
Nutritional Information
Per serving, this smoothie offers approximately 165 calories, 26g of carbohydrates, 2g of protein, 8g of fat, 6g of fiber, and a mere 7mg of sodium. This profile makes it an excellent choice for those seeking a nutritious, low-sodium option that supports overall health.
Variations
To keep your smoothie routine interesting, try substituting the pineapple with mango for a tropical twist. Mangoes add a different dimension of sweetness and are also rich in vitamins C and A. This variation can provide a new flavor profile while maintaining the smoothie’s health benefits.
Precautions
While this smoothie is generally safe for most people, individuals with specific dietary restrictions or allergies should modify the recipe accordingly. For instance, those allergic to avocado might omit it and add a bit more water for the desired consistency.
Tips
- For a colder, more refreshing drink, use frozen pineapple chunks instead of fresh ones.
- If the smoothie is too thick, adjust the consistency by adding a little more water until it meets your preference.
- To maximize the health benefits, opt for organic ingredients whenever possible.
Conclusion
The Pineapple-Collard Green Smoothie is a testament to the idea that healthy eating doesn’t have to be boring or tasteless. With its unique combination of ingredients, it offers a delicious way to consume a variety of nutrients essential for health. Whether you’re a seasoned smoothie aficionado or just looking to try something new, this recipe is sure to delight your taste buds and contribute to your well-being. So, grab your blender and get ready to enjoy a glass of this nutritious, delicious smoothie.

In the quest for refreshing and healthful beverage options, the cucumber and green bell pepper smoothie stands out as a vibrant, nutrient-packed choice. This unique combination not only tantalizes the taste buds with its fresh and slightly spicy flavor but also offers a plethora of health benefits. Ideal for those looking to add a nutritious boost to their diet, this smoothie is both invigorating and hydrating. Let’s dive into how you can prepare this green elixir, its nutritional benefits, and ways to customize it to your liking.
Things Needed
- Ingredients:
- 2 medium cucumbers, peeled
- 2 tablespoons freshly squeezed lime juice
- 1/8 teaspoon ground cayenne
- 1/2 small green bell pepper, seeded
- 1/2 cup filtered water
- 1 cup ice OR an additional 1/2 cup filtered water
- Sea salt, to taste
- Garnish: green bell pepper slices
- Equipment:
- High-powered blender
- Measuring spoons
- Knife and cutting board for preparation
Steps to Prepare
- Preparation: Begin by thoroughly washing the cucumbers and green bell pepper. Peel the cucumbers and remove the seeds from the bell pepper. Roughly chop them into smaller pieces to make the blending process smoother.
- Blending: Place the cucumbers, lime juice, ground cayenne, green bell pepper, and filtered water into the blender. Start blending on a low setting to combine the ingredients, gradually increasing the speed to high until the mixture becomes smooth and frothy.
- Finishing Touches: Once the smoothie reaches your desired consistency, taste it and add sea salt as needed. If you prefer a colder beverage, blend in the ice until smooth.
- Garnish and Serve: Pour the smoothie into two glasses and garnish each with a slice of green bell pepper. This not only adds a visual appeal but a crunchy texture to enjoy.
How to Consume
This cucumber and green bell pepper smoothie is best enjoyed fresh, immediately after preparation. Sipping it slowly allows you to savor the flavors and aids in digestion. It’s perfect as a morning boost, an afternoon refreshment, or a light, hydrating drink before or after a workout.
Benefits
- Hydration: Cucumbers are known for their high water content, making this smoothie an excellent hydration source.
- Nutrient-Rich: Rich in vitamins C and K, potassium, and fiber, this smoothie supports immune function, bone health, and digestive wellness.
- Low-Calorie: With just 58 calories per serving, it’s an ideal choice for those monitoring their calorie intake.
- Antioxidant Properties: The ingredients, especially green bell pepper and lime juice, provide antioxidants that combat oxidative stress.
Nutritional Information
Per serving, this smoothie offers:
- Calories: 58
- Carbohydrates: 14g
- Protein: 2g
- Fat: 0g
- Fiber: 2g
- Sodium: 298mg
Variations
- Add Heat: For an extra kick, include a small jalapeno (stemmed) in the blend.
- Sweeten It Up: If you prefer a slightly sweeter taste, add a small amount of honey or agave nectar.
- Herbal Flavors: Fresh herbs like mint or cilantro can introduce an interesting flavor twist.
Precautions (if any)
- Individuals with sensitive stomachs should start with a small serving due to the cayenne pepper and adjust according to tolerance.
- Ensure all ingredients are washed thoroughly to avoid contamination.
Tips (If any)
- For a creamier texture, add a small piece of avocado.
- To retain the maximum nutritional benefits, consume the smoothie immediately after preparation.
Conclusion
The cucumber and green bell pepper smoothie is not just a drink; it’s a nutrient-dense elixir that promises to refresh, hydrate, and nourish your body. With its simple preparation and customizable options, it caters to a wide range of taste preferences and dietary needs. Whether you’re seeking a low-calorie hydration option or a quick nutrient boost, this smoothie is a versatile choice that promises health benefits and delicious refreshment in every sip.

In a world where the pursuit of health and wellness becomes more paramount with each passing day, the Peach and Raspberry Flax Smoothie stands out as a beacon of nutritional excellence and delightful taste. This smoothie combines the juicy sweetness of peaches, the tartness of raspberries, the nutty flavor of ground flax meal, and the creamy texture of almond milk to create a drink that’s not just refreshing but also incredibly beneficial for your health. This article delves into the art and science of crafting this smoothie, exploring its myriad benefits, variations, and tips to enhance your smoothie experience.
Things Needed
Ingredients:
- Medium peaches – 4 each
- Medium banana – 2 each
- Ground flax meal – 1 tablespoon
- Fresh raspberries – 1 cup
- Unsweetened almond milk – 1 cup
- Ice – 1 cup OR filtered water – 1/2 cup (based on preference)
- Garnish: Peach slices and a sprinkle of flax meal
Equipment:
- A high-powered blender
- Measuring cups and spoons
- A knife and cutting board for preparing the fruits
Steps to Prepare
- Prep the Fruits: Begin by washing the peaches and raspberries under cold water. Peel and cut the peaches into chunks, removing the pits. Peel the bananas and break them into smaller pieces.
- Blend the Ingredients: In the blender, combine the peach chunks, banana pieces, ground flax meal, raspberries, and almond milk. If you prefer a colder smoothie, add ice; for a slightly thinner consistency, use filtered water instead. Start blending on low, then gradually increase to high speed until the mixture is completely smooth.
- Garnishing and Serving: Pour the smoothie into glasses, garnish with a peach slice, and a sprinkle of flax meal for an extra touch of nutrition and elegance.
How to Consume
This Peach and Raspberry Flax Smoothie is perfect as a nutritious breakfast, a midday snack to combat the afternoon slump, or a post-workout drink to replenish and rehydrate. Its rich fiber content makes it particularly satisfying, helping to stave off hunger and sustain energy levels.
Benefits
- Nutritional Powerhouse: Packed with vitamins, minerals, antioxidants, and omega-3 fatty acids from the flax meal, this smoothie supports heart health, improves digestion, and helps fight inflammation.
- Hydration: The high water content from the fruits combined with almond milk and ice or water makes it an excellent hydrator.
- Energy Boosting: The natural sugars in peaches and bananas provide a quick, healthy energy boost without the crash associated with processed sugars.
- Weight Management: High in fiber but low in calories, this smoothie can aid in weight management by promoting a feeling of fullness and reducing overall calorie intake.
Nutritional Information (per serving)
- Calories: 237
- Carbohydrates: 54g
- Protein: 5g
- Fat: 3g
- Fiber: 11g
- Sodium: 63mg
This smoothie is an excellent choice for those looking to increase their intake of dietary fiber and essential nutrients while keeping calorie consumption in check.
Variations
For those who wish to experiment with flavors or simply don’t have raspberries on hand, substituting blackberries for raspberries offers a delicious twist. Blackberries can provide a different set of antioxidants and vitamins. If desired, strain the smoothie after blending to remove blackberry seeds for a smoother texture.
Precautions
- Allergy Information: Those with nut allergies should be cautious due to the almond milk; substitute with another non-dairy milk if necessary.
- Flax Meal: Ensure that the flax meal is fresh to avoid the bitter taste that can come from rancid flaxseed.
Tips
- Soak Flax Meal: For better absorption and digestion, consider soaking the flax meal in a bit of almond milk before blending.
- Ripe Fruits: Use ripe peaches and bananas for the sweetest, most flavorful smoothie.
- Chill Your Fruits: For an extra refreshing smoothie, refrigerate your fruits before blending.
Conclusion
The Peach and Raspberry Flax Smoothie is more than just a beverage; it’s a journey into the delicious world of healthy eating. By combining the sweetness of peaches, the tartness of raspberries, and the nutritional benefits of flax meal, this smoothie offers a perfect blend of taste and health benefits. Whether you’re looking for a nutritious breakfast option, a refreshing snack, or a health-boosting drink, this smoothie is sure to satisfy. Embrace the versatility of this smoothie by exploring its variations and incorporating it into your daily diet for a delicious boost of nutrients and hydration.

In the vibrant world of health and nutrition, the cantaloupe, banana, and herb smoothie stands as a testament to the delightful harmony that can be achieved when fresh fruits and aromatic herbs unite. This concoction is not just a drink but a refreshing experience that tantalizes the taste buds while offering a multitude of health benefits. With its unique blend of sweet cantaloupe, creamy bananas, and the refreshing zest of basil and mint, this smoothie promises a burst of flavors and nutrients in every sip. Let’s dive into the art of crafting this delightful beverage, exploring its benefits, variations, and tips to enhance your smoothie-making journey.
Things Needed
Ingredients:
- Cantaloupe, peeled and cut into 1-inch chunks – 4 cups
- Large bananas – 2 each
- Fresh basil leaves – 1 tablespoon
- Fresh mint leaves – 1 tablespoon
- Ice – 2 cups OR filtered water – 1 cup (depending on preference)
- Garnish: Small slices of cantaloupe
Equipment:
- A high-powered blender
- Measuring spoons
- Knife and cutting board for preparing the fruit
- Glasses for serving
Steps to Prepare
- Prep Your Fruits: Begin by peeling the cantaloupe and cutting it into 1-inch chunks. Peel the bananas and break them into smaller pieces for easier blending.
- Blend the Ingredients: In your high-powered blender, combine the cantaloupe chunks, banana pieces, fresh basil, and mint leaves. Add ice for a chilled smoothie or filtered water for a less icy texture. Start blending on low, gradually increasing to high speed until the mixture is completely smooth.
- Garnishing: Pour the smoothie into glasses and garnish each with a small slice of cantaloupe on the rim, adding an elegant and inviting touch.
How to Consume
This cantaloupe, banana, and herb smoothie is perfect as a refreshing start to your day, a midday pick-me-up, or a post-workout hydration boost. Its light yet satisfying nature makes it suitable for any time of the day, providing a quick and delicious way to consume essential nutrients.
Benefits
- Hydration: Cantaloupe is high in water content, making this smoothie an excellent hydration source.
- Antioxidants: Both cantaloupe and bananas are rich in vitamins and antioxidants, which help fight oxidative stress and inflammation.
- Digestive Health: The dietary fiber from the fruits promotes healthy digestion and regularity.
- Energy Boost: Natural sugars in bananas provide a quick energy boost, while the minerals and electrolytes in cantaloupe help replenish the body.
- Mental Refreshment: The aroma and properties of basil and mint can enhance mental alertness and provide a calming effect.
Nutritional Information (per serving)
- Calories: 197
- Carbohydrates: 51g
- Protein: 3g
- Fat: 1g
- Fiber: 6g
- Sodium: 37mg
This smoothie is an excellent low-fat option for those monitoring their caloric intake while seeking to maximize their nutrient consumption.
Variations
For those looking to experiment with flavors, substituting cantaloupe with equal parts of other melons like honeydew, watermelon, or canary melon can offer a delightful new taste experience. Each melon brings its unique flavor and nutritional profile, allowing for endless variation and excitement in your smoothie routine.
Precautions
- Allergy Awareness: Individuals with allergies to specific fruits or herbs should adjust the recipe accordingly or consult a healthcare provider.
- Ripe Fruits: Ensure the cantaloupe and bananas are ripe for the best flavor and nutrient content but not overripe to avoid a too mushy texture.
Tips
- Chill Your Fruits: For a colder smoothie without adding ice, consider refrigerating the cantaloupe and bananas beforehand.
- Herb Balance: Start with the recommended amount of basil and mint, then adjust according to taste preferences. Herbs can be powerful in flavor.
- Smooth Texture: If you find the smoothie too thick, add a little more filtered water until you reach your desired consistency.
Conclusion
The cantaloupe, banana, and herb smoothie is more than just a refreshing drink; it’s a nutrient-rich blend that supports health and wellness with every delicious sip. Whether you stick to the original recipe or venture into variations with different melons, this smoothie offers a perfect balance of hydration, energy, and dietary fiber. By incorporating these simple ingredients and steps into your routine, you can enjoy a delightful and healthful addition to your diet, proving that nutritious eating can indeed be delicious and diverse. Em
brace this smoothie as a testament to the power of combining natural flavors and nutrients for optimal health and enjoyment.

Introduction
In the realm of health and wellness, smoothies stand out as both a versatile and delicious way to pack a variety of nutrients into a single, convenient drink. Among the myriad of recipes available, the pink grapefruit and strawberry smoothie shines for its unique blend of flavors, health benefits, and simple preparation. This guide will not only walk you through creating this vibrant drink but also introduce a delightful variation featuring mixed berries, ensuring there’s a flavor to match every preference.
Things Needed
Ingredients for the Base Recipe:
- Pink grapefruits, peeled and seeded – 2 each
- Fresh strawberries, cored – 2 cups
- Raw, unsalted cashews – 1/4 cup
- Oranges, peeled and seeded – 2 medium
- Ice – 2 cups OR filtered water – 1 cup
- Garnish: Strawberry and grapefruit slices
Ingredients for the Variation:
- Mixed berries (blueberries, raspberries, strawberries, etc.) – substitute for grapefruit
Kitchen Equipment:
- A high-powered blender
- Measuring cups
- A knife for preparing the fruits
- Serving glasses
Steps to Prepare
- Prep Your Ingredients: Start by washing your fruit thoroughly. Peel and seed the grapefruits and oranges, ensuring all bitter white pith is removed for a smoother taste. Core the strawberries.
- Blend: Combine the grapefruits, strawberries, oranges, and cashews in your blender. Decide whether you prefer ice for a frosty texture or water for a lighter smoothie, and add accordingly. Blend starting at a low speed, increasing to high until the mixture is smooth.
- Garnish and Serve: Enhance the visual appeal and flavor with a slice of strawberry and grapefruit on the rim of each glass.
Steps for the Mixed Berry Variation
Follow the same steps, but substitute the pink grapefruit with an equal amount of mixed berries. This change introduces a different set of flavors and health benefits, making the smoothie even more versatile.
How to Consume
This smoothie and its variation serve as excellent choices for various dietary needs and occasions:
- Breakfast: Kickstart your day with a burst of vitamins and energy.
- Post-Workout: Replenish and hydrate your body after exercise.
- Snack: Enjoy a healthy and satisfying afternoon snack.
Benefits
Original Smoothie:
- Nutritional Value: High in vitamin C, antioxidants, and fiber, supporting immune function and digestive health.
- Hydration: The high water content from fruits and added liquids aids in hydration.
- Energy Boost: Provides a natural energy boost without the crash associated with sugary drinks.
Mixed Berry Variation:
- Enhanced Antioxidants: Berries are known for their dense antioxidant profile, which can help reduce inflammation and oxidative stress.
- Versatility: Allows for customization based on seasonal berry availability or personal taste preferences.
Original Pink Grapefruit and Strawberry Smoothie Nutritional Information (per serving)
- Calories: 359 kcal
- Carbohydrates: 38 g
- Protein: 8 g
- Fat: 8 g
- Fiber: 13 g
- Sodium: 4 mg
This smoothie is a rich source of vitamin C, antioxidants, and dietary fiber. The inclusion of cashews adds healthy fats and a modest amount of protein.
Nutritional Information for the Mixed Berry Variation (Estimated per serving)
Assuming the mixed berries replace the grapefruit in equal parts, the nutritional content will shift slightly due to the different nutrient profiles of mixed berries compared to grapefruit. Here’s an approximate breakdown:
- Calories: 330 kcal
- Carbohydrates: 42 g
- Protein: 7 g
- Fat: 8 g
- Fiber: 12 g
- Sodium: 4 mg
Mixed berries tend to be higher in carbohydrates due to their natural sugars but also offer a rich supply of antioxidants and vitamins. The calorie count might be slightly lower or similar, depending on the specific types of berries used and their proportions.
Precautions
- Allergies and Interactions: Be mindful of nut allergies due to the cashews and potential interactions between grapefruit and certain medications.
- Berry Seeds: The mixed berry variation may include seeds, which could affect the texture for some. Consider straining if preferred.
Tips
- Freeze Your Fruit: For a colder, thicker smoothie, use frozen fruit instead of fresh.
- Soaking Cashews: Soak the cashews beforehand for a creamier texture.
- Sweetness Adjustment: Adapt the sweetness naturally with honey or maple syrup, depending on the fruits’ tartness and your preference.
Conclusion
Whether opting for the tangy and refreshing pink grapefruit and strawberry blend or the antioxidant-rich mixed berry variation, these smoothies offer a delightful way to nourish your body and satisfy your taste buds. With simple preparation steps and the flexibility to adapt to your nutritional needs and flavor preferences, they represent the epitome of healthy, enjoyable eating. So, blend away and dive into the delicious world of smoothies, where wellness meets indulgence in every sip.

Incorporate Moisturizing Products
Damaged and dry hair requires tender love and care. Ensure your hair is constantly moisturized to prevent breakage and brittleness. Begin your hair care routine with shampoos and conditioners rich in moisture, incorporating oils like Argan, Coconut, Avocado, Jojoba, and Olive to enhance smoothness, moisture, and shine. Your hair will become easier to manage and free of tangles. Regular use of deep conditioners and finishing with a moisturizing cream or leave-in conditioner after each wash will add an extra layer of hydration and help control frizz. Additionally, hot oil treatments and natural masks made from eggs, yogurt, bananas, avocados, or mayonnaise are superb for hydrating your hair, preventing breakage and splits, and promoting healthy growth.
Minimize Heat Usage
Heat styling tools weaken your hair, increasing susceptibility to breakage. Limit their use to once a week, always applying a heat protectant beforehand. Choose a reliable brand that suits all hair types.
Switch to Silk Pillowcases
Sleeping on cotton pillowcases can lead to hair breakage and dryness due to friction and oil absorption. Opt for silk or satin pillowcases to keep your hair smooth and hydrated overnight. Wearing your hair in a bun while sleeping can also protect the ends.
Reduce Chemical Exposure
Frequent use of hair dyes and chemical straighteners can dry out and damage your hair, leading to hair loss. It’s best to avoid these products to maintain healthy, strong hair.
Opt for Gentle Towel Drying
Traditional towels can harm your hair’s cuticle, causing frizz, breakage, and split ends. Use a microfiber towel or a soft cotton T-shirt for gentle drying, which effectively absorbs water without damaging the hair.
Control Washing Frequency
Over-washing strips your hair and scalp of essential natural oils needed for moisture. Depending on your hair type, shampoo once or twice a week for dry hair, and up to three times for oily hair. Consider using dry shampoo as a gentler alternative.
Regular Trims
Trimming your hair every four to six months helps maintain its health and reduces breakage and split ends, making a noticeable difference in hair condition.
Limit Styling Products
Styling products like mousse, gel, and hairspray contain alcohol and other chemicals that can dry out and damage your hair. Use them sparingly, and avoid spraying hairspray too close to the scalp to prevent inflammation and potential hair loss.
Shield Your Ends
Protect your hair from sun exposure and cold weather by wearing a bun, hat, or silk scarf outdoors. These measures help safeguard your hair and scalp from environmental damage.
Choose the Right Hair Brushes
Avoid brushes made from metal, ceramic, or ionic materials as they can heat up and damage your hair during blow-drying. Instead, opt for wooden brushes with boar bristles for a gentler styling experience.

The natural hair color movement seeks alternatives to chemical dyes that can offer color enhancement without compromising hair health. Cloves, with their rich antioxidant and color-enhancing properties, present an intriguing option. Whether used alone or mixed with henna, cloves can impart a warm, subtle tone to the hair, making it a perfect solution for those looking for a gentle color boost or to cover up grays naturally.
Things Needed
- 15 clove sticks
- 1 ½ cups of warm water
- 1 cup of red henna (optional)
- A pot for warming water
- A strainer
- A bowl for mixing
- Gloves (if using henna)
- A shower cap (if using henna)
Steps to Prepare
Clove Water Preparation
- Warm the Water: Begin by warming 1 ½ cups of water in a pot and add the clove sticks. Allow the mixture to simmer for 20-30 minutes. This process extracts the essence and color of the cloves.
- Cool and Strain: After simmering, remove the pot from the heat and let the clove water cool to a comfortable temperature. Strain the mixture to remove the clove sticks, retaining the infused water for application.
Clove-Henna Mixture Preparation
- Prepare Clove Water: Follow the same steps as above to prepare your clove-infused water.
- Mix with Henna: In a separate bowl, gradually add the clove water to 1 cup of red henna, stirring continuously until you achieve a smooth, consistent paste. Allow the mixture to sit for an hour to enhance the dye release from the henna.
How to Apply
Clove Water Application
- Apply After Shampooing: After shampooing and conditioning your hair, rinse it thoroughly and apply the clove water. Gently massage it into your scalp and hair, ensuring even coverage.
Clove-Henna Mixture Application
- Apply to Clean Hair: With gloves on to avoid staining your hands, apply the clove-henna mixture to your hair. Use a brush or your fingers to ensure the mixture covers all strands evenly.
- Cover and Wait: Wrap your hair with a shower cap and wait for 1-3 hours, depending on the desired intensity of the color.
- Rinse: Rinse your hair thoroughly with water until it runs clear. Avoid shampooing immediately to allow the color to set.
Benefits
- Natural Coloring: Both methods provide a natural way to enhance hair color, with cloves offering a subtle tint and henna a more pronounced hue.
- Antioxidant Properties: Cloves are rich in antioxidants, which can help protect the scalp and hair from environmental damage.
- Conditioning: Henna naturally conditions hair, leaving it smoother and stronger.
Precautions
- Allergy Test: Conduct a patch test, especially if you’re using henna, to ensure you don’t have an allergic reaction.
- Stain Prevention: Wear old clothes and use gloves when handling henna to avoid stains.
Tips
- Enhance Color: For a stronger color payoff, consider increasing the simmering time of cloves in water.
- Maintenance: Reapply the treatment every 2-4 weeks to maintain color intensity and cover new growth.
- Hydration: Follow up with a deep conditioner or hair mask to keep your hair hydrated, especially if using the henna mixture.
Conclusion
Using cloves for natural hair coloring offers a versatile and health-conscious alternative to traditional dyes. Whether you’re seeking a slight tint or a deeper color transformation by incorporating henna, this method respects the integrity of your hair while providing the benefits of natural ingredients. By embracing the warmth and richness of cloves, individuals can enjoy a subtle enhancement to their natural hair color, along with the therapeutic benefits that come from using spices in beauty treatments.

Transitioning to natural hair color solutions is not just a trend but a healthier choice for many. Among the options, black henna and the black walnut-black tea combination stand out for their effectiveness in achieving black hair. While black henna offers a straightforward method, the black walnut and black tea recipe provides a more traditional approach. Both recipes aim to deliver lasting color, enhance hair health, and minimize potential damage associated with synthetic dyes.
Recipe #1: Black Henna for Hair
Things Needed
- 1 pack of black henna powder
- Boiling water
- Non-metallic mixing bowl
- Gloves to prevent staining
- Shower cap or plastic wrap
- Hair conditioner
Steps to Prepare
- Boil Water: Start by boiling enough water to mix with the henna powder.
- Prepare Henna Mixture: Pour the boiling water into the black henna powder gradually, stirring until you achieve a smooth, consistent paste.
- Let it Cool: Allow the mixture to cool down to a comfortable temperature for application.
How to Apply
- Apply to Hair: Wear gloves to avoid staining your hands and apply the henna mixture evenly to your hair, ensuring full coverage.
- Cover and Wait: Cover your hair with a shower cap or plastic wrap and leave the mixture on for at least two hours for the color to develop fully.
- Rinse and Condition: Rinse your hair thoroughly with water and follow up with a conditioner to moisturize.
Benefits
- Natural coloring agent with minimal risk of damage
- Conditions and strengthens hair
- Long-lasting color
Precautions
- Conduct a patch test to avoid allergic reactions.
- Use gloves to prevent staining of hands.
Tips
- Apply petroleum jelly around your hairline to prevent skin staining.
- For deeper color, extend the duration before rinsing.
Recipe #2: Black Walnut and Black Tea for Hair
Things Needed
- ¼ cup of black walnut powder
- 3 black tea bags
- 2 cups of water
- Pot for boiling
- Strainer or cheesecloth
- Shower cap
Steps to Prepare
- Boil Black Tea: Boil the black tea bags in water for about 10 minutes.
- Mix with Black Walnut Powder: Remove the tea bags and pour the hot tea over the black walnut powder, stirring until well combined.
How to Apply
- Apply to Wet Hair: After shampooing, apply the mixture to wet hair, ensuring even coverage.
- Leave and Cover: Cover with a shower cap and leave the mixture on for a few hours to allow the color to penetrate.
- Shampoo: Rinse out the mixture and shampoo your hair as usual.
Benefits
- Provides a natural, dark tone to the hair
- The tannins in black tea can add shine and enhance hair color
- Black walnut is known for its strong natural dye properties
Precautions
- Black walnut can stain skin and fabrics, so use gloves and old towels.
- Conduct a patch test, especially if you have sensitive skin.
Tips
- For a stronger color, you can leave the mixture on overnight.
- Reapply every few weeks to maintain the color intensity.
Conclusion
Choosing a natural path to achieve black hair color offers not just a safer alternative to chemical dyes but also nourishes and enhances the health of your hair. Whether you prefer the simplicity of black henna or the traditional blend of black walnut and black tea, both recipes provide effective solutions to darkening your hair naturally. By following the detailed steps and tips provided, you can enjoy rich, vibrant black hair color, embracing the beauty of natural ingredients while maintaining the integrity of your hair’s health.
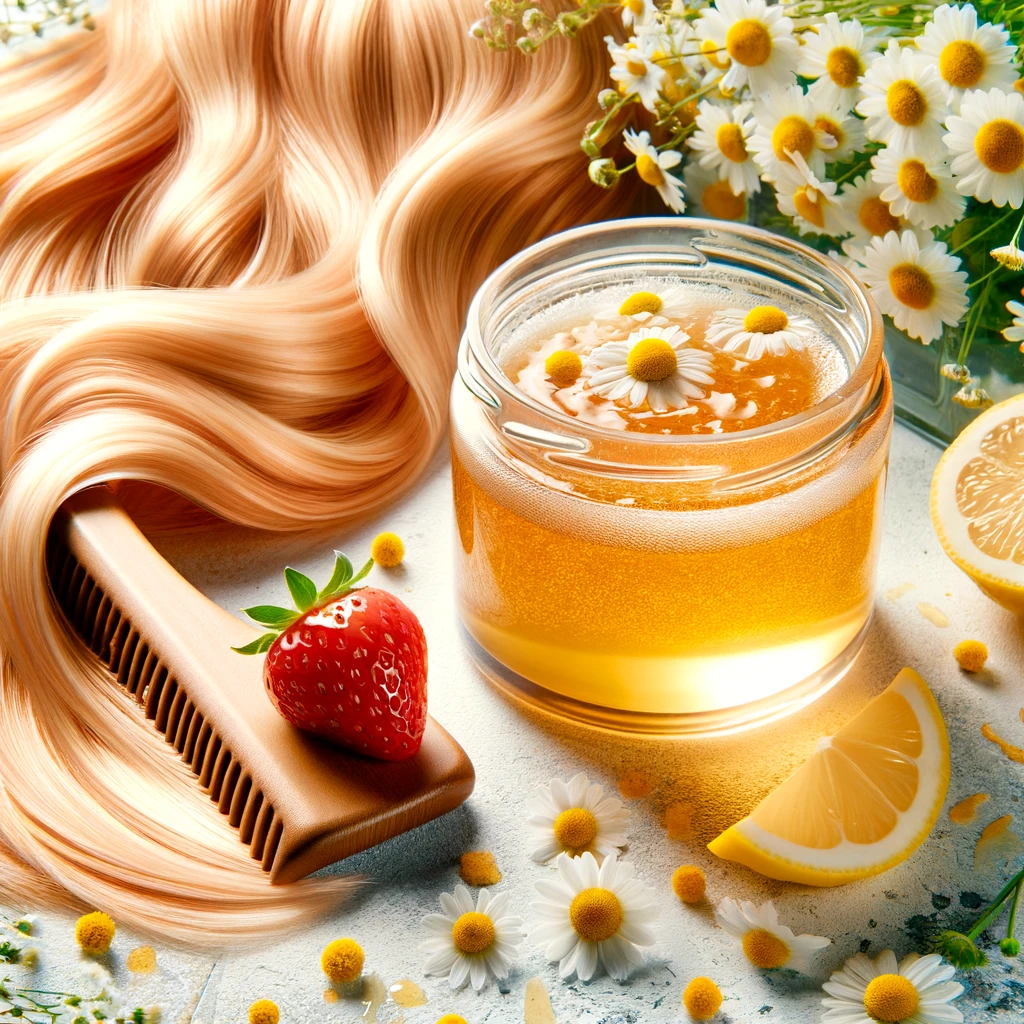
The journey towards lighter hair shades naturally is not only about achieving a new look but also about maintaining hair health. The combination of chamomile and lemon juice offers a gentle yet effective means to subtly lighten hair, adding warm, strawberry ginger tones. This recipe is particularly suited for those with natural or oily hair, as lemon juice can be drying. Through this guide, you will learn the step-by-step process to achieve this desirable hair color naturally.
Things Needed
- 1 cup of freshly brewed chamomile flower tea
- ¼ cup of fresh lemon juice
- A spray bottle for application
- A comb or brush
- Shower cap or plastic wrap (optional)
- Sun exposure or a hairdryer
Steps to Prepare
- Brew Chamomile Tea: Start by steeping chamomile flowers in boiling water for about 10 minutes. This step extracts the lightening agents present in chamomile.
- Mix Ingredients: After the tea has cooled to a comfortable temperature, strain out the flowers. Combine 1 cup of this chamomile tea with ¼ cup of fresh lemon juice in a spray bottle. Shake well to ensure the mixture is thoroughly blended.
How to Apply
- Apply to Hair: Spray the chamomile and lemon mixture evenly throughout your hair, or apply it to specific sections where you want highlights. Ensure that your hair is damp but not dripping.
- Comb Through: Use a comb or brush to distribute the mixture evenly through your hair. This ensures that every strand is coated, promoting uniform lightening.
- Dry and Activate: For the best results, sit in the sun for 15-20 minutes to activate the lightening process. The UV rays enhance the effect of chamomile and lemon. Alternatively, use a hairdryer to heat your hair evenly.
- Don’t Rinse Immediately: Allow your hair to remain coated with the mixture for at least an hour before rinsing. This duration maximizes the lightening effect.
Benefits
- Natural Lightening: This method provides a gentle way to achieve lighter tones without the damage associated with chemical dyes.
- Enhanced Shine: Lemon juice can add a natural shine to your hair, leaving it looking vibrant and healthy.
- Cost-Effective: Using kitchen and garden ingredients, this recipe is a cost-effective alternative to salon treatments.
Precautions
- Dry Hair Caution: Given lemon juice’s drying properties, this recipe is not recommended for those with dry hair.
- Patch Test: Always perform a patch test to ensure you don’t have an adverse reaction to the mixture.
- Sun Protection: While sun exposure is recommended for activating the lightening effect, be mindful of protecting your skin with sunscreen.
Tips
- Condition Well: After rinsing out the mixture, apply a deep conditioner or hair mask to counteract any potential drying effects from the lemon juice.
- Repeat for Intensity: For more pronounced results, repeat the application several times, allowing a few days between treatments to monitor your hair’s condition.
- Even Application: For an even lighter effect, ensure the mixture is thoroughly applied to all areas you wish to lighten.
Additional Considerations
Hair Texture and Health
Individuals with fine or particularly greasy hair might find this recipe especially beneficial, as the lemon juice helps manage oiliness while lightening the hair.
Longevity and Maintenance
The effects of this natural lightening process are gradual and require multiple applications for significant change. Regular treatments can help maintain the strawberry ginger blonde shade, but be mindful of your hair’s health and moisture levels.
Conclusion
Achieving a strawberry ginger blonde hair color naturally is a rewarding process that marries the gentle lightening effect of chamomile with the brightening power of lemon juice. This recipe offers a sustainable and health-conscious alternative to traditional hair coloring methods, ideal for those with natural to oily hair types. By following the steps outlined in this guide and paying heed to the provided tips and precautions, you can enjoy a beautiful, naturally lightened hair color that shines with the warm tones of summer.

The journey to lighter hair shades often involves harsh chemicals that can damage hair over time. However, nature offers its palette, capable of imparting beautiful colors without the adverse effects associated with synthetic dyes. The strawberry ginger blonde recipe is designed for individuals with medium to light brown or lighter hair, offering a way to achieve sun-kissed highlights with a hint of warm tones. This guide will walk you through the process, highlighting the simplicity and beauty of natural hair coloring.
Things Needed
- 1 cup of chamomile flowers
- 1 tablespoon of turmeric
- 1 ½ cups of water
- A pot for boiling
- A strainer or cheesecloth
- A spray bottle or applicator for easy application
- A comb
Steps to Prepare
- Boil the Ingredients: Combine the chamomile flowers, turmeric, and water in a pot. Bring the mixture to a boil, then let it simmer for 15 to 20 minutes. This process allows the water to become infused with the coloring and lightening properties of the ingredients.
- Cool and Filter: Allow the mixture to cool to a manageable temperature. Then, using a strainer or cheesecloth, filter out the solid particles to obtain a clear tonic.
- Transfer to Applicator: Pour the filtered tonic into a spray bottle or another applicator for easy use. This preparation makes the application process smoother and more efficient.
How to Apply
- Shampoo and Condition: Start with clean, conditioned hair to ensure the tonic is absorbed evenly.
- Apply the Tonic: Spray or apply the tonic evenly across your hair, from roots to ends. Ensure thorough coverage for an even tone.
- Comb Through: Gently comb your hair to distribute the tonic evenly. This step also helps in detangling and preparing your hair for drying.
- Dry and Activate: To activate the tonic’s lightening effects, stay in the sun for 15 to 20 minutes or use a blow dryer. The heat or UV rays help to intensify the lightening process.
- Don’t Rinse: Leave the tonic in your hair without rinsing it out. This allows the active ingredients more time to impart their color to your hair.
Benefits
- Natural Lightening: The chamomile and turmeric work together to naturally lighten hair and add warm tones, without the damaging effects of bleach or chemical dyes.
- Conditioning Effects: Chamomile is known for its soothing and conditioning properties, leaving hair soft and healthy.
- Cost-Effective: This method is significantly more affordable than salon treatments and commercial hair dyes.
Precautions
- Hair Color Limitations: This recipe is most effective on medium to light brown or lighter hair colors. Darker hair may achieve a reddish tone instead.
- Allergic Reactions: Conduct a patch test before applying the tonic to your entire head, especially if you have sensitive skin.
Tips
- Consistency is Key: Repeat the application after every wash to gradually build up the desired color intensity.
- Enhance Effects: For a more pronounced effect, increase the amount of turmeric slightly, but be cautious as it can impart a more vibrant hue.
- Protect Your Skin and Clothes: Wear gloves and an old shirt during application to avoid staining.
Additional Insights
Customizing the Color
You can adjust the shade by playing with the ratio of chamomile to turmeric. More chamomile will emphasize lighter tones, while more turmeric will enhance the strawberry ginger effect.
Maintenance
To maintain the color, continue to apply the tonic regularly, as the natural dye will gradually fade over time, especially with frequent washing.
Conclusion
The quest for a strawberry ginger blonde hair color need not be laden with harsh chemicals and damaging processes. This natural recipe offers a gentle, effective alternative, imbuing hair with beautiful, sun-kissed highlights and warm tones. By embracing the power of chamomile and turmeric, individuals can enjoy a gradual and healthy color change, reflecting the beauty of nature in their hair. As with any hair color process, patience and consistency are key to achieving the best results, making this natural approach a rewarding journey to the perfect shade of strawberry ginger blonde.

The quest for a natural, healthier alternative to chemical hair dyes has led many to rediscover the benefits of henna, a plant-based dye known for its conditioning and strengthening properties. When combined with coffee, a common household ingredient, it creates a potent natural dye capable of imparting rich, warm brunette tones to your hair. This guide will walk you through a simple yet effective recipe for using coffee and henna to dye your hair, offering tips and precautions to ensure the best results.
Things Needed
- 5 tablespoons of ground coffee
- 1 cup of Egyptian or Indian henna powder
- Hot water (enough to create a paste)
- A non-metallic mixing bowl
- A wooden or plastic spoon for mixing
- Gloves to avoid staining your hands
- A plastic bonnet or shower cap
- An old towel or shirt to protect your clothing
Steps to Prepare
- Boil the Coffee: Start by boiling the ground coffee in water for about 10 minutes. This process extracts the deep colors and aromatic compounds from the coffee, which will help to tint the henna mixture.
- Mix Coffee with Henna: Gradually pour the hot coffee into the henna powder, stirring continuously with a wooden or plastic spoon. Mix until it forms a smooth, consistent paste. Adjust the consistency by adding more hot water or henna, as needed.
- Let the Mixture Rest: Allowing the mixture to sit for a few minutes can enhance the dyeing properties of henna, making the application more effective.
How to Apply
- Preparation: Don protective gloves and drape an old towel or shirt over your shoulders to protect your skin and clothing from stains.
- Application: Section your hair and apply the mixture evenly, starting from the roots and moving towards the ends. Ensure every strand is well-coated for uniform color.
- Covering: Once your hair is fully covered in the mixture, wrap it with a plastic bonnet or shower cap. This helps to keep the mixture moist and warm, enhancing the dyeing effect.
- Waiting Time: Leave the mixture in your hair for at least two hours. For deeper color penetration or if you have resistant gray hair, you may extend this time.
- Rinsing: Rinse your hair thoroughly with warm water until all the mixture is washed out. Avoid shampooing immediately to allow the color to set. Follow up with a moisturizing conditioner or a deep hair mask to nourish your hair.
Benefits
- Natural Coloring: Provides a safe and natural alternative to chemical dyes, reducing the risk of allergic reactions and scalp irritation.
- Conditioning: Henna naturally conditions and strengthens hair, while coffee adds shine and depth to the color.
- Sustainability: Using coffee and henna for hair dyeing is an eco-friendly option, minimizing environmental impact compared to synthetic dyes.
Precautions
- Patch Test: Always conduct a patch test before applying the mixture to your entire head, especially if you have sensitive skin or allergies.
- Staining: Be mindful of potential stains on fabrics and surfaces. Use protective coverings and wear old clothes during application.
Tips
- Enhance Color: For a richer color, consider adding a spoonful of apple cider vinegar to the mixture; the acidity can help the henna penetrate the hair shaft more effectively.
- Heat Application: Applying gentle heat with a hairdryer over the plastic bonnet can intensify the dyeing process.
- Frequency: For sustained color and conditioning benefits, apply this coffee and henna mixture once a month.
Additional Insights
Customizing the Color
You can adjust the shade of brunette by varying the amount of coffee in the recipe. More coffee results in darker, cooler tones, while less coffee maintains henna’s natural warmth.
Longevity and Maintenance
The longevity of the color depends on your hair type, the frequency of washing, and exposure to sunlight. To maintain the richness of the color, limit washing and use color-safe shampoos.
Conclusion
Utilizing coffee and henna as a natural hair dye offers a sustainable and health-conscious alternative to traditional coloring methods. This recipe not only imbues your hair with beautiful brunette tones but also contributes to its overall health and shine. By following the steps outlined in this guide, you can
achieve and maintain a rich, natural hair color, embracing the beauty of natural ingredients while minimizing your chemical exposure.

The journey towards achieving a reddish hue in your hair doesn’t have to involve harsh chemicals. Nature offers a palette of colors, among which Roselle, Saffron, and Henna are particularly notable for their dyeing properties. This recipe is not just about changing hair color; it’s about embracing a holistic approach to beauty that respects both your health and the environment. Through this guide, you will learn how to prepare and apply a hair color mixture that is as beneficial as it is beautiful.
Things Needed
- 1 tablespoon of Roselle (dried)
- 2 tablespoons of Saffron threads
- 1 cup of natural Henna powder
- Hot water (sufficient to create a smooth paste)
- A non-metallic mixing bowl
- A wooden or plastic spoon for mixing
- Gloves to prevent staining your hands
- A hair wrap or shower cap
- An old towel or shirt to protect your clothing
Steps to Prepare
- Boiling Roselle and Saffron: Begin by adding the Roselle and Saffron to a pot of water. Bring the mixture to a boil, then simmer for 15 to 20 minutes. This process extracts the colors and properties of the herbs, creating a potent dye.
- Mixing with Henna: Pour the hot herbal water through a strainer directly into the Henna powder in a non-metallic bowl. Stir continuously until you achieve a smooth, consistent paste. Adjust the thickness by adding more water or Henna, as needed.
- Letting the Mixture Rest: Allow the mixture to sit for an hour. This resting period lets the Henna fully absorb the herbal dye, enhancing the final color’s richness and depth.
How to Apply
- Preparation: Wear your gloves and drape an old towel or shirt over your shoulders to protect your clothing. Divide your hair into sections to ensure even application.
- Application: Apply the paste thoroughly to each section of your hair, from roots to tips, ensuring complete coverage. Use your fingers (with gloves) or a dye brush for an even application.
- Covering: Once all hair is covered, wrap your head with a hair wrap or shower cap. This helps maintain the mixture’s warmth and moisture, improving dye uptake.
- Waiting: Leave the mixture in your hair for 2 to 3 hours. The duration can affect the depth of the color; longer times may result in a richer hue.
- Rinsing: Rinse your hair thoroughly with lukewarm water until all the paste is removed. Avoid using shampoo for the first 24 hours to allow the color to set in fully.
Benefits
- Natural Dyeing: This recipe offers a chemical-free alternative to conventional hair dyes, reducing the risk of scalp irritation and hair damage.
- Conditioning Properties: Henna acts as a natural conditioner, improving hair texture and adding shine.
- Antioxidant Rich: Both Roselle and Saffron are rich in antioxidants, which can help protect hair from environmental damage.
Precautions
- Allergy Test: Always perform a patch test before applying the mixture to your entire head, especially if you have sensitive skin.
- Stain Prevention: The paste can stain fabrics and surfaces, so take appropriate precautions to protect your environment and wear old clothes during the application.
Tips
- Enhancing Color: Adding a teaspoon of vinegar or lemon juice to the mixture can help enhance the color release from the Henna.
- Heat Application: Applying gentle heat (such as with a hairdryer over the shower cap) can intensify the dyeing process.
- Post-Application Care: Using a silicone-free conditioner after rinsing can help seal the cuticles and lock in the color.
Additional Considerations
Customizing the Color
Experiment with the ratios of Roselle and Saffron to adjust the final color tone to your liking. More Roselle can give a deeper reddish tint, while Saffron adds a golden hue.
Longevity and Fading
Natural dyes tend to fade more gracefully than chemical dyes. To maintain the color, you may need to reapply every 4 to 6 weeks, depending on your hair growth and washing
frequency.
Conclusion
Achieving a beautiful reddish hair color with Roselle, Saffron, and Henna is not only possible but also beneficial for your hair’s health. This natural recipe offers a sustainable and health-conscious alternative to synthetic dyes, embracing the power of nature to transform and beautify your hair. By following this guide, you can enjoy a vibrant hair color that reflects your commitment to natural beauty solutions.
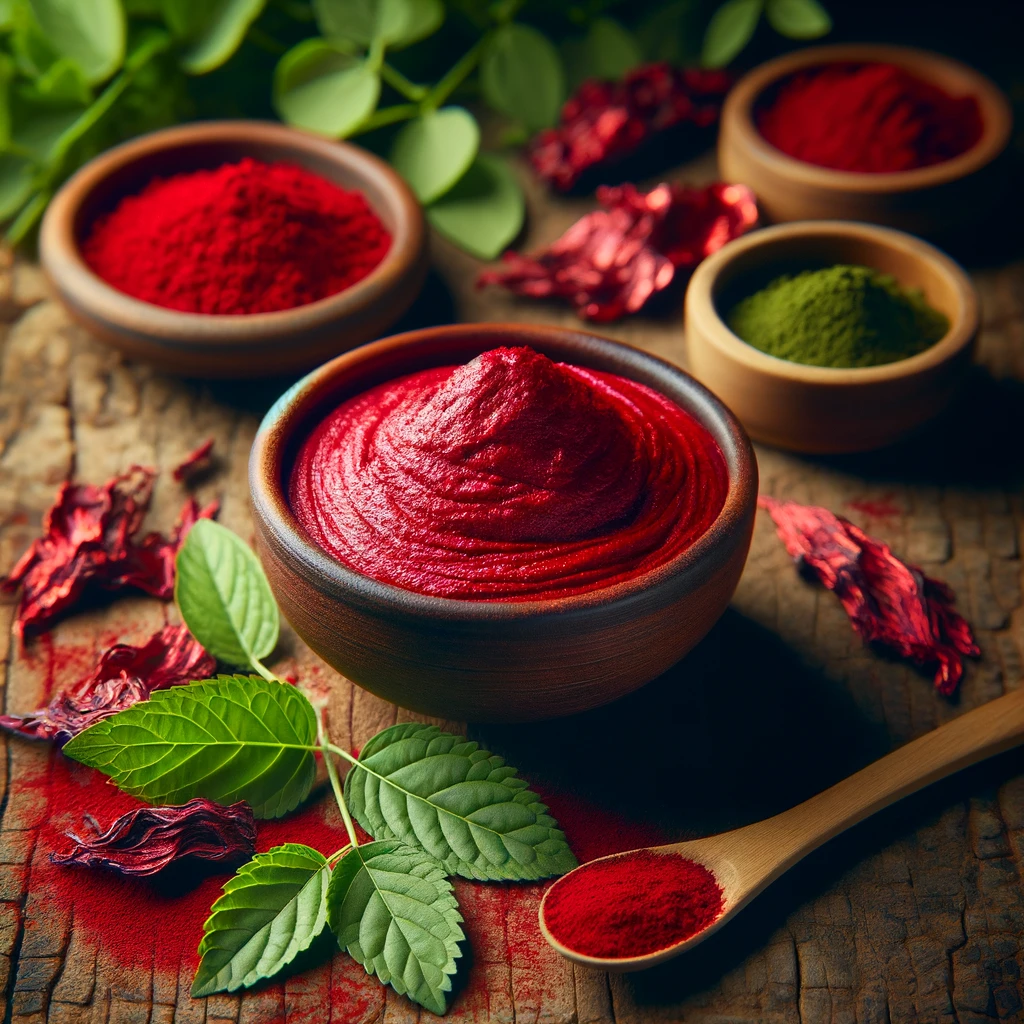
For centuries, henna has been celebrated for its ability to dye hair in a range of earthy tones, from reddish to deep brown, depending on the original hair color and the ingredients mixed with it. This recipe elevates the traditional henna application by incorporating red tea, enhancing the reddish tones and offering a unique hue that can captivate the eye. This guide aims to provide a comprehensive approach to using these natural ingredients to achieve a beautiful reddish hair color, suitable for anyone looking to explore the benefits of natural hair dye.
Things Needed
- 1 cup of natural Indian or Egyptian henna powder
- 4 tablespoons of red tea leaves
- Hot water (enough to blend the mixture into a dough-like consistency)
Additional tools:
- A non-metallic bowl for mixing
- A spoon or spatula for stirring
- A shower cap or plastic wrap
- Gloves to protect your hands from staining
- An applicator brush (optional for ease of application)
Steps to Prepare
- Boil the Red Tea: Begin by boiling the red tea leaves in water for a few minutes. This process extracts the color from the tea, creating a potent dye solution. After boiling, turn off the heat and allow the tea to steep for 5 to 10 minutes.
- Mix Henna and Tea: Gradually add the red tea solution to the henna powder in a non-metallic bowl. Stir continuously until the mixture achieves a smooth, dough-like consistency. If the mixture is too thick, add more tea; if too runny, add a bit more henna powder.
- Let the Mixture Rest: Allow the henna mixture to sit for an hour or so, enabling the dye to release. This step is crucial for achieving the full color potential of the henna.
How to Apply
- Section Your Hair: Divide your hair into small sections to ensure even application. Starting from the roots, apply the henna mixture generously using your hands (with gloves) or an applicator brush.
- Cover Your Head: Once all sections are covered, wrap your head with a shower cap or plastic wrap. This keeps the henna moist and warm, enhancing the dye’s ability to penetrate the hair shafts.
- Wait: Leave the henna in your hair for at least two hours. For a deeper color, you can extend this period up to four hours or more, depending on your preference.
- Rinse: Rinse your hair thoroughly with warm water until all the henna is washed out. Avoid using shampoo immediately after rinsing as it can strip the color. Instead, apply a moisturizing conditioner or a deep hair mask to nourish your hair.
Benefits
- Natural Coloring: Henna provides a safer alternative to chemical hair dyes, minimizing the risk of allergic reactions and hair damage.
- Conditioning: Henna naturally conditions your hair, leaving it soft, shiny, and manageable.
- Scalp Health: The antimicrobial properties of henna help maintain scalp health, potentially reducing issues like dandruff.
Precautions
- Allergy Test: Conduct a patch test before full application to ensure you’re not allergic to henna.
- Color Variability: The final color can vary based on your original hair color, the henna’s quality, and how long you leave the mixture in your hair.
Tips
- Use Fresh Ingredients: For the best results, ensure your henna powder and red tea are fresh and of high quality.
- Heat the Mixture: Applying the mixture while it’s slightly warm can enhance the dye uptake.
- Avoid Metal Utensils: Metal can react with henna, affecting the color outcome. Use plastic, glass, or ceramic bowls and spoons instead.
Conclusion
Embracing the natural route for hair coloring can be a rewarding and health-conscious choice. This recipe for achieving a reddish hair color with henna and red tea not only offers a vibrant hue but also nurtures your hair with natural conditioning properties. While the process might seem more labor-intensive than using boxed dyes, the benefits of minimized chemical exposure and enhanced hair health are compelling reasons to give it a try. By following this guide, you’re not just coloring your hair; you’re embracing a centuries-old tradition
of natural beauty care, tailored for the modern enthusiast.
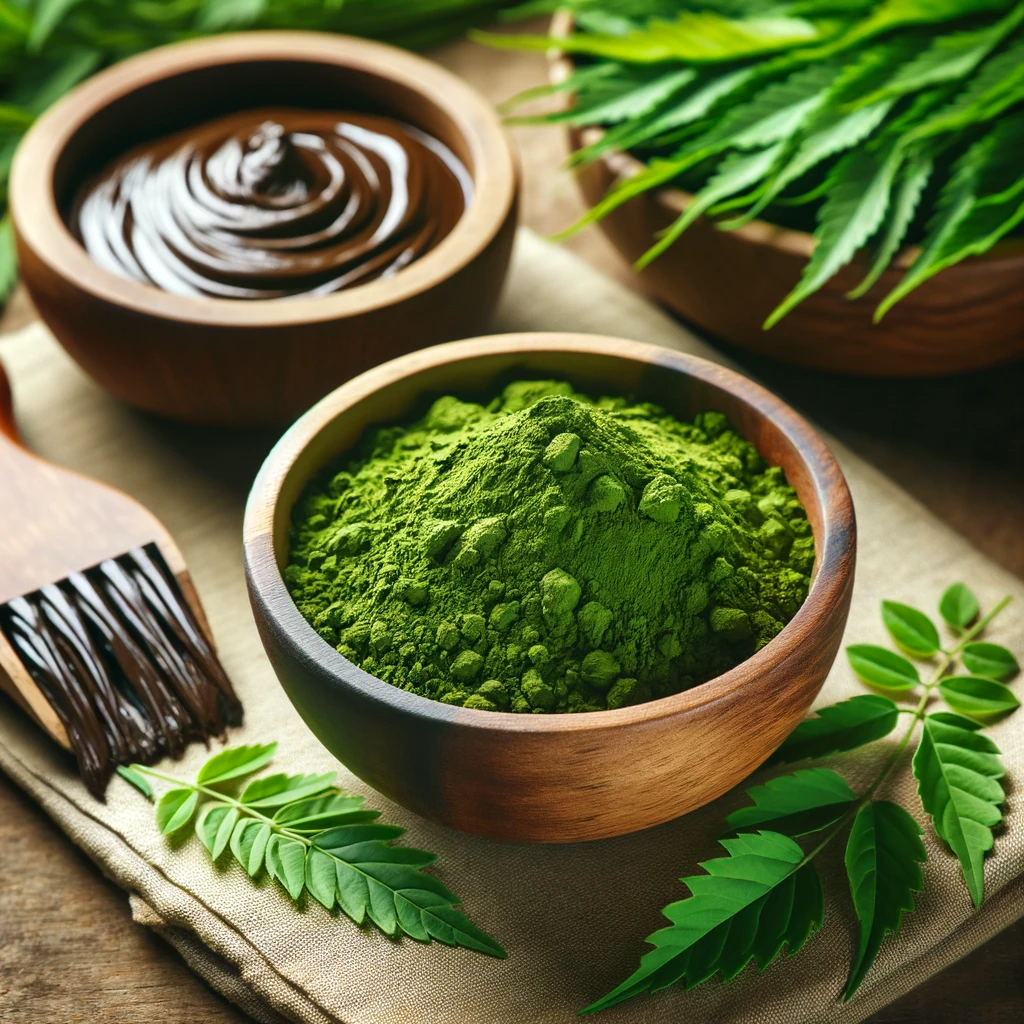
In the quest for vibrant hair colors and the covering of grays, many of us turn to hair dyes without a second thought to their composition. However, the stark reality is that these conventional dyes are laden with harsh chemicals such as ammonia, peroxide, p-phenylenediamine, diaminobenzene, toluene-2,5-diamine, resorcinol, and more. These ingredients not only pose a risk to our hair’s health, leading to damage from roots to ends and even hair loss, but also to our overall well-being.
Thankfully, nature offers us a bounty of alternatives that can color our hair beautifully without the adverse effects. Among these, Henna (or Mehandi) stands out as not just a personal favorite but also as a testament to the power and gentleness of natural hair dyes. Henna’s use dates back to ancient Egyptian and Indian civilizations, highlighting its long-standing trust and efficacy.
The Henna Advantage
Safety First: For those sensitive or allergic to chemical hair dyes, Henna presents a safe haven. It’s free from ammonia and harsh chemicals, offering a natural path to coloring your hair.
Fosters Hair Growth: Henna is more than just a dye; it’s a natural remedy that nourishes hair from roots to ends, encouraging stronger, thicker growth.
Protection: By coating the hair strands, Henna creates a protective layer that shields the hair from breakage, splitting, and damage from environmental factors like the sun and heat. This layer also adds volume, making thin hair appear thicker.
Health Benefits: Beyond hair care, Henna is known for its therapeutic properties, such as preventing headaches—a common practice in the Middle East—and healing scalp conditions by restoring the scalp’s acid-alkaline balance and preventing dandruff.
Tips for Using Henna
To ensure the best results with Henna, consider the following tips:
- Moderation is Key: Use Henna no more than once a month to prevent drying and brittleness.
- Application Conditions: Apply Henna to clean, wet hair for optimal results. Dry hair does not absorb Henna well.
- Handling: Avoid brushing or combing your hair with Henna in it to prevent damage.
- Post-Henna Coloring: Should you choose to switch back to chemical dyes after using Henna, wait until the treated hair grows out to avoid unexpected color results. For necessary dyeing, stick to dark colors.
- Avoid Mixing Oil: Adding oil to Henna can alter its coloring effect and reduce its permanence.
Embracing natural hair dyes like Henna not only aligns with a healthier lifestyle but also pays homage to centuries-old traditions that celebrated beauty in harmony with nature. By choosing natural dyes, you’re not just making a cosmetic choice but a commitment to your health and the environment. Whether you’re looking to revive your hair color or embark on a new hair health journey, the natural path offers a rich palette of possibilities that nourish, protect, and beautify.

An itchy scalp can be more than just an annoyance; it can signify underlying scalp conditions, including dryness, dandruff, or even fungal infections. Finding relief is crucial for comfort and scalp health. A natural remedy, combining the soothing and healing properties of lavender, German chamomile, coconut, and eucalyptus oils, offers a potent solution to alleviate scalp itchiness. This article will guide you through creating and applying an effective itching scalp formula.
Understanding Itchy Scalp Causes and Natural Solutions
Scalp itchiness can arise from various factors, from environmental to physiological. Natural oils are renowned for their ability to address these issues gently and effectively, providing both immediate relief and long-term benefits.
Things Needed
- Lavender oil
- German chamomile oil
- Coconut oil
- Eucalyptus oil
Steps to Prepare
- Oil Mixture: Mix equal parts of lavender, German chamomile, coconut, and eucalyptus oils in a bowl. The coconut oil serves as a carrier oil, diluting the essential oils to make the blend safe for direct scalp application.
- Container Transfer: Pour the blended oils into a glass bottle or container for easy application.
How to Apply
- Apply a small amount of the oil blend to your scalp, focusing on the areas most affected by itchiness.
- Gently massage the oil into the scalp with your fingertips, using circular motions to enhance absorption and stimulate blood circulation.
- Leave the oil on your scalp for at least 30 minutes or overnight for more intensive treatment.
- Wash your hair with a gentle shampoo to remove the oil residue.
Benefits
- Lavender Oil: Known for its soothing properties, lavender oil can reduce scalp inflammation and irritation.
- German Chamomile Oil: Offers anti-inflammatory benefits, calming the scalp and reducing itchiness.
- Coconut Oil: Moisturizes the scalp, addressing dryness that can lead to itchiness.
- Eucalyptus Oil: With its cooling effect, eucalyptus oil provides immediate relief from itchiness.
Precautions
- Conduct a patch test before applying the oil blend to your scalp to ensure no allergic reactions.
- Avoid using excessive amounts of essential oils, as they can be potent.
Tips for Enhanced Effectiveness
- Warm the oil blend slightly before application to increase its soothing effects.
- For best results, incorporate the scalp massage into your regular hair care routine, applying the oil blend 2 to 3 times a week.
- Maintain a healthy diet and stay hydrated to support scalp health from within.
Additional Insights: Integrating Scalp Care into Hair Health
A comprehensive approach to hair care includes regular scalp treatments, using natural remedies like this itching scalp formula, alongside proper nutrition and hydration.
Conclusion
The itching scalp formula, with its blend of lavender, German chamomile, coconut, and eucalyptus oils, offers a natural and effective way to alleviate scalp itchiness. By regularly applying this oil blend, you can enjoy the dual benefits of immediate itch relief and improved overall scalp health. Remember, consistency and attention to scalp care are key to maintaining a healthy, itch-free scalp.
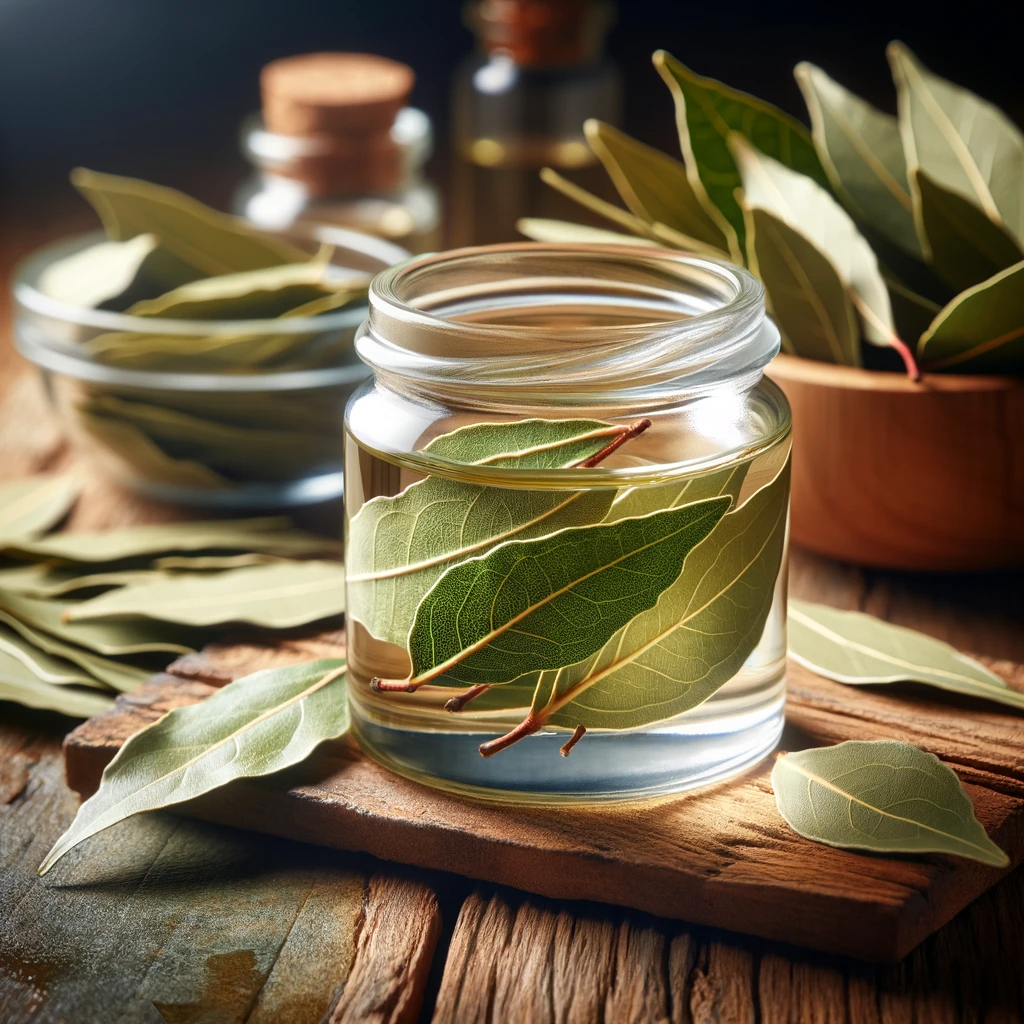
Dandruff is a common scalp condition that affects many, characterized by flakiness and sometimes an itchy scalp. While there are numerous commercial treatments available, natural remedies like bay leaves offer a gentle yet effective solution. Bay leaves, known for their aromatic and medicinal properties, can be used to treat dandruff and various other scalp issues. This article explores the benefits of bay leaves for hair and scalp health and provides a step-by-step guide to preparing and using a bay leaves rinse as an anti-dandruff cure.
The Healing Properties of Bay Leaves for Scalp Care
Bay leaves are not just culinary herbs; they possess potent properties beneficial for hair and scalp health. They act as a natural conditioner, combat fungal infections, reduce scalp inflammation, control hair shedding, stimulate hair growth, and effectively treat dandruff and lice.
Things Needed
- 2 cups of pure water.
- 1 ½ tablespoons of crushed bay leaves.
Steps to Prepare
- Boiling Water: Start by boiling the 2 cups of pure water.
- Infusing Bay Leaves: Once the water is boiled, remove it from heat and add the crushed bay leaves.
- Steeping: Allow the mixture to steep for an hour.
- Straining: After an hour, filter the mixture to remove the bay leaves, leaving you with a potent bay leaf-infused water.
How to Apply
- After shampooing your hair, gently apply the bay leaves water to your scalp.
- Massage the infusion into your scalp with your fingertips to ensure it reaches all areas.
- Leave the treatment on your scalp for about an hour to allow the bay leaves’ properties to take effect.
- Rinse off the treatment with water.
Benefits
- Natural Conditioning: Bay leaves act as a natural conditioner, making hair softer and more manageable.
- Fungal Protection: They offer protection against scalp fungal infections that can cause dandruff.
- Inflammation Reduction: The anti-inflammatory properties help soothe the scalp.
- Stimulates Hair Growth: Encourages healthy hair growth by nourishing the scalp.
- Dandruff Treatment: Effectively reduces dandruff with regular use.
- Lice Removal: Can aid in eliminating head lice.
Precautions
- Ensure you’re not allergic to bay leaves by conducting a patch test.
- Avoid using hot bay leaves water directly on your scalp to prevent burns.
Tips for Enhanced Effectiveness
- Use fresh bay leaves for a more potent infusion.
- Incorporate this treatment into your regular hair care routine for the best results.
- Complement the bay leaves treatment with a balanced diet to support hair health from within.
Additional Insights: Integrating Bay Leaves into Hair Care
Alongside the bay leaves rinse, maintaining proper scalp hygiene and minimizing the use of harsh hair products can further improve scalp health and reduce dandruff.
Conclusion
Bay leaves offer a natural and effective way to combat dandruff and promote overall scalp health. By following the steps outlined in this guide, you can prepare and apply a bay leaves rinse to harness the herb’s benefits. Regular use can lead to a healthier scalp, reduced dandruff, and enhanced hair growth, showcasing the power of natural remedies in hair care.
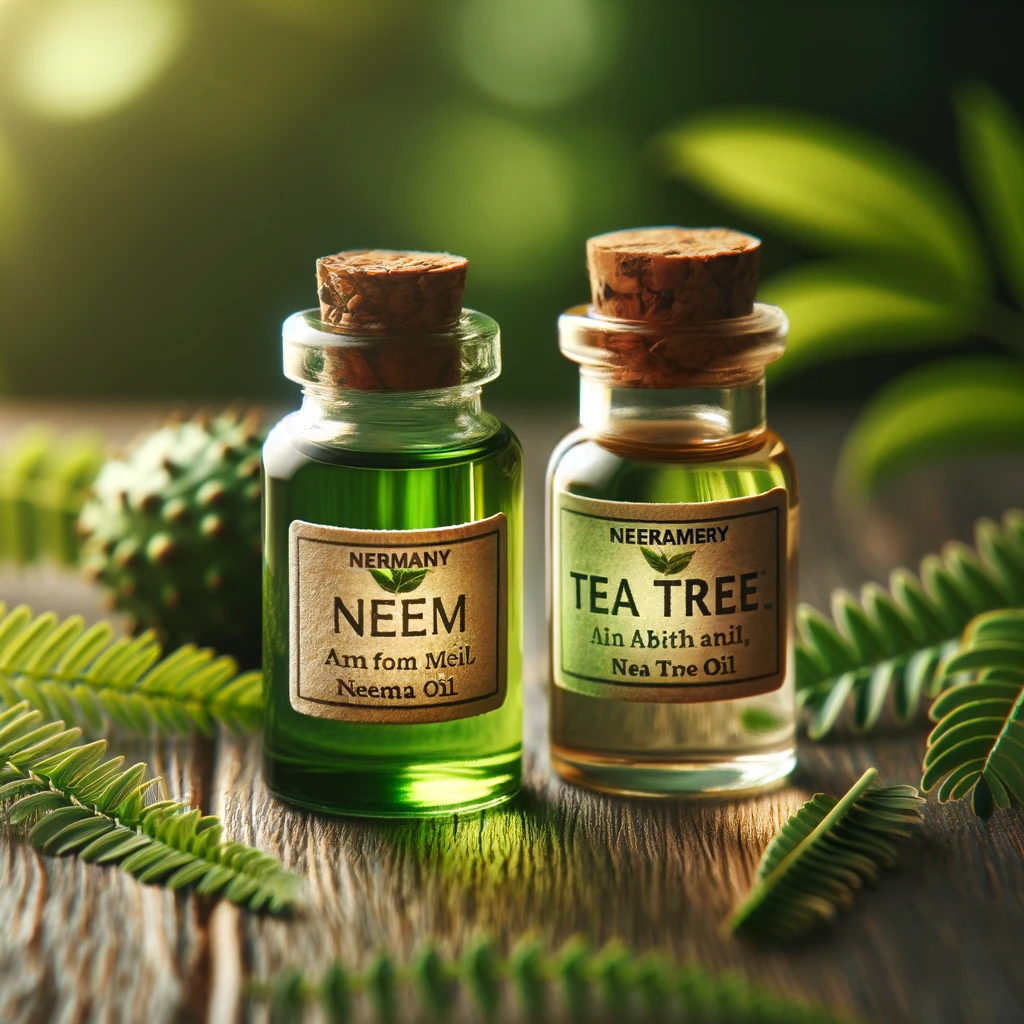
Scalp issues like fungal infections, dandruff, ringworm, bacteria, scalp acne, and head lice not only cause discomfort but also affect hair health and self-confidence. A natural remedy combining neem and tea tree oils, known for their potent antifungal and antibacterial properties, offers a powerful solution to these problems. This article delves into preparing and using a neem and tea tree oil blend to restore scalp health.
The Power of Neem and Tea Tree Oils in Scalp Care
Neem and tea tree oils are celebrated for their natural ability to combat fungal and bacterial infections. When used together, they form a synergistic blend that enhances scalp health, making them effective against a wide range of scalp conditions.
Things Needed
- 5 drops of neem oil.
- 5 drops of tea tree oil.
- 1 tablespoon of coconut or olive oil (as a carrier oil).
Steps to Prepare
- Creating the Oil Blend: In a small bowl, mix the neem and tea tree oils with coconut or olive oil. The carrier oil dilutes the potent essential oils, making the blend safe for direct scalp application.
How to Apply
- Apply the oil mixture directly to your scalp, focusing on areas most affected by fungal infections, dandruff, or other conditions.
- Gently massage the blend into your scalp to ensure even distribution and to stimulate blood circulation.
- Cover your head with a shower cap or towel to maximize absorption.
- Leave the oil on your scalp for at least 20 minutes, or overnight for more intensive treatment.
- Wash your hair with a high-quality anti-fungus or anti-dandruff shampoo.
Benefits
- Antifungal and Antibacterial: Targets the root cause of dandruff, scalp acne, and other infections.
- Moisturizing: Coconut or olive oil moisturizes the scalp, preventing dryness and flakiness.
- Promotes Scalp Health: Regular use leads to a healthier scalp, free from irritation and infections.
- Stimulates Hair Growth: A healthy scalp environment is conducive to hair growth.
Precautions
- Conduct a patch test before full application to ensure no allergic reactions.
- Avoid using excessive amounts of essential oils to prevent scalp irritation.
Tips for Enhanced Effectiveness
- Warm the oil blend slightly before application for better penetration.
- Combine this treatment with regular scalp hygiene practices.
- Maintain a healthy diet to support overall scalp and hair health.
Additional Insights: Comprehensive Scalp Care
Treating scalp conditions effectively requires a holistic approach that includes both topical treatments and lifestyle adjustments for optimal scalp health.
Conclusion
The neem and tea tree oil blend is a natural, effective remedy for a variety of scalp issues, from fungal infections to dandruff. By incorporating this treatment into your hair care routine two to three times a week, you can achieve significant improvements in scalp health and hair quality. Remember, consistency is key to seeing lasting results and restoring your scalp to its natural, healthy state.
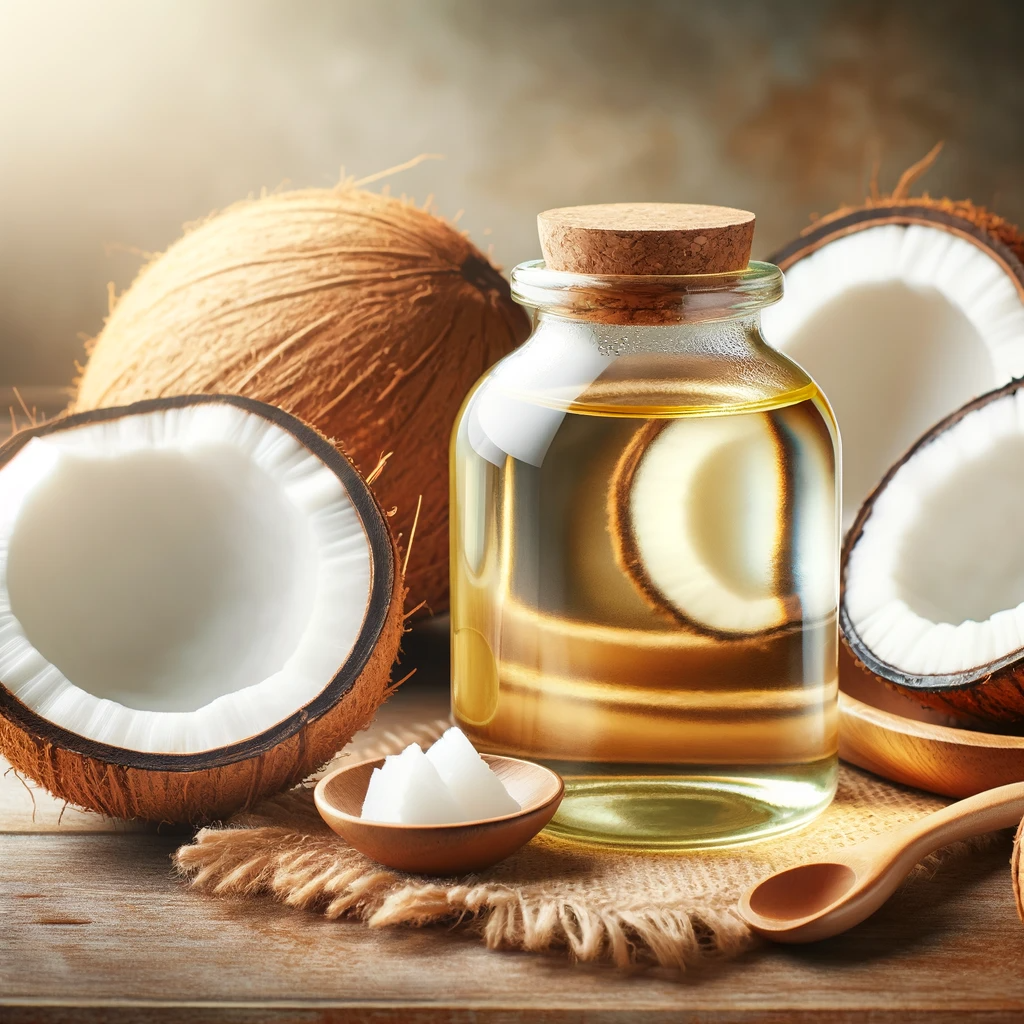
Dandruff can be a persistent issue, often causing discomfort and affecting the appearance of the hair. While coconut oil may not cure the root cause of dandruff, it can significantly alleviate symptoms like dryness and itchiness. Incorporating a coconut hot oil massage into your hair care routine can moisturize your scalp and reduce dandruff. This article provides a comprehensive guide on how to perform a coconut hot oil massage, along with additional tips for maximizing its benefits.
Understanding Dandruff and Its Management
Dandruff is typically caused by a dry scalp, fungal growth, or seborrheic dermatitis. Coconut oil’s moisturizing properties can help manage these symptoms, but it’s important to use it alongside other treatments for comprehensive dandruff control.
Things Needed
- Coconut oil.
- Optional: 5 drops of jojoba oil or rosemary oil, or 1 tablespoon of lemon juice.
Steps to Prepare
- Warming the Coconut Oil: Heat a sufficient amount of coconut oil until it’s warm but not hot enough to cause discomfort or burns.
- Adding Additional Ingredients: If desired, mix in jojoba or rosemary oil, or lemon juice for added benefits.
How to Apply
- Apply the warm oil to your scalp, using gentle massage motions.
- Ensure even distribution across the entire scalp.
- Cover your head with a shower cap to maximize absorption.
- Leave the oil on your scalp for at least 30 minutes, or overnight for deeper conditioning.
- Wash your hair with a dandruff shampoo to remove the oil.
Benefits
- Moisturizes Scalp: Coconut oil hydrates the scalp, reducing dryness and flakiness.
- Soothes Itchiness: Offers relief from dandruff-induced itchiness.
- Enhances Hair Growth: Regular massages can promote healthier and faster hair growth.
- Prevents Dryness: Keeps the scalp nourished, preventing dryness which can lead to dandruff.
Precautions
- Avoid overheating the oil to prevent scalp burns.
- Conduct a patch test if you’re using essential oils for the first time.
Tips for Enhanced Effectiveness
- Use virgin or cold-pressed coconut oil for the best results.
- Massage your scalp gently to improve blood circulation.
- Combine this treatment with a balanced diet rich in vitamins and minerals.
Additional Insights: Holistic Approach to Scalp Health
In addition to topical treatments, managing stress and maintaining overall health are crucial in combating dandruff.
Conclusion
A coconut hot oil massage is an effective method to moisturize the scalp and minimize dandruff. While it may not address the root cause of dandruff, regular application, combined with suitable dandruff shampoos and other remedies, can significantly improve scalp health. Consistency and patience are key to achieving the best results in your hair care routine.
Dandruff is a common scalp issue that can cause discomfort and affect self-esteem. Natural remedies like an anti-dandruff honey mask, combining olive oil, honey, and black pepper essential oil, offer a gentle yet effective solution. This article outlines how to prepare and use this natural mask to combat dandruff.
The Benefits of Natural Ingredients for Scalp Health
Natural ingredients like honey and olive oil are known for their nourishing properties, while black pepper essential oil can stimulate the scalp. This combination can effectively address the root causes of dandruff.
Things Needed
- 2 tablespoons of extra-virgin olive oil.
- 1 tablespoon of pure honey.
- 1 drop of black pepper essential oil.
Steps to Prepare
- Creating the Mask: In a bowl, mix the olive oil, honey, and black pepper essential oil until well combined.
How to Apply
- Apply the mixture to dry hair, ensuring to focus on the scalp.
- Gently massage the mask into the scalp for 10 minutes to enhance absorption and stimulate blood flow.
- Rinse the hair thoroughly with warm water.
- Follow up with your regular shampooing routine.
Benefits
- Moisturizes Scalp: Olive oil and honey deeply nourish and hydrate the scalp.
- Reduces Dandruff: The antifungal properties of the ingredients help reduce dandruff.
- Stimulates Scalp: Black pepper essential oil stimulates blood flow to the scalp.
- Improves Hair Health: Regular use can lead to healthier, shinier hair.
Precautions
- Conduct a patch test to ensure you’re not allergic to any of the ingredients.
- Be cautious with the amount of black pepper essential oil, as it is potent.
Tips for Enhanced Effectiveness
- Use organic and pure ingredients for maximum benefits.
- Warm the mixture slightly before application for better penetration.
- Be gentle during the massage to avoid irritating the scalp.
Additional Insights: Holistic Approach to Dandruff Control
In addition to topical treatments, maintaining a balanced diet and reducing stress can help in managing dandruff.
Conclusion
The anti-dandruff honey mask is a simple, natural remedy for combating dandruff and improving scalp health. By incorporating this treatment into your weekly hair care routine, you can achieve a healthier scalp and more vibrant hair. Consistency and a holistic approach to scalp care are key to the effectiveness of natural remedies.

Complementing a pre-wash white vinegar tonic, an after-wash white vinegar rinse is a vital step in a comprehensive scalp care routine. This simple yet effective method can enhance the health of your hair and scalp, particularly in combating dandruff. This article will guide you through preparing and using an after-wash vinegar rinse, highlighting its benefits and the best practices for its application.
The Role of Vinegar in Hair Care
White vinegar, known for its acetic acid content, can help in balancing the pH of the scalp, removing product buildup, and enhancing hair shine. When used in conjunction with a pre-wash tonic, it maximizes the treatment’s effectiveness.
Things Needed
- 2 tablespoons of white vinegar.
- 1 cup of pure water.
Steps to Prepare
- Mixing the Rinse: In a container, combine the white vinegar with a cup of water.
How to Apply
- After shampooing and conditioning your hair, use the vinegar mixture as a final rinse.
- Pour the mixture evenly over your scalp and hair.
- Ensure that the rinse covers the entire scalp and hair length.
- Do not rinse your hair again after applying the vinegar mixture.
- Proceed to apply your usual hair moisturizer.
Benefits
- Enhances Scalp Health: Helps in maintaining a healthy scalp environment, reducing dandruff.
- Removes Residues: Effectively cleanses the hair of any remaining shampoo or conditioner residues.
- Restores Hair Shine: Leaves hair looking shiny and feeling smooth.
- Balances pH: Vinegar’s natural acidity helps balance the pH of your hair and scalp.
Precautions
- Dilute the vinegar properly to avoid any potential scalp irritation.
- Avoid using hot water immediately after the vinegar rinse to prevent hair damage.
Tips for Enhanced Effectiveness
- Use cool or lukewarm water for the final rinse to seal the hair cuticles.
- Consider using an organic, unpasteurized vinegar for more natural benefits.
- Regularly trim your hair to prevent split ends, which can exacerbate scalp issues.
Additional Insights: Complete Scalp Care
Alongside the vinegar rinse, maintain a balanced diet, stay hydrated, and avoid excessive heat styling to promote overall scalp and hair health.
Conclusion
The after-wash white vinegar rinse is a straightforward and effective way to improve scalp health, particularly when used in combination with a pre-wash vinegar tonic. Regular use of this rinse can lead to a healthier scalp, reduced dandruff, and shinier hair. Consistency and proper care are key to reaping the full benefits of this natural hair care treatment.
Dandruff is a common scalp issue characterized by flakiness and itchiness. Among various natural remedies, tea tree oil stands out for its effectiveness in treating dandruff. Incorporating tea tree oil into your shampoo routine can provide a gentle yet potent solution. This article will guide you on preparing and using a tea tree shampoo for anti-dandruff treatment.
Understanding Dandruff and Natural Solutions
Dandruff can be caused by several factors, including dry skin, seborrheic dermatitis, and fungal growth. Tea tree oil, with its natural antifungal and cleansing properties, is an excellent choice for addressing these underlying causes.
Things Needed
- 1 drop of tea tree essential oil.
- 1 tablespoon of your regular shampoo.
Steps to Prepare
- Creating Tea Tree Shampoo: In a container, add one drop of tea tree essential oil to one tablespoon of your regular shampoo.
- Combining Well: Mix the oil and shampoo thoroughly to ensure even distribution of the tea tree oil.
How to Apply
- Apply the tea tree-infused shampoo to your hair.
- Gently massage the shampoo into your scalp for 2 minutes. This helps the tea tree oil penetrate the scalp and alleviate dandruff.
- Rinse your hair thoroughly with water.
Benefits
- Anti-Dandruff Properties: Tea tree oil effectively cleanses and soothes flaky, itchy scalp caused by dandruff.
- Gentle Cleansing: Unlike harsh chemical treatments, tea tree oil provides a gentle yet effective solution for scalp health.
- Natural Antifungal: Its antifungal properties help in controlling the growth of dandruff-causing fungi.
Precautions
- Conduct a patch test to ensure you’re not allergic to tea tree oil.
- Avoid using excessive amounts of tea tree oil as it can be potent.
Tips for Enhanced Effectiveness
- Use a mild, sulfate-free shampoo as a base for mixing with tea tree oil.
- For chronic dandruff, consider leaving the shampoo on your scalp for a few minutes before rinsing.
- Regularly use the tea tree shampoo for continued dandruff control.
Additional Insights: Holistic Dandruff Control
Along with using tea tree shampoo, maintaining a balanced diet and reducing stress can further help in controlling dandruff.
Conclusion
Tea tree shampoo is a simple, natural remedy for combating dandruff. By incorporating tea tree oil into your regular shampoo, you can enjoy the benefits of a healthier, dandruff-free scalp. Remember, consistent use and a holistic approach to scalp care are key to managing dandruff effectively.
Dandruff is a common scalp condition that can be both irritating and embarrassing. While there are numerous commercial products available, natural remedies often offer a gentler and equally effective solution. An anti-dandruff herbs tonic, made from ingredients like rosemary, sage, and nettle, can be a powerful natural treatment. This article will guide you through the process of making and using this herbal tonic for a healthier scalp.
Understanding Dandruff and Natural Remedies
Dandruff is typically caused by dry skin, seborrheic dermatitis, or fungal growth on the scalp. Natural herbs like rosemary, sage, and nettle have properties that address these underlying causes and improve overall scalp health.
Things Needed
- A handful of fresh rosemary.
- 1 teaspoon of sage.
- 1 teaspoon of nettle.
- 1 cup of hot water.
Steps to Prepare
- Infusing Herbs: Pour the hot water over the rosemary, sage, and nettle in a bowl.
- Steeping: Allow the mixture to steep for 20 minutes.
- Cooling: Wait for the tonic to cool down to room temperature.
How to Apply
- After shampooing your hair, apply the cooled herbal tonic to your clean and wet hair.
- Ensure that the tonic covers your entire scalp and hair.
- Leave the tonic in your hair for 30 minutes for maximum effectiveness.
- Rinse your hair thoroughly with water.
- Follow up with your regular moisturizing and styling routine.
Benefits
- Rosemary: Known to soothe scalp soreness, stimulate hair growth, and reduce dandruff.
- Sage: Helps in inhibiting premature graying and reduces hair loss.
- Nettle: Renowned for its ability to reduce scalp inflammation and promote healthy hair growth.
Precautions
- Ensure you are not allergic to any of the herbs used in the tonic.
- Conduct a patch test if you have sensitive skin.
Tips for Enhanced Effectiveness
- Use fresh herbs for more potent benefits.
- Gently massage the tonic into your scalp to improve absorption and stimulate blood circulation.
- Regularly use the tonic for sustained results.
Additional Insights: Holistic Approach to Scalp Care
A balanced diet and proper hydration complement the use of natural hair treatments, enhancing overall scalp and hair health.
Conclusion
This natural anti-dandruff herbs tonic offers an effective solution to combat dandruff and promote a healthy scalp. By incorporating this tonic into your hair care routine, you can experience reduced dandruff, soothed scalp soreness, and overall improved hair health. Natural remedies, coupled with good hair care practices, can lead to lasting benefits for your scalp and hair.
Achieving healthy, hydrated hair and scalp often requires a holistic approach that includes both dietary changes and topical treatments. Incorporating natural ingredients like extra virgin olive oil and coconut into your diet, along with regular scalp massages, can significantly improve the health and texture of your hair. This article will explore how these simple additions to your routine can benefit your hair and scalp.
The Importance of Nutrition and Scalp Care in Hair Health
The health of your hair is closely linked to your diet and how you care for your scalp. Nutrients from food can strengthen and moisturize your hair from the inside, while external treatments like scalp massages enhance natural oil production.
Things Needed
- 1 tablespoon of extra virgin olive oil.
- 1 tablespoon of grated coconut.
- Your regular shampoo and conditioner.
- Natural oils for scalp massage (optional).
Steps to Prepare
- Dietary Inclusion: Add 1 tablespoon each of extra virgin olive oil and grated coconut to your regular green salad.
- Scalp Massage: No preparation is needed for a daily scalp massage.
How to Apply
- Dietary Approach: Simply consume the salad with olive oil and coconut as part of your regular diet.
- Scalp Massage:
- Use your fingertips to gently massage your scalp daily.
- For a more intensive treatment, massage your scalp with natural oils like olive oil or coconut oil once or twice a week before shampooing.
Benefits
- Extra Virgin Olive Oil: Rich in antioxidants and vitamin E, it helps improve hair texture and moisturizes from within.
- Coconut: Provides natural oils that hydrate the skin, hair, and scalp.
- Scalp Massage: Stimulates natural oil production, promoting hydration and health of hair and scalp.
Precautions
- Use pure, organic ingredients for dietary inclusion to avoid additives and chemicals.
- Be gentle during scalp massages to avoid causing irritation.
Tips for Enhanced Effectiveness
- Consistently include olive oil and coconut in your diet for sustained benefits.
- Warm the oil slightly before a scalp massage for deeper penetration and relaxation.
- Combine this routine with a balanced diet rich in proteins, vitamins, and minerals for overall hair health.
Additional Insights: Holistic Hair Care Approach
Incorporating a combination of nutritional, physical, and topical treatments can provide a comprehensive approach to hair and scalp health.
Conclusion
Incorporating extra virgin olive oil and coconut into your diet and regular scalp massages can significantly improve the health and hydration of your hair and scalp. These simple, natural methods are effective in maintaining the moisture balance and enhancing the overall quality of your hair. Consistency and a holistic approach are key to achieving the best results.
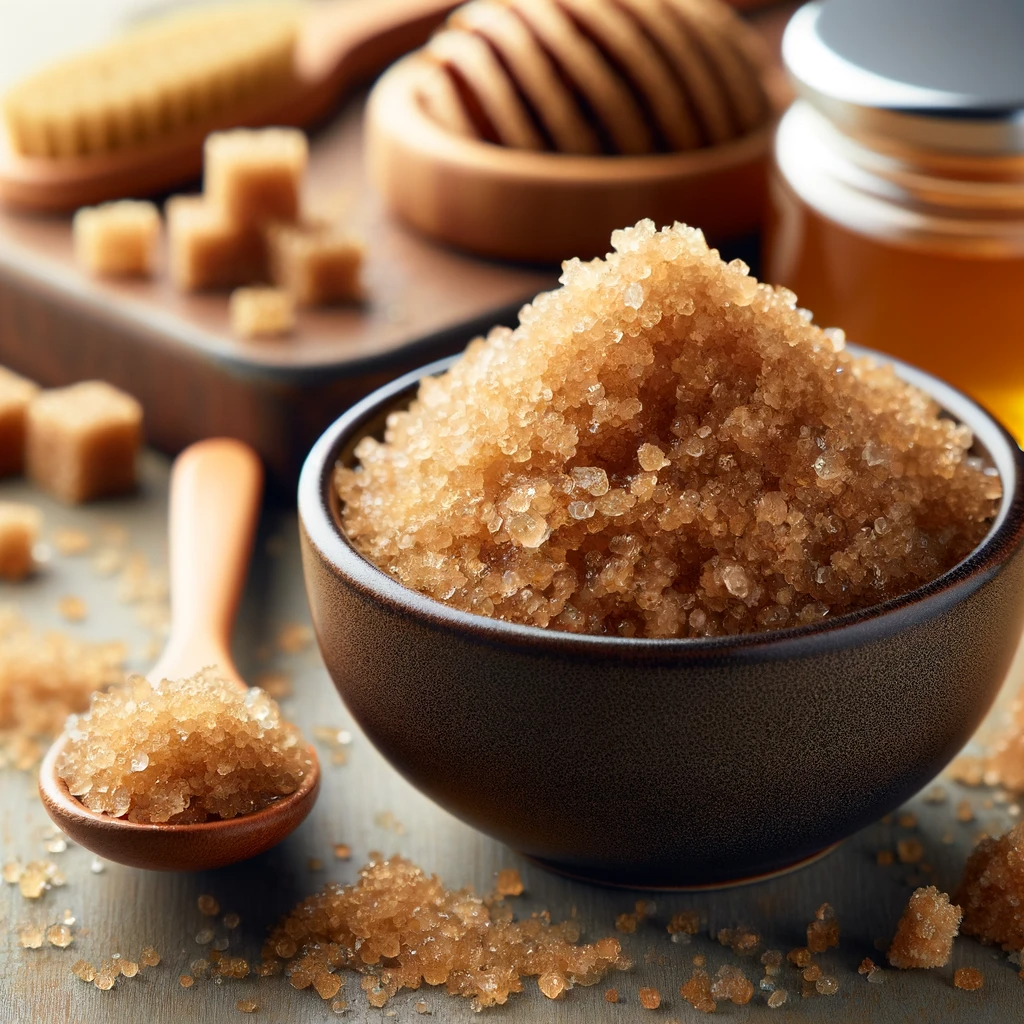
A healthy scalp is the foundation of healthy hair. For those struggling with dry scalp or looking for a natural way to exfoliate, a brown sugar scalp scrub can be an effective solution. This simple, homemade remedy can help remove dead skin cells, unclog pores, and rejuvenate the scalp. In this article, we will explore the benefits of a brown sugar scalp scrub and how to prepare and apply it.
Understanding Scalp Health and Exfoliation
The scalp, like any other part of the skin, requires regular exfoliation to remain healthy. Build-up of dead skin cells, product residues, and excess oils can lead to issues like dandruff, itchiness, and slow hair growth.
Things Needed
- ½ cup of brown sugar.
- ½ cup of your preferred conditioner.
Steps to Prepare
- Mixing Ingredients: In a bowl, combine the brown sugar with the conditioner. Stir until the mixture reaches a consistent, scrub-like texture.
How to Apply
- After shampooing your hair, apply the brown sugar scrub to your scalp while your hair is still damp.
- Gently massage the scrub into your scalp using circular motions. Be careful not to be too abrasive.
- Allow the scrub to sit for a couple of minutes to maximize its exfoliating benefits.
- Rinse thoroughly with plenty of water to remove all the sugar particles from your hair and scalp.
Benefits
- Exfoliation: Brown sugar gently exfoliates the scalp, removing dead skin cells and unclogging pores.
- Moisturization: The conditioner in the scrub helps to hydrate the scalp and hair.
- Improved Scalp Health: Regular exfoliation can lead to healthier scalp conditions, reducing issues like dandruff and itchiness.
- Stimulates Hair Growth: A clean and healthy scalp can foster better hair growth.
Precautions
- Ensure you don’t have any cuts or open wounds on your scalp before applying the scrub.
- Brown sugar granules can be abrasive, so massage gently to avoid irritation.
Tips for Enhanced Effectiveness
- Use organic brown sugar for its natural and unrefined properties.
- Choose a conditioner that suits your hair type for added benefits.
- Follow up with a deep conditioning treatment for extra nourishment.
Additional Insights: Holistic Scalp Care
In addition to exfoliation, maintaining a balanced diet, staying hydrated, and minimizing the use of harsh hair products contribute to overall scalp health.
Conclusion
The brown sugar scalp scrub is a simple, natural, and effective way to maintain scalp health. By incorporating this scrub into your hair care routine, you can enjoy the benefits of a cleaner, healthier scalp, which in turn can lead to healthier hair growth. Remember, consistent and gentle care is key to achieving the best results from natural remedies.
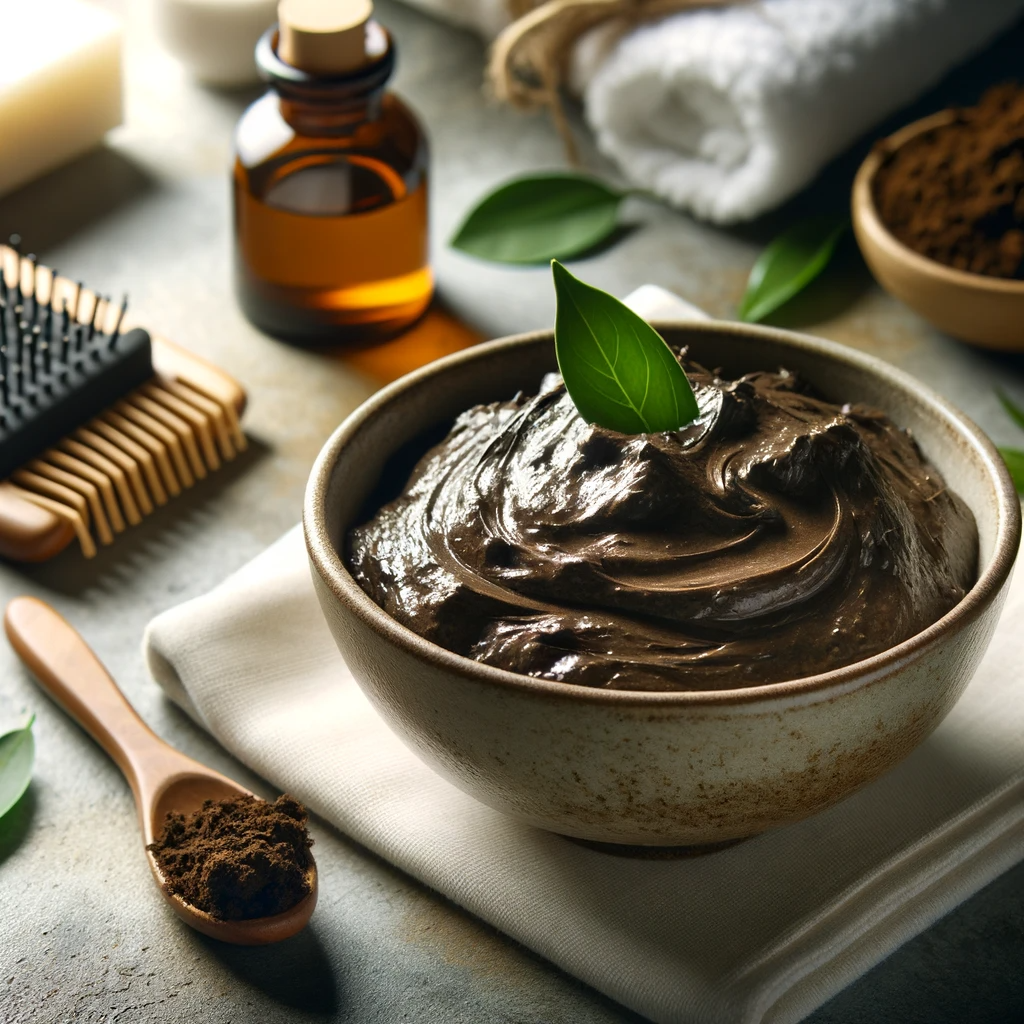
Dry hair and scalp can lead to various hair issues like dullness, breakage, and dandruff. A natural prewash mud mask, incorporating ingredients like seaweed, Dead Sea mud, and essential oils, can be an effective solution. This article guides you through the process of making and applying a prewash mud mask to rejuvenate your hair and scalp.
The Benefits of Natural Ingredients for Hair and Scalp
Natural ingredients like seaweed, Dead Sea mud, and essential oils are known for their nourishing properties. They can deeply moisturize the scalp, strengthen hair, and enhance overall hair health.
Things Needed
- 1 strip of dried seaweed.
- 4 tablespoons of Dead Sea mud.
- 1 tablespoon of honey.
- 1 tablespoon of grape seed oil.
- 1 tablespoon of thyme oil.
- 2 drops of rosemary essential oil.
- 2 drops of cedarwood essential oil.
- 1 cup of cooled green tea.
Steps to Prepare
- Mixing Ingredients: In a bowl, combine the seaweed and Dead Sea mud.
- Creating the Paste: Add the green tea and honey to the mixture. Stir well to form a paste.
- Adding Oils: Incorporate all the essential oils (rosemary, cedarwood, thyme, and grape seed oil) into the paste and stir again.
How to Apply
- Apply the mud mask evenly over your scalp and through your hair.
- Cover your scalp with a plastic bag, then wrap your head with warm towels for better absorption.
- Relax and let the mask sit for 20 to 30 minutes.
- Rinse your hair thoroughly with water, then follow with your regular shampoo.
Benefits
- Seaweed and Dead Sea Mud: Provide deep moisturization and nourishment to the scalp.
- Honey and Oils: Soften the hair, add shine, and stimulate hair growth.
- Essential Oils: Promote scalp health and may help in preventing hair loss.
Precautions
- Conduct a patch test to ensure you’re not allergic to any of the ingredients.
- Be careful to prevent the mask from getting into your eyes.
Tips for Enhanced Effectiveness
- Use organic ingredients for maximum benefits.
- Gently massage the mask into your scalp to stimulate blood circulation.
- Ensure the water is not too hot when rinsing to preserve the nutrients.
Additional Insights: Holistic Hair Care
Complementing this treatment with a balanced diet and proper hydration can further enhance hair health.
Conclusion
A prewash mud mask with natural ingredients is an excellent way to tackle dry hair and scalp issues. Regular use of this mask can lead to healthier, stronger, and more lustrous hair. Remember, natural remedies often require consistency and patience for the best results.
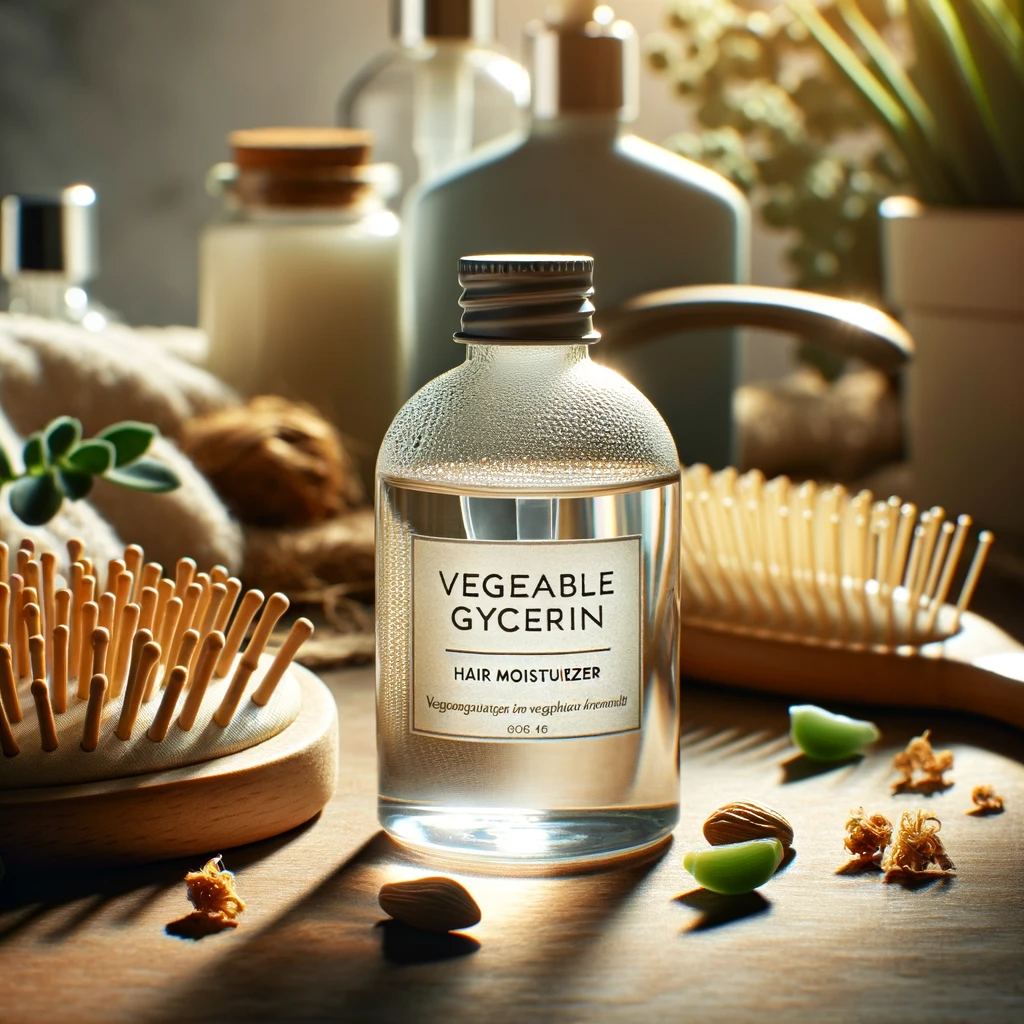
Vegetable glycerin, a natural compound derived from plant oils, is a hidden gem in the world of hair care. Its excellent moisturizing properties have made it a popular ingredient in various hair products. This article will explore how to use vegetable glycerin as a hair moisturizer, particularly beneficial for managing curly hair, controlling frizz, and adding shine.
Understanding the Role of Glycerin in Hair Care
Glycerin is a humectant, meaning it attracts moisture from the environment into the hair. This quality makes it an ideal ingredient for hair products, especially in dry and frizzy hair management.
Things Needed
- Pure vegetable glycerin.
Steps to Prepare
- Procuring Glycerin: Purchase pure vegetable glycerin from health food stores or pharmacies.
- Preparation: No preparation is required as glycerin is used in its pure form.
How to Apply
- After shampooing and conditioning your hair, towel dry it until it’s damp.
- Apply a small amount of vegetable glycerin to your hair, focusing on the ends where dryness is most common.
- Distribute the glycerin evenly using your fingers or a wide-tooth comb.
Benefits
- Moisturizes Hair: Glycerin provides deep hydration, making hair soft and manageable.
- Defines Curls: Helps in defining and maintaining curls without making them stiff.
- Controls Frizz: Reduces frizz by maintaining adequate moisture levels in the hair.
- Adds Shine: Regular use of glycerin can enhance the natural shine of your hair.
Precautions
- Use glycerin in moderation; excessive use can make hair greasy.
- In very humid environments, glycerin might attract too much moisture, leading to hair swelling and frizz.
Tips for Enhanced Effectiveness
- Dilute glycerin with water or aloe vera juice if you find it too sticky.
- Combine glycerin with other natural oils for additional nourishment.
- Use glycerin as part of a regular hair care routine for the best results.
Additional Insights: Balanced Hair Care Routine
Incorporating natural moisturizers like vegetable glycerin complements a holistic hair care approach, including a healthy diet and gentle hair styling practices.
Conclusion
Vegetable glycerin is an effective, natural solution for enhancing hair health. Its ability to moisturize, control frizz, and add shine makes it a valuable addition to your hair care routine. By using glycerin judiciously and consistently, you can achieve softer, more lustrous, and healthier hair.
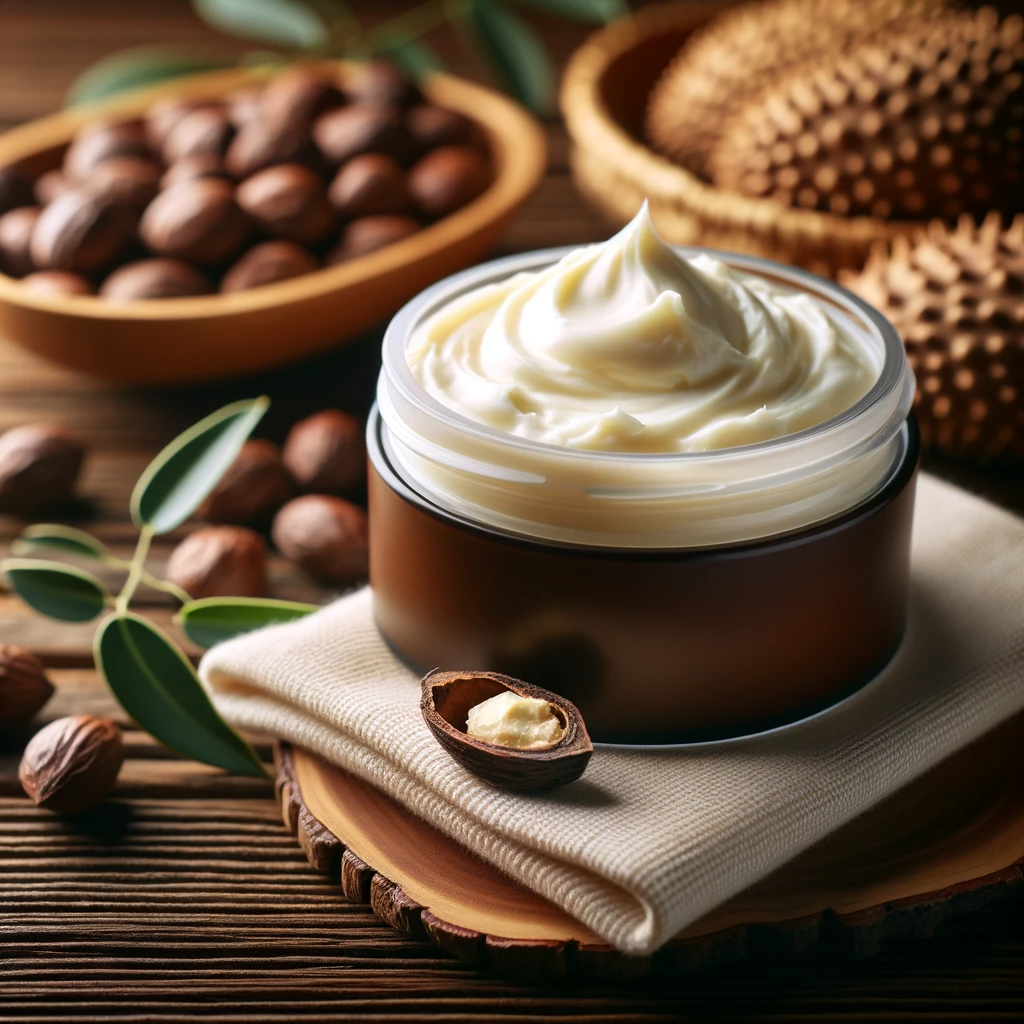
In the world of natural hair care, shea butter stands out as a versatile and beneficial ingredient. Known for its moisturizing properties, shea butter is an excellent choice for those seeking a natural method to keep their hair healthy and hydrated. This article will guide you through creating a shea butter moisturizer, enriched with aloe vera and olive oil, suitable for use as a cream or a leave-in conditioner.
The Benefits of Shea Butter in Hair Care
Shea butter is rich in vitamins and fatty acids, making it incredibly nourishing for hair. It helps control hair strands, protect against breakage, heat, dryness, and sun damage, and adds shine and moisture.
Things Needed
- ½ cup of Aloe Vera gel (blended).
- ¼ cup of raw Shea Butter.
- ¼ cup of extra virgin olive oil.
Steps to Prepare
- Melting Shea Butter: Melt the Shea butter in the top of a double boiler until it becomes smooth.
- Combining Ingredients: Remove from heat, add the Aloe Vera gel and olive oil, and stir well.
- Storing: Transfer the mixture into a jar for easy use.
How to Apply
- Apply the shea butter mixture to your hair as you would with any moisturizer or leave-in conditioner.
- Focus on the ends of your hair, which are more prone to dryness and damage.
- This cream does not leave hair greasy or oily, thanks to the inclusion of Aloe Vera gel.
Customizing the Cream
- For a thicker consistency, reduce the amount of olive oil.
- For a lighter texture, increase the amount of olive oil or replace it with other oils like Argan or Macadamia oil.
Benefits
- Moisturizes Hair: Shea butter deeply nourishes and hydrates hair.
- Adds Shine: Leaves hair shiny and lustrous.
- Protects Hair: Shields hair from environmental damage and breakage.
- Versatile Use: Can be used as a cream or leave-in conditioner.
Precautions
- Perform a patch test to ensure you are not allergic to any of the ingredients.
- Be cautious with the temperature when melting Shea butter to avoid burns.
Tips for Enhanced Effectiveness
- Use organic, unrefined Shea butter for maximum benefits.
- Apply the cream to damp hair for better absorption.
- Store the cream in a cool, dry place to maintain its consistency.
Additional Insights: Holistic Hair Care
Incorporating natural ingredients like Shea butter into your hair care routine complements other hair health practices, such as a balanced diet and gentle hair styling.
Conclusion
Shea butter moisturizer, combined with Aloe Vera and olive oil, offers a natural and effective solution for maintaining healthy, hydrated hair. By customizing the consistency and ingredients according to your hair type and preference, you can enjoy the full benefits of this natural hair care treatment. Regular use will lead to stronger, shinier, and more nourished hair.
Emu oil, derived from the fat of the emu bird, has gained recognition for its remarkable benefits in hair care. Known for its ability to rejuvenate hair cells, promote growth, and soothe scalp inflammation, emu oil is a potent natural ingredient for achieving healthy, shiny, and soft hair. This article provides a detailed overview of how to use emu oil for hair care, its benefits, and some useful tips.
The Healing Properties of Emu Oil for Hair
Emu oil is rich in fatty acids and natural compounds that are beneficial for the hair and scalp. It penetrates deeply, offering nourishment and hydration.
Things Needed
- Pure emu oil.
- Your regular shampoo and conditioner (if opting for the mixed method).
Steps to Prepare
- Direct Application:
- No preparation is needed for direct application to the scalp and hair.
- Mixing with Shampoo and Conditioner:
- Add one tablespoon of emu oil to your shampoo or conditioner bottle.
- Shake well to ensure the oil is evenly distributed.
How to Apply
- Direct Scalp Massage:
- Gently massage emu oil into your scalp.
- Leave it on for at least an hour or more for deep nourishment.
- Using with Shampoo and Conditioner:
- Use the emu oil-infused shampoo and conditioner as you normally would during your hair wash routine.
Frequency of Application
- For direct scalp application: Twice a week for faster results.
- As an addition to shampoo/conditioner: Use as per your regular hair washing schedule.
Benefits
- Promotes Hair Growth: Emu oil stimulates hair follicles, encouraging hair growth.
- Heals Scalp Inflammation: Its anti-inflammatory properties soothe the scalp.
- Enhances Hair Shine and Softness: Regular use leaves hair looking shiny and feeling soft.
- Deep Nourishment: It deeply penetrates hair shafts, providing essential nutrients.
Precautions
- Conduct a patch test to ensure you don’t have an allergic reaction to emu oil.
- If you have a scalp condition, consult with a dermatologist before using emu oil.
Tips for Enhanced Effectiveness
- Warm the emu oil slightly before application for better absorption.
- Combine emu oil treatment with a balanced diet rich in vitamins and omega-3 fatty acids.
- Avoid using high heat styling tools to minimize hair damage.
Additional Insights: Emu Oil in Holistic Hair Care
Incorporating emu oil into a holistic hair care routine that includes gentle cleaning, conditioning, and minimal chemical treatments can amplify its benefits.
Conclusion
Emu oil offers a natural, effective way to nourish and rejuvenate your hair and scalp. By incorporating emu oil into your hair care routine, whether through direct application or mixed with your shampoo and conditioner, you can achieve healthier, faster-growing, and more radiant hair. Consistency and care are key to reaping the full benefits of this unique natural remedy.
Achieving healthy and lustrous hair is a goal for many, and incorporating Argan oil as a post-shampoo moisturizer can be transformative. Known for its enriching properties, Argan oil is an all-in-one solution for various hair concerns. This article explores the benefits of using Argan oil after shampooing and how to incorporate it into your hair care routine.
The Versatility of Argan Oil in Hair Care
Argan oil, often referred to as ‘liquid gold,’ is celebrated for its extensive benefits in hair care. It’s particularly effective in treating dry, damaged hair and preventing common issues like breakage, split ends, and frizz.
Things Needed
- Pure Moroccan Argan oil.
Steps to Apply
- After Shampooing: Wash your hair as usual with your preferred shampoo.
- Applying to Damp Hair: Once your hair is clean and still damp, take a few drops of Argan oil.
- Distribution: Rub the oil between your palms and gently apply it through your hair, focusing on the ends and mid-lengths rather than the scalp.
Benefits
- Treats Dry, Damaged Hair: Argan oil deeply nourishes and revitalizes dry, damaged hair.
- Eliminates Breakage: Its fortifying properties help reduce hair breakage.
- Prevents Split Ends: Regular application can prevent the occurrence of split ends.
- Controls Frizz: It’s excellent for taming frizz and flyaways.
- Heat Protection: Argan oil can be used as a protective barrier against heat styling tools.
- Scalp Health: Beneficial for dry scalp conditions, promoting overall scalp health.
Precautions
- Use pure, high-quality Moroccan Argan oil for the best results.
- Avoid using excessive amounts, as it can weigh down the hair.
Tips for Enhanced Effectiveness
- Apply Argan oil when the hair is damp for better absorption.
- Combine Argan oil treatment with a balanced diet rich in nutrients for overall hair health.
- Regularly trim your hair to prevent split ends.
Additional Insights: Holistic Approach to Hair Care
In addition to using Argan oil, maintaining a holistic hair care routine, including gentle cleansing, conditioning, and minimal chemical treatments, is crucial for healthy hair.
Conclusion
Incorporating Argan oil into your post-shampoo routine is a simple yet effective way to enhance the health and appearance of your hair. Its multifaceted benefits address a range of hair concerns, making it a must-try for anyone seeking to improve their hair’s health and luster. Remember, consistent care and quality products are key to achieving and maintaining beautiful, healthy hair.
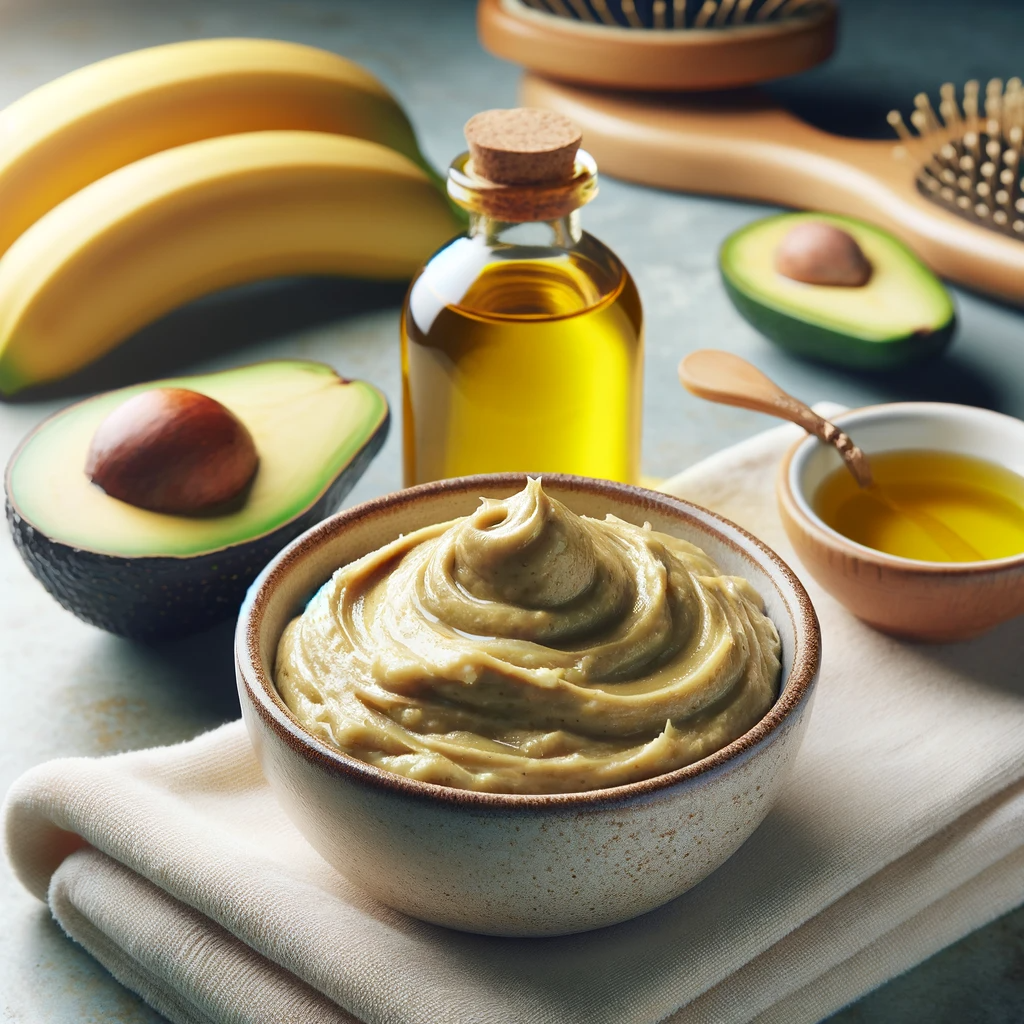
Frizzy, dry, and damaged hair can be a challenge to manage and maintain. Natural remedies often offer effective and gentle solutions. A hair mask made from banana, avocado, and olive oil is an excellent treatment for revitalizing such hair types. This article will guide you through creating and using this nourishing mask to restore hair health.
Understanding Hair Damage and Natural Treatments
Hair damage can result from various factors, including environmental stress, heat styling, and chemical treatments. Natural ingredients like banana, avocado, and olive oil are packed with nutrients that can repair and rejuvenate damaged hair.
Things Needed
- One ripe banana.
- One ripe avocado.
- Three tablespoons of extra virgin olive oil.
Steps to Prepare
- Preparing Ingredients: Cut the banana and avocado into small pieces.
- Blending: Add the banana and avocado pieces along with the olive oil to a blender.
- Creating the Mask: Blend the ingredients until you achieve a smooth, lump-free mixture.
How to Apply
- Apply the mask thoroughly to your hair and scalp, ensuring that all areas are covered.
- Let the mask sit in your hair for about 30 minutes to an hour for deep conditioning.
- Rinse your hair well with plenty of water, followed by shampooing.
Frequency of Application
For optimal results, use this banana, avocado, and olive oil mask once a week.
Benefits
- Banana: Rich in vitamins and minerals, it helps in moisturizing and repairing damaged hair.
- Avocado: Contains fatty acids that nourish and strengthen the hair.
- Olive Oil: Adds shine, softens hair, and penetrates deeply to moisturize.
Precautions
- Ensure that the mask is thoroughly rinsed out to prevent any residue.
- Be careful if you have allergies to any of the ingredients.
Tips for Enhanced Effectiveness
- Use ripe banana and avocado for easier blending and better nutrient extraction.
- You can slightly warm the olive oil before adding it to the mixture for better absorption.
- Comb your hair before applying the mask for even distribution.
Additional Insights: Holistic Hair Care
Incorporating a balanced diet and proper hair care routine complements the benefits of this natural hair mask, promoting overall hair health.
Conclusion
The banana, avocado, and olive oil hair mask is a simple, natural solution for treating frizzy, dry, and damaged hair. Regular use of this mask can transform your hair, making it healthier, softer, and more manageable. Remember, natural remedies require consistency and patience for the best results.
Coconut milk, a popular ingredient in various cuisines, is also a hidden gem in hair care. Rich in proteins and essential fats, it offers numerous benefits for hair health. This article will delve into how you can use coconut milk to treat hair breakage, promote hair growth, and improve overall hair health.
The Power of Coconut Milk in Hair Care
Coconut milk is not just for cooking; it’s a natural hair treatment packed with nutrients beneficial for strengthening and nourishing hair.
Things Needed
- One cup of coconut milk.
Steps to Prepare
- Preparing Coconut Milk: If using fresh coconuts, grate the flesh and extract the milk using a cheesecloth. For convenience, store-bought coconut milk can also be used.
How to Apply
- Apply the coconut milk thoroughly over your hair and scalp, ensuring even coverage.
- Let the coconut milk sit in your hair for at least 30 minutes for deep conditioning.
- Optionally, cover your hair with a shower cap during this period.
- Wash your hair with your regular shampoo after the treatment.
Frequency of Application
For best results, apply coconut milk to your hair every 15 days.
Benefits
- Treats Hair Breakage: The proteins in coconut milk help repair and prevent hair breakage.
- Promotes Hair Growth: Essential fats and nutrients in coconut milk stimulate hair growth.
- Adds Shine: Regular application adds a natural shine to your hair.
- Strengthens Weak Hair: Nourishes and strengthens weak and brittle hair.
Precautions
- If you have a coconut allergy, avoid using this treatment.
- Conduct a patch test if you’re using coconut milk for the first time to check for any adverse reactions.
Tips for Enhanced Effectiveness
- Use organic or high-quality coconut milk for maximum benefits.
- Gently warm the coconut milk before application for better absorption.
- Combine this treatment with a balanced diet rich in proteins and vitamins for overall hair health.
Additional Insights: Natural Hair Care Routine
Incorporating natural ingredients like coconut milk into your hair care routine can complement other healthy hair practices, promoting stronger, healthier hair.
Conclusion
Coconut milk is a simple, natural remedy that offers a multitude of benefits for hair health. Its rich nutrient profile makes it an ideal solution for treating hair breakage, promoting growth, and adding shine. By incorporating coconut milk into your hair care routine, you can achieve healthier, stronger, and more lustrous hair over time. Remember, consistent care and patience are key to the effectiveness of natural hair treatments.
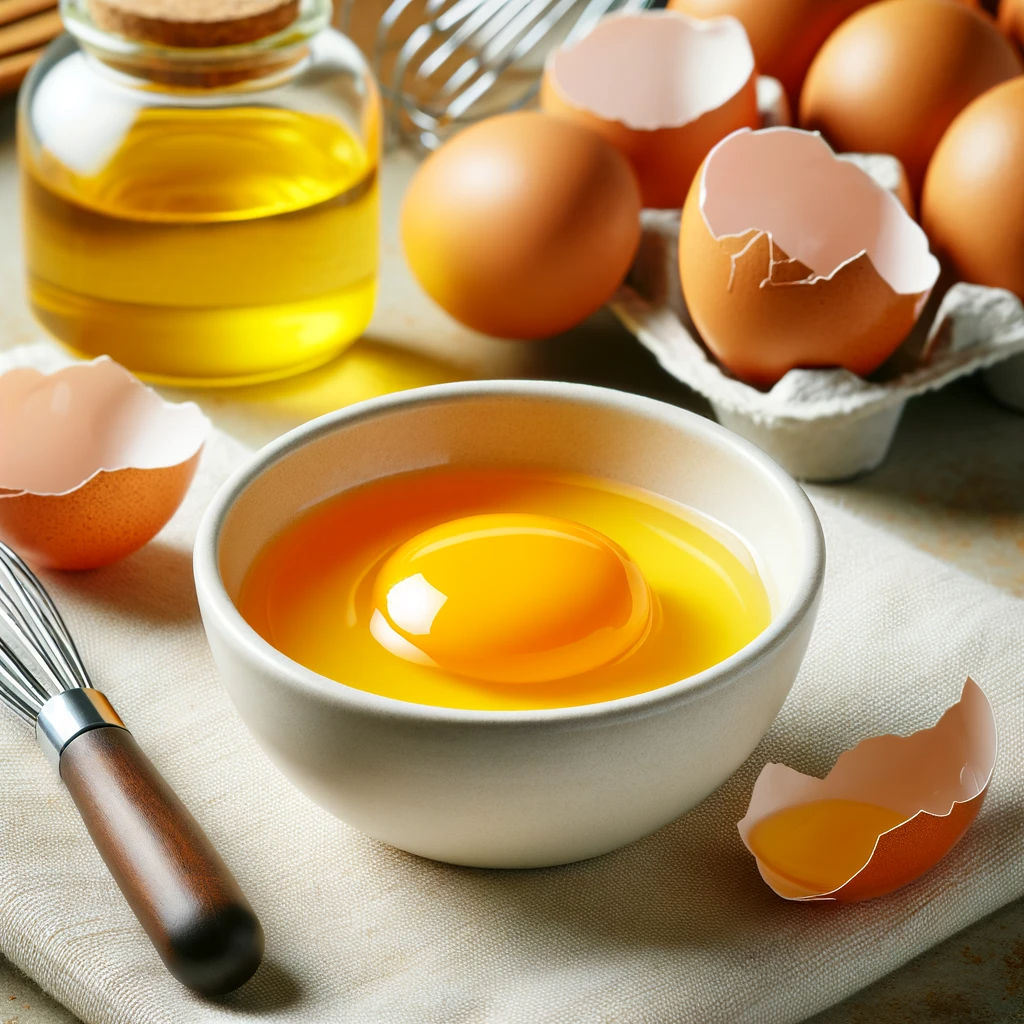
Hair breakage is a common concern, often a result of damage from styling, environmental factors, or lack of proper nourishment. A natural approach to addressing this issue is using an egg yolk shampoo. Rich in proteins, egg yolk can provide the necessary nourishment to dry, coarse, and damaged hair, promoting strength and health. This article will guide you through creating and using an egg yolk-infused shampoo for healthier hair.
The Role of Protein in Hair Health
Protein is a fundamental building block of hair. It’s essential for hair strength, elasticity, and overall health. Egg yolk, being a natural source of protein, can be particularly beneficial for hair prone to breakage.
Things Needed
- One teaspoon of egg yolk.
- 250 ml of your choice of shampoo.
Steps to Prepare
- Mixing the Ingredients: In a container, mix one teaspoon of egg yolk with 250 ml of shampoo. Ensure that the yolk is fully integrated into the shampoo.
- Shaking the Bottle: Once mixed, shake the bottle well to ensure that the egg yolk is evenly distributed throughout the shampoo.
How to Apply
- Apply the egg yolk shampoo to wet hair, just as you would with any regular shampoo.
- Massage it into your scalp and through the lengths of your hair.
- Rinse thoroughly with water.
Storing the Shampoo
- Store the egg yolk shampoo in the refrigerator between uses to preserve its freshness.
Frequency of Application
For the best results, use this protein shampoo every 15 days.
Benefits
- Strengthens Hair: The protein in egg yolk fortifies the hair strands, reducing breakage.
- Moisturizes Dry Hair: Egg yolk provides essential moisture to dry and coarse hair.
- Enhances Shine: Regular use can lead to shinier, healthier-looking hair.
- Softens Hair: It helps in softening the hair texture, making it more manageable.
Precautions
- If you have an egg allergy, avoid using this shampoo.
- Ensure the shampoo is thoroughly washed out to prevent any residue or smell.
Tips for Enhanced Effectiveness
- Use a mild, sulfate-free shampoo as the base for better results.
- Combine this treatment with a balanced diet rich in proteins and vitamins.
- Regularly trim your hair to prevent split ends, which can lead to breakage.
Additional Insights: The Importance of a Balanced Hair Care Routine
In addition to using egg yolk shampoo, maintaining a balanced hair care routine including conditioning, gentle styling, and protection from environmental damage is crucial for overall hair health.
Conclusion
Egg yolk shampoo is a simple, natural way to address hair breakage and enhance hair health. By incorporating this homemade protein treatment into your hair care routine, you can achieve stronger, softer, and healthier hair. Remember, the key to great hair is consistency in care and using the right products for your hair type.

Healthy hair is a sign of overall well-being and beauty. Hair breakage, weakness, and dullness are common issues that many people face. A protein hair mask, made with natural ingredients, offers an effective solution to these problems. This article will guide you through creating a protein hair mask that can strengthen weak hair, treat dullness, add shine, and promote faster hair growth.
The Importance of Protein for Hair Health
Protein is a vital component of hair, as it makes up the hair’s structure. A protein-rich hair mask can replenish and repair damaged hair fibers, enhancing hair strength and vitality.
Things Needed
- One egg yolk.
- One cup of fresh yogurt.
- ¼ teaspoon of vanilla powder (optional for smell).
Steps to Prepare
- Combining Ingredients: In a bowl, mix the egg yolk, fresh yogurt, and vanilla powder (if using) together.
- Creating a Smooth Mixture: Ensure that the ingredients are thoroughly blended to form a uniform mixture.
How to Apply
- Start by applying the protein mask directly to your scalp.
- Gradually work the mask through your hair, ensuring that it reaches the ends.
- Massage your scalp gently to enhance absorption and stimulate blood flow.
- Cover your hair with a plastic cap to lock in moisture and nutrients.
- Leave the mask on for about an hour for deep conditioning.
- Wash your hair well with a shampoo designed for hair breakage.
Frequency of Application
For optimal results, use this protein mask every 15 days or at least once a month.
Benefits
- Strengthens Weak Hair: The protein in egg yolk fortifies hair strands, reducing breakage.
- Revives Dull Hair: Yogurt provides moisture and luster, revitalizing lifeless hair.
- Promotes Hair Growth: Regular use of the mask can stimulate faster hair growth.
- Adds Shine: The natural ingredients impart a healthy shine to the hair.
Precautions
- Ensure you’re not allergic to any of the ingredients.
- Avoid using hot water to wash off the mask, as it can cook the egg.
Tips for Enhanced Effectiveness
- Use organic, fresh ingredients for the best results.
- Allow the mask to reach room temperature before applying if you have a sensitive scalp.
- Follow up with a gentle conditioner after shampooing.
Additional Insights: Balanced Diet for Hair Health
A diet rich in proteins, vitamins, and minerals complements the benefits of topical hair treatments, promoting overall hair health.
Conclusion
The protein hair mask offers a natural, effective way to address common hair concerns like breakage, dullness, and slow growth. By incorporating this treatment into your hair care routine, you can achieve stronger, healthier, and more vibrant hair. Consistency and patience are key to realizing the full benefits of this nutrient-rich hair mask.
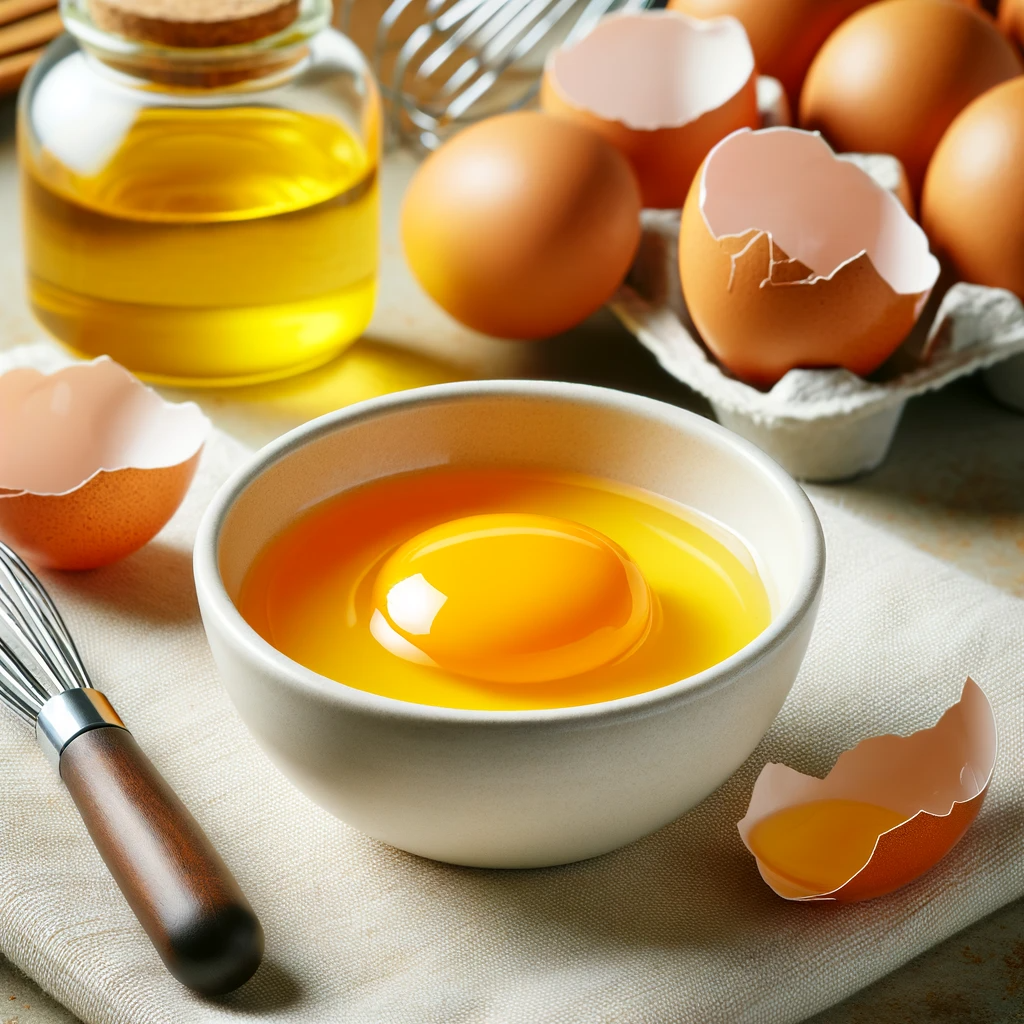
Hair health is a crucial aspect of personal grooming and self-care. Among various natural remedies for hair care, egg yolk stands out for its rich nutritional profile. This article will guide you through preparing and applying an egg yolk hair mask, enriched with oils, to enhance hair health and address common hair concerns.
The Nutritional Power of Egg Yolk for Hair
Egg yolk is a powerhouse of essential nutrients like biotin, omega-3, folate, vitamins A and D. These nutrients are vital for maintaining the natural health and strength of hair. Using egg yolk in hair care can help in reducing hair loss, accelerating hair growth, and preventing issues like brittleness, breakage, and split ends.
Things Needed
- One egg yolk.
- 2 teaspoons of extra virgin olive oil.
- 1 teaspoon of avocado oil.
- 1 teaspoon of flaxseed oil.
Steps to Prepare
- Mixing the Ingredients: In a bowl, combine the egg yolk, olive oil, avocado oil, and flaxseed oil.
- Creating a Smooth Mixture: Use a fork to stir the ingredients well, ensuring a consistent blend without lumps.
How to Apply
- Apply the egg yolk mask thoroughly from the roots to the ends of your hair.
- Gently massage the mixture into your scalp and hair for better absorption.
- Cover your hair with a plastic cap to enhance the treatment’s effectiveness.
- Leave the mask on for about 30 minutes to an hour.
- Rinse off with a purifying shampoo to remove the mask completely.
Frequency of Application
For best results, use this egg yolk hair mask once every 15 days.
Benefits
- Rich Nutrients: The combination of egg yolk and oils provides essential vitamins and proteins, nourishing the hair.
- Hair Growth Stimulation: Biotin and omega-3 in egg yolk promote hair growth.
- Prevents Hair Damage: The mask helps in reducing breakage, brittleness, and split ends.
- Scalp Nourishment: Vital nutrients from the mask improve scalp health, fostering healthier hair growth.
Precautions
- Be careful to prevent the mask from dripping into your eyes.
- Avoid using hot water to rinse off the mask, as it can cook the egg yolk.
Tips for Enhanced Effectiveness
- Use fresh, organic egg yolk for maximum benefits.
- Warm the oils slightly before mixing for better nutrient absorption.
- Follow up with a mild conditioner after shampooing to maintain hair moisture.
Additional Insights: Balanced Diet for Hair Health
A diet rich in proteins, vitamins, and omega-3 fatty acids complements the external application of the egg yolk mask, promoting overall hair health.
Conclusion
The egg yolk hair mask is a simple, natural, and effective way to nourish and strengthen your hair. Incorporating this treatment into your hair care routine can lead to significant improvements in hair texture, strength, and growth. Consistency and patience are key to realizing the full benefits of this nutrient-rich hair mask.
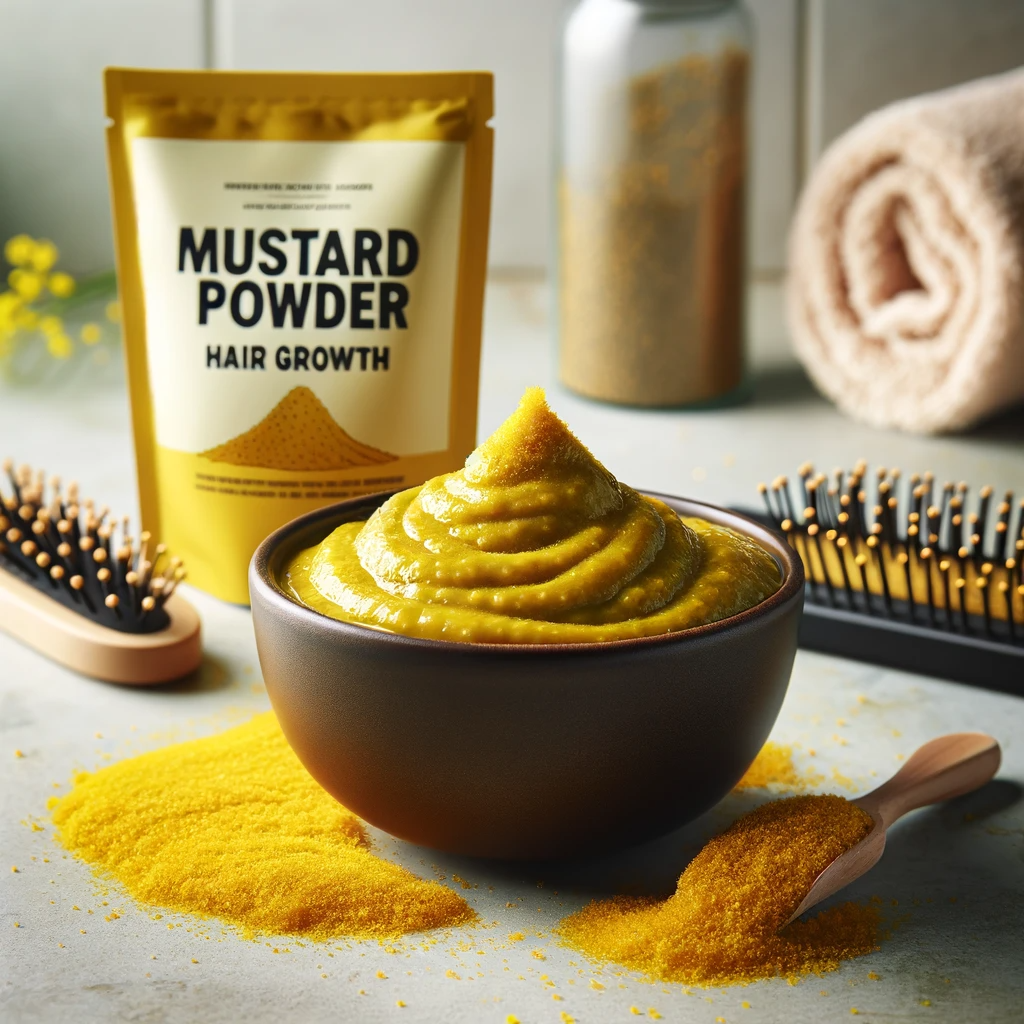
In the quest for natural hair growth solutions, mustard powder stands out as a remarkable ingredient. Known for its rich content of omega-3 fatty acids and protein, mustard powder can significantly nourish and stimulate hair growth. This article explores how to create a mustard powder hair growth mask, its application, benefits, and necessary precautions.
The Science Behind Mustard for Hair Growth
Mustard powder is not just a common kitchen spice; it’s a powerhouse of nutrients beneficial for hair. Its properties include nourishing hair follicles, stimulating growth, and preventing hair loss, making it an excellent natural remedy.
Things Needed
- 5 tablespoons of dry mustard powder.
- 3 tablespoons of warm olive oil.
- 3 tablespoons of warm sesame oil.
Steps to Prepare
- Creating the Mask: In a bowl, blend the mustard powder with warm olive and sesame oils to create a smooth paste.
- Consistency Check: Ensure the paste is neither too thick nor too runny for easy application.
How to Apply
- Apply the mask to the roots of your hair, ensuring even coverage.
- Gently massage the mask into your scalp to stimulate blood circulation.
- Cover your hair with a plastic cap to enhance the mask’s effectiveness.
- Leave the mask on for a couple of hours.
- Wash your hair with shampoo after the treatment.
Frequency of Application
For optimal results, apply this mask twice a week for a duration of 3 months.
Benefits
- Hair Growth Stimulation: Omega-3 fatty acids and protein in mustard nourish hair follicles, promoting growth.
- Scalp Health: Its antibacterial and antifungal properties ensure a healthy scalp, further aiding in hair growth.
- Prevents Hair Loss: Regular application can reduce hair fall and strengthen hair.
Precautions
- Conduct a patch test to ensure you’re not allergic to mustard.
- Avoid using the mask on broken or irritated scalp.
- Be cautious to prevent the mask from getting into your eyes.
Tips for Enhanced Effectiveness
- Use high-quality mustard powder and oils for better results.
- Warm the oils slightly before mixing to enhance nutrient absorption.
- Rinse the mask thoroughly to avoid any residue.
Additional Insights: Diet and Hair Health
Incorporating foods rich in omega-3 fatty acids and proteins in your diet can complement the mustard mask’s benefits, contributing to overall hair health.
Conclusion
The mustard powder hair growth mask offers a natural, effective solution for those seeking to boost hair growth and improve scalp health. By incorporating this treatment into your regular hair care routine, you can achieve stronger, healthier, and more vibrant hair. Patience and consistency are key to realizing the full benefits of this natural hair growth remedy.
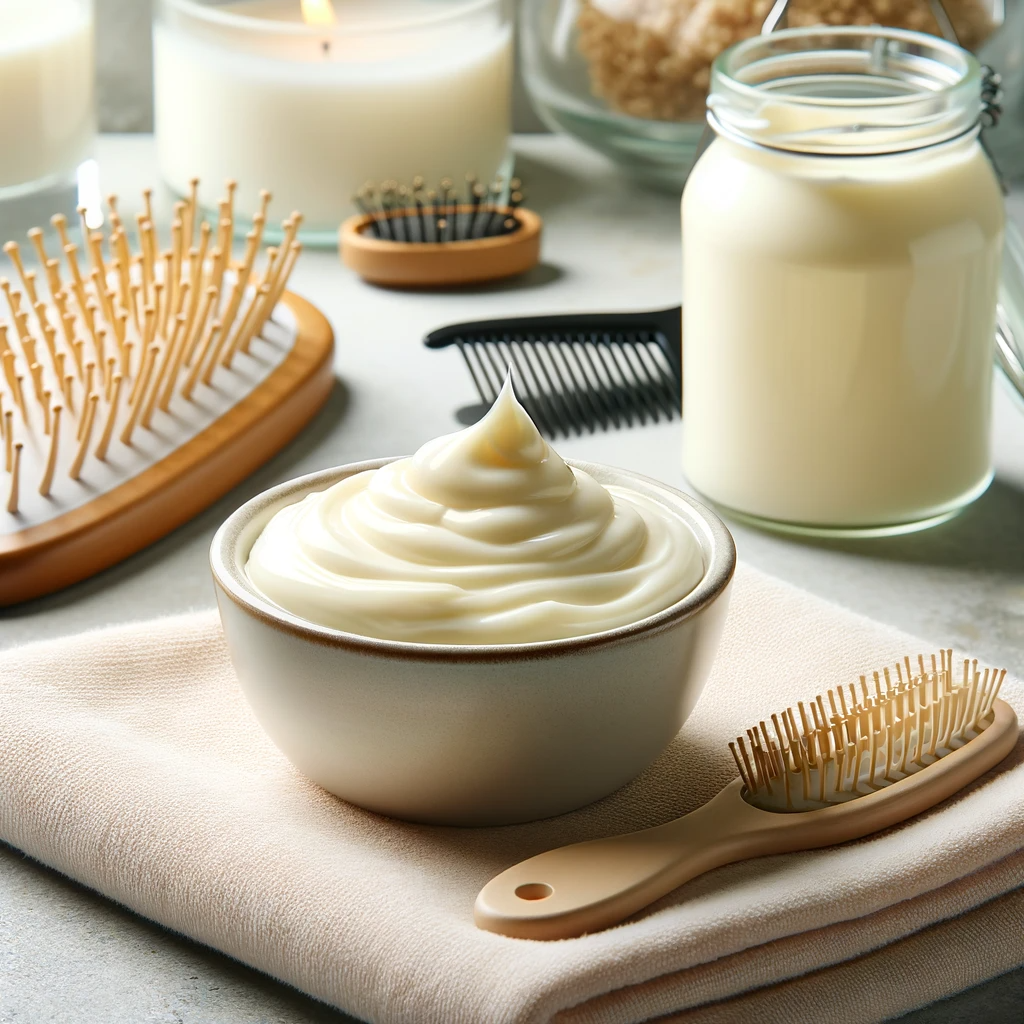
Hair health is vital for overall appearance and self-confidence. One surprisingly effective treatment for enhancing hair health is a mayonnaise hair mask. Mayonnaise, typically used as a condiment, contains ingredients like eggs, vinegar, lemon juice, and oils, which are beneficial for hair. This article will guide you through creating a mayonnaise hair mask, its application, and the numerous benefits it offers.
Understanding the Benefits of Mayonnaise for Hair
Mayonnaise is more than just a spread for sandwiches; it’s a powerhouse of nutrients for hair. The combination of its ingredients provides moisturization, nourishment, and restoration to hair, especially if it’s damaged or color-treated.
Things Needed
- ½ cup of mayonnaise.
- 3 teaspoons of extra virgin olive oil.
- 1 egg yolk.
- 1 tablespoon of lemon juice.
Steps to Prepare
- Mixing Ingredients: In a bowl, combine the mayonnaise, olive oil, egg yolk, and lemon juice.
- Blending: Mix the ingredients thoroughly to ensure a smooth, consistent mixture.
How to Apply
- Apply the mayonnaise mixture generously to your hair and scalp.
- Massage the mixture into your hair and scalp for full coverage.
- Leave the mask on for about 20 to 30 minutes, allowing the nutrients to penetrate deeply.
- Rinse out the mask with warm water, followed by your regular shampoo routine.
Benefits
- Vinegar: Reduces dandruff and adds shine to lifeless hair, while maintaining a healthy pH balance.
- Egg Yolk: Prevents hair breakage and stimulates healthy hair growth.
- Olive Oil: Strengthens hair, reducing hair loss.
- Lemon Juice: Removes excess oil build-up on the scalp.
- Mustard: Rich in omega-3 fatty acids, promoting hair growth.
Precautions
- Ensure you’re not allergic to any of the mask’s ingredients.
- Be cautious if you have sensitive skin or scalp conditions, as some ingredients may cause irritation.
Tips for Enhanced Effectiveness
- Use high-quality, fresh ingredients for the mask.
- Apply the mask to damp hair for better absorption.
- Cover your hair with a shower cap during the treatment for enhanced effectiveness.
Additional Insights: Diet and Hair Health
A balanced diet rich in omega-3 fatty acids, proteins, and vitamins complements external hair treatments, contributing to overall hair health.
Conclusion
The mayonnaise hair mask is a simple, cost-effective way to nourish and rejuvenate your hair. By incorporating this natural treatment into your hair care routine, you can achieve stronger, healthier, and shinier hair. Remember, consistency is key to reaping the full benefits of this nutrient-rich hair mask.
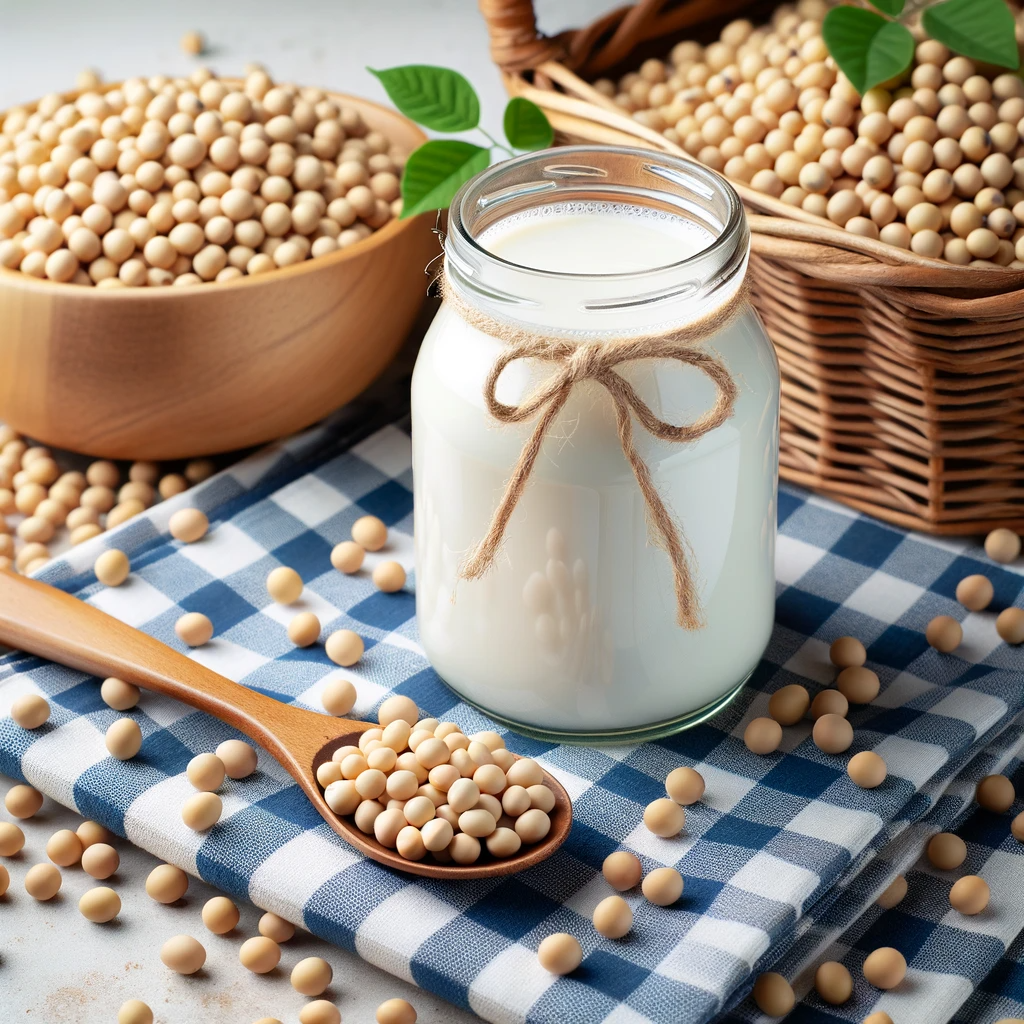
In the quest for healthy hair, natural remedies often provide surprising benefits. Soybean juice, derived from one of the most versatile legumes, has emerged as an effective solution for accelerating hair growth and enhancing hair texture. This article will explore how to harness the power of soybeans for hair care, outlining the preparation, application, and benefits of soybean juice for your hair.
The Benefits of Soybeans in Hair Care
Soybeans are packed with nutrients that are beneficial for hair health, including proteins, vitamins, and minerals. They are particularly known for their role in promoting hair growth and improving hair texture, making them an excellent natural remedy for those seeking to enhance the quality and appearance of their hair.
Things Needed
- 1 cup of soybeans.
- 2 cups of water.
Steps to Prepare
- Boil the Soybeans: Combine the soybeans and water in a pot and bring to a boil.
- Simmering: Allow the mixture to simmer for 30 minutes. This process extracts the nutrients from the soybeans into the water.
- Cooling Down: Remove the pot from heat and let the mixture cool to room temperature.
- Filtering: Strain the mixture to separate the soybean juice from the beans.
How to Apply
- After shampooing your hair, apply the soybean juice evenly to your hair and scalp.
- Gently massage the juice into your scalp for a few minutes.
- There is no need to rinse it out immediately; allow it to sit in your hair for a while to maximize absorption.
Frequency of Application
For best results, use this treatment 2 to 3 times a week for a period of three months. Regular use is key to achieving significant improvements in hair growth and texture.
Benefits
- Stimulates Hair Growth: Soybeans are rich in proteins that are essential for hair growth.
- Strengthens Hair: Regular application helps in reducing breakage and split ends, resulting in stronger hair.
- Enhances Shine: Soybean juice can impart a natural shine to your hair, making it look healthier and more vibrant.
Precautions
- Ensure you are not allergic to soybeans before using this treatment.
- It is advisable to do a patch test on a small section of your scalp to check for any adverse reactions.
Tips for Enhanced Effectiveness
- Combine this treatment with a balanced diet that includes other protein-rich foods to support hair growth.
- Avoid using hot water when washing your hair as it can strip natural oils, making hair dry and brittle.
Understanding Different Hair Types
Different hair types may react differently to soybean juice. It’s important to monitor your hair’s response and adjust the frequency of application accordingly.
Additional Insights: The Role of Diet in Hair Health
Your diet plays a crucial role in maintaining healthy hair. Including soybeans and other nutrient-rich foods in your diet can complement external hair treatments.
Conclusion
Soybean juice offers a simple, natural, and effective way to enhance hair growth and improve hair health. By incorporating this natural remedy into your hair care routine and adopting a healthy lifestyle, you can achieve stronger, healthier, and more lustrous hair. Remember, patience and consistency are key in natural hair care for long-lasting benefits.
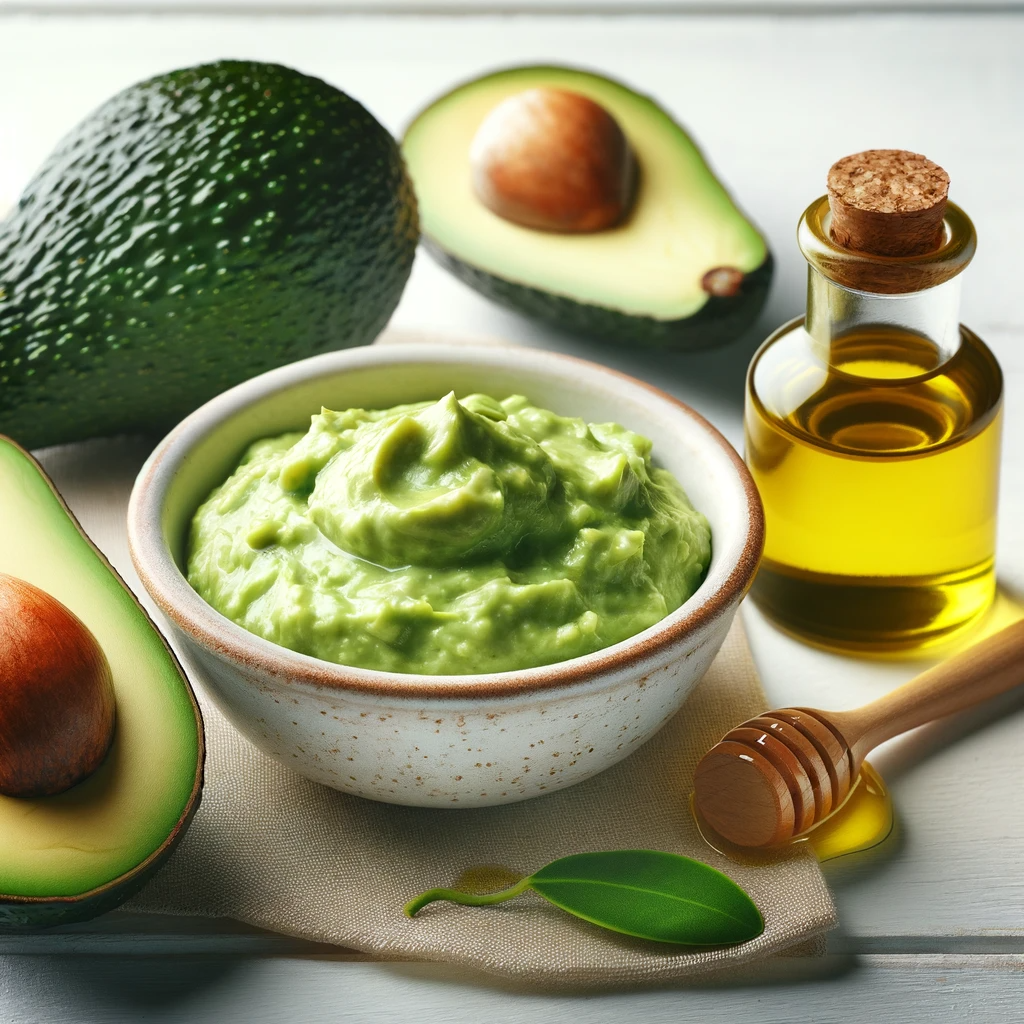
In the pursuit of healthy, vibrant hair, natural remedies often surpass chemical treatments in both safety and effectiveness. An olive oil and avocado hair mask is a perfect example of this, offering a deeply nourishing treatment for all hair types. This article will guide you through preparing and applying this natural hair mask, outlining its numerous benefits for hair health.
The Power of Natural Ingredients in Hair Care
Utilizing natural ingredients like olive oil, avocado, yogurt, egg yolk, and honey can significantly improve hair health. Each ingredient brings unique properties that contribute to hair strength, moisture, and shine.
Things Needed
- 3 tablespoons of extra virgin olive oil.
- One ripe avocado, peeled.
- 1 cup of yogurt.
- 1 egg yolk.
- 1 tablespoon of pure honey (optional).
Steps to Prepare
- Blend the Ingredients: Combine the olive oil, avocado, yogurt, egg yolk, and honey in a food processor.
- Process to Smoothness: Blend for 2 minutes or until the mixture is smooth and creamy, ensuring no chunks remain.
How to Apply
- Apply the hair mask evenly from the roots to the ends of your hair.
- Massage the mask into your scalp and hair for a few minutes.
- Cover your hair with a shower cap or a warm towel.
- Leave the mask on for at least 30 minutes for deep conditioning.
Frequency of Application
For optimal results, apply this hair mask once a week. Regular use will enhance the mask’s benefits for your hair.
Benefits
- Olive Oil: Rich in antioxidants and vitamins, it nourishes the scalp, promotes hair growth, and adds shine.
- Avocado: Packed with vitamins and essential fatty acids, it moisturizes and strengthens hair.
- Yogurt: Contains proteins and lactic acid that help in hydrating and smoothing the hair.
- Egg Yolk: A natural source of proteins and biotin, crucial for hair strength and growth.
- Honey (Optional): Acts as a natural humectant, adding moisture and shine to the hair.
Precautions
- Ensure you’re not allergic to any of the ingredients.
- Rinse the mask thoroughly to avoid any residue in your hair.
Tips for Enhanced Effectiveness
- Use ripe avocados for easy blending and maximum nutrients.
- Apply the mask to slightly damp hair for better absorption.
- Rinse the mask with lukewarm water and follow with a mild shampoo and conditioner.
Understanding Hair Types
Different hair types may respond differently to this mask. Adjust the frequency of use and the amount of each ingredient based on your hair type and condition.
Additional Insights: The Role of Diet in Hair Health
A balanced diet, rich in vitamins, minerals, and proteins, complements external hair treatments, contributing to overall hair health and growth.
Conclusion
The olive oil and avocado hair mask is a simple, effective way to nourish and revitalize your hair. By regularly incorporating this natural remedy into your hair care routine, you can achieve stronger, healthier, and more lustrous hair. Remember, consistency is key in natural hair care for long-lasting benefits.

Hair damage is a widespread issue, often resulting from improper care and harsh styling practices. Recognizing the early signs of hair damage is essential for preventing further harm and restoring the health and beauty of your locks. This article delves into the common indicators of hair damage and the primary reasons behind it, offering insights into maintaining healthy, luscious hair.
Signs of Damaged Hair
Damaged hair exhibits several tell-tale signs that can be easily spotted with careful observation:
- Split Ends: The most common sign, indicating the fraying or splitting of the hair shaft due to dryness or mechanical stress.
- Dulled Shine: Healthy hair has a natural shine, which is lost when the hair is damaged, leaving it looking dull and lifeless.
- Tangles and Knots: Excessive tangling is a sign of damaged hair cuticles, making hair difficult to comb and prone to breakage.
- Brittleness and Dryness: Hair becomes brittle and dry when deprived of moisture, leading to breakage with minimal manipulation.
- Frequent Breakage: Weakened hair tends to break easily, indicating compromised hair strength and health.
- Lifelessness: Lack of volume and bounce, leaving hair looking flat and lifeless.
Causes of Hair Breakage and Damage
Understanding the reasons behind hair damage is crucial for prevention and treatment:
- Lack of Moisture: Essential for hair elasticity and strength, its absence makes hair brittle.
- Excessive Heat Styling: Tools like straighteners and curling irons can weaken hair, especially when used frequently or at high temperatures.
- Blow-Drying Wet Hair: Applying high heat to wet hair causes significant stress, leading to cuticle damage.
- Chemical Exposure: Treatments like coloring, bleaching, and perming involve harsh chemicals that can weaken the hair structure.
- Overuse of Hair Dyes: Frequent coloring strips hair of its natural oils and proteins, leading to dryness and breakage.
- Bleaching Products: They lift the hair cuticle, making it prone to dryness and damage.
- Cotton Pillowcases: They can create friction, leading to hair breakage during sleep.
- Rough Towels: Vigorously drying hair with coarse towels can damage the cuticle.
- Over-washing: Strips hair of its natural oils, causing dryness.
- Chemical Straightening: Alters the natural structure of hair, weakening it.
- Excessive Combing: Especially with hard combs, can cause mechanical stress and breakage.
Preventative Measures and Care
- Hydrate Your Hair: Regular use of moisturizing products like conditioners and hair masks.
- Limit Heat Styling: Use lower heat settings and protective sprays.
- Gentle Drying: Pat hair dry and use microfiber towels.
- Chemical Treatment Moderation: Limit the frequency of chemical treatments and use protective products.
- Silk or Satin Pillowcases: To reduce friction while sleeping.
- Regular Trims: To remove split ends and prevent further splitting.
- Balanced Washing Routine: Avoid over-washing and use gentle, sulfate-free shampoos.
- Diet and Hydration: A balanced diet rich in vitamins and minerals supports hair health.
Conclusion
Recognizing the signs of damaged hair and understanding the causes are pivotal in adopting a hair care routine that prevents further damage and restores hair health. Embracing gentler styling practices, proper hydration, and nourishment can lead to stronger, healthier, and more vibrant hair. Remember, the journey to healthier hair is gradual, requiring patience, consistency, and the right care.
A healthy scalp is the foundation of healthy hair. One way to enhance scalp health is through the use of natural ingredients like essential oils in your shampoo. Geranium essential oil, known for its hair strengthening properties, is an excellent choice for a stimulating scalp shampoo. This article will guide you through creating and using a geranium oil-infused shampoo for improved scalp and hair health.
The Benefits of Natural Ingredients in Hair Care
Incorporating natural ingredients like essential oils into hair care routines has gained popularity due to their effectiveness and minimal side effects compared to synthetic products. Geranium essential oil, in particular, is celebrated for its ability to strengthen hair follicles and improve scalp health.
Things Needed
- 1 drop of geranium essential oil.
- 1 tablespoon of your regular shampoo.
Steps to Prepare
- Mixing the Ingredients: In a small container, mix one drop of geranium essential oil with one tablespoon of shampoo.
- Blending Thoroughly: Ensure the oil is evenly distributed throughout the shampoo.
How to Apply
- Apply the geranium-infused shampoo directly to your scalp.
- Gently massage the scalp with your fingertips. This massage not only helps in distributing the shampoo evenly but also stimulates blood circulation in the scalp.
- Rinse the shampoo thoroughly from your hair.
Frequency of Use
Use this shampoo as part of your regular hair washing routine to continuously reap the benefits of geranium essential oil.
Benefits
- Stimulates Blood Flow: Geranium essential oil can help increase blood circulation to the scalp, promoting hair growth.
- Strengthens Hair Follicles: Regular use can strengthen hair follicles, reducing hair fall.
- Improves Hair Health: It contributes to overall hair health, making hair strands stronger and healthier.
Pre-Wash Oil Treatment
For added benefits, mix 5-10 drops of geranium essential oil with ½ cup of warm coconut oil. Use this mixture as a pre-wash oil treatment for enhanced nourishment.
Precautions
- Essential oils are potent. Always use the recommended amount.
- Conduct a patch test to ensure you are not allergic to geranium essential oil.
Tips for Enhanced Effectiveness
- Incorporate a balanced diet and adequate hydration into your lifestyle to support hair health from within.
- Avoid excessive heat styling and harsh chemical treatments to prevent hair damage.
Understanding Different Hair Types
Consider your hair type when using this shampoo. Different hair types may respond differently to essential oil treatments.
Additional Insights: The Role of Essential Oils in Hair Care
Essential oils have long been used in hair care for their therapeutic properties. Geranium oil, with its hair strengthening and scalp stimulating properties, is a valuable addition to any hair care regimen.
Conclusion
Creating a stimulating scalp shampoo with geranium essential oil is a simple and effective way to enhance scalp health and strengthen hair. Regular use of this shampoo, combined with a healthy lifestyle, can lead to noticeable improvements in hair quality and scalp health. Remember, consistency is key to achieving and maintaining the best results.
In the realm of hair care, natural remedies continue to gain popularity for their effectiveness and minimal side effects. Essential oils like lavender and rosemary are especially renowned for their benefits in promoting hair growth. This article presents a simple yet potent shampoo recipe combining these essential oils to stimulate hair growth.
The Power of Essential Oils in Hair Care
Lavender and rosemary oils are not just pleasing to the senses; they’re packed with properties that can significantly improve scalp health and hair growth. Incorporating these oils into your hair care routine can provide a natural boost to your hair’s health and appearance.
Things Needed
- 1 drop of lavender oil.
- 1 drop of rosemary oil.
- One tablespoon of your regular shampoo.
Steps to Prepare
- Mixing Ingredients: In a small bowl, combine one tablespoon of shampoo with one drop each of lavender and rosemary oils.
- Blending Well: Ensure that the oils are thoroughly mixed into the shampoo for even distribution.
How to Apply
- Apply the shampoo mixture to your hair, focusing mainly on the scalp.
- Massage the scalp gently but firmly for 2 minutes. This massage not only helps in evenly distributing the shampoo but also stimulates blood flow to the scalp.
- Rinse thoroughly after application.
Frequency of Use
Use this shampoo mixture as part of your regular hair washing routine. Consistent use is key to observing significant improvements in hair growth.
Benefits
- Lavender Oil: Known for its soothing properties, lavender oil can reduce scalp inflammation and dryness. It also helps in promoting hair growth.
- Rosemary Oil: This oil is celebrated for its ability to stimulate hair follicles, enhance hair growth, and improve hair thickness.
- Combined Effectiveness: Together, lavender and rosemary oils create a synergistic effect that enhances scalp health and encourages hair growth.
Precautions
- Essential oils are potent; ensure you only use the recommended amount.
- Conduct a patch test before applying the mixture to your entire scalp, especially if you have sensitive skin.
Tips for Enhanced Effectiveness
- Regularly massage your scalp, even on non-wash days, to improve blood circulation.
- Maintain a balanced diet rich in vitamins and minerals to support hair health from within.
- Avoid using hot water to wash your hair, as it can strip natural oils and lead to dryness.
Understanding Different Hair Types
Recognize that different hair types may react differently to essential oils. Adjust the frequency of use based on how your hair and scalp respond.
Additional Insights: The Role of Natural Ingredients in Hair Health
The trend towards natural ingredients in hair care is grounded in their ability to provide effective, gentle treatment without harsh chemicals.
Conclusion
This simple shampoo recipe utilizing lavender and rosemary oils offers a natural, effective way to encourage hair growth. By incorporating it into your regular hair care routine and complementing it with healthy lifestyle choices, you can achieve stronger, healthier, and more vibrant hair. Consistency and patience are key in reaping the full benefits of this natural hair growth solution.
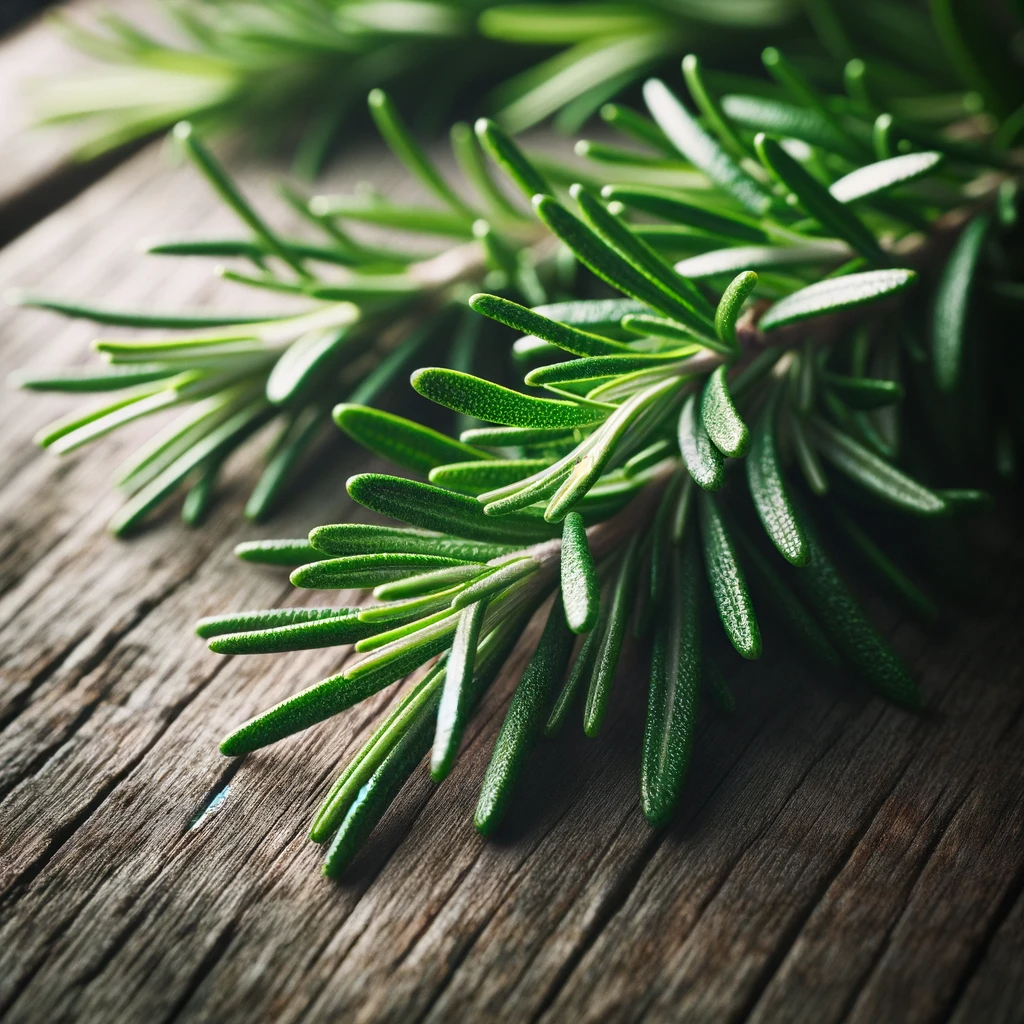
Fine hair often requires special care to maintain its health and appearance. One effective natural solution is incorporating rosemary, a herb renowned for its hair benefits, into your shampoo routine. This article provides a detailed guide on creating and using a rosemary-infused shampoo, ideal for those with fine hair.
The Natural Power of Rosemary in Hair Care
Rosemary has been used for centuries in hair care for its ability to stimulate hair growth, improve scalp health, and enhance hair’s overall texture and appearance. It’s especially beneficial for fine hair, which tends to be more delicate and prone to damage.
Things Needed
- One tablespoon of dried rosemary herbs.
- 250 ml of any shampoo of your choice.
Steps to Prepare
- Infusing Rosemary: Add the dried rosemary directly to your shampoo bottle.
- Storage: Let the shampoo sit in a dark place for 3 to 5 days. This duration allows the rosemary to infuse properly into the shampoo.
- Before Use: Shake the bottle well before every use to ensure the rosemary is evenly distributed within the shampoo.
How to Apply
- Use this rosemary-infused shampoo as you would with any regular shampoo.
- When applying, focus on massaging the shampoo into your scalp.
- Spend about 3 minutes massaging your scalp with your fingertips to stimulate blood circulation.
Frequency of Use
Use this shampoo regularly as part of your hair care routine. Regular use will allow you to see the full benefits of rosemary on your fine hair.
Benefits
- Stimulates Hair Growth: Rosemary helps in stimulating the hair follicles, promoting hair growth.
- Scalp Health: It aids in reducing dandruff and soothing the scalp.
- Hair Strengthening: Rosemary is known for making hair stronger and improving its texture, which is particularly beneficial for fine hair.
- Adds Shine: Regular use of rosemary shampoo can add a natural shine to your hair.
Precautions
- Ensure that you are not allergic to rosemary. Conduct a patch test if necessary.
- Avoid using rosemary in excess, as it can be potent.
Tips for Enhanced Effectiveness
- Complement your hair care routine with a balanced diet rich in nutrients.
- Avoid excessive heat styling and harsh chemical treatments.
- Regularly trim your hair to prevent split ends, which are more common in fine hair.
Understanding Hair Types
Consider your hair type when using this treatment. Fine hair may react differently to this treatment than thicker hair types, so monitor your hair’s response and adjust usage accordingly.
Additional Insights: The Role of Herbs in Hair Care
Incorporating herbs like rosemary into hair care routines is an age-old practice. Their natural properties can offer significant benefits without the harsh side effects of chemical products.
Conclusion
Rosemary shampoo is a simple, natural way to care for fine hair. By following this recipe and regularly using the shampoo, you can enjoy stronger, healthier, and more vibrant hair. Remember, natural remedies often require consistency and time to show results, so patience is key in achieving the desired outcome for your hair.

Licorice root, known for its myriad benefits in herbal medicine, has also carved out a niche in hair care. This in-depth article explores an innovative licorice root recipe that can be incorporated into your shampoo for faster hair growth. It’s a natural approach to achieving longer, healthier hair.
The Benefits of Licorice Root in Hair Care
Licorice root is not just a flavoring agent; it’s packed with properties beneficial for hair health. This recipe utilizes its natural goodness to stimulate hair growth and improve hair texture.
Things Needed
- 3 tablespoons of minced licorice root.
- A piece of gauze.
- 250 ml of your regular shampoo.
- A dark, cool storage place.
Steps to Prepare
- Encasing Licorice Root: Place the minced licorice root in the gauze and tie it securely to create a small pouch.
- Infusing the Shampoo: Immerse the gauze pouch with licorice root into the shampoo bottle.
- Storage: Store the shampoo with the licorice pouch in a dark place to allow the infusion of the root into the shampoo.
- Shaking: Periodically shake the bottle to ensure the licorice root’s properties are well-infused into the shampoo.
How to Apply
- When shampooing, focus on applying this licorice-infused shampoo primarily to the scalp.
- Massage the scalp gently for about 3 minutes to enhance blood circulation and ensure the absorption of the licorice properties.
- Rinse thoroughly after application.
Frequency of Use
For best results, use this licorice root-infused shampoo twice a week, consistently for 3 months, to notice significant hair growth.
Benefits
- Stimulates Hair Growth: Licorice root is rich in compounds that promote hair growth and improve hair health.
- Scalp Health: Regular use can also aid in maintaining a healthy scalp, reducing dandruff and irritation.
- Strengthens Hair: Over time, this treatment can lead to stronger, thicker hair.
Precautions
- Ensure that the licorice root is properly encased in the gauze to prevent any pieces from getting into the hair.
- If you have a sensitive scalp or skin allergies, conduct a patch test before regular use.
Tips for Enhanced Effectiveness
- Combine this hair treatment with a balanced diet rich in vitamins and minerals for overall hair health.
- Avoid harsh chemical treatments and heat styling to prevent damage to your hair.
Understanding Hair Types
Different hair types may react differently to this treatment. It’s important to observe how your hair responds and adjust the frequency of use accordingly.
Additional Insights: The Role of Natural Ingredients in Hair Care
The trend towards natural ingredients in hair care is growing, as they offer effective results without the harsh side effects of chemicals.
Conclusion
Incorporating licorice root into your shampoo is an easy, natural way to stimulate hair growth. This treatment, rooted in herbal wisdom, offers a chemical-free alternative for those seeking longer, healthier hair. With consistent use and proper hair care practices, you can achieve noticeable improvements in hair length and health.
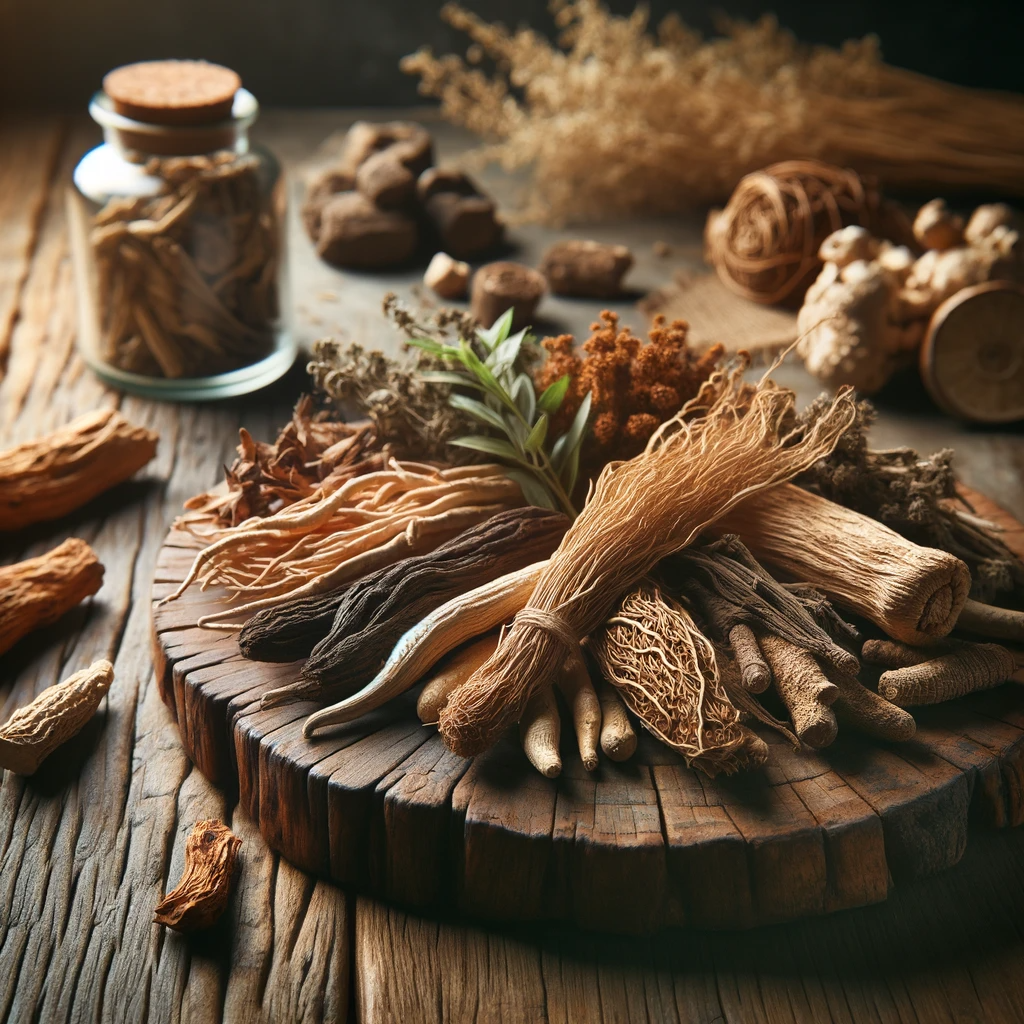
Licorice root, known for its sweet flavor and medicinal properties, has been a staple in traditional remedies for centuries. Rich in phytoestrogens, it not only stimulates new hair growth but also strengthens and elongates hair. This article explores a simple licorice root recipe designed to enhance hair health.
The Ancient Wisdom of Using Licorice in Hair Care
Licorice root has been used in various cultures for its health benefits, including hair care. Its natural compounds contribute to its effectiveness in promoting hair growth and improving hair strength.
Things Needed
- 2 cups of pure or mineral water.
- 2 tablespoons of dried, crushed licorice root.
Steps to Prepare
- Boiling Water: Start by heating the water until it reaches a boil.
- Adding Licorice Root: Add the crushed licorice root to the boiling water.
- Boiling the Mixture: Let the mixture boil for about 10 minutes.
- Cooling Down: Remove the mixture from heat and allow it to cool down to a comfortable temperature.
How to Apply
- Use the cooled licorice root tonic as a final rinse for your hair after shampooing.
- Ensure even distribution by gently massaging it into your scalp and hair.
Frequency of Application
For optimal results, use this licorice root rinse one to two times a week, consistently for about 3 months.
Benefits
- Stimulates Hair Growth: The phytoestrogens in licorice root promote new hair growth.
- Strengthens Hair: Regular use of licorice root strengthens hair, making it less prone to breakage and fall.
- Adds Length: With its nourishing properties, licorice root can help in growing hair longer.
- Scalp Health: Its soothing properties can help in reducing scalp irritations and dandruff.
Precautions
- Perform a patch test to ensure you’re not allergic to licorice root.
- Avoid using licorice root if you have hypertension, as it can sometimes affect blood pressure.
Tips for Enhanced Effectiveness
- Combine this treatment with a balanced diet rich in vitamins and minerals to support overall hair health.
- Stay hydrated and avoid harsh chemical treatments on your hair.
Understanding Different Hair Types
Consider your hair type when using this remedy. Oily, dry, or combination hair types may react differently to licorice root, so adjust the frequency of use accordingly.
Additional Insights: The Role of Phytoestrogens in Hair Care
Phytoestrogens, plant-derived compounds mimicking estrogen, play a significant role in hair growth and health, making licorice root a beneficial ingredient in hair care routines.
Conclusion
The use of licorice root as a hair rinse offers a natural, effective way to stimulate hair growth, strengthen hair, and improve scalp health. By incorporating this age-old remedy into your hair care regimen and adopting a healthy lifestyle, you can achieve healthier, longer, and stronger hair. Remember, consistency is key to realizing the full benefits of this natural treatment.
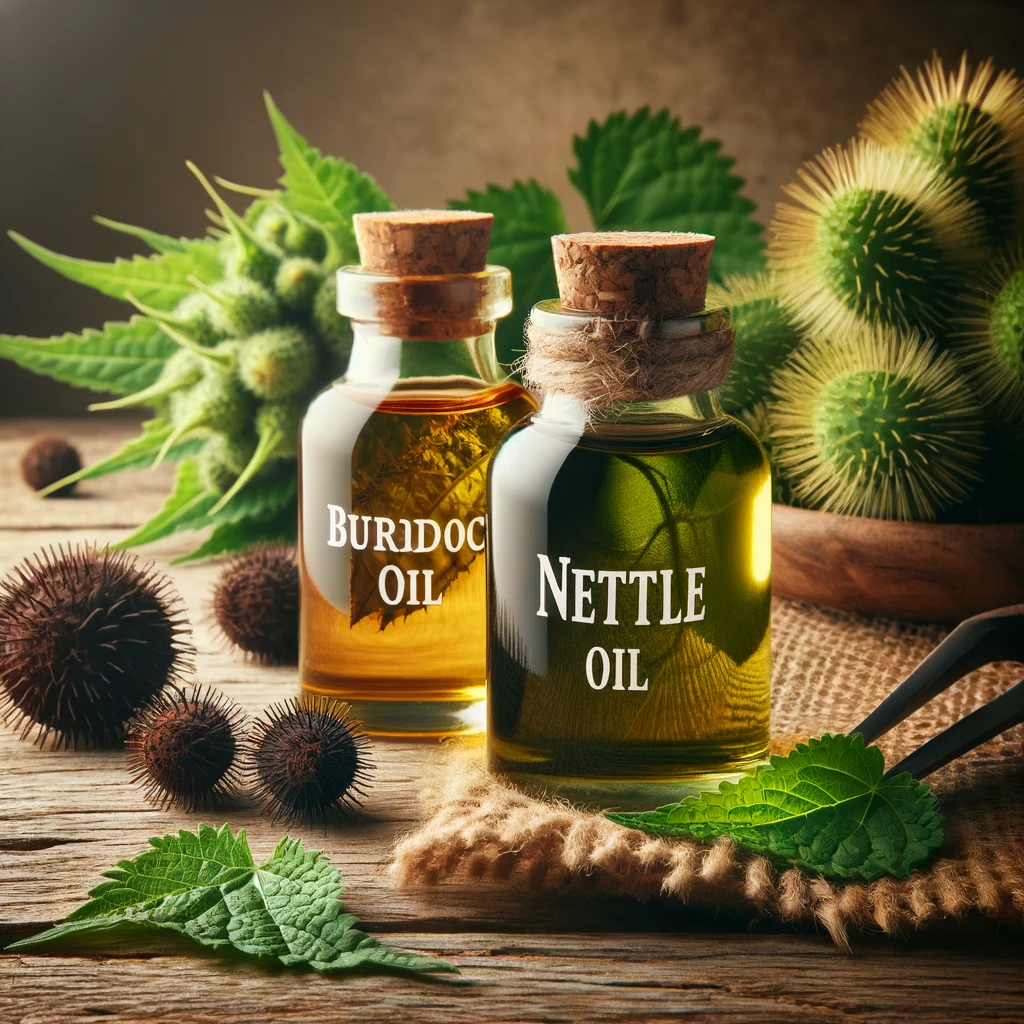
In the quest for natural hair care solutions, the combination of burdock and nettle oils emerges as a potent remedy. Rich in essential nutrients and vitamins, these oils have been historically used to stimulate hair growth, combat hair loss, and improve overall hair health. This article delves into the preparation, application, and benefits of this natural hair treatment.
The Rising Popularity of Natural Hair Treatments
With an increasing awareness of the harmful effects of chemical-laden hair products, more people are turning to natural remedies. Burdock and nettle oils, known for their nourishing properties, offer a chemical-free alternative for hair care.
Things Needed
- ¼ cup of burdock oil.
- ¼ cup of nettle oil.
Steps to Prepare
- Oil Mixture: In a bowl, combine equal parts of burdock and nettle oils.
- Preparation for Application: Ensure the oils are well mixed to form a homogenous blend.
How to Apply
- Massage the oil mixture into your scalp for approximately 7 minutes, ensuring even coverage.
- Wrap your hair with a plastic cap to enhance absorption of the oils.
- Leave the mixture in your hair for at least a couple of hours for maximum effectiveness.
- Wash your hair with shampoo and conditioner after the treatment.
Frequency of Application
For best results, repeat this treatment twice a week. It’s recommended to use this oil mixture consistently for 2 to 3 months.
Benefits
- Burdock Oil: Contains mucilage, tannins, inulin, vitamin A, and essential fatty acids, which are beneficial for hair. It helps alleviate scalp itching, redness, dandruff, and improves hair strength and shine.
- Nettle Oil: A time-honored remedy for hair loss, nettle oil enhances blood flow to the scalp, oxygenates hair follicles, and strengthens hair fibers, resulting in healthier, shinier, and fuller hair.
- Combined Effects: Together, these oils provide a comprehensive treatment for thinning hair, promoting thickness and hair growth.
Precautions
- Conduct a patch test to check for any allergic reactions to the oils.
- Be aware of the oils’ scent, which might be strong for some users.
Tips for Enhanced Effectiveness
- Complement this treatment with the consumption of nettle tea once a day to treat hair loss from within.
- Maintain a balanced diet rich in nutrients that support hair health.
Understanding Hair Types
Different hair types may respond differently to oil treatments. It’s important to consider your hair type and adjust the quantity of oil accordingly.
Additional Insights: Holistic Hair Care
A holistic approach to hair care, involving a balanced diet, adequate hydration, and stress management, can significantly boost the effectiveness of natural hair treatments.
Conclusion
Burdock and nettle oils offer a natural, effective solution for those seeking to improve their hair health without resorting to harsh chemicals. By incorporating this treatment into a regular hair care routine and complementing it with a healthy lifestyle, you can achieve stronger, healthier, and more vibrant hair. Patience and consistency are key to realizing the full benefits of these natural hair elixirs.
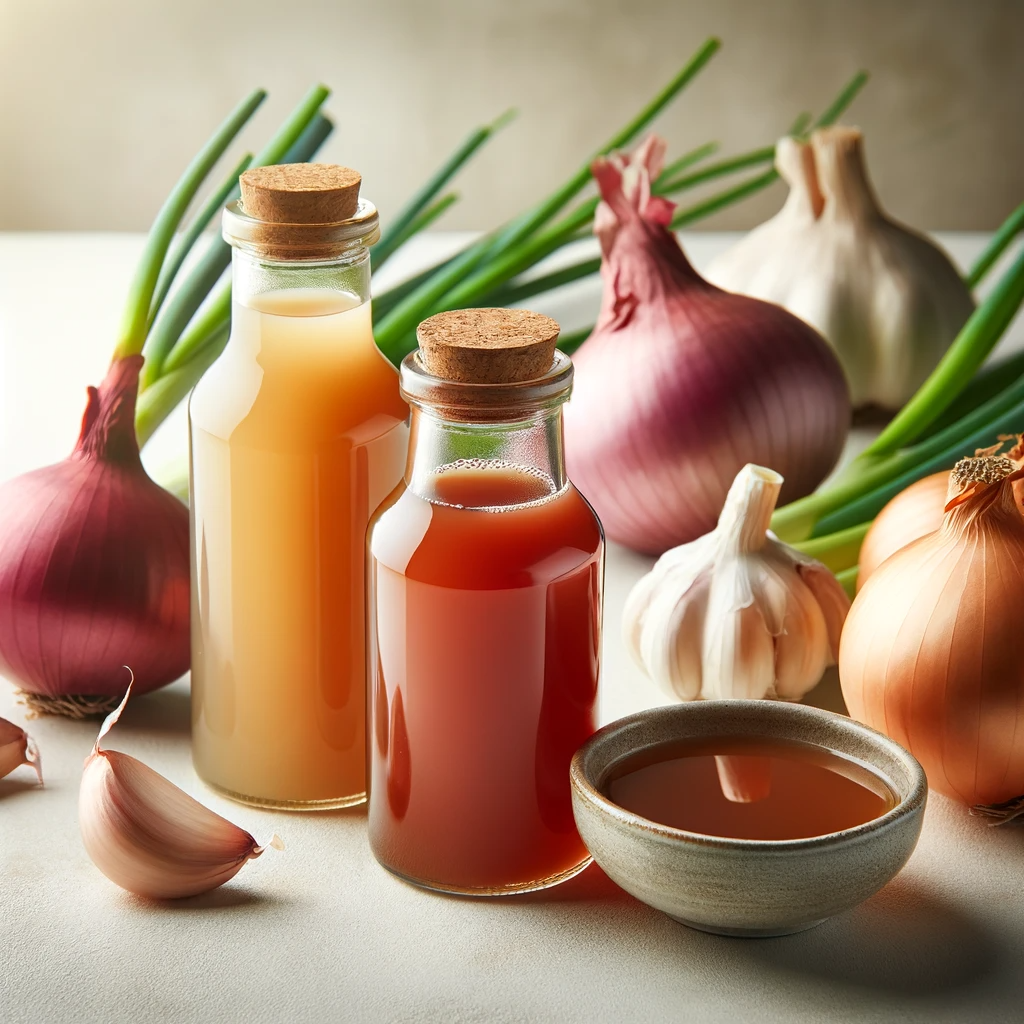
Hair loss is a common issue affecting many individuals, often leading to a loss of confidence and self-esteem. While there are numerous commercial products available, natural remedies like onion and garlic juice have gained popularity for their effectiveness in combating hair loss and promoting hair growth. This article will delve into a simple recipe using these ingredients and explore its benefits for hair health.
Understanding Hair Loss
Hair loss can be caused by various factors, including genetics, hormonal changes, nutritional deficiencies, and stress. Natural remedies, such as onion and garlic juice, offer a holistic approach to hair care, addressing these issues without the side effects of chemical treatments.
Things Needed
- One large red onion.
- 3 cloves of garlic.
Steps to Prepare
- Chop the Ingredients: Begin by cutting the red onion and garlic cloves into small pieces.
- Blending: Place the chopped ingredients into a high-speed blender. Blend until a smooth mixture is achieved.
- Filtering: Use a gauze or fine strainer to filter the juice, separating the solids from the liquid.
How to Apply
- Apply the onion and garlic juice directly to the scalp, ensuring even coverage.
- Gently massage the scalp to enhance absorption and stimulate blood circulation.
- Cover your head with a plastic cap to maximize the treatment’s effectiveness.
- Leave the mixture on the scalp for 2 to 3 hours.
- Wash your hair with shampoo to remove the juice.
Benefits
- Hair Growth Stimulation: Both onion and garlic are rich in sulfur, which helps in the regeneration of hair follicles, stimulating hair growth.
- Anti-inflammatory Properties: They have anti-inflammatory properties that help in reducing scalp infections and dandruff.
- Blood Circulation Improvement: The application of these juices improves blood circulation to the scalp, further promoting hair growth.
Precautions
- Conduct a patch test to ensure no allergic reaction to the ingredients.
- The strong smell of onion and garlic might be unpleasant for some; ensure proper ventilation during application.
Tips for Enhanced Results
- Use this treatment consistently for at least 15 days to observe significant results.
- Combine this treatment with a balanced diet rich in proteins, vitamins, and minerals to support hair health.
- Stay hydrated and manage stress levels, as these factors significantly impact hair growth.
Additional Insights: The Role of Diet in Hair Health
A balanced diet plays a crucial role in hair health. Incorporating foods rich in iron, zinc, proteins, and omega-3 fatty acids can significantly improve hair quality and growth.
Conclusion
The onion and garlic juice treatment offers a natural, cost-effective solution for hair loss and promoting hair growth. While the remedy is straightforward, its effectiveness lies in the rich, hair-benefiting compounds present in these kitchen staples. Regular use, coupled with a healthy lifestyle, can lead to visibly longer, stronger, and healthier hair in a relatively short period. Remember, patience and consistency are key to achieving the best results with natural remedies.
In the world of natural hair care, onion and garlic stand out as powerful ingredients for promoting hair growth and improving scalp health. Their rich nutritional profiles and unique properties make them ideal for a homemade shampoo that can accelerate hair growth and strengthen hair. This in-depth guide will explore how to harness the benefits of these natural ingredients to create an Onion & Garlic Faster Hair Growth Shampoo, offering a chemical-free alternative to commercial hair care products.
The Power of Natural Ingredients in Hair Care
Understanding the significance of natural ingredients in hair care is crucial. Unlike many commercial products that rely on chemicals and synthetic components, natural ingredients like onion and garlic provide a plethora of vitamins, minerals, and compounds beneficial for hair health. This section will delve into why choosing natural ingredients can be a game-changer in your hair care routine.
Things Needed
To embark on this natural hair care journey, you will need a few simple ingredients:
- 250 ml of honey shampoo or any shampoo of your choice (avoid 2-in-1 shampoos)
- 6 large cloves of garlic
- One red onion
Choosing the Right Base Shampoo
Selecting an appropriate base shampoo is an important step in this process. This section will explain why honey shampoo is recommended and what qualities to look for in a shampoo when creating a hair growth formula.
Steps to Prepare
The preparation of this natural hair growth shampoo involves several steps that are easy to follow:
- Chopping the Ingredients: Start by finely chopping the onion and garlic. This section will explain the importance of chopping the ingredients finely and how it helps in releasing their beneficial properties.
- Infusing the Shampoo: Add the chopped ingredients to your shampoo bottle. This part will discuss the infusion process, why it’s necessary, and how it enhances the shampoo’s properties.
- Storage and Infusion Time: Store the mixture in a dark place for 5 to 7 days, preferably in a refrigerator. This section will delve into why storing the shampoo in a dark, cool place is essential for the infusion process.
The Science Behind Infusion
Understanding how the infusion process works and why it is effective in extracting the beneficial properties of onion and garlic will be explored in this segment.
How to Apply
Applying this shampoo correctly is key to reaping its benefits:
- Application Technique: The method of applying the shampoo to the scalp and hair is crucial. This part will provide detailed instructions on how to apply the shampoo effectively, focusing on the scalp.
- Importance of Timing: Leaving the shampoo on the scalp for about 2 minutes is recommended. This section will explain why allowing the shampoo to sit on the scalp for this duration is important for its effectiveness.
- Rinsing Process: Thoroughly rinsing the hair after application is essential. Tips on how to rinse effectively to ensure no residue is left behind will be covered here.
Follow-up Wash
In some cases, a follow-up wash with a regular shampoo might be necessary, especially if the garlic causes an itchy scalp. This part will discuss when and how to perform a follow-up wash.
Benefits
The benefits of using this Onion & Garlic Faster Hair Growth Shampoo are numerous:
- Stimulating Hair Growth: This section will delve into how onion and garlic contribute to hair growth, referencing scientific studies and research that support their efficacy.
- Nourishing the Scalp: The nutritional content of onion and garlic, including their vitamins and minerals, plays a vital role in nourishing and revitalizing the scalp. This part will explore these nutrients in detail.
- Natural Antimicrobial Properties: Both garlic and onion possess natural antimicrobial properties that help maintain a healthy scalp environment, crucial for healthy hair growth. This segment will explain these properties and their significance.
- Strengthening Hair Follicles: The role of onion and garlic in strengthening hair follicles and preventing hair breakage will be discussed, highlighting how they contribute to overall hair health.
Precautions
While this natural remedy is generally safe, certain precautions should be considered:
- Allergy Concerns: Understanding the importance of allergy tests before using this shampoo, especially for those sensitive to garlic or onion, will be covered in this section.
- Avoiding Eye Irritation: Tips on how to apply the shampoo while avoiding eye contact to prevent irritation will be provided.
- Scent Considerations: Addressing the potent smell of garlic and onion and ways to mitigate it during and after the application process will be discussed.
Tips
To maximize the effectiveness of this homemade shampoo, several tips will be provided:
- Enhancing Application Technique: Techniques for massaging the scalp during application to stimulate blood flow will be explored.
- Optimizing Infusion Time: Tips on how to determine the optimal infusion time based on ingredient potency will be discussed.
- Maintaining Hair Health: Additional advice on maintaining overall hair health while using this treatment, such as regular trims and avoiding heat styling, will be provided.
Conclusion
Concluding the article, a summary of the key points discussed will be presented, emphasizing the effectiveness of Onion & Garlic Faster Hair Growth Shampoo as a natural, cost-effective solution for promoting hair growth and improving hair health. The conclusion will reinforce the benefits of turning to nature for hair care solutions and encourage readers to embrace natural remedies in their hair care routines.
Further Insights
In this final section, further insights into natural hair care will be provided, including:
- Diet and Hair Health: The importance of a healthy diet rich in nutrients for supporting hair growth and how it complements the use of natural hair care treatments will be discussed.
- Lifestyle Factors Affecting Hair Health: Factors such as stress, sleep, and exercise that can impact hair health will be explored, providing a holistic view of hair care.
- Exploring Other Natural Ingredients: A brief overview of other natural ingredients beneficial for hair health, such as aloe vera and coconut oil, and how they can be incorporated into hair care routines will be presented.
By integrating these insights with the use of the Onion & Garlic Faster Hair Growth Shampoo, readers can achieve a well-rounded approach to maintaining healthy, vibrant hair naturally.
Hair fall-out and the quest for regrowing and lengthening hair are common concerns for many. A natural solution to these issues can be found in a homemade scalp lotion using garlic. Known for its potent properties, garlic can effectively halt hair fall-out, stimulate new hair growth, and contribute to longer hair. However, it’s important to note that this remedy should not be used by anyone allergic to garlic. This article will guide you through the process of preparing and applying this garlic scalp lotion.
Things Needed
To prepare this scalp lotion, the following ingredients are required:
- 3 cloves of garlic
- 200 ml of pure water
Steps to Prepare
Creating the garlic scalp lotion involves a few straightforward steps:
- Prepare the Garlic: Chop the garlic cloves into small pieces.
- Boil Water: Heat the water until it reaches a boiling point.
- Infuse Garlic: Remove the water from heat and add the garlic pieces to it. Cover the container and allow it to cool.
- Transfer to Spray Bottle: Once cooled, transfer the lotion to a spray bottle.
How to Apply
The application process is simple and effective:
- Spray onto Scalp: Use the spray bottle to apply the lotion to your scalp once or twice a day.
- Leave Overnight: The tonic can be left on the scalp until the next day without washing.
Benefits
The garlic scalp lotion offers several benefits:
- Stops Hair Fall-Out: Garlic is effective in reducing hair loss.
- Stimulates Hair Regrowth: Promotes the growth of new hair.
- Encourages Hair Lengthening: Contributes to longer hair over time.
- Natural and Safe: Provides a chemical-free alternative to commercial hair products.
Precautions
While using this remedy, consider the following:
- Allergy Warning: Do not use if allergic to garlic.
- Avoid Eye Contact: Ensure the lotion does not get into the eyes.
Tips
To maximize the effectiveness of the lotion:
- Fresh Preparation: Prepare the lotion fresh each time before use.
- Regular Use: For best results, use consistently for at least 3 weeks.
Conclusion
Garlic scalp lotion is an effective, natural remedy for addressing hair fall-out, stimulating new hair growth, and achieving longer hair. Its ease of preparation and application makes it a convenient and cost-effective solution. Regular use can lead to noticeable improvements in hair health and length.
Additional Considerations
Enhance overall hair health by:
- Balanced Diet: A nutritious diet supports hair growth.
- Hydration: Proper hydration is essential for healthy hair.
- Gentle Hair Care: Avoid harsh treatments and heat styling to maintain hair integrity.
By integrating this garlic scalp lotion into your hair care regimen and following healthy practices, you can achieve stronger, healthier, and longer hair.
Ginger is not only a staple in culinary arts but also a powerful ingredient in hair care, primarily due to its rich content of essential oils, minerals, and vitamins. This article will explore how ginger, packed with nutrients like Iron, Magnesium, Potassium, Phosphorous, Zinc, Vitamin C, Vitamin E, and Vitamin B6, can enhance hair health, leading to stronger, healthier, and shinier hair. Additionally, we’ll discuss ginger’s effectiveness in treating dandruff and soothing dry, itchy scalps.
Things Needed
To prepare this ginger-based hair tonic, gather the following ingredients:
- 1 cup of mineral or pure water
- ½ tablespoon of fresh ginger or ginger powder
- 1 tablespoon of chamomile
- 1 tablespoon of dry rosemary leaves
Steps to Prepare
The preparation process is straightforward:
- Boiling Ingredients: Combine water, ginger, chamomile, and rosemary in a pot and bring to a boil.
- Cooling Down: Allow the mixture to cool to a lukewarm temperature.
- Straining: Strain to remove solids, retaining the liquid.
How to Apply
Effective application ensures maximum benefits:
- Post-Wash Application: Apply the tonic to your scalp after shampooing and conditioning.
- Duration: Leave it on for 20 to 30 minutes.
- Partial Rinse: Rinse your hair lightly, leaving some tonic on the scalp.
Benefits
This ginger hair tonic offers numerous benefits:
- Vitamins for Hair Growth: Vitamins C, E, and B6 in ginger are crucial for hair growth and repair.
- Mineral Rich: Iron, magnesium, potassium, and phosphorous strengthen hair follicles.
- Scalp Health: Ginger’s anti-inflammatory and antiseptic properties combat dandruff and soothe the scalp.
- Natural and Safe: Offers a chemical-free alternative to commercial hair products.
Precautions
Remember these precautions when using the tonic:
- Allergy Test: Test for allergies to any ingredient.
- Avoid Eye Contact: Prevent the tonic from contacting your eyes.
Tips
Enhance the treatment’s effectiveness:
- Consistency: Use twice weekly for at least 3 months.
- Scalp Massage: Gently massage the tonic into the scalp.
Conclusion
The ginger hair tonic is a potent, natural solution for improving hair health. Its rich nutrient profile makes it especially effective for stimulating hair growth and maintaining scalp health. Regular use of this tonic can lead to significant improvements in hair strength and vitality.
Additional Considerations
Complement this treatment with:
- Nutrient-Rich Diet: A balanced diet supports hair health.
- Hydration: Adequate water intake is essential.
- Gentle Hair Care: Avoid harsh treatments to maintain hair integrity.
By integrating this ginger hair tonic into your routine and following healthy practices, you can achieve and maintain vibrant, healthy hair.

In the quest for rapid hair regrowth and achieving long hair, natural remedies often prove to be both effective and gentle. A popular and powerful combination in this regard is garlic and olive oil. This article will guide you through creating a hair regrowth formula using these ingredients, promising noticeable results in as little as 15 days.
Ingredients
To prepare this hair regrowth treatment, you’ll need:
- 4 to 5 crushed garlic cloves
- ½ cup of extra virgin olive oil
Steps to Prepare
Creating this potent hair regrowth formula involves a few simple steps:
- Warm the Olive Oil: Gently warm the olive oil in a double boiler for about 2 to 3 minutes. Be careful not to boil it; the oil should be only mildly warm.
- Add Crushed Garlic: Remove the olive oil from heat and immediately add the crushed garlic cloves.
- Infuse the Mixture: Cover the pot and leave the mixture to infuse for 15 to 30 minutes.
How to Apply
Applying the mixture correctly is essential for effectiveness:
- Apply with a Brush: Use a clean hair color brush to apply the formula to your scalp.
- Cover Your Head: After applying, cover your head with a plastic hair wrap.
- Leave the Mixture On: Allow the mixture to sit for at least a couple of hours.
- Wash Your Hair: Finally, wash your hair with a mild shampoo and follow up with a moisturizing conditioner.
Benefits
The combination of garlic and olive oil offers several benefits for hair:
- Stimulates Hair Regrowth: Garlic is known for its ability to stimulate hair follicles, promoting rapid regrowth.
- Strengthens Hair: Olive oil nourishes the hair, making it stronger and healthier.
- Improves Scalp Health: Both garlic and olive oil have properties that benefit scalp health, contributing to overall hair vitality.
Precautions
While this is a natural remedy, some precautions should be taken:
- Allergy Test: Perform a patch test to ensure you’re not allergic to garlic or olive oil.
- Avoid Eye Contact: Be careful to prevent the mixture from getting into your eyes.
Tips
Maximize the effectiveness of the treatment with these tips:
- Consistency: Use the formula once a week or once every 15 days for best results.
- Gentle Application: Apply the mixture gently to avoid irritation.
Conclusion
Garlic and olive oil form a powerful natural remedy for stimulating hair regrowth and achieving longer hair in a short period. By incorporating this treatment into your hair care routine, you can experience the benefits of these natural ingredients, leading to healthier, stronger, and longer hair.
Additional Considerations
To support hair health further:
- Balanced Diet: A diet rich in vitamins and minerals is crucial for hair growth.
- Hydration: Keeping well-hydrated supports overall health, including hair health.
- Gentle Hair Care: Avoid harsh chemicals and excessive styling to maintain hair integrity.
Combining this garlic and olive oil treatment with healthy lifestyle choices can lead to even better results, helping you achieve the hair growth and strength you desire.
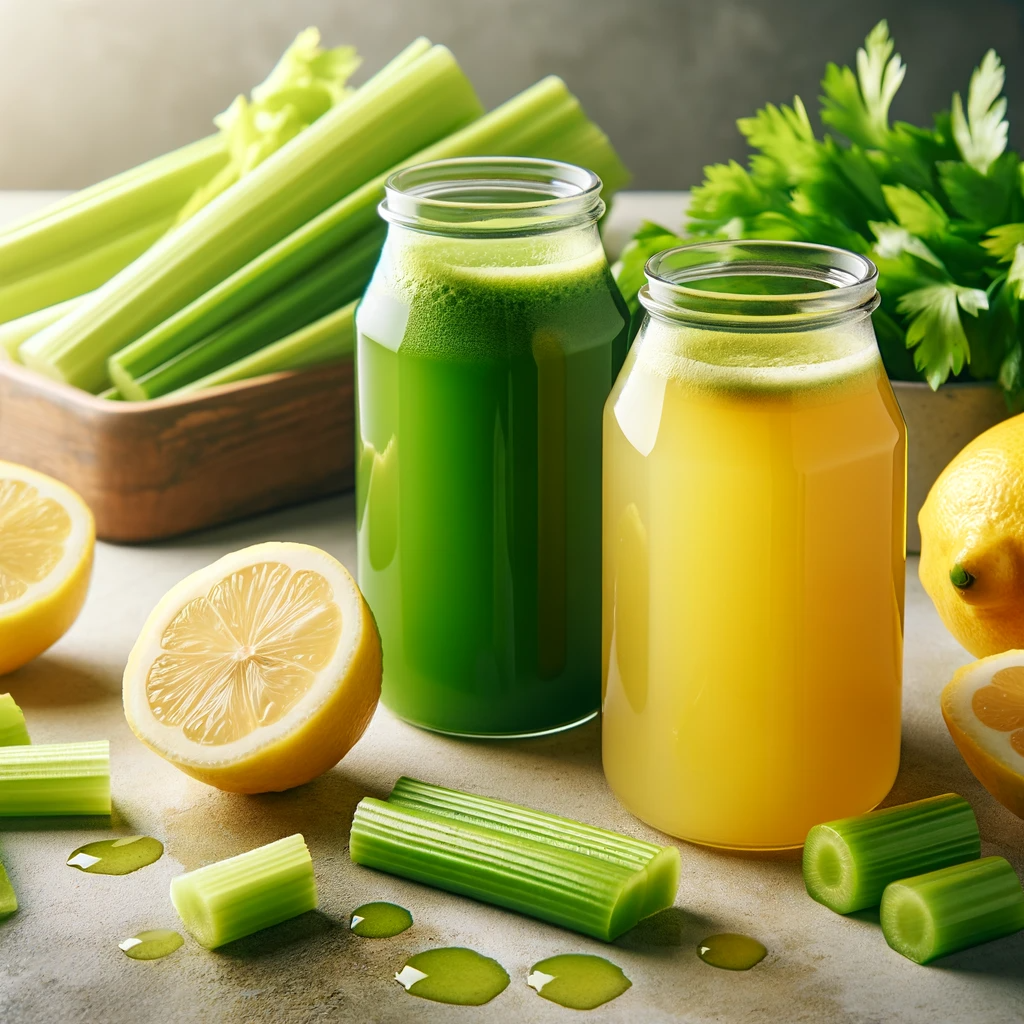
Achieving rapid hair growth and maintaining healthy hair can be a challenging task for many. However, natural remedies like boiled celery leaves and lemon juice offer an efficient and beneficial solution. Rich in antioxidants and nutrients, this combination not only promotes hair growth but also strengthens hair. This article will guide you through the process of preparing and applying this natural hair growth treatment.
Things Needed
To prepare this hair growth elixir, you will need:
- One handful of celery
- 2 tablespoons of lemon juice
- 1 cup of water
Steps to Prepare
Follow these simple steps to create your hair growth mixture:
- Prepare the Celery: Chop the celery into small pieces.
- Boil the Ingredients: Add the chopped celery and lemon juice to one cup of water. Boil this mixture for 15 minutes.
- Cooling and Filtering: Allow the mixture to cool down to a lukewarm temperature. Then, strain the mixture to remove the celery pieces.
How to Apply
Applying the mixture correctly is crucial for the best results:
- Post-Shampoo Application: After shampooing your hair, pour the celery and lemon juice mixture directly onto your scalp.
- Massage Gently: Massage the mixture into your scalp for a few minutes to enhance absorption.
- No Need to Rinse: You don’t need to rinse your hair after the application. Simply style as usual.
Benefits
This natural remedy offers several benefits for your hair:
- Stimulates Hair Growth: The nutrients in celery and lemon juice promote rapid hair growth.
- Strengthens Hair: Rich in antioxidants, this mixture helps in strengthening hair strands.
- Reduces Oiliness: It’s particularly beneficial for those with oily or greasy hair, helping to balance scalp oil production.
- Safe and Natural: Free from the harsh chemicals found in many commercial hair growth products.
Precautions
While this is a natural remedy, it’s important to consider the following precautions:
- Allergy Test: Conduct a patch test to ensure you’re not allergic to celery or lemon.
- Avoid Eye Contact: Be cautious to prevent the mixture from getting into your eyes.
Tips
Enhance the effectiveness of this treatment with these tips:
- Consistency: For best results, apply this treatment twice a week for at least 3 months.
- Healthy Lifestyle: Complement this treatment with a healthy diet and proper hair care for optimal results.
Conclusion
Using a combination of boiled celery leaves and lemon juice is an effective, natural way to promote rapid hair growth and maintain healthy hair. With its rich nutrient profile and antioxidant properties, this remedy is an excellent choice for those seeking a natural solution to hair growth challenges, especially for individuals with oily hair.
Additional Considerations
To maximize hair health, consider incorporating other healthy practices:
- Balanced Nutrition: Ensure your diet is rich in vitamins and minerals essential for hair health.
- Hydration: Keep yourself well-hydrated to support overall health and hair vitality.
- Gentle Hair Care: Avoid harsh chemicals and excessive heat styling to maintain hair integrity.
By combining this natural hair treatment with a comprehensive approach to hair care and lifestyle, you can enjoy healthier, stronger, and faster-growing hair.
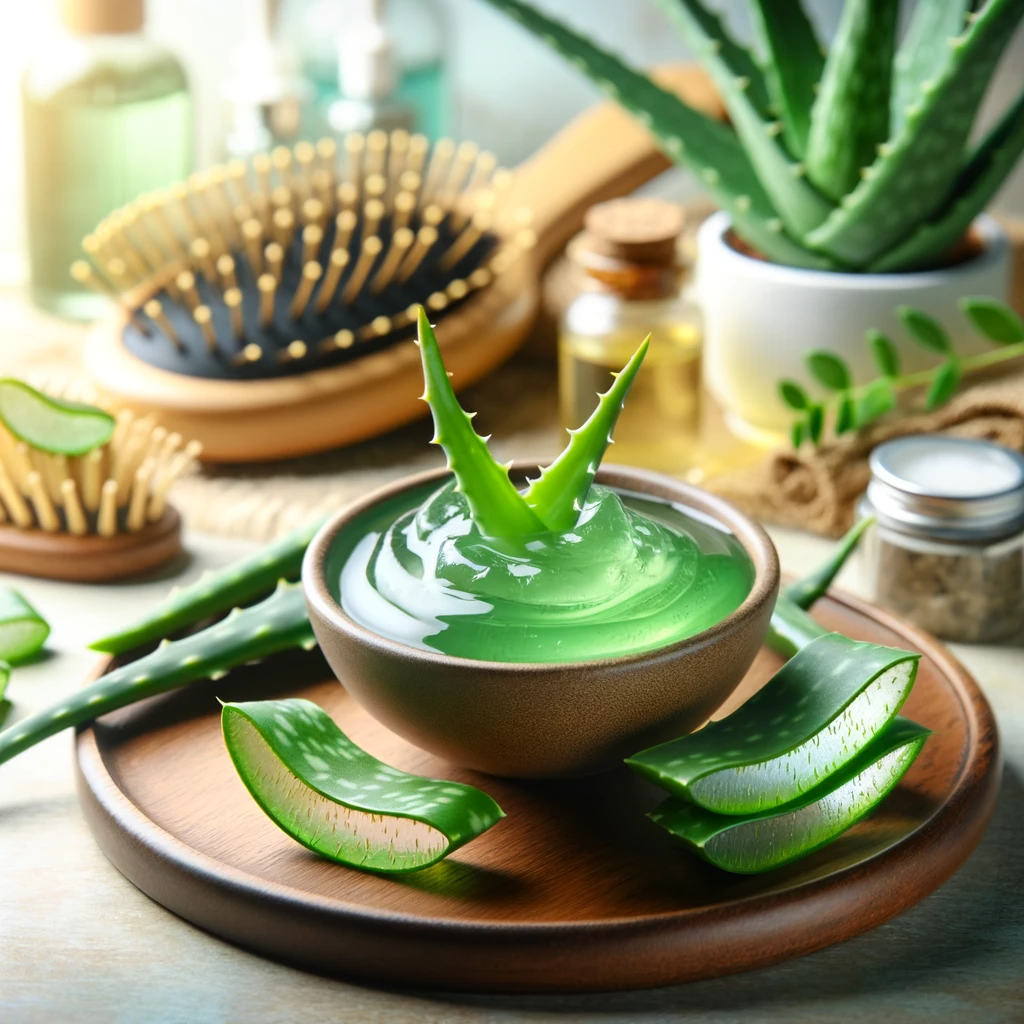
Hair problems like itchy scalp, scalp redness, dandruff, and inflammation are common concerns that many people face. Aloe Vera, renowned for its enzymes that promote healthy hair growth, is a key ingredient in this natural remedy. Along with a blend of beneficial oils and the suggested daily intake of burdock tea, this recipe is a holistic approach to improving scalp health and stimulating hair growth.
Things Needed
To prepare this Aloe Vera hair growth elixir, you will require:
- 1 teaspoon of rosemary oil
- 1 teaspoon of basil oil
- 1 teaspoon of castor oil
- 1 teaspoon of lavender oil
- 1 teaspoon of burdock oil
- 1 teaspoon of extra virgin olive oil
- ½ cup of fresh Aloe Vera gel
For the burdock tea:
- 1 tablespoon of crushed burdock
- 1 cup of hot water
Advice: Drink a cup of burdock tea every day that help to stimulate hair growth. To prepare burdock tea all you need is one tablespoon of crushed burdock and one cup of hot water, boil both ingredients together and then filter. Enjoy.
Steps to Prepare
Follow these steps to create your hair growth elixir:
- Extracting Aloe Vera Gel: Cut an Aloe Vera leaf and scoop out ½ cup of the fresh gel.
- Blending Aloe Vera: Blend the Aloe Vera gel until smooth.
- Mixing Oils with Aloe Vera: In a bowl, mix the blended Aloe Vera gel with the rosemary, basil, castor, lavender, burdock, and olive oils.
How to Apply
The application process is crucial for effectiveness:
- Massage onto Scalp and Hair: Apply the mixture by massaging it into the scalp and hair thoroughly.
- Cover with Plastic Cap: After applying, wrap your hair with a plastic cap.
- Leave for a Couple of Hours: Allow the mixture to sit for a few hours for maximum absorption.
- Shampooing and Conditioning: Rinse your hair with shampoo and conditioner as usual.
Precautions
While using natural ingredients, consider these precautions:
- Allergy Test: Conduct a patch test with each oil to ensure you’re not allergic.
- Avoid Eye Contact: Be cautious to prevent the mixture from getting into your eyes.
Tips
Maximize the benefits with these additional tips:
- Regular Application: For best results, apply this treatment regularly.
- Gentle Massaging: Use gentle circular motions while massaging to stimulate blood flow.
Benefits
This Aloe Vera hair growth elixir offers numerous benefits:
- Promotes Healthy Hair Growth: Enzymes in Aloe Vera stimulate hair growth.
- Soothes Scalp Issues: Effective in reducing itchy scalp, redness, and inflammation.
- Dandruff Control: Helps in controlling dandruff.
- Strengthens Hair: The oils provide essential nutrients, strengthening the hair.
- Natural and Safe: Free from harsh chemicals found in commercial products.
Conclusion
This Aloe Vera and oil mixture, coupled with regular consumption of burdock tea, is a powerful natural remedy for various hair problems. By incorporating this treatment into your hair care routine, you can enjoy healthier, stronger, and more vibrant hair.
Additional Information
Incorporating a healthy diet and lifestyle practices can further enhance hair health:
- Balanced Diet: A diet rich in vitamins, minerals, and proteins supports hair growth.
- Hydration: Drinking sufficient water is essential for maintaining overall health, including hair.
- Stress Management: Reducing stress levels can positively affect hair health.
By combining this natural hair treatment with healthy habits, you can achieve optimal results for your hair and scalp.
Rosemary is not just a culinary herb; it’s also a powerhouse for hair care. Known for its numerous benefits for scalp and hair health, rosemary can be a game-changer for anyone struggling with hair issues. This article will guide you through creating and using a rosemary tonic, a natural remedy that promises to strengthen weak hair, stimulate growth, slow graying, prevent dandruff, and add volume.
Things Needed
To prepare this rosemary tonic, you’ll need:
- 2 teaspoons of dried rosemary leaves.
- 250 ml of warm water.
Steps to Prepare
Creating your own rosemary tonic is simple:
- Boil Water: Start by heating the 250 ml of water.
- Add Rosemary: Once the water is boiling, add the 2 teaspoons of dried rosemary leaves.
- Steep the Mixture: Turn off the heat and let the mixture steep until it cools down to a warm temperature.
- Strain: Use a gauze or a colander to strain the mixture, removing the rosemary leaves.
How to Apply
The application process is crucial for effectiveness:
- After Shampooing: Apply the rosemary tonic directly to your scalp after shampooing and conditioning.
- No Rinsing: Do not rinse your hair again after applying the tonic.
- Style as Usual: Style your hair as you normally would.
Precautions
While rosemary tonic is generally safe, consider the following:
- Allergy Test: Perform a patch test to ensure you’re not allergic to rosemary.
- Avoid Eye Contact: Be careful to keep the tonic away from your eyes.
Tips
For optimal results, keep these tips in mind:
- Consistency is Key: Regular use is crucial. Apply the tonic twice a week after each wash for a couple of months.
- Massage the Scalp: While applying, gently massage your scalp to enhance absorption and stimulate blood flow.
Benefits
Rosemary tonic offers a multitude of benefits:
- Strengthens Hair: It reinforces weak strands and reduces breakage.
- Promotes Hair Growth: Stimulates the scalp, encouraging hair growth.
- Slows Down Graying: Regular use can slow the process of graying.
- Dandruff Prevention: Helps in preventing dandruff and dry scalp.
- Adds Volume: Great for adding volume to thin hair.
- DHT Minimization: Reduces Dihydrotestosterone (DHT) levels that cause hair loss.
- Anti-Inflammatory and Antioxidant Properties: Soothes the scalp and fights free radicals.
Conclusion
Rosemary tonic is an effective, natural way to tackle a variety of hair issues. With regular use, it can strengthen, grow, and revitalize your hair, making it a worthwhile addition to your hair care routine. Embrace the power of this natural herb and enjoy healthier, fuller hair.
Additional Information
To further enhance the benefits of this tonic, consider incorporating other healthy hair practices:
- Healthy Diet: A balanced diet rich in vitamins and minerals supports hair health.
- Hydration: Keeping your body well-hydrated is essential for maintaining healthy hair.
- Gentle Hair Care: Avoid excessive heat and harsh chemicals in hair products.
Combining the rosemary tonic with these practices can lead to even better results, giving you the luscious, healthy hair you’ve always desired.
When it comes to achieving healthy, long, and voluminous hair, nature often holds the key to stunning locks. Garlic, a kitchen staple with potent properties, has been used for centuries to address hair concerns and stimulate hair growth. This garlic hair mask is a remarkable solution that not only helps stop hair shedding but also encourages rapid hair growth. With just a few simple ingredients and a commitment to regular use, you can transform your hair into a luscious mane. In this comprehensive guide, we will explore the Garlic Hair Mask, its preparation, and the numerous benefits it offers for your hair and scalp.
Things Needed
Before we dive into the process of preparing and using the Garlic Hair Mask, let’s gather all the essential items you’ll need:
- Fresh Garlic Cloves: You’ll require 4 to 5 fresh garlic cloves, crushed and ready to use.
- Deep Conditioner: Obtain 250 ml of a deep conditioner with active fruit concentrate. A product like Garnier Fructis Fortifying Deep Conditioner is a suitable choice. Alternatively, you can choose any hair mask of your preference, as long as it can be applied directly to the scalp.
Now that you have the ingredients ready, let’s proceed with the steps to prepare and apply the Garlic Hair Mask.
Steps to Prepare
Follow these detailed steps to create and apply the Garlic Hair Mask for strong and fast-growing hair:
Step 1: Mixing Ingredients
- In a jar, thoroughly mix the crushed garlic cloves with the deep conditioner or hair mask of your choice. Ensure that the mixture is well-blended and the garlic is evenly distributed.
Step 2: Storing the Mixture
- Close the jar securely and store the garlic-conditioner mixture in the refrigerator. Allow it to sit for at least 3 to 5 days. This resting period allows the garlic’s beneficial properties to infuse into the conditioner.
Step 3: Application
- After every shampoo, use this garlic-infused conditioner. Begin by massaging the mixture gently into your scalp. Ensure that you cover the entire scalp area.
Step 4: Application to Hair Tips
- Extend the application to the tips of your hair as well. This ensures that your hair receives the nourishing benefits of the garlic mask from root to tip.
Step 5: Waiting Period
- Leave the garlic conditioner on your hair for about 15 to 20 minutes. This allows the active ingredients to penetrate your scalp and hair.
Step 6: Rinsing
- Rinse your hair thoroughly with a generous amount of water. There is no need to shampoo your hair again after using the garlic hair mask.
For the best results, repeat this mask after every shampoo for a period of three months.
Benefits
Incorporating the Garlic Hair Mask into your hair care routine offers a multitude of benefits for your scalp and hair:
1. Reduced Hair Shedding
The garlic-infused conditioner effectively helps reduce hair shedding, allowing you to maintain fuller, thicker hair.
2. Rapid Hair Growth
This mask promotes rapid hair growth by stimulating hair follicles and encouraging the growth of new, healthy hair.
3. Stronger Hair
Regular use of the garlic hair mask strengthens your hair, making it less prone to breakage and damage.
4. Improved Scalp Health
Garlic’s natural properties contribute to scalp health by addressing issues like dandruff and itching.
5. Enhanced Shine
Your hair will have a natural shine and vitality, making it look more attractive and healthier.
Conclusion
The Garlic Hair Mask is a natural, effective solution for achieving strong, fast-growing hair. Packed with the power of garlic and the nourishing properties of deep conditioner or hair mask, this remedy reduces hair shedding, promotes rapid growth, and enhances hair strength and vitality. Say goodbye to hair concerns and embrace the natural path to luscious locks. Make this mask a regular part of your hair care regimen, and watch your hair transform into a strong, healthy, and stunning mane that radiates confidence and beauty.
Hair care has always been a priority for those seeking to enhance their appearance and confidence. When it comes to nurturing healthy and luscious locks, nature often provides some of the best solutions. Onion juice, rich in sulfur, has been recognized for its ability to reduce hair loss, promote hair growth, stimulate blood flow to hair follicles, and regenerate hair follicles. On the other hand, honey, known for its benefits in skincare and haircare, contains essential vitamins, minerals, enzymes, and antioxidants that are vital for healthy hair growth. Its antibacterial and anti-fungal properties make it effective in preventing dandruff and scalp acne. When combined, onion juice and honey create a potent remedy that not only combats hair loss and thinning but also promotes long, healthy hair growth and eliminates dandruff. In this comprehensive guide, we will explore the Onion Juice & Honey Recipe, its preparation, and the numerous benefits it offers for your hair and scalp.
Things Needed
Before we delve into the process of preparing and using the Onion Juice & Honey Recipe, let’s gather all the essential items you’ll need:
- Red Onion Juice: You’ll require one cup of freshly extracted red onion juice. Ensure it is free from any additives or preservatives.
- Pure Honey (Optional): For added benefits and sweetness, gather two teaspoons of pure honey. Make sure it is free from any additives or artificial sweeteners.
Now that you have the ingredients ready, let’s proceed with the steps to prepare and apply the Onion Juice & Honey Recipe.
Steps to Prepare
Follow these detailed steps to create and apply the Onion Juice & Honey mixture for promoting hair health:
Step 1: Mixing Ingredients
- In a bowl, mix one cup of red onion juice with two teaspoons of pure honey. Ensure the mixture is well-blended.
Step 2: Application
- Without heating the mixture, apply it directly to your scalp or to the areas where your hair appears thin.
Step 3: Covering Your Hair
- Cover your hair and scalp with a plastic cap to create a warm and conducive environment for the mixture to work its magic.
Step 4: Using a Dry Towel
- On top of the plastic cap, wrap a dry towel around your hair. This additional layer helps maintain the warmth and enhances the effectiveness of the remedy.
Step 5: Waiting Period
- Leave the mixture on your scalp for at least a couple of hours. This allows sufficient time for the ingredients to penetrate your hair follicles and provide their nourishing benefits.
Step 6: Hair Wash
- After the designated waiting time, wash your hair thoroughly with a good-quality shampoo. Rinse until all traces of the mixture are removed.
For the best results, repeat the Onion Juice & Honey Recipe 2 to 3 times a week for several weeks.
Benefits
Incorporating the Onion Juice & Honey Recipe into your hair care routine offers a multitude of benefits for your scalp and hair:
1. Reduced Hair Loss
The sulfur content in onion juice helps reduce hair loss, ensuring that you keep more of your precious locks.
2. Promoted Hair Growth
Onion juice stimulates blood flow to hair follicles, promoting healthy hair growth and encouraging the regeneration of dormant follicles.
3. Nourished Scalp
Honey’s vitamins, minerals, enzymes, and antioxidants provide essential nourishment to your scalp, creating an ideal environment for hair growth.
4. Dandruff Prevention
The antibacterial and anti-fungal properties of honey effectively combat dandruff, ensuring a healthy and flake-free scalp.
5. Enhanced Hair Thickness
Consistent use of this recipe can lead to thicker, more voluminous hair that exudes vitality and strength.
Conclusion
The Onion Juice & Honey Recipe offers a natural and effective solution for promoting hair health. Harnessing the power of sulfur-rich onion juice and the nourishing properties of honey, this remedy reduces hair loss, stimulates hair growth, prevents dandruff, and enhances the thickness and vitality of your locks. Say goodbye to hair woes and embrace this holistic approach to hair care. Make this recipe a regular part of your hair care regimen, and watch your hair transform into a healthy, luscious mane that radiates confidence and beauty.
Fenugreek, also known as Methi, is a versatile herb known for its numerous health benefits. Not only does it contribute to overall well-being, but it also plays a significant role in enhancing hair health. Fenugreek seeds are highly effective in strengthening hair from the roots, addressing follicular issues, reducing hair loss, minimizing gray hair, and preventing damage and dandruff. These tiny seeds are packed with essential nutrients, including protein, vitamin C, iron, potassium, nicotinic acid, and lecithin. Additionally, fenugreek seeds contain hormone antecedents, which act as growth hormones and promote hair growth. In this comprehensive guide, we will explore how to harness the power of fenugreek seeds to stimulate hair growth and improve the overall health of your hair.
Things Needed
Before we dive into the process of preparing and using the Fenugreek Hair Mask, let’s gather all the essential items you’ll need:
- Fenugreek Seeds: You’ll require one cup of fenugreek seeds, which are readily available in most grocery stores.
- Pure Water: Prepare one cup of pure water for soaking the fenugreek seeds.
- Olive Oil: You’ll need two tablespoons of olive oil, preferably extra virgin olive oil, known for its nourishing properties.
- Lemon Juice: Gather one tablespoon of lemon juice, which adds shine and helps balance the scalp’s pH.
Now that you have the ingredients ready, let’s proceed with the steps to prepare and apply the Fenugreek Hair Mask.
Steps to Prepare
Follow these detailed steps to create and apply the Fenugreek Hair Mask for stronger, healthier hair:
Step 1: Soaking Fenugreek Seeds
- Begin by soaking one cup of fenugreek seeds in one cup of pure water overnight. This allows the seeds to soften and become more manageable for blending.
Step 2: Blending the Fenugreek Seeds
- In the morning, blend the soaked fenugreek seeds with two tablespoons of olive oil and one tablespoon of lemon juice. Blend until you achieve a smooth paste-like consistency.
Step 3: Application
- Apply the Fenugreek Hair Mask paste to the roots of your hair, ensuring it covers your scalp thoroughly.
Step 4: Covering with a Shower Cap
- After applying the paste, cover your hair with a shower cap. This helps create a warm environment that aids in better absorption of the mask’s nutrients.
Step 5: Waiting Period
- Allow the mask to sit on your hair and scalp for a couple of hours. This period allows the nutrients to penetrate your hair follicles and provide their nourishing benefits.
Step 6: Hair Wash
- After the designated waiting time, wash your hair with a mild shampoo and conditioner. Rinse thoroughly to remove any residue.
Benefits
Incorporating the Fenugreek Hair Mask into your hair care routine offers a multitude of benefits for your scalp and hair:
1. Strengthened Hair Roots
Fenugreek seeds work to strengthen hair from the roots, reducing the risk of hair loss and promoting healthy hair growth.
2. Follicular Health
This mask helps address follicular problems, ensuring your hair follicles remain healthy and active.
3. Reduced Hair Loss
The mask’s nourishing properties reduce hair loss, making your hair appear fuller and thicker.
4. Gray Hair Minimization
Fenugreek aids in minimizing premature graying, allowing you to maintain a youthful appearance.
5. Damage Prevention
Regular use of this hair mask helps prevent damage caused by environmental factors and styling.
6. Dandruff Control
The Fenugreek Hair Mask helps combat dandruff, keeping your scalp clean and healthy.
Conclusion
The Fenugreek (Methi) Hair Mask is a natural, effective solution for achieving stronger, healthier hair. Packed with essential nutrients and vitamins, fenugreek seeds stimulate hair growth, reduce hair loss, and prevent damage. This simple yet powerful hair mask can be easily incorporated into your hair care routine, offering a wide range of benefits, from strengthening your hair roots to minimizing gray hair and controlling dandruff. Say goodbye to hair woes and embrace the natural goodness of fenugreek for a head of vibrant, flourishing locks. Make this hair mask a regular part of your hair care regimen, and watch your hair transform into the luscious, radiant mane you’ve always desired.
Long, luscious locks have always been a symbol of beauty and vitality. However, many individuals struggle with slow hair growth, leaving them feeling frustrated and dissatisfied with the appearance of their hair. If you’ve been dreaming of faster hair growth, look no further. In this comprehensive guide, we’ll unveil a powerful formula designed to accelerate your hair’s growth rate. This unique blend of nourishing oils and natural ingredients is the key to unlocking the secret of rapid hair growth. Say goodbye to sluggish hair growth and hello to a head of vibrant, flourishing locks.
Things Needed
Before we embark on the journey to prepare the Faster Hair Growth Formula, let’s gather all the essential items you’ll need:
- Soy Oil: You’ll require 1/4 cup of soy oil, a rich source of essential fatty acids that nourish the hair and promote growth.
- Sesame Oil: Prepare 1/4 cup of sesame oil, known for its hair-strengthening properties and ability to improve hair texture.
- Extra Virgin Olive Oil: You’ll need 1/4 cup of extra virgin olive oil, a natural conditioner that enhances hair softness and shine.
- Lavender Oil: Include 2 tablespoons of lavender oil, which not only promotes hair growth but also provides a soothing and pleasant fragrance.
- Dry Rosemary Leaves: Prepare 1 tablespoon of dry rosemary leaves, a powerful herb known for its hair-stimulating properties.
- Chamomile Flower: Gather 1 tablespoon of chamomile flower, a soothing ingredient that adds a calming touch to the formula.
Now that you have the ingredients ready, let’s proceed with the steps to prepare and apply the Faster Hair Growth Formula.
Steps to Prepare
Follow these detailed steps to create and apply the Faster Hair Growth Formula:
Step 1: Warming the Oils
- Warm all the oils in a double boiler for approximately 3 minutes. This gentle warming process ensures that the oils blend seamlessly and can be applied effectively.
Step 2: Adding Rosemary and Chamomile
- Incorporate the dry rosemary leaves and chamomile flower into the warmed oils. Allow these natural ingredients to infuse their beneficial properties into the oil blend.
Step 3: Boiling the Ingredients
- Boil the mixture of oils, rosemary, and chamomile for a few additional minutes. This step ensures that the oils fully absorb the beneficial compounds from the added herbs.
Step 4: Cooling and Filtering
- Remove the mixture from heat and allow it to cool until it reaches a lukewarm temperature. Once cooled, filter the mixture through gauze to remove any solid particles.
Step 5: Application
- Use the lukewarm Faster Hair Growth Formula by pouring it directly onto your scalp. Ensure that the entire scalp is covered evenly with the oil.
Step 6: Covering and Waiting
- Cover your oiled hair and scalp with a plastic wrap or shower cap. Leave the formula in place for a couple of hours to allow it to work its magic.
Step 7: Shampooing
- After the designated waiting period, shampoo your hair thoroughly to remove the oil. Use a gentle, sulfate-free shampoo for the best results.
Benefits
Incorporating the Faster Hair Growth Formula into your hair care routine offers a multitude of benefits for your scalp and hair:
1. Accelerated Hair Growth
The carefully chosen blend of oils and natural ingredients stimulates hair follicles, promoting faster and healthier hair growth.
2. Strengthened Hair
Soy, sesame, and olive oils provide essential nutrients to strengthen the hair shaft, reducing breakage and improving overall hair health.
3. Improved Hair Texture
Sesame oil enhances hair texture, leaving your locks feeling soft, smooth, and manageable.
4. Soothing Sensation
Lavender oil and chamomile flower bring a soothing and calming effect to your scalp, creating a spa-like experience.
5. Natural Fragrance
The combination of lavender, rosemary, and chamomile imparts a delightful, natural fragrance to your hair.
Conclusion
Achieving faster hair growth is not an elusive dream but a reality you can attain with the Faster Hair Growth Formula. This powerful blend of nourishing oils and natural ingredients offers a holistic approach to hair care, addressing not only growth but also strength, texture, and overall health. Say goodbye to slow hair growth and hello to a head of vibrant, flourishing locks. Make this formula a regular part of your hair care regimen, and watch as your hair transforms into the luscious, radiant mane you’ve always desired.
Hair loss, dryness, and scalp issues are common concerns that many people face in their hair care journey. To combat these problems effectively, it’s essential to prioritize scalp and hair moisturization. One highly beneficial method is the Hair Oil Massage, which involves using a combination of nourishing oils to massage the scalp. This step not only moisturizes the scalp but also stimulates hair growth, promotes relaxation, and reduces scalp tension. Additionally, the use of a Hot Oil Treatment enhances the effectiveness of these oils, providing faster results. In this comprehensive guide, we will explore the process of preparing and using hair oils, the benefits they offer, and essential tips for maintaining a healthy scalp and luscious locks.
Things Needed
Before we delve into the process of preparing and using hair oils for a rejuvenating Hair Oil Massage and Hot Oil Treatment, let’s gather all the essential items you’ll need:
- Hair Oils: You can choose from a variety of hair oils, such as extra virgin olive oil, coconut oil, sesame oil, wheat germ oil, almond oil, and castor oil. When using castor oil, it should be mixed with a carrier oil, such as jojoba oil, almond oil, avocado oil, or sesame oil, due to its thickness.
- Other Ingredients: You’ll require a combination of these nourishing oils for your Hair Oil Massage and Hot Oil Treatment. For instance:
- 3 tablespoons of castor oil
- 3 tablespoons of sesame oil
- 3 tablespoons of extra virgin olive oil
- 3 tablespoons of basil oil
- 3 tablespoons of peanut oil
- 3 tablespoons of wheat germ oil
- 3 teaspoons of rosemary oil
Now that you have the ingredients ready, let’s proceed with the steps to prepare and use these hair oils effectively.
Steps to Prepare
Follow these comprehensive steps to create and apply the Hair Oil Massage and Hot Oil Treatment:
Step 1: Oil Mixture Preparation
- Heat all the oils in a top of a double boiler until they become warm. Ensure that the oils are not too hot to avoid burning your scalp.
Step 2: Application
- Sit on a chair and bend your head forward to apply the oil mixture directly to your hair and scalp.
Step 3: Scalp Massage
- Gently massage your scalp with circular movements using your fingertips. Scalp massage improves blood flow to hair follicles, stimulates healthy hair growth, and provides relaxation while reducing scalp tension.
Step 4: Hot Oil Treatment
- For a Hot Oil Treatment, you have two options:
- Use a hair steamer for 20 minutes.
- Alternatively, cover your hair with a plastic cap and then wrap your head with a dry towel for two to three hours.
Step 5: Hair Wash
- After the treatment, wash your hair with an SLS-free shampoo to remove excess oil.
Step 6: Enjoy the Benefits
- The oil mixture strengthens hair follicles, reduces hair loss, accelerates hair growth, and softens your hair.
Benefits
Incorporating Hair Oil Massage and Hot Oil Treatment into your hair care routine offers numerous benefits for your scalp and hair:
1. Scalp and Hair Moisturization
The oils deeply moisturize your scalp and hair, preventing dryness and associated issues.
2. Improved Blood Circulation
Scalp massage enhances blood flow to hair follicles, promoting healthy hair growth.
3. Relaxation and Stress Reduction
Scalp massages provide relaxation and reduce tension, contributing to overall well-being.
4. Hair Strengthening
The oil mixture strengthens hair follicles, reducing hair loss and breakage.
5. Accelerated Hair Growth
Improved scalp health and circulation accelerate the hair growth cycle, resulting in faster growth.
6. Soft and Manageable Hair
The oils leave your hair soft, manageable, and easy to style.
Conclusion
Prioritizing scalp and hair moisturization through Hair Oil Massage and Hot Oil Treatment is a crucial step in achieving and maintaining healthy, luscious locks. By choosing nourishing oils and following the correct application method, you can enjoy numerous benefits, including reduced hair loss, improved hair growth, and enhanced scalp health. Remember to follow essential tips, such as not leaving oils on the scalp for more than 8 hours and using oils specifically designed for hair care. With the right approach, you can rejuvenate your scalp and hair, promoting a revitalized and vibrant look for your locks. Make these treatments a regular part of your hair care regimen, and witness the transformation of your hair and scalp.

Your hair and scalp often bear the brunt of products build-up, excess sebum, and dirt, which can lead to issues like hair loss, clogged pores, itchy scalp, slow hair growth, and hair breakage. To counteract these problems and prepare your hair and scalp for other treatments, the first step is the Apple Cider Vinegar (ACV) Rinse. This recipe is a vital component in your hair care routine as it helps remove impurities and create a clean canvas for subsequent treatments. In this article, we’ll guide you through the process of preparing and using an ACV Rinse to ensure your hair and scalp respond positively to further care.
Things Needed
Before we embark on the journey of preparing and using the Apple Cider Vinegar Rinse, let’s gather all the essential items you’ll need:
- Warm Water: You’ll require 600 ml of warm water, which will serve as the base for your rinse.
- Apple Cider Vinegar: You’ll need 2 tablespoons of apple cider vinegar (ACV), known for its cleansing and clarifying properties.
Now that you have the ingredients ready, let’s proceed with the steps to prepare and use this crucial scalp and hair detox.
Steps to Prepare
Follow these simple steps to create and use the Apple Cider Vinegar Rinse:
Step 1: Mixing the Ingredients
In a container, mix the 2 tablespoons of apple cider vinegar with 600 ml of warm water. Ensure that the ingredients are well combined.
Step 2: Hair Preparations
After shampooing your hair, gently dry it with a soft towel or a microfiber towel until it is damp.
Step 3: Application
Apply the ACV mixture directly to your hair and scalp. Massage your scalp gently with your fingertips to ensure the rinse covers all areas of your scalp.
Step 4: Shower Cap and Waiting Time
Once applied, wrap your hair with a shower cap to trap heat and enhance the effectiveness of the rinse. Leave the rinse on for 15 to 20 minutes.
Step 5: Rinsing
After the waiting time, thoroughly rinse your hair with a generous amount of water. There’s no need to use shampoo again in this step.
Step 6: Conditioning and Moisturizing
Use your regular conditioner or apply a deep hair mask to replenish moisture to your hair. Finish by applying your favorite moisturizer.
Benefits
Incorporating the Apple Cider Vinegar Rinse into your hair care routine offers numerous benefits for your scalp and hair:
1. Removal of Build-Up
The ACV rinse effectively removes product build-up, excess sebum, and dirt from your hair and scalp, creating a clean slate for further treatments.
2. Improved Scalp Health
By unclogging pores and eliminating impurities, this rinse promotes a healthier scalp, reducing the risk of issues like hair loss and itchiness.
3. Enhanced Hair Growth
A clean and revitalized scalp provides a conducive environment for hair growth, encouraging a faster and more robust hair growth cycle.
4. Reduced Hair Breakage
Removing residue and impurities can strengthen your hair, reducing breakage and damage caused by build-up.
Conclusion
Don’t underestimate the power of the Apple Cider Vinegar Rinse in your hair care routine. This essential step helps remove product build-up, sebum, and dirt, creating a healthy foundation for subsequent treatments. With its ability to promote scalp health, hair growth, and reduced breakage, the ACV rinse is a crucial component in achieving and maintaining gorgeous, healthy locks. Make it a regular part of your hair care regimen and unlock the potential for revitalized, radiant hair and a clean, itch-free scalp.
Dandruff can be a persistent and frustrating issue, causing discomfort and self-consciousness. While many commercial products claim to combat dandruff, they often contain harsh chemicals that may not be suitable for everyone. Fortunately, there’s a natural and effective solution in the form of a Dandruff Fighting Scalp Treatment. This homemade remedy is designed to combat the fungi responsible for dandruff while also helping to absorb excessive moisture on the scalp. In this article, we’ll guide you through the process of preparing and using this treatment to achieve a healthier and flake-free scalp.
Things Needed
Before we dive into the process of making and applying the Dandruff Fighting Scalp Treatment, let’s gather all the essential items you’ll need:
- Salt: You’ll require 1-2 teaspoons of salt, which acts as a natural exfoliant and helps combat the fungi causing dandruff.
- Water: A few drops of water will be needed to moisten your hands for massaging the scalp.
Now that you have the ingredients ready, let’s proceed with the steps to prepare and use this effective dandruff treatment.
Steps to Prepare
Follow these simple steps to create and apply the Dandruff Fighting Scalp Treatment:
Step 1: Salt Application
Start by sprinkling 1-2 teaspoons of salt directly onto your scalp. Ensure that you distribute the salt evenly across your entire scalp.
Step 2: Moistening Hands
Moisten your hands with a few drops of water to create a damp surface for massaging your scalp. This step is crucial for activating the treatment.
Step 3: Scalp Massage
With your wet hands, gently massage your scalp for 10-15 minutes. Focus on circular motions and be thorough in covering your entire scalp area. The salt will act as an exfoliant, helping to remove dead skin cells and combat fungi.
Step 4: Hair Wash
After the 10-15 minute massage, wash your hair thoroughly to remove any remaining salt and dead skin cells. Be sure to use a mild and gentle shampoo.
Step 5: Pat Dry
Gently pat your hair dry with a clean towel, avoiding any harsh rubbing that can irritate the scalp.
Step 6: Hair Conditioning
Apply your preferred hair conditioning cream to moisturize and soften your hair. This step is essential to replenish any moisture lost during the treatment and maintain the health of your hair.
Benefits
Using the Dandruff Fighting Scalp Treatment offers several benefits for your scalp and overall hair health:
1. Fungi Combat
The salt in this treatment acts as a natural fungicide, helping to combat the fungi responsible for dandruff.
2. Exfoliation
The salt also acts as an exfoliant, removing dead skin cells from the scalp, which can contribute to dandruff.
3. Moisture Absorption
Excessive moisture on the scalp can contribute to dandruff. This treatment helps absorb excess moisture, restoring balance to the scalp.
4. Natural Solution
Unlike many commercial dandruff products that contain harsh chemicals, this homemade treatment offers a natural and gentle solution for dandruff control.
Conclusion
Say goodbye to dandruff and hello to a healthier, flake-free scalp with the Dandruff Fighting Scalp Treatment. By using simple ingredients like salt and water, you can combat fungi, exfoliate your scalp, and restore moisture balance naturally. This treatment offers an effective and gentle alternative to commercial dandruff products, allowing you to enjoy the benefits of a healthier scalp without the harsh chemicals. Make this treatment a part of your hair care routine and experience the confidence and comfort of a dandruff-free scalp.

Imagine having hair that not only looks beautiful but also carries a delightful fragrance wherever you go. With the Scented Hair Aromatherapy Recipe, you can make this dream a reality. This simple yet effective recipe uses the power of essential oils to infuse your hair with a captivating scent. In this article, we’ll guide you through the process of creating a scented hair aromatherapy treatment that not only leaves your locks smelling divine but also offers potential therapeutic benefits.
Things Needed
Before we embark on the journey of preparing the scented hair aromatherapy treatment, let’s gather all the essential items you’ll need:
- Essential Oil: You’ll require 1 drop of essential oil, and you can choose from options like Lavender, Rosemary, or Sandalwood, depending on your preference and the fragrance you desire.
Now that you have the ingredient ready, let’s proceed with the steps to prepare your scented hair aromatherapy recipe.
Steps to Prepare
Follow these simple steps to create your scented hair aromatherapy treatment:
Step 1: Essential Oil Selection
Begin by selecting one of the essential oils listed in the ingredient list. Each essential oil offers a unique fragrance and potential therapeutic benefits for your hair and scalp.
Step 2: Applying to Hair Brush
Once you’ve chosen your essential oil, apply a single drop of it directly to the bristles of your hair brush. Ensure that the drop is evenly distributed across the bristles.
Step 3: Thorough Brushing
Use the scented hair brush to thoroughly brush your hair. Start from the roots and work your way down to the tips, ensuring that every strand is touched by the fragrance. Enjoy the calming and aromatic experience as you brush your hair.
Benefits
Using this scented hair aromatherapy recipe offers several benefits for your hair and overall well-being:
1. Captivating Fragrance
Infusing your hair with the aroma of essential oils like Lavender, Rosemary, or Sandalwood adds a delightful and lasting fragrance that can uplift your mood and leave a positive impression.
2. Therapeutic Effects
Depending on the essential oil you choose, you can potentially experience therapeutic effects such as relaxation, stress relief, improved hair health, or enhanced scalp condition.
3. Convenient Application
This aromatherapy treatment is easy and quick to apply, making it a convenient addition to your daily hair care routine.
4. Chemical-Free Option
Unlike commercial hair fragrances that may contain harsh chemicals, this natural aromatherapy recipe offers a chemical-free way to scent your hair.
Conclusion
Enhance your hair’s beauty and aroma with the Scented Hair Aromatherapy Recipe. By incorporating the power of essential oils into your hair care routine, you can enjoy a captivating fragrance and potential therapeutic benefits, all in a simple and convenient manner. Say goodbye to synthetic hair fragrances and hello to the natural allure of scented locks. Elevate your daily routine with the enchanting scent of Lavender, Rosemary, or Sandalwood, and let your hair become a source of relaxation and well-being.
For those with blonde hair, maintaining and enhancing your natural color can sometimes be a challenge. Commercial hair dyes often contain harsh chemicals that can damage your locks over time. However, nature offers a gentle alternative in the form of coconut oil, chamomile tea, and lemon juice. In this article, we’ll guide you through the process of creating a homemade blonde hair color base using these natural ingredients. Say goodbye to chemical treatments and hello to a more natural and nourishing way to enhance your blonde locks.
Things Needed
Before we delve into the process of making your own blonde hair color base, let’s gather all the essential items you’ll need:
- Strong Chamomile Tea: Prepare 1/2 cup of strong chamomile tea, known for its natural lightening properties.
- Fresh Lemon Juice: You’ll require 1/4 cup of fresh lemon juice, which can help lighten and brighten your hair.
- Coconut Oil: 1/4 cup of coconut oil, known for its moisturizing and conditioning effects on the hair.
Now that you have all the ingredients ready, let’s proceed with the steps to prepare your homemade blonde hair color base.
Steps to Prepare
Follow these simple steps to create your own natural blonde hair color base:
Step 1: Ingredient Combination
In a small bowl, combine the 1/2 cup of strong chamomile tea, 1/4 cup of fresh lemon juice, and 1/4 cup of coconut oil.
Step 2: Stirring
Stir the ingredients together to ensure they are well combined. You want a consistent mixture for your blonde hair color base.
Step 3: Emulsification
Transfer the mixture into an electric blender and blend until it emulsifies into a smooth and creamy consistency.
Step 4: Application
Apply the blonde hair color base evenly to your entire hair length, from the tips to the roots. Ensure that all your hair is thoroughly coated.
Step 5: Waiting Time
To maximize the lightening effect, wear a plastic cap and leave the mixture on your hair for 45 to 75 minutes. If you’d like to intensify the results, consider adding heat by staying in the sun or using a hair dryer during this time.
Benefits
Creating your own blonde hair color base using coconut oil and natural ingredients offers several benefits for your hair and overall hair care routine:
1. Natural Lightening
Chamomile tea and lemon juice are known for their natural lightening properties, helping to brighten and enhance your blonde hair color.
2. Nourishment and Moisture
Coconut oil provides essential moisture and nourishment to your hair, leaving it soft, shiny, and healthy.
3. Avoiding Harsh Chemicals
By choosing a natural hair color base, you can avoid the potentially harmful chemicals often found in commercial hair dyes, protecting the health of your hair.
4. Customizable Shade
This homemade blonde hair color base allows you to customize the shade and intensity of your blonde hair, giving you control over your look.
Conclusion
Enhancing your blonde hair color naturally is not only possible but also beneficial for the overall health and vitality of your hair. With the help of coconut oil, chamomile tea, and lemon juice, you can create a DIY blonde hair color base that not only brightens your locks but also nourishes them from within. Say goodbye to chemical treatments and hello to a gentler, more natural way to achieve the blonde hair of your dreams. Embrace the power of nature and enjoy the radiance and beauty of your enhanced blonde hair, all while maintaining its health and shine.
Many people with dark hair desire to enrich their natural color or cover up gray strands without resorting to harsh chemical hair dyes. Fortunately, nature provides a gentle solution in the form of coconut oil. By combining coconut oil with other natural ingredients, you can create a dark hair color base that enhances your existing shade and promotes hair health. In this article, we will guide you through the process of preparing a coconut oil-based dark hair color base that is both effective and safe for your locks.
Things Needed
Before we dive into the process of making your own dark hair color base, let’s gather all the essential items you’ll need:
- Coconut Oil: You’ll require 2 tablespoons of coconut oil, known for its nourishing properties and ability to penetrate the hair shaft.
- Spent Coffee Grounds: 1 tablespoon of spent coffee grounds, which can add depth and darkness to your hair color.
- Strong Coffee: 1 cup of strong coffee, which acts as a natural dye and provides a rich, dark hue.
Now that you have all the ingredients ready, let’s proceed with the steps to prepare your homemade dark hair color base.
Steps to Prepare
Follow these simple steps to create your very own coconut oil-based dark hair color base:
Step 1: Ingredient Combination
In a small mixing bowl, combine the 2 tablespoons of coconut oil, 1 tablespoon of spent coffee grounds, and 1 cup of strong coffee.
Step 2: Stirring
Stir the ingredients together thoroughly to ensure they are well combined. You want a consistent mixture that will evenly coat your hair.
Step 3: Application
Massage the prepared mixture into your hair, starting from the roots and working your way down to the tips. Ensure that your hair is thoroughly coated with the dark hair color base.
Step 4: Waiting Time
Leave the mixture on your hair for approximately 45 to 60 minutes. This allows the natural dye properties of the coffee and the conditioning effects of coconut oil to work their magic.
Step 5: Rinse and Style
After the waiting time has elapsed, wash off the dark hair color base thoroughly with water. Pat your hair dry and style it as desired.
Benefits
Creating your own dark hair color base using coconut oil offers several benefits for your hair and overall hair care routine:
1. Natural Darkening
Coffee and spent coffee grounds contain natural pigments that can help enhance the darkness of your hair color, giving it a richer and more vibrant look.
2. Nourishment and Moisture
Coconut oil is a fantastic natural conditioner that moisturizes and nourishes your hair, leaving it soft, shiny, and healthy.
3. Chemical-Free Option
By opting for a natural hair color base, you can avoid the potentially harmful chemicals found in commercial hair dyes, which can damage your hair and scalp.
4. Temporary Solution
This homemade dark hair color base offers a temporary solution for those who want to experiment with a darker hair shade without committing to a permanent change.
Conclusion
Enhancing your dark hair color naturally has never been easier with the help of coconut oil and coffee. By following the simple steps outlined in this article, you can create a DIY dark hair color base that not only enriches your natural shade but also promotes the overall health and vitality of your hair. Say goodbye to harsh chemical dyes and hello to a more natural and gentle way of achieving the hair color you desire. Experiment with this homemade solution and enjoy the confidence that comes with beautiful, naturally darkened locks.
When it comes to achieving lustrous and healthy hair, nature often provides the best solutions. Coconut oil, in particular, is renowned for its moisturizing and nourishing properties, making it an ideal ingredient for a DIY hair conditioner. In this article, we’ll guide you through the process of creating a homemade coconut oil hair conditioner that will leave your locks looking and feeling rejuvenated. Say goodbye to commercial conditioners filled with chemicals and hello to the natural goodness of coconut oil.
Things Needed
Before we dive into the process of making your coconut oil hair conditioner, let’s gather all the essential items you’ll need:
- Coconut Oil: You’ll require 2/3 cup of coconut oil, known for its exceptional moisturizing properties.
- Jojoba Oil: 1 tablespoon of jojoba oil, which helps condition and soften your hair.
- Vitamin E Oil: 1 tablespoon of vitamin E oil, known for its nourishing and antioxidant benefits for hair and skin.
- Essential Oil: Choose 10 drops of your favorite essential oil to add a pleasant fragrance to your conditioner. Popular options include lavender, rosemary, or eucalyptus.
Now that you have all the ingredients ready, let’s proceed with the steps to prepare your homemade coconut oil hair conditioner.
Steps to Prepare
Follow these simple steps to create your own nourishing coconut oil hair conditioner:
Step 1: Ingredient Combination
In a mixing bowl, combine the 2/3 cup of coconut oil, 1 tablespoon of jojoba oil, 1 tablespoon of vitamin E oil, and your chosen 10 drops of essential oil.
Step 2: Mixing
Mix the ingredients together thoroughly using a hand mixer. Continue mixing until you achieve a creamy and smooth consistency. This will ensure that all the oils are well combined.
Step 3: Application
After shampooing your hair, apply 1-2 teaspoons of the coconut oil conditioner to your hair. Make sure to smooth it through your hair evenly, focusing on the ends where hair tends to be drier.
Step 4: Rinse and Pat Dry
Allow the conditioner to sit on your hair for a few minutes to maximize its effects. Then, rinse it out thoroughly with water. Gently pat your hair dry with a clean towel.
Note: If you use hair dyes, be aware that coconut oil may fade the color, especially in the case of red hair tints. Other hair tints or dyes may not be affected.
Benefits
Using a homemade coconut oil hair conditioner offers several benefits for your hair and overall hair care routine:
1. Deep Moisturization
Coconut oil is an excellent natural moisturizer, helping to hydrate and nourish your hair from root to tip. It’s particularly beneficial for dry and damaged hair, leaving it soft and manageable.
2. Jojoba Oil Benefits
Jojoba oil mimics the natural oils produced by the scalp, making it a great choice for conditioning and restoring the hair’s natural balance.
3. Vitamin E Nourishment
Vitamin E oil provides essential nutrients and antioxidants to your hair, promoting overall hair health and shine.
4. Customizable Fragrance
By adding your favorite essential oil, you can customize the scent of your conditioner, leaving your hair smelling delightful.
5. Natural Alternative
Homemade hair conditioner allows you to avoid the harsh chemicals often found in commercial products, making it a gentler and more natural choice for your hair care routine.
Conclusion
Elevate your hair care routine with a homemade coconut oil hair conditioner that provides deep moisturization, nourishment, and a delightful fragrance, all without the harsh chemicals found in commercial products. By following the simple steps outlined in this article, you can enjoy the natural benefits of coconut oil and other nourishing ingredients while keeping your hair soft, manageable, and healthy. Say goodbye to dry and damaged hair, and say hello to the rejuvenating power of nature. Make this DIY conditioner a part of your hair care regimen and enjoy the transformation of your locks, one application at a time.
Achieving healthy and lustrous hair doesn’t always require expensive salon treatments or commercial hair products laden with chemicals. Nature offers a simple yet effective solution in the form of coconut oil. By making your own coconut oil hair shampoo, you can enjoy the nourishing benefits of this tropical wonder. In this article, we’ll guide you through the process of creating a natural, coconut oil-based shampoo that will leave your hair feeling refreshed, rejuvenated, and radiant.
Things Needed
Before we embark on the journey of preparing this DIY coconut oil hair shampoo, let’s gather all the essential items you’ll need:
- Liquid Castile Soap: You’ll require 1 cup of liquid castile soap, a gentle and natural soap base.
- Coconut Oil: You’ll need 1/3 cup of coconut oil, known for its moisturizing and conditioning properties.
- Coconut Milk: 1/3 cup of coconut milk, which adds extra nourishment to your hair.
- Essential Oils: To customize your shampoo’s scent and enhance its benefits, you’ll need 50-60 drops of essential oils. Consider using oils like lavender, peppermint, wild orange, lemon grass, clary sage, and rosemary.
Now that you have all the ingredients ready, let’s move on to the steps to prepare your homemade coconut oil hair shampoo.
Steps to Prepare
Follow these simple steps to create your very own coconut oil hair shampoo:
Step 1: Combining Coconut Milk and Coconut Oil
Begin by combining the 1/3 cup of coconut milk and 1/3 cup of coconut oil in a mixing bowl. Stir the mixture well until it’s thoroughly combined.
Step 2: Warming the Mixture
Place the mixture over very low heat, warming it gently. It’s crucial to keep the heat exceptionally low to preserve the nutrients in the mixture. Stir occasionally to ensure even heating.
Note: If the heat is too high, the nutrients in the mixture would be destroyed, and the benefits of coconut oil and milk may be compromised.
Step 3: Transfer to a Container
Once the mixture is warmed and well combined, transfer it into a suitable container. This container will serve as the base for your homemade shampoo.
Step 4: Measuring Castile Soap
Measure 1 cup of liquid castile soap and carefully pour it into the container with the coconut milk and oil mixture.
Step 5: Vigorous Shaking
Seal the container tightly and shake it vigorously. This step is essential to ensure that the castile soap combines effectively with the coconut milk and oil.
Step 6: Essential Oils
Next, measure in your choice of essential oil(s) to customize the scent and add their unique benefits to your shampoo. Aim for 50-60 drops in total, but feel free to adjust the amount based on your preferences.
Step 7: Final Shake
Shake the bottle once more to incorporate the essential oils thoroughly with the rest of the ingredients.
Step 8: Covering Well
Ensure that the container is well-covered or sealed to prevent any contamination or evaporation of the ingredients.
Step 9: Application
When using your homemade coconut oil hair shampoo, simply squeeze an appropriate amount onto your hair as you would with any other shampoo. Massage it gently into your hair and scalp, allowing it to lather.
Step 10: Rinse Thoroughly
After massaging the shampoo into your hair and scalp, rinse it out thoroughly with water.
Benefits
Creating your coconut oil hair shampoo offers numerous benefits for your hair and overall well-being:
1. Natural Nourishment
Coconut oil and coconut milk provide natural nourishment to your hair, helping to moisturize and condition it. This can result in softer, smoother, and more manageable hair.
2. Customizable Aromatherapy
By using different essential oils, you can customize the scent of your shampoo to suit your preferences. Essential oils also offer various therapeutic benefits, such as promoting relaxation or invigorating your senses.
3. Avoiding Harsh Chemicals
Homemade shampoo allows you to avoid the harsh chemicals often found in commercial hair products, making it a gentler option for your hair and scalp.
4. Cost-Effective
Creating your shampoo can be more cost-effective in the long run, as you’ll have control over the ingredients and won’t need to purchase expensive salon products.
Conclusion
Embrace the natural goodness of coconut oil with your very own homemade hair shampoo. By following the straightforward steps outlined in this article, you can create a nourishing, customizable, and cost-effective shampoo that will leave your hair feeling refreshed and revitalized. Say goodbye to harsh chemicals and hello to luxurious locks that are sure to turn heads. Elevate your hair care routine with this coconut oil-based shampoo and experience the difference of natural beauty, one wash at a time.
Lice infestations can be a common and frustrating problem, especially among children. Dealing with these tiny parasites can be both time-consuming and uncomfortable. Fortunately, nature has provided us with a powerful ally in the form of coconut oil. In this article, we’ll explore how you can use coconut oil, along with a few other essential ingredients, to create a highly effective leave-in conditioner that not only helps prevent lice but also works as a natural cure. Say goodbye to lice-related worries and hello to healthier, lice-free hair!
Things Needed
Before we delve into the process of making and using this coconut oil-based leave-in conditioner, let’s gather all the necessary items you’ll need:
- Coconut Oil: You’ll require 3 tablespoons of coconut oil. Ensure it’s pure, unrefined coconut oil for the best results.
- Ylang Ylang Oil: 1 teaspoon of ylang-ylang oil, known for its pleasant fragrance and potential lice-repelling properties.
- Tea Tree Oil: 1 teaspoon of tea tree oil, which is widely recognized for its antimicrobial and insect-repelling qualities.
- Anise Oil: 1 teaspoon of anise oil, which has been used traditionally for lice prevention.
- Distilled Water: 1 cup of distilled water, ensuring purity.
- Apple Cider Vinegar: 2 cups of apple cider vinegar, known for its ability to help dissolve the sticky substance that lice eggs use to attach to hair.
Now that you have all the ingredients ready, let’s move on to the steps to prepare and apply this lice prevention and cure leave-in conditioner.
Steps to Prepare
Follow these simple steps to create and apply the coconut oil-based leave-in conditioner:
Step 1: Mixing the Ingredients
In a small mixing bowl, combine the first four ingredients: coconut oil, ylang-ylang oil, tea tree oil, and anise oil. Blend them together thoroughly to create a well-mixed solution.
Step 2: Application
Massage the oil mixture generously over your entire scalp and hair area. Ensure that you cover all parts of your head, from the scalp down to the tips of your hair.
Step 3: Combing
Using a fine-toothed comb or your fingers, work the oil through your hair. This step helps to ensure that the conditioner is distributed evenly and reaches all parts of your hair.
Step 4: Wait
Leave the conditioner on your hair for approximately 120 minutes. To maximize the effectiveness, cover your hair with a plastic cap.
Tip: Heat Application
To enhance the conditioner’s effectiveness, consider using a hair dryer or exposing your hair to direct sunlight for some heat during this waiting period.
Step 5: Combing Again
After the waiting time has passed, use a fine-toothed comb to comb through your hair. This will help remove any dead lice or eggs.
Step 6: Rinse and Pat Dry
Wash your hair thoroughly, ensuring that all the conditioner is rinsed out. Afterward, gently pat your hair dry with a clean towel.
Step 7: Vinegar Spray
Combine the distilled water and apple cider vinegar in a spray bottle. Shake vigorously to mix the solution.
Step 8: Apply Vinegar Spray
Apply the vinegar spray to your hair, gently rubbing it in. This helps to dissolve the glue that lice eggs use to attach to your hair.
Step 9: Final Rinse and Comb
Rinse your hair once more and use a fine-toothed comb to ensure that all lice and eggs have been removed.
Step 10: Apply Light Coconut Oil
To moisturize your hair, apply a light layer of coconut oil. Cover your hair with a plastic cap and style as desired.
Tip: Leave-In Treatment
For ongoing lice prevention, you can leave the coconut oil in your hair until your next hair wash.
Benefits
Using this coconut oil-based leave-in conditioner offers several benefits for lice prevention and hair health:
1. Natural Lice Prevention
Coconut oil, ylang-ylang oil, tea tree oil, and anise oil have all been associated with properties that help repel lice naturally. This leave-in conditioner provides an effective preventive barrier.
2. Lice Cure
In addition to prevention, this treatment can help eliminate existing lice and their eggs, making it a natural and non-toxic alternative to chemical treatments.
3. Hair Health
Coconut oil is an excellent moisturizer for hair, leaving it soft and nourished. The additional ingredients provide antimicrobial and soothing benefits for your scalp.
4. Cost-Effective
Compared to commercial lice treatments, this homemade conditioner is cost-effective and uses natural ingredients without harsh chemicals.
Conclusion
Tackling lice infestations doesn’t have to involve harsh chemicals or expensive treatments. With the power of coconut oil and a few other natural ingredients, you can create a leave-in conditioner that not only helps prevent lice but also acts as a lice cure. By following the simple steps outlined in this article, you can enjoy lice-free hair while maintaining the health and vitality of your locks. Say goodbye to lice-related worries and hello to a more natural and effective solution for lice prevention and treatment!
Frizzy hair can be a frustrating and challenging issue to deal with, especially on those days when you want your locks to look sleek and polished. The good news is that you don’t need to invest in expensive hair products or salon treatments to tame your unruly strands. One simple and natural solution that has been used for centuries is coconut oil. Coconut oil is not only an excellent moisturizer for your hair but also a fantastic frizz tamer. In this article, we will walk you through the steps to prepare and apply coconut oil to get rid of frizz and enjoy smoother, shinier hair.
Things Needed
Before we dive into the process of taming frizz with coconut oil, let’s gather all the essential items you’ll need:
- Coconut Oil: You’ll require about 1/4 to 1 teaspoon of coconut oil, depending on the length of your hair. Make sure to use pure, unrefined coconut oil for the best results.
- A Small Bowl: To warm the coconut oil.
- Your Hands: You’ll be applying the coconut oil using your hands, so make sure they are clean.
- A Hair Dryer: To blow dry your hair after applying the coconut oil.
Now that you have everything ready, let’s proceed with the steps to prepare and apply coconut oil for frizz control.
Steps to Prepare
Follow these simple steps to prepare and use coconut oil to tame frizz:
Step 1: Warm the Coconut Oil
Start by scooping out the required amount of coconut oil (1/4 to 1 teaspoon) and place it in a small bowl. To make the oil easier to work with, warm it slightly. You can do this by microwaving the oil for a few seconds or by placing the bowl in a bowl of hot water until it liquefies.
Step 2: Application
Now, pour the warmed coconut oil into the palm of your hands. Rub your hands together to evenly distribute the oil.
Step 3: Apply to Your Hair
Gently apply the coconut oil to your hair, starting from the ends and working your way up towards the roots. Make sure to coat all your hair strands evenly. If you have particularly frizzy areas, pay extra attention to them.
Step 4: Blow Dry
After you’ve applied the coconut oil, use a hair dryer on a low heat setting to blow dry your hair. This will help the oil penetrate your hair shafts and lock in the moisture. Continue blow drying until your hair is completely dry.
Tip: Detangler and Sunscreen
Coconut oil not only tames frizz but also works as an excellent detangler. If you have short and thin hair, use a smaller amount of coconut oil to prevent your hair from feeling greasy. Additionally, you can leave the oil on your hair as a natural sunscreen to protect it from the sun’s harmful rays.
Benefits
Using coconut oil for frizz control offers a range of benefits for your hair:
1. Natural Moisturization
Coconut oil is a natural emollient that penetrates deep into the hair shafts, providing intense moisture. It helps to hydrate and nourish your hair, reducing frizz and leaving it soft and manageable.
2. Frizz Taming
The rich fatty acids present in coconut oil help to smooth the hair’s cuticle, preventing moisture from entering and causing frizz. This results in smoother, sleeker hair.
3. Strengthens Hair
Coconut oil contains proteins that can strengthen your hair, reducing breakage and split ends. This not only improves the overall health of your hair but also contributes to a frizz-free appearance.
4. Natural Shine
Coconut oil adds a natural shine to your hair, making it look lustrous and healthy. Say goodbye to dull, lifeless locks.
5. Versatility
Apart from taming frizz, coconut oil has numerous other benefits for your hair, including promoting hair growth, preventing dandruff, and protecting against environmental damage.
Conclusion
Coconut oil is a natural and effective solution for taming frizz and achieving smooth, beautiful hair. With just a few simple steps, you can incorporate this wonder ingredient into your hair care routine and enjoy the benefits of moisturized, frizz-free hair. So, the next time you find yourself battling with frizzy locks, reach for that jar of coconut oil and let its natural magic work wonders on your hair. Say hello to a frizz-free and fabulous mane!

In the world of natural hair care, finding the perfect styling product that is both effective and chemical-free can be a challenge. However, there’s a delightful solution that combines the soothing qualities of chamomile and mint with the styling prowess of xanthan gum. This homemade Chamomint Hair Styling Gel offers a gentle yet effective alternative for those seeking a natural way to style and nourish their hair.
Ingredients
Before diving into the preparation steps, gather the following ingredients:
- 1 tablespoon lemon juice
- 1/2 teaspoon xanthan gum powder
- 1 tablespoon or 2 teabags of chamomile
- 1 cup water
- 1/2 tablespoon or 1 teabag of mint
- 1/3 cup aloe vera juice
- 1 teaspoon maple syrup
Steps to Prepare
Follow these steps to craft your own Chamomint Hair Styling Gel:
1. Begin by bringing a cup of water to a boil.
2. Once the water reaches a boil, add the chamomile and mint to infuse the boiling water.
3. Allow the tea to sit and cool to room temperature, giving it time to release the herbal flavors into the liquid.
4. After cooling, strain the tea using a mesh strainer, tea strainer, or cheesecloth, removing the chamomile and mint, and discarding the teabags.
5. In a separate container, combine the lemon juice, xanthan gum powder, aloe vera juice, and maple syrup with the herbal tea.
6. Whisk all the ingredients together thoroughly.
7. Let the mixture rest for a minute; during this time, the xanthan gum will gradually thicken the gel.
Note: If the desired degree of thickness has not been achieved, consider adding a little more xanthan gum. Conversely, if the gel becomes too thick, you can thin it out by adding a touch more water.
Benefits
Using Chamomint Hair Styling Gel offers several advantages:
- Natural Ingredients: This gel is made from all-natural ingredients, avoiding the harsh chemicals found in many commercial hair styling products.
- Soothing Properties: Chamomile and mint provide a calming effect on the scalp and hair.
- Customizable Thickness: You have control over the gel’s thickness by adjusting the amount of xanthan gum and water to your preference.
- Moisturizing: Aloe vera juice and maple syrup help retain moisture in your hair.
- Chemical-Free Styling: Achieve your desired hairstyle without subjecting your hair to harmful chemicals.
Conclusion
With the Chamomint Hair Styling Gel, you can enjoy a natural and chemical-free way to style your hair while benefiting from the soothing qualities of chamomile and mint. This DIY solution allows you to take control of your hair care routine and tailor it to your specific needs. Say goodbye to commercial styling products loaded with chemicals and hello to a gentler, more nourishing option for your hair. Your locks will thank you for it!
Achieving the perfect hairstyle often requires the use of styling products, but many of these products on the market are loaded with chemicals that can leave your hair dry and damaged. What if there was a way to style your hair while also nourishing it with natural ingredients? Enter the Styling Cream Moisturizer, a versatile hair care product that combines the benefits of a moisturizing conditioner, aloe vera gel, and other natural goodies to help you achieve stunning styles while keeping your hair healthy. In this article, we’ll guide you through the process of making your own Styling Cream Moisturizer and uncover the many benefits it offers.
Things Needed
Before you embark on creating your Styling Cream Moisturizer, let’s gather all the necessary ingredients:
- 6 tablespoons of your favorite moisturizing conditioner
- 12 tablespoons of aloe vera gel
- 2 pinches of cinnamon
- ½ teaspoon of your preferred oil (extra virgin olive oil – EVOO – is an excellent choice)
- 2 teaspoons of blue agave nectar
- Tea tree or jasmine essential oils (for fragrance, optional)
Steps to Prepare
Creating your Styling Cream Moisturizer is a straightforward process. Follow these steps to make your hair’s new best friend:
1. In a small bowl, combine 6 tablespoons of your favorite moisturizing conditioner, 12 tablespoons of aloe vera gel, 2 pinches of cinnamon, ½ teaspoon of your preferred oil (EVOO is recommended), and 2 teaspoons of blue agave nectar.
2. Stir the mixture thoroughly until all the ingredients are well combined and you achieve a thick consistency.
Tip: The end result should be lighter than a traditional hair gel but thicker than an average styling cream.
3. Once you’ve achieved the desired consistency, transfer the mixture into a clean glass jar for storage.
Benefits
The Styling Cream Moisturizer offers numerous benefits for your hair care routine:
- Chemical-Free Styling: Unlike many commercial styling products, this moisturizer is made from natural ingredients, reducing the risk of exposure to harmful chemicals.
- Moisturizing Properties: With aloe vera gel and moisturizing conditioner as key components, this cream hydrates your hair, preventing dryness and frizz.
- Styling Versatility: Use this moisturizer to create various hairstyles, from sleek and sophisticated to voluminous and textured.
- Nutrient-Rich Ingredients: Ingredients like EVOO and blue agave nectar provide essential nutrients and promote hair health.
- Customizable Fragrance: If desired, add tea tree or jasmine essential oils for a delightful fragrance that suits your preferences.
Conclusion
The Styling Cream Moisturizer is a game-changer in the world of hair care. It not only helps you achieve your desired hairstyles but also nourishes your hair with natural, wholesome ingredients. By making this moisturizer at home, you gain control over what you apply to your hair, eliminating the need for chemical-laden styling products. Say goodbye to dry and damaged hair and hello to beautiful, healthy locks that can be styled with ease. Your hair deserves the best, and with Styling Cream Moisturizer, it’s only a jar away from perfection.

In the pursuit of luscious, healthy curls, many people are turning to natural, organic solutions to enhance and style their hair. Matilda’s Organic Curls Cream is a delightful concoction designed to cater to those seeking an all-natural hair care option. Crafted with a blend of nourishing ingredients, this cream is here to transform your hair care routine and unleash the beauty of your curls.
Things Needed
Before we embark on the journey of creating Matilda’s Organic Curls Cream, let’s gather the essential ingredients:
- 1 jar or tube of Non-Flaking Gel or Aloe
- 1 tablespoon of your choice of oil (avocado oil, coconut oil, olive oil, mango butter, or jojoba oil)
- 2 tablespoons of pure shea butter
Steps to Prepare
Creating this organic curls cream is a breeze. Follow these simple steps to concoct your personalized hair elixir:
1. Begin by combining the non-flaking gel or aloe, your chosen oil (avocado, coconut, olive, mango butter, or jojoba), and pure shea butter in a bowl or container.
2. Mix the ingredients well until they blend into a smooth and consistent cream.
3. Prepare your hair by washing it thoroughly.
4. Using your hands, gently massage the cream into your scalp and throughout your hair, ensuring an even distribution.
5. Grab a wide-toothed brush and use it to comb your hair, helping to form beautiful curl definitions.
6. After you’ve applied the cream and brushed your hair, give it a little shake for that extra flair.
With these simple steps, you’ve created Matilda’s Organic Curls Cream, a natural elixir to enhance your curls and keep your hair looking fabulous.
Benefits
Matilda’s Organic Curls Cream offers a range of benefits for your hair care routine:
- Natural Ingredients: This cream is crafted with organic components, eliminating the need for harsh chemicals often found in commercial hair products.
- Nourishing Oils: The inclusion of nourishing oils like avocado, coconut, olive, mango butter, or jojoba oil adds moisture and promotes hair health.
- Shea Butter: Pure shea butter is known for its moisturizing properties and helps to prevent dryness, making your curls appear more vibrant and defined.
- No Flaking: The non-flaking gel or aloe ensures that your curls stay in place without the annoyance of flaking or residue.
- Easy Application: Applying this cream is a straightforward process, requiring no special tools or techniques.
Conclusion
Matilda’s Organic Curls Cream is a fantastic addition to the world of natural hair care. By choosing to create this cream yourself, you not only enjoy the benefits of organic, nourishing ingredients but also gain control over what goes into your hair care routine. Say goodbye to chemicals and hello to beautiful, well-defined curls. This cream is a testament to the wonders of nature and the simplicity of self-care. Treat your hair to Matilda’s Organic Curls Cream and let your curls shine with radiance and health.

Styling our hair often involves a variety of products, many of which are packed with chemicals that can leave our locks dry and damaged. What if you could refresh and style your hair using natural ingredients that not only enhance your look but also nourish your hair? Enter the Hair Refreshing Styling Spray, a versatile hair care product that combines Epsom salt, aloe vera gel, and more to give your hair a rejuvenating boost. In this article, we will guide you through creating your very own Hair Refreshing Styling Spray, exploring the ingredients, steps, and the numerous benefits it offers to your hair.
Things Needed
Before we delve into creating this refreshing styling spray, let’s gather the essential ingredients:
- 2 teaspoons Epsom salt
- 1 cup hot water
- 1/3 cup aloe vera gel
- 1 tablespoon jojoba or olive oil
- 2 tablespoons conditioner
- Spray bottle for storage
Steps to Prepare
Making your own Hair Refreshing Styling Spray is a simple and rewarding process. Follow these steps to create your natural hair elixir:
1. In a mixing bowl, combine 2 teaspoons of Epsom salt, 1 cup of hot water, 1/3 cup of aloe vera gel, 1 tablespoon of jojoba or olive oil, and 2 tablespoons of conditioner.
2. Stir the mixture thoroughly to ensure all the ingredients are well combined.
3. Carefully transfer the mixture into a clean and empty spray bottle.
4. Before each use, give the bottle a vigorous shake to mix the ingredients properly.
5. Store the spray bottle in the refrigerator to maintain its freshness.
6. You can use this spray in two different ways:
- a) After washing your hair, apply the spray to damp hair to style it as desired.
- b) For a mid-day hair revival and refresh, spray it on dry hair to rejuvenate your locks.
Tip: In hot temperatures, consider omitting the oil and substituting it with a bit of honey and/or aloe vera juice to prevent any potential greasiness.
Note: Feel free to experiment and tweak the ingredients to suit your hair type. The effectiveness of this Hair Refreshing Styling Spray may vary depending on the brands of the products used, so don’t hesitate to find the perfect combination for your hair.
Benefits
The Hair Refreshing Styling Spray offers a range of benefits for your hair care routine:
- Natural Ingredients: Made from natural components, this spray eliminates the need for harsh chemicals, reducing the risk of damage to your hair.
- Revitalization: The Epsom salt and aloe vera gel help revitalize and rejuvenate your hair, giving it a fresh look.
- Moisturizing Effect: Ingredients like jojoba or olive oil provide essential moisture, preventing dryness and promoting hair health.
- Styling Versatility: Use this spray to style your hair after washing or to refresh your look during the day.
- Customization: Feel free to customize the ingredients to suit your hair type and preferences.
Conclusion
The Hair Refreshing Styling Spray is a remarkable addition to your hair care routine. It not only helps you style your hair naturally but also provides nourishment and hydration to keep your locks healthy and vibrant. By crafting this spray at home, you have control over what goes into your hair, eliminating the need for chemical-laden styling products. Say goodbye to dry and damaged hair and welcome the refreshing and rejuvenating benefits of the Hair Refreshing Styling Spray. Your hair will thank you for the natural care and attention it deserves.
Beautiful, healthy curls are a dream for many, but achieving and maintaining them can be a challenge, especially with the use of commercial hair products filled with chemicals. What if you could pamper your hair with natural, nurturing ingredients that not only moisturize your curls but also make them glow with vitality? The Glowing Waves Coconut Milk/Oil Conditioner is here to make your hair dreams come true. This DIY conditioner recipe is suitable for all hair types and is designed to strengthen your hair, stimulate growth, remedy hair loss, and provide an unparalleled shine. In this article, we will guide you through the creation of this amazing conditioner, exploring the ingredients, steps, and the incredible benefits it brings to your hair.
Things Needed
Before we embark on the journey of creating Glowing Waves Coconut Milk/Oil Conditioner, let’s gather all the necessary ingredients:
- 1 tablespoon of your favorite hair conditioner
- 1 tablespoon of cane molasses
- 3 tablespoons of coconut milk (adjust to taste)
- 1 tablespoon of coconut oil
- 1 tablespoon of honey
- 1 tablespoon of rosemary-infused olive oil (or substitute with oil of your choice)
- Small bowl for mixing
- Spoon for stirring
Steps to Prepare
Creating this nourishing conditioner is a straightforward process. Follow these steps to give your hair the love and care it deserves:
1. In a small bowl, combine 1 tablespoon of your favorite hair conditioner, 1 tablespoon of cane molasses, 3 tablespoons of coconut milk (adjust the quantity according to your preference), 1 tablespoon of coconut oil, 1 tablespoon of honey, and 1 tablespoon of rosemary-infused olive oil (or your preferred oil).
2. Stir the mixture thoroughly until all the ingredients are well combined, creating a smooth and consistent conditioner.
3. To ensure the best results, it’s recommended to shampoo your hair three days before applying the hair mixture.
4. Apply the conditioner by massaging it gently from your hair tips to the roots and scalp.
5. Leave the conditioner on for at least 60 minutes, or if you prefer, you can leave it on for longer to let the nourishing ingredients work their magic.
Note: If you have a preferred oil other than rosemary-infused olive oil, feel free to substitute it to cater to your unique hair needs and fragrance preferences.
Benefits
The Glowing Waves Coconut Milk/Oil Conditioner offers a plethora of benefits for your hair:
- Moisturization: The combination of coconut milk, coconut oil, and honey ensures that your curls receive the moisture they need to stay soft and healthy.
- Hair Strength: The conditioner helps to strengthen your hair, reducing breakage and promoting overall hair health.
- Hair Growth: The ingredients in this conditioner, particularly rosemary-infused olive oil, stimulate hair growth and remedy hair loss.
- Natural Shine: Expect an out-of-this-world glow for your hair, making it look radiant and vibrant.
- Versatility: Suitable for all hair types, this conditioner is a versatile solution for those seeking a natural and effective hair care product.
Conclusion
The Glowing Waves Coconut Milk/Oil Conditioner is a true gem in the world of natural hair care. Not only does it moisturize your curls, but it also strengthens, stimulates growth, and brings out an unparalleled shine. By creating this conditioner at home, you take control of what goes into your hair, avoiding the harsh chemicals commonly found in commercial products. Say goodbye to lackluster hair and hello to the nourishing care and radiant glow of Glowing Waves. Your hair will thank you for the love and attention it receives from this incredible DIY conditioner.
Maintaining healthy and vibrant hair is a goal shared by many. However, the battle against hair loss, dandruff, dryness, and an itchy scalp can be challenging. What if you could create a leave-in conditioner at home that not only fights these common hair issues but also promotes hair growth? This DIY Leave-in Conditioner is the answer to your hair care prayers. Packed with natural ingredients like lime juice, aloe, coconut milk, and essential oils, this conditioner provides your hair with the love and nourishment it deserves. In this article, we’ll guide you through creating this miraculous conditioner, detailing the ingredients, steps, and the numerous benefits it brings to your hair.
Things Needed
Before we embark on the journey of creating your DIY Leave-in Conditioner, let’s gather all the necessary ingredients:
- 10 small squirts of Lime Juice
- ½ cup of Aloe Juice and gel
- 1 cup distilled water
- Milk/Water from 1 coconut
- 1 tablespoon of melted Shea butter
- 1 tablespoon of melted Coconut Oil
- 1 teaspoon of Olive oil
- ½ teaspoon of Thyme oil
- 1 teaspoon of Rosemary oil
- Small bowl for mixing
- Spoon for stirring
- Spray bottle for storage
Steps to Prepare
Creating this nourishing leave-in conditioner is a straightforward process. Follow these steps to give your hair the care it deserves:
1. In a small bowl, combine 10 small squirts of lime juice, ½ cup of aloe juice and gel, 1 cup of distilled water, milk or water from 1 coconut, 1 tablespoon of melted shea butter, 1 tablespoon of melted coconut oil, 1 teaspoon of olive oil, ½ teaspoon of thyme oil, and 1 teaspoon of rosemary oil.
2. Mix the ingredients thoroughly until you achieve a smooth and consistent conditioner.
3. Once the conditioner is well mixed, transfer it into a clean spray bottle for easy application.
4. Apply the leave-in conditioner as you would a regular conditioner, ensuring your hair is well-covered.
Benefits
The DIY Leave-in Conditioner offers a multitude of benefits for your hair care routine:
- Hair Loss Prevention: Ingredients like thyme and rosemary oil help prevent hair loss and promote healthy growth.
- Dandruff Control: The natural components in this conditioner combat dandruff, leaving your scalp refreshed and flake-free.
- Dryness Relief: Coconut milk, aloe, and essential oils provide essential moisture to combat dryness and an itchy scalp.
- Hair Growth Promotion: The combination of natural ingredients promotes hair growth, giving your locks a lush and full appearance.
- Nourishment: With shea butter, coconut oil, and olive oil, this conditioner provides vital nutrients to keep your hair healthy and strong.
Conclusion
The DIY Leave-in Conditioner is a true gem in the world of natural hair care. Not only does it address common hair concerns like dandruff, dryness, and hair loss, but it also promotes healthy hair growth. By creating this conditioner at home, you take control of what goes into your hair, eliminating the need for chemical-laden products. Say goodbye to hair issues and hello to the natural care and nourishment your hair deserves. Your hair will thank you for the love and attention it receives from this miraculous DIY conditioner.
Achieving healthy, strong, and lustrous hair is a goal for many, but the effects of daily styling, exposure to environmental factors, and chemical treatments can take a toll on our locks. What if you could rejuvenate and fortify your hair using natural ingredients that have been trusted for centuries? The Protein Filled Mud Mask is here to bring your hair back to life, providing the elasticity and strength it deserves. This DIY hair mask combines the power of ayurvedic henna and nourishing ingredients like coconut oil, aloe vera juice, and more to promote hair growth and restore vitality. In this article, we will guide you through the creation of this miraculous mud mask, revealing the ingredients, steps, and the many benefits it offers to your hair.
Things Needed
Before we dive into creating the Protein Filled Mud Mask, let’s gather all the necessary ingredients:
- 1 cup of aloe vera juice or coconut milk
- 2 cups of Nupur henna mixture (includes Brahmi, hibiscus powder, shikakai, aloe vera, amla, bhringraj, neem, and jatamansi powders)
- Your favorite moisture rinse-out conditioner
- 1 large egg, beaten
- 2 1/2 tablespoons of coconut oil
- 4 tablespoons of agave nectar or honey
- Bowl for mixing
- Spoon for stirring
- Plastic cap or wrap for covering hair
Steps to Prepare
Creating this protein-filled mud mask is a rewarding process that can transform your hair. Follow these steps to rejuvenate and strengthen your locks:
1. In a bowl, combine 2 cups of Nupur henna mixture with 1 cup of aloe vera juice or coconut milk.
2. Stir the mixture thoroughly until it is well combined, ensuring a smooth and consistent texture.
3. Measure in 2 1/2 tablespoons of coconut oil, 4 tablespoons of agave nectar or honey, and add the beaten egg to the mixture.
4. Stir the ingredients well to ensure even distribution, creating a rich, nourishing mask.
5. Apply the mud mask generously by massaging it into your hair ends, hair strands, hair roots, and scalp, ensuring full coverage.
6. Leave the mask on for a duration of 60 to 180 minutes, allowing the natural ingredients to work their magic.
7. To enhance the effectiveness of the mask, cover your hair with a plastic cap or wrap while the mask is in place.
8. After the desired duration, wash off the mud mask using water and a protein-free, moisture-rich conditioner.
Tip: You’ll be left with hair that feels vibrant and rejuvenated after this treatment.
Note: Avoid excessive bending or movements that may cause your hair to knot or tangle while the mud mask is still in place, as this can affect the overall effectiveness of the treatment.
Benefits
The Protein Filled Mud Mask offers a multitude of benefits for your hair care routine:
- Hair Growth: Ayurvedic henna and nourishing ingredients stimulate hair growth, making your hair look lush and vibrant.
- Strength and Elasticity: The mask fortifies your hair, providing strength and elasticity that help prevent breakage.
- Natural Shine: Expect a radiant, healthy shine that adds vibrancy to your locks.
- Moisturization: Ingredients like coconut oil, aloe vera juice, and agave nectar or honey provide essential moisture to combat dryness.
- Hair Restoration: This mask can restore vitality to your hair, bringing it back to its former glory.
Conclusion
The Protein Filled Mud Mask is a natural miracle for your hair. Not only does it promote hair growth and strength, but it also restores vitality and shine. By creating this mask at home, you take control of what goes into your hair, avoiding the harsh chemicals commonly found in commercial products. Say goodbye to lackluster hair and hello to the nourishing care and rejuvenation offered by the Protein Filled Mud Mask. Your hair will thank you for the love and attention it receives from this amazing DIY treatment.
Achieving a close and comfortable shave without irritation is a top priority for many individuals. Commercial shaving creams often contain chemicals and fragrances that can be harsh on sensitive skin. What if you could create a luxurious and skin-friendly shaving cream at home? This Homemade Shaving Cream recipe is the perfect solution. With natural ingredients like shea butter, coconut oil, and sweet almond oil, this cream not only provides a smooth shave but also pampers your skin, making it an excellent choice for those with sensitive skin. In this article, we will guide you through the process of creating this soothing shaving cream, exploring the ingredients, steps, and the numerous benefits it offers for your skin.
Things Needed
Before we delve into creating your Homemade Shaving Cream, let’s gather all the necessary ingredients and tools:
- 4 tablespoons of solid shea butter
- 3 tablespoons of coconut oil
- 2 tablespoons of sweet almond oil
- 10-12 drops of pure lavender essential oil (optional, for fragrance)
- Double boiler or a heatproof bowl and saucepan
- Stirring utensil
- Bowl for mixing
- Electric mixer or stand mixer
- A well-covered jar or container for storage
Steps to Prepare
Creating this homemade shaving cream is a straightforward process. Follow these steps to pamper your skin naturally:
1. Begin by mixing 4 tablespoons of solid shea butter and 3 tablespoons of coconut oil together in a bowl.
2. Transfer the shea butter and coconut oil mixture into a double boiler over very low heat. If you don’t have a double boiler, you can use a heatproof bowl placed on top of a saucepan filled with water.
3. As the mixture melts, stir it from time to time to ensure even melting. Once the mixture has completely melted, remove it from heat.
4. Measure in 2 tablespoons of sweet almond oil and, if desired, add 10-12 drops of pure lavender essential oil for a delightful fragrance. Stir to incorporate the oils well.
5. Pour the mixture into a bowl and place it in the refrigerator to allow the mixture to solidify. This can take a few hours.
6. Once the mixture has solidified, whip the shaving cream using an electric mixer or a stand mixer until it reaches a creamy and fluffy consistency.
7. Set the whipped shaving cream aside before transferring it into a well-covered jar or container for storage.
Tip: It’s recommended not to use the shaving cream beyond a month to ensure its freshness and effectiveness.
Benefits
The Homemade Shaving Cream offers numerous benefits for your shaving routine and skin care:
- Gentle on Sensitive Skin: Natural ingredients like shea butter and coconut oil make this cream an excellent choice for individuals with sensitive skin, reducing the risk of irritation and redness.
- Smooth and Close Shave: The creamy texture of this shaving cream provides a smooth glide for your razor, ensuring a close and comfortable shave.
- Moisturizing Effect: Shea butter and sweet almond oil provide essential moisture, leaving your skin feeling soft and hydrated.
- Optional Fragrance: The addition of lavender essential oil adds a delightful fragrance to enhance your shaving experience.
- Chemical-Free: By making your shaving cream at home, you avoid the chemicals and fragrances often found in commercial products.
Conclusion
Homemade Shaving Cream is the perfect way to pamper your skin while achieving a smooth and comfortable shave. By utilizing natural ingredients and a simple DIY process, you can take control of what goes on your skin, especially if you have sensitive skin that requires gentle care. Say goodbye to commercial shaving creams filled with chemicals and hello to the soothing and moisturizing benefits of Homemade Shaving Cream. Your skin will thank you for the natural and luxurious treatment it deserves.
Shaving is a common grooming ritual for many, but it often comes with the need for a good quality shaving cream. Commercial shaving creams may contain chemicals and fragrances that can be harsh on the skin. What if you could create your own shaving cream at home, using natural ingredients that nourish your skin while providing a smooth shave? This DIY Shaving Cream recipe is the answer. Made with simple and wholesome ingredients like coconut oil, shea butter, and eucalyptus essential oil, this shaving cream offers a luxurious shaving experience that’s gentle on the skin. In this article, we’ll guide you through creating this homemade shaving cream, discussing the ingredients, steps, and the numerous benefits it offers for your shaving routine.
Things Needed
Before we dive into creating your DIY Shaving Cream, let’s gather all the necessary ingredients and tools:
- 1/2 (4-ounce) cup of coconut oil
- 1/4 cup of olive oil
- 1/2 (4-ounce) cup of shea butter
- 20-25 drops of eucalyptus essential oil
- Mixing bowl
- Double boiler or a heatproof bowl and saucepan
- Stirring utensil
- Hand mixer or standing mixer
- Well-covered jar for storage
Steps to Prepare
Creating this homemade shaving cream is a simple and rewarding process. Follow these steps to make your own natural shaving cream:
1. Start by combining 1/2 cup of shea butter and 1/2 cup of coconut oil in a mixing bowl.
2. Transfer the mixture from the bowl into a double boiler over medium-low heat, allowing it to melt gently. If you don’t have a double boiler, you can use a heatproof bowl placed on top of a saucepan filled with water.
3. Once the shea butter and coconut oil have melted and combined, remove the mixture from the heat and transfer it back into a bowl.
4. Measure 1/4 cup of olive oil and add it to the mixture. Stir well to incorporate the olive oil into the mixture.
5. Place the bowl with the mixture in the refrigerator and allow it to cool and solidify. This can take a few hours.
6. Once the mixture has solidified, remove it from the refrigerator.
7. Using either a hand mixer or a standing mixer, whip the mixture until stiff peaks are formed. This typically takes about 3 minutes.
8. While whipping the mixture, measure in 20-25 drops of eucalyptus essential oil. Continue to whip until the essential oil is fully incorporated.
9. Transfer the whipped shaving cream into a well-covered jar or container for storage.
Benefits
Creating your own DIY Shaving Cream offers various benefits for your shaving routine and skincare:
- Natural Ingredients: With ingredients like coconut oil, shea butter, and olive oil, this shaving cream is free from harsh chemicals and fragrances, making it suitable for sensitive skin.
- Smooth Shave: The creamy texture of this shaving cream provides a smooth glide for your razor, ensuring a comfortable and close shave.
- Moisturizing Effect: Shea butter and olive oil offer essential moisture to your skin, leaving it soft and hydrated.
- Eucalyptus Essential Oil: The addition of eucalyptus essential oil provides a refreshing scent and may have soothing properties for the skin.
- Customizable: You can experiment with different essential oils to customize the fragrance of your shaving cream.
Conclusion
DIY Shaving Cream is a fantastic way to create a natural and skin-friendly solution for your shaving needs. By using simple and wholesome ingredients, you can ensure a smooth and comfortable shave without the use of harsh chemicals or artificial fragrances. Say goodbye to commercial shaving creams and hello to the luxury of homemade shaving cream that pampers your skin. Enjoy a more natural and enjoyable shaving experience with the benefits of this DIY creation.
Healthy and lustrous hair is a desire shared by many. Achieving beautiful hair doesn’t always require expensive products or complicated routines. Sometimes, simple and natural solutions can work wonders. Coconut oil, with its numerous benefits for hair, has long been a favorite in the world of natural hair care. This article introduces you to the Coconut Oil Hair Conditioner, a quick and easy DIY solution that can help you achieve the soft, shiny, and nourished hair you’ve always wanted. Whether you have thin or thick hair, this conditioner can be tailored to your needs. Join us as we explore the simplicity of this hair care ritual and its incredible benefits.
Things Needed
Before we delve into creating the Coconut Oil Hair Conditioner, let’s gather the few items you’ll need:
- 1/4 teaspoon of coconut oil (for thinner, shorter hair) or 1/2 teaspoon of coconut oil (for thicker, longer hair)
- Geranium and/or sandalwood essential oils (optional, for damaged or dry hair)
Steps to Prepare
Creating this natural hair conditioner is a breeze. Follow these straightforward steps for nourished and beautiful hair:
1. Start by warming the appropriate amount of coconut oil in your palms. You can adjust the quantity based on the thickness and length of your hair.
2. Once the coconut oil is warmed and in a liquid state, transfer it into the palm of your hands.
3. Apply the warmed coconut oil to your hair shaft and hair ends, gently smoothing it through your strands using your hands.
Tip: If you have damaged or dry hair that needs extra care, consider adding 3-4 drops of geranium and/or sandalwood essential oils to the coconut oil. These essential oils serve as leave-in and deep conditioners, providing additional nourishment and a delightful fragrance.
Benefits
The Coconut Oil Hair Conditioner offers numerous benefits for your hair and overall hair care routine:
- Natural Nourishment: Coconut oil is packed with essential fatty acids and vitamins that provide deep nourishment to your hair, leaving it soft and shiny.
- Protection: This conditioner creates a protective barrier for your hair, helping to prevent damage from environmental factors and styling tools.
- Split End Prevention: Regular use of coconut oil can help prevent split ends and promote healthier hair growth.
- Simplicity: With only one or two ingredients, this conditioner is simple to make and use, making it a convenient addition to your hair care routine.
- Customization: You can tailor the quantity of coconut oil and essential oils to your specific hair type and needs, ensuring it works perfectly for you.
Conclusion
Achieving beautiful and healthy hair doesn’t have to be complicated or expensive. The Coconut Oil Hair Conditioner is a simple yet effective DIY solution that provides natural nourishment, protection, and split end prevention for your locks. Whether you have short or long hair, thick or thin, this conditioner can be customized to suit your specific needs. By incorporating this easy and natural hair care ritual into your routine, you can enjoy the benefits of coconut oil and essential oils for softer, shinier, and more nourished hair. Say goodbye to expensive hair products and hello to the simplicity and beauty of natural hair care.
A healthy scalp is the foundation of strong, vibrant hair. If you’re looking to enhance the condition of your scalp and promote hair growth, natural solutions are often the best choice. In this article, we introduce you to the Coconut Oil Scalp Conditioner and Hair Growth Serum, a simple yet effective DIY remedy. With just one key ingredient, coconut oil, you can nurture your scalp, encourage hair growth, and enjoy a more lustrous mane. Let’s explore the ease and benefits of this natural scalp conditioner and hair growth serum.
Things Needed
To create the Coconut Oil Scalp Conditioner and Hair Growth Serum, you’ll only need one ingredient:
- 1 teaspoon of coconut oil
Steps to Prepare
This DIY serum requires minimal effort and time. Follow these simple steps to nurture your scalp and promote healthy hair growth:
1. Begin by applying 1 teaspoon of coconut oil to your scalp using your fingertips. As you apply the oil, gently press it into your scalp.
2. Once the coconut oil is evenly distributed, start massaging your scalp. Use gentle, circular motions and continue massaging for approximately 10 minutes.
Tip: For the best results, apply this coconut oil scalp conditioner and hair growth serum 3-4 times weekly.
Benefits
The Coconut Oil Scalp Conditioner and Hair Growth Serum offer several advantages for your scalp and hair care routine:
- Promotes Hair Growth: Coconut oil is known for its ability to nourish hair follicles, stimulate circulation, and encourage hair growth.
- Strengthens Hair: Regular application of coconut oil can strengthen hair strands, reducing the risk of breakage and split ends.
- Soothes Scalp: Coconut oil has natural soothing properties that can help alleviate dryness, itchiness, and dandruff on the scalp.
- Improves Scalp Health: By massaging the coconut oil into your scalp, you enhance blood flow and promote overall scalp health.
- Simple and Convenient: This DIY serum is quick to prepare and easy to incorporate into your regular hair care routine.
Conclusion
Healthy hair begins with a healthy scalp, and the Coconut Oil Scalp Conditioner and Hair Growth Serum are here to help. With just one natural ingredient, coconut oil, you can give your scalp the nourishment it needs to promote hair growth and maintain overall scalp health. Regular application of this serum can lead to stronger, shinier, and more vibrant hair. Say goodbye to complicated hair growth solutions and hello to the simplicity and effectiveness of coconut oil. Your scalp and hair will thank you for the natural care they deserve.

Are you looking for a simple yet effective way to promote hair growth and prevent hair fall? Look no further than the natural remedy of curry leaves and coconut oil. This powerful hair tonic combines the benefits of both ingredients to provide exceptional results for your hair. In this article, we will explore the simplicity and efficacy of using curry leaves as a hair tonic. Discover how this natural concoction can work wonders in improving the health and appearance of your hair.
Things Needed
To prepare this hair tonic, you will require just two key ingredients:
- One cup of curry leaves
- Pure coconut oil
Steps to Prepare
Creating this natural hair tonic is straightforward. Follow these simple steps to harness the power of curry leaves and coconut oil for your hair:
1. Begin by taking some pure coconut oil in a pan.
2. Heat the coconut oil over a moderate flame until it becomes warm.
3. Add a handful of fresh curry leaves to the warm coconut oil. Be cautious, as the leaves may splatter when added.
4. Allow the mixture to boil until the coconut oil turns black. This transformation is a sign that the beneficial compounds from the curry leaves have infused into the oil.
5. Once the oil has turned black, remove the pan from the heat source.
6. Allow the infused oil to cool down to a comfortable temperature for application.
7. Apply this hair tonic directly to your scalp, gently massaging it in. Ensure that you cover your entire scalp with the tonic.
8. Leave the hair tonic on your scalp for approximately one hour to allow it to work its magic.
9. After the recommended time has passed, wash your hair thoroughly with a mild and chemical-free shampoo.
Benefits
The use of curry leaves as a hair tonic offers numerous benefits for your hair and overall hair care:
- Hair Growth: Coconut oil is well-known for its hair growth properties, and when combined with curry leaves, it becomes a potent elixir that promotes hair growth.
- Hair Fall Prevention: Regular application of this hair tonic can help prevent hair fall and strengthen your hair roots.
- Natural Ingredients: This hair tonic relies on natural ingredients, making it a safe and chemical-free solution for your hair care routine.
- Improved Scalp Health: Curry leaves contain essential nutrients that nourish your scalp and improve its overall health.
- Convenient: This hair treatment can be easily incorporated into your weekly hair care routine and requires minimal effort.
Conclusion
Using curry leaves as a hair tonic is a simple yet highly effective way to improve the health and appearance of your hair. This natural remedy combines the power of coconut oil and curry leaves to promote hair growth, prevent hair fall, and enhance scalp health. By incorporating this treatment into your hair care routine twice a week, you can expect noticeable results within a month. Say goodbye to hair woes and hello to the benefits of this natural and nourishing hair tonic. Your hair will thank you for the care it deserves.
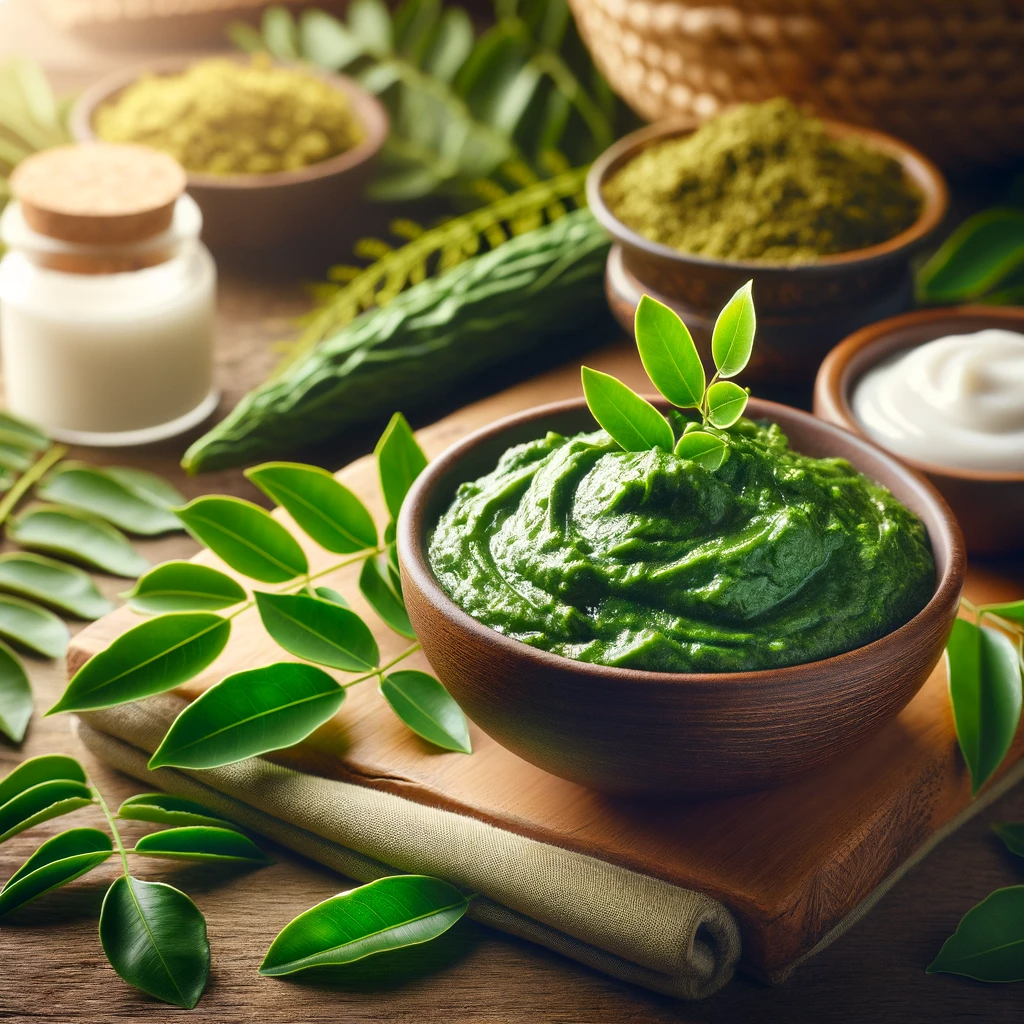
Dreaming of long, luscious locks and a healthy scalp? Look no further than the goodness of curry leaves and curd. Incorporating a curry leaves and curd hair mask into your hair care routine can work wonders in improving the health of your hair roots and stimulating the growth of new hair. In this article, we will delve into the simplicity and effectiveness of the Curry Leaves Hair Mask. Discover how this natural remedy can help you achieve stronger, healthier hair.
Things Needed
To create this nourishing hair mask, you will need just two main ingredients:
- One cup of fresh curry leaves
- One cup of curd (yogurt)
Steps to Prepare
Creating the Curry Leaves Hair Mask is a straightforward process. Follow these simple steps to harness the power of curry leaves and curd for your hair:
1. Begin by grinding the fresh curry leaves to form a smooth paste. You can use a blender or mortar and pestle for this step.
2. Once the curry leaves have been ground into a paste, mix some curd (yogurt) into the paste until the two ingredients are well combined. The curd should be added in a quantity that allows for easy application.
3. With your hair parted, apply this paste directly to your scalp using your fingertips. Ensure that you cover your entire scalp evenly with the mask.
4. After applying the hair mask, leave it on for about one hour to allow the beneficial properties to work their magic.
5. Once the recommended time has passed, wash off the hair mask thoroughly using a mild shampoo. Make sure all remnants of the mask are removed.
Benefits
The use of a Curry Leaves Hair Mask provides numerous benefits for your hair and overall hair care:
- Stimulates Hair Growth: Curry leaves, when applied directly to the scalp, provide medicinal benefits that stimulate the hair roots and encourage the growth of new hair.
- Strengthens Hair Roots: Regular use of this hair mask can lead to stronger hair roots, reducing the risk of hair fall and breakage.
- Enhances Scalp Health: The natural ingredients in this mask help nourish and improve the overall health of your scalp.
- Natural and Chemical-Free: This hair mask relies on natural ingredients, making it a safe and chemical-free solution for your hair care routine.
- Convenient: Incorporating this hair mask into your weekly routine is easy and requires minimal effort.
Conclusion
The Curry Leaves Hair Mask is a simple yet highly effective way to boost the health of your hair roots and stimulate new hair growth. This natural remedy harnesses the power of curry leaves and curd to provide a nourishing and revitalizing treatment for your hair and scalp. By using this hair mask once a week, you can observe visible improvements within a month. Say goodbye to hair woes and hello to the natural goodness of this hair mask, and watch your hair thrive and flourish.
In the realm of natural hair care, innovative solutions like Aloe Pectin Hair Jelly offer a refreshing alternative to commercial hair products. Combining the soothing properties of aloe vera juice with the thickening power of fruit pectin, this hair jelly is further enhanced with honey, agave nectar, EVOO (extra virgin olive oil), sweet almond oil, and essential oils. This mixture creates a versatile hair styling product that not only styles but also nourishes your hair.
Things Needed
To prepare this hair jelly, you will need:
- 1 Cup Aloe Vera Juice: Soothes the scalp and hair.
- 1 Packet Instant Fruit Pectin (approx. 1.60 oz.): Acts as a natural thickener.
- ¼ Teaspoon Honey: Natural humectant to retain moisture.
- ¼ Teaspoon Agave Nectar: Provides shine and smoothness.
- 2 Teaspoons EVOO: Nourishes and strengthens hair.
- 1 Teaspoon Sweet Almond Oil: Adds softness and promotes hair health.
- 5-7 Drops of Essential Oils: For fragrance, optional.
- Mixing Bowl: For combining ingredients.
- Spoon or Whisk: To mix the ingredients.
- Storage Container: To store the hair jelly.
- Refrigerator: To keep the jelly fresh.
Steps to Prepare
1. Start by slowly adding the instant fruit pectin into a mixing bowl to prevent clumping.
2. Gradually stir in the aloe vera juice to the pectin until well mixed.
3. Add ¼ teaspoon each of honey and agave nectar to the mixture.
4. Pour in 2 teaspoons of EVOO and 1 teaspoon of sweet almond oil.
5. Stir the mixture thoroughly until all ingredients are well combined.
6. Add 5-7 drops of your favorite essential oils for fragrance, if desired, and mix again to ensure even distribution.
7. Transfer the aloe gel mixture into a storage container and cover it tightly.
8. Store the hair jelly in the refrigerator to maintain its freshness.
Benefits
The Aloe Pectin Hair Jelly offers several benefits:
- Natural Styling: Provides a light hold without harsh chemicals found in many styling products.
- Moisturizing: Aloe vera and honey hydrate the hair, preventing dryness.
- Hair Nourishment: EVOO and sweet almond oil strengthen and nourish hair strands.
- Scalp Health: Aloe vera juice soothes the scalp.
- Customizable: Essential oils can be added for a personalized fragrance.
Conclusion
Creating your own Aloe Pectin Hair Jelly is a simple and effective way to embrace natural hair care. This homemade jelly not only helps in styling your hair but also contributes to its overall health. By using this natural styling product, you can avoid the harsh chemicals typically found in commercial hair products, providing a safer and healthier alternative for your hair and scalp.
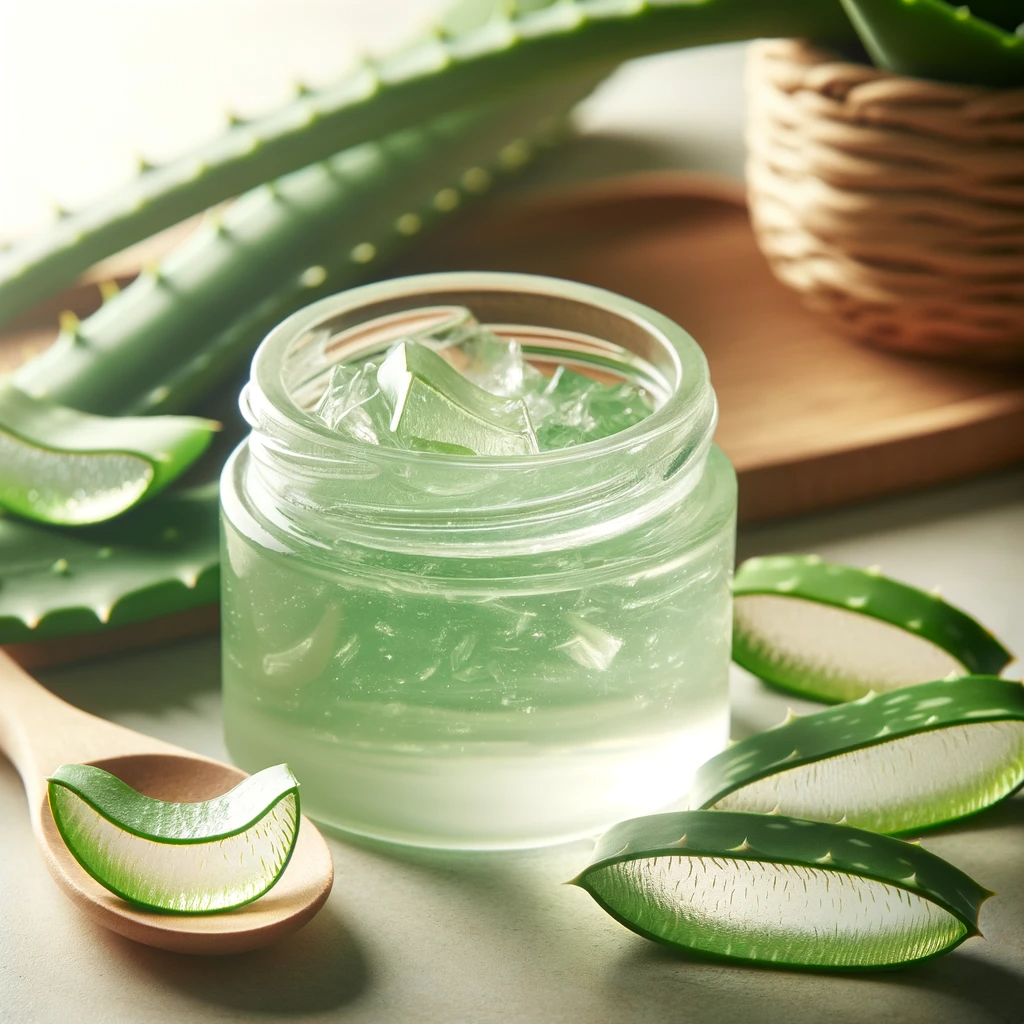
The quest for natural and organic hair care products has led many to explore homemade solutions. This Organic Aloe Hair Gel, made with egg whites, vegetable glycerin, aloe vera gel, essential oils, and water, offers a chemical-free alternative to conventional hair styling products. Ideal for those seeking a natural way to manage and style their hair, this gel not only provides hold but also nourishes the hair.
Things Needed
To prepare this organic hair gel, you will need:
- 3 Egg Whites: Provide protein to strengthen hair.
- 1-2 Tablespoons Vegetable Glycerin: Acts as a natural humectant, adding moisture.
- 2/3 Cup Aloe Vera Gel: Soothes the scalp and adds a light hold.
- 5-8 Drops Essential Oil(s) of Choice: Orange and vanilla extract for fragrance.
- 1/8 Cup of Water: To adjust consistency.
- Small Mixing Bowl: For combining ingredients.
- Electric Blender: To blend the mixture into a smooth consistency.
- Container with a Lid: For storing the gel.
- Refrigerator: To keep the gel fresh.
Steps to Prepare
1. In a small mixing bowl, combine 3 egg whites, 1-2 tablespoons of vegetable glycerin, 2/3 cup of aloe vera gel, and 1/8 cup of water.
2. Transfer the mixture into an electric blender.
3. Blend the mixture for about 20 seconds or until it reaches a smooth consistency.
4. Add 5-8 drops of your chosen essential oils, such as orange and vanilla extract, for a pleasant fragrance.
5. Transfer the blended mixture into a container and cover it well.
6. Store the hair gel in the refrigerator until you are ready to use it.
Benefits
The Organic Aloe Hair Gel offers several benefits:
- Natural Styling: Provides a light hold without the use of harsh chemicals found in many styling products.
- Hair Nourishment: Egg whites and vegetable glycerin strengthen and moisturize the hair.
- Scalp Soothing: Aloe vera gel is known for its soothing properties, making it great for sensitive scalps.
- Customizable: You can adjust the fragrance and properties by choosing different essential oils.
- Safe and Non-toxic: This homemade gel is free from artificial preservatives and harmful chemicals.
Conclusion
Creating your own Organic Aloe Hair Gel is a simple and effective way to embrace natural hair care. This gel not only helps in styling your hair but also contributes to its overall health. By using this homemade gel, you can avoid the harsh chemicals typically found in commercial hair products, providing a safer and healthier alternative for your hair and scalp.
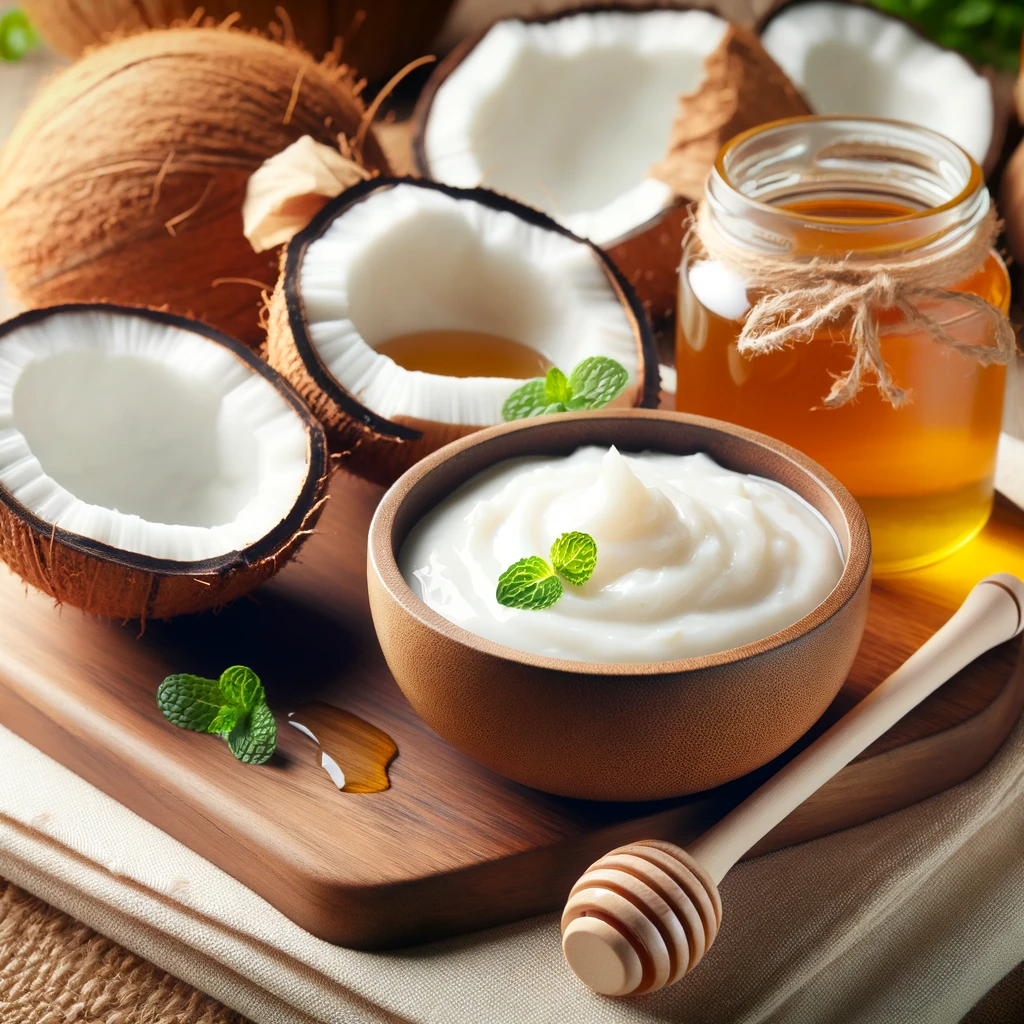
In the pursuit of healthy, vibrant hair, natural remedies are gaining popularity for their effectiveness and nourishment. This DIY Coconut/Honey Cooling Hair Mask is a perfect blend of natural oils, honey, and a deep conditioning mask, enhanced with the soothing properties of peppermint essential oil. This mask is designed to deeply moisturize, strengthen, and refresh your hair, making it an ideal treatment for all hair types.
Things Needed
To prepare this hair mask, you will need:
- Castor Oil: Promotes hair growth and thickness.
- Avocado Oil: Nourishes and strengthens hair.
- 10-20 Drops Peppermint Essential Oil: Provides a cooling effect and stimulates the scalp.
- Olive Oil: Moisturizes and improves hair health.
- Raw Honey: Acts as a natural humectant, retaining moisture.
- Shea Moisture Deep Conditioning Mask: Offers additional deep conditioning.
- Organic Coconut Milk: Hydrates and conditions the hair.
- Mixing Bowl: For combining ingredients.
- Spoon or Whisk: To mix the ingredients.
- Shower Cap or Towel: To cover hair during treatment.
- Mild Shampoo: For washing off the mask.
Steps to Prepare
1. In a mixing bowl, combine equal parts of castor, olive, and avocado oils with a generous amount of raw honey.
2. Stir the mixture well until the oils and honey are well combined.
3. Add an appropriate amount of Shea Moisture Deep Conditioning Mask and organic coconut milk to the oil/honey mixture, adjusting the quantities based on your hair length and thickness.
4. Stir the mixture until it reaches a smooth, thick, and creamy consistency.
5. Add 10-20 drops of peppermint essential oil to the mixture.
6. Mix thoroughly to ensure the essential oil is evenly distributed throughout the mask.
7. Wash your hair and pat it dry to ensure it’s damp before application.
8. Apply the cooling hair mask to your damp hair, covering it from roots to ends.
9. Leave the mask on your hair for about 30 minutes. For deeper conditioning, you can cover your hair with a shower cap or towel.
10. After 30 minutes, wash your hair with a mild shampoo and gently pat it dry.
Benefits
The DIY Coconut/Honey Cooling Hair Mask offers several benefits:
- Deep Moisturization: The combination of oils and honey provides intense moisture to the hair.
- Hair Growth Stimulation: Castor and peppermint oils stimulate the scalp, promoting hair growth.
- Soothing Effect: Peppermint oil offers a cooling sensation, soothing the scalp.
- Strengthens Hair: Avocado oil and the deep conditioning mask strengthen hair strands.
- Natural and Chemical-Free: This homemade mask avoids harsh chemicals found in many commercial hair products.
Conclusion
Creating your own Coconut/Honey Cooling Hair Mask is an effective way to nourish and revitalize your hair naturally. This blend of natural ingredients not only provides deep moisturization and conditioning but also stimulates hair growth and soothes the scalp. Regular use of this mask can lead to healthier, stronger, and more vibrant hair. Embrace this natural treatment and enjoy the benefits of homemade hair care.
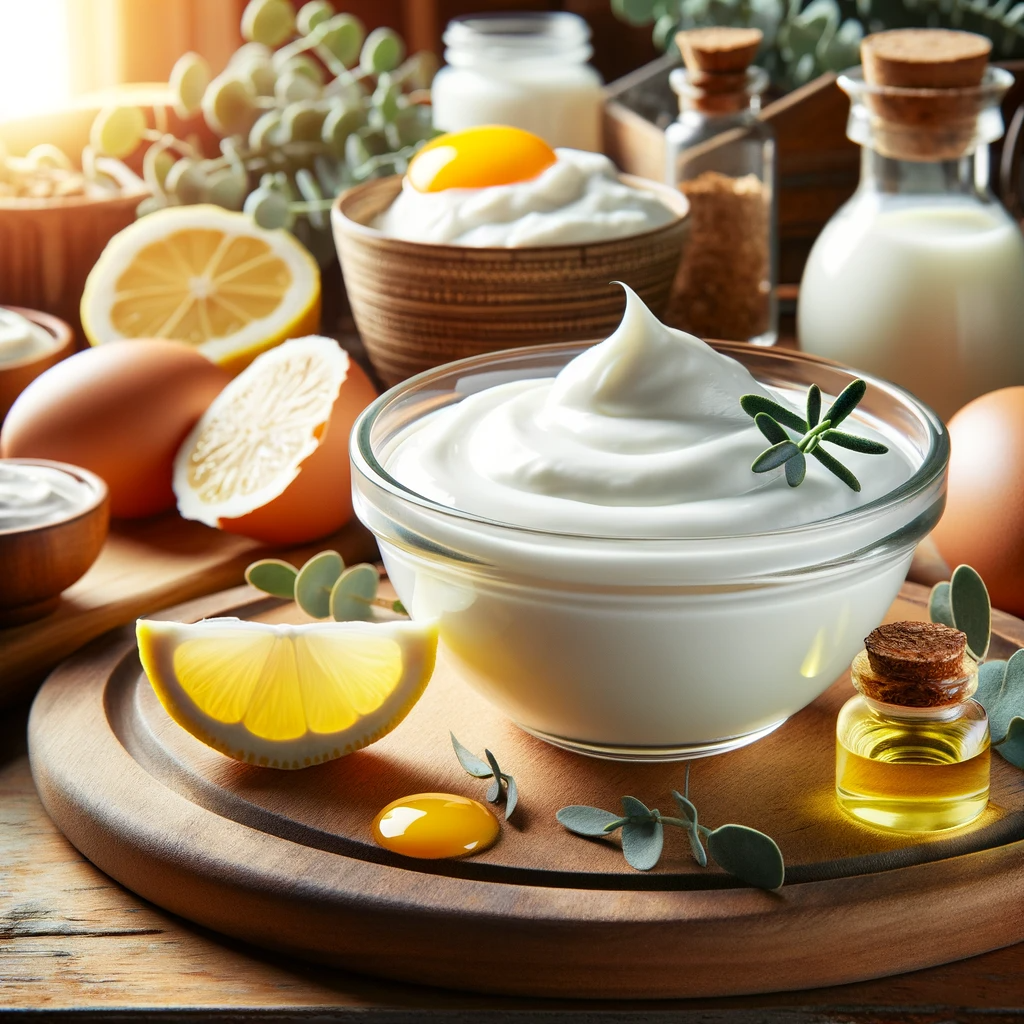
In the pursuit of healthier hair, natural and organic solutions often provide the most beneficial outcomes. This DIY Organic Conditioner, tailored for hair growth stimulation, combines plain natural yogurt, egg, lemon juice, and eucalyptus oil – each ingredient contributing to the overall health and vitality of your hair. Ideal for those seeking a natural approach to hair care, this conditioner is a simple, cost-effective way to nourish and strengthen your hair.
Things Needed
To prepare this organic conditioner, you will need:
- ¼ Cup of Plain Natural Yogurt: Rich in protein and lactic acid, helping in hydrating hair.
- 1 Egg: Provides protein and nutrients essential for hair health.
- 1 Teaspoon of Fresh Lemon Juice: Helps in balancing scalp pH and reducing dandruff.
- 8 to 10 Drops of Eucalyptus Oil (or Alternative Oils): Stimulates hair follicles and promotes hair growth.
- Electric Blender: For creating a smooth mixture.
- Bowl: For initial mixing of ingredients.
- Shower Cap or Towel: To cover hair during treatment.
- Mild Shampoo: For washing off the conditioner.
Steps to Prepare
1. In a bowl, combine ¼ cup of plain natural yogurt with a beaten egg and 1 teaspoon of fresh lemon juice.
2. Stir the mixture well to ensure all ingredients are blended.
3. Transfer the mixture into an electric blender and blend until a smooth, creamy consistency is achieved.
4. Apply the conditioner to your scalp and hair, massaging it gently to ensure even distribution.
5. Cover your hair with a shower cap or towel and leave the conditioner on for 20-30 minutes. This allows the nutrients to penetrate deeply into the hair and scalp.
6. After the treatment time, wash your hair with a mild shampoo and gently pat it dry.
Benefits
The DIY Organic Conditioner offers several benefits:
- Nourishes Hair and Scalp: Yogurt and egg provide essential proteins and nutrients, strengthening hair.
- Stimulates Hair Growth: Eucalyptus oil and its alternatives stimulate the scalp, promoting hair growth.
- Balances Scalp pH: Lemon juice helps in maintaining a healthy scalp environment.
- Moisturizes Hair: The natural ingredients in this conditioner deeply moisturize the hair, leaving it soft and shiny.
- Natural and Chemical-Free: This conditioner avoids harsh chemicals found in commercial hair products.
Conclusion
Creating your own organic conditioner is a rewarding way to take care of your hair’s health. This DIY Organic Conditioner for Hair Growth Stimulation not only nourishes and strengthens hair but also stimulates hair growth using natural ingredients. Regular use of this conditioner can lead to healthier, stronger, and more vibrant hair, showcasing the power of natural ingredients in hair care.
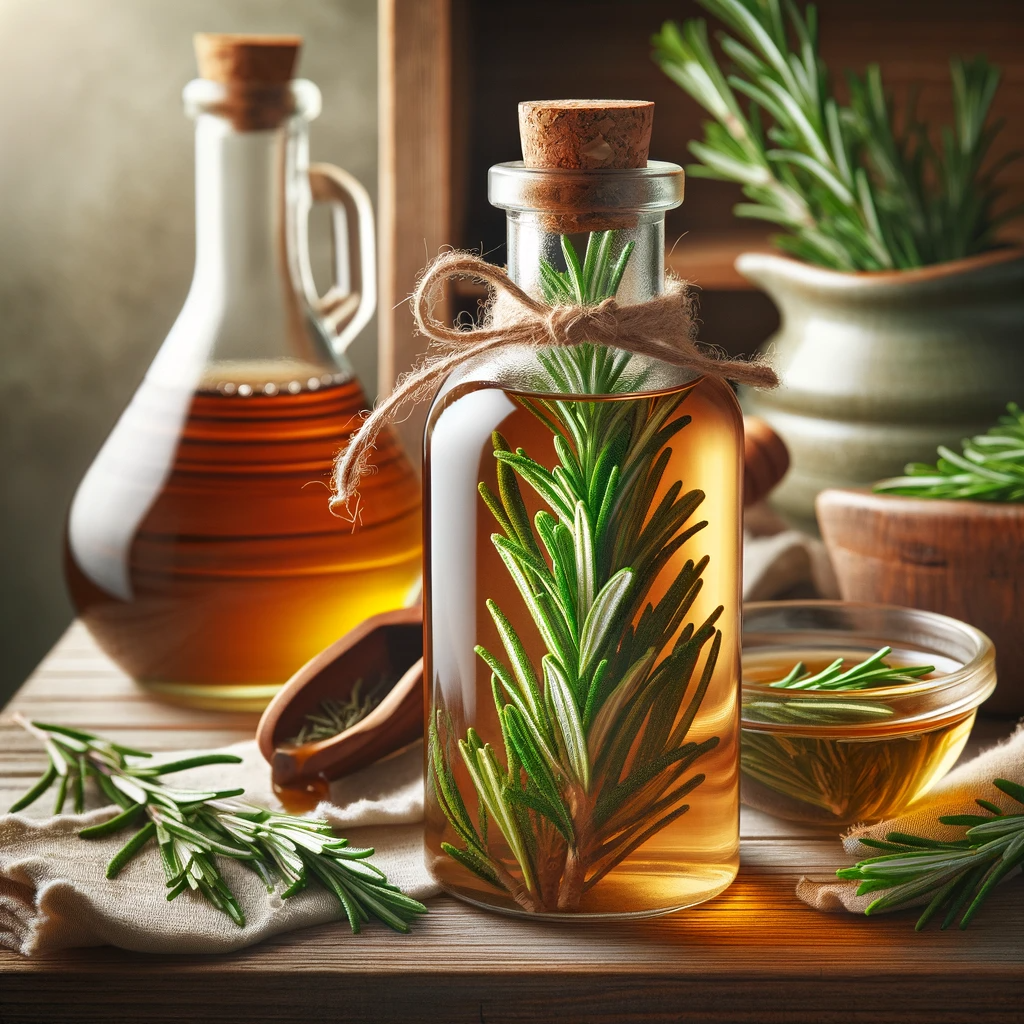
In the world of natural hair care, apple cider vinegar is celebrated for its numerous benefits. This Apple Cider Vinegar Growth Rinse, enhanced with the power of rosemary, is a simple yet effective remedy designed to promote hair growth and improve scalp health. Ideal for those looking for a natural way to nourish their hair, this rinse combines the clarifying properties of apple cider vinegar with the stimulating effects of rosemary.
Things Needed
To prepare this hair growth rinse, you will need:
- 2 Tablespoons Dried Rosemary Leaf: Known for stimulating hair growth and improving scalp health.
- 1 Cup Apple Cider Vinegar: Helps in balancing scalp pH and removing build-up.
- 1 Cup Water: To dilute the vinegar.
- Small Mixing Bowl: For combining ingredients.
- Microwave: For heating the mixture.
- Strainer: To strain the rosemary leaves.
- Storage Bottle: To store the rinse.
- Shower Cap or Towel: To wrap your hair during application.
Steps to Prepare
1. Pour 1 cup of apple cider vinegar into a small mixing bowl.
2. Add 2 tablespoons of dried rosemary leaf to the vinegar.
3. Stir the mixture to combine the ingredients.
4. Heat the vinegar and rosemary mixture in the microwave for 30 seconds. This step helps to infuse the rosemary’s properties into the vinegar.
5. Using the smallest available strainer, strain the vinegar to remove the rosemary leaves.
6. Add 1 cup of water to the strained vinegar and stir well.
7. Transfer the rinse to a storage bottle for use during your hair care routine.
8. To use, apply the rinse as you would a regular hair rinse after shampooing. You can leave it on for a few minutes before rinsing it out, or for a deeper treatment, cover your hair with a shower cap or towel and leave it on for up to 30 minutes.
Benefits
The Apple Cider Vinegar Growth Rinse offers several benefits:
- Stimulates Hair Growth: Rosemary is known for promoting hair growth and preventing hair loss.
- Balances Scalp pH: Apple cider vinegar helps in restoring the natural pH balance of the scalp.
- Removes Build-up: It effectively removes product build-up, leaving hair clean and refreshed.
- Improves Scalp Health: The antimicrobial properties of vinegar can help in treating dandruff and itchy scalp.
Conclusion
Creating your own Apple Cider Vinegar and Rosemary Hair Growth Rinse is an easy and cost-effective way to enhance your hair care routine. This natural remedy not only promotes hair growth but also ensures a healthy scalp. With regular use, you can enjoy stronger, healthier, and more vibrant hair, all thanks to the natural goodness of apple cider vinegar and rosemary.
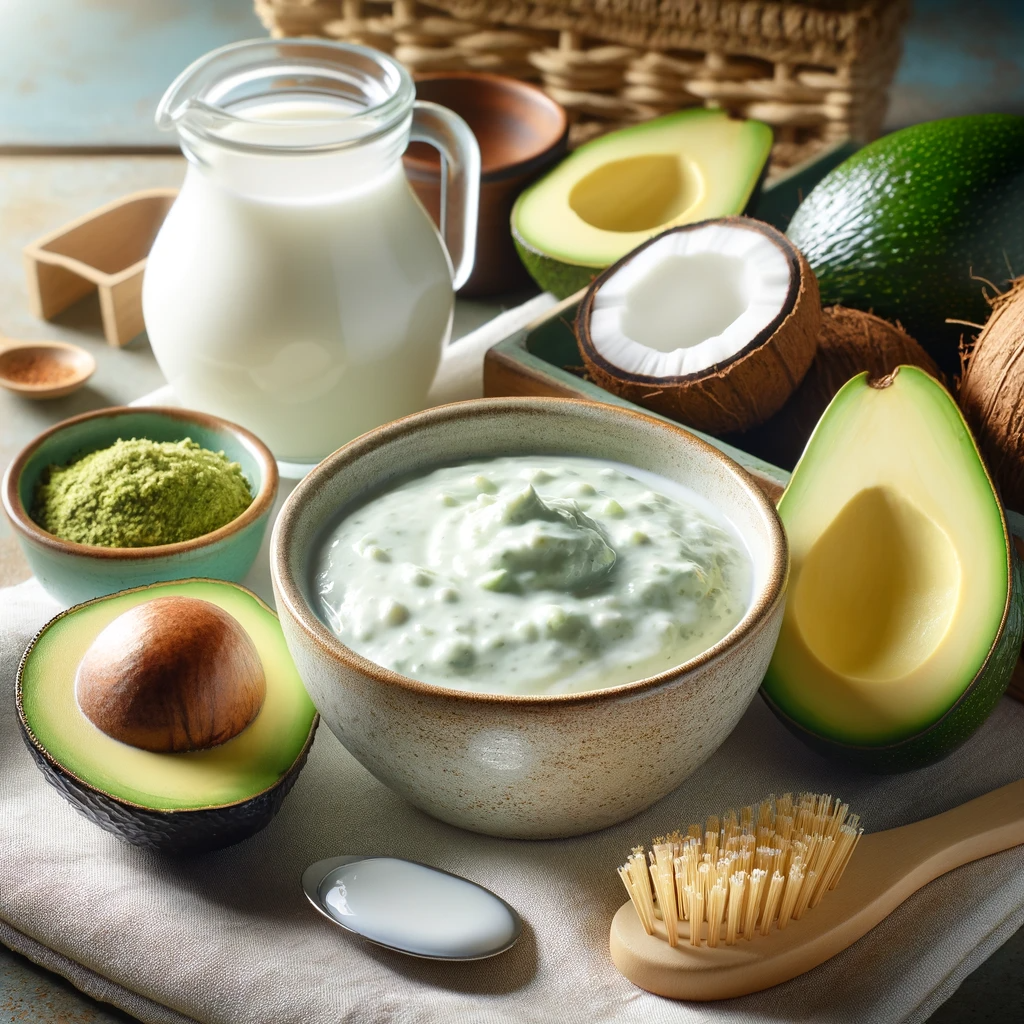
In the quest for healthier, stronger hair, natural remedies often offer the best solutions. This revitalizing hair mask combines avocado, coconut milk, banana, castor oil, rosemary, and cayenne pepper, creating a potent blend for nourishing and stimulating hair growth. Ideal for those seeking a natural approach to hair care, this mask is designed to cater to various hair needs, from moisturizing to strengthening.
Things Needed
To prepare this hair mask, you will need:
- ½ Avocado (ripe): Rich in vitamins and natural oils for hair nourishment.
- ½ Cup of Coconut Milk: Moisturizes and strengthens hair.
- ½ Banana (ripe): Adds smoothness and shine to hair.
- 1 Tablespoon of Castor Oil: Promotes hair growth and thickness.
- 2 Tablespoons of Rosemary: Stimulates the scalp and enhances hair growth.
- 1 Teaspoon of Cayenne Pepper: Increases blood circulation to the scalp.
- Blender: For creating a smooth mixture.
- Bowl: To mix the ingredients.
- Shower Cap or Plastic Wrap: To cover hair during treatment.
- Mild Shampoo: For washing off the mask.
Steps to Prepare
1. In a bowl, mash ½ ripe avocado and ½ ripe banana together.
2. Add ½ cup of coconut milk, 1 tablespoon of castor oil, 2 tablespoons of rosemary, and 1 teaspoon of cayenne pepper to the mashed mixture.
3. Transfer the mixture into an electric blender and blend until you achieve a smooth, consistent texture.
4. Apply the mask to your hair, starting from the tips and working your way down the strands to the roots and scalp.
5. Leave the mask on your hair for 15-60 minutes, depending on your hair’s needs.
6. After the treatment time, wash your hair with warm water and a mild shampoo, then gently pat it dry.
Tip: Adjust the ingredients according to the length and thickness of your hair.
Benefits
The Avocado and Coconut Milk Hair Mask offers several benefits:
- Moisturizes Hair: Avocado and coconut milk deeply hydrate hair strands.
- Strengthens Hair: Castor oil and coconut milk help in strengthening hair follicles.
- Promotes Hair Growth: Rosemary and cayenne pepper stimulate blood flow to the scalp, encouraging hair growth.
- Adds Shine: Banana adds natural shine and smoothness to the hair.
- Natural and Chemical-Free: This mask is a safe and natural alternative to commercial hair care products.
Conclusion
Creating your own Avocado and Coconut Milk Hair Mask is an effective way to nourish and revitalize your hair using natural ingredients. Regular use of this mask can lead to healthier, stronger, and more vibrant hair. Embrace this natural treatment and enjoy the benefits of a homemade, nutrient-rich hair care solution.
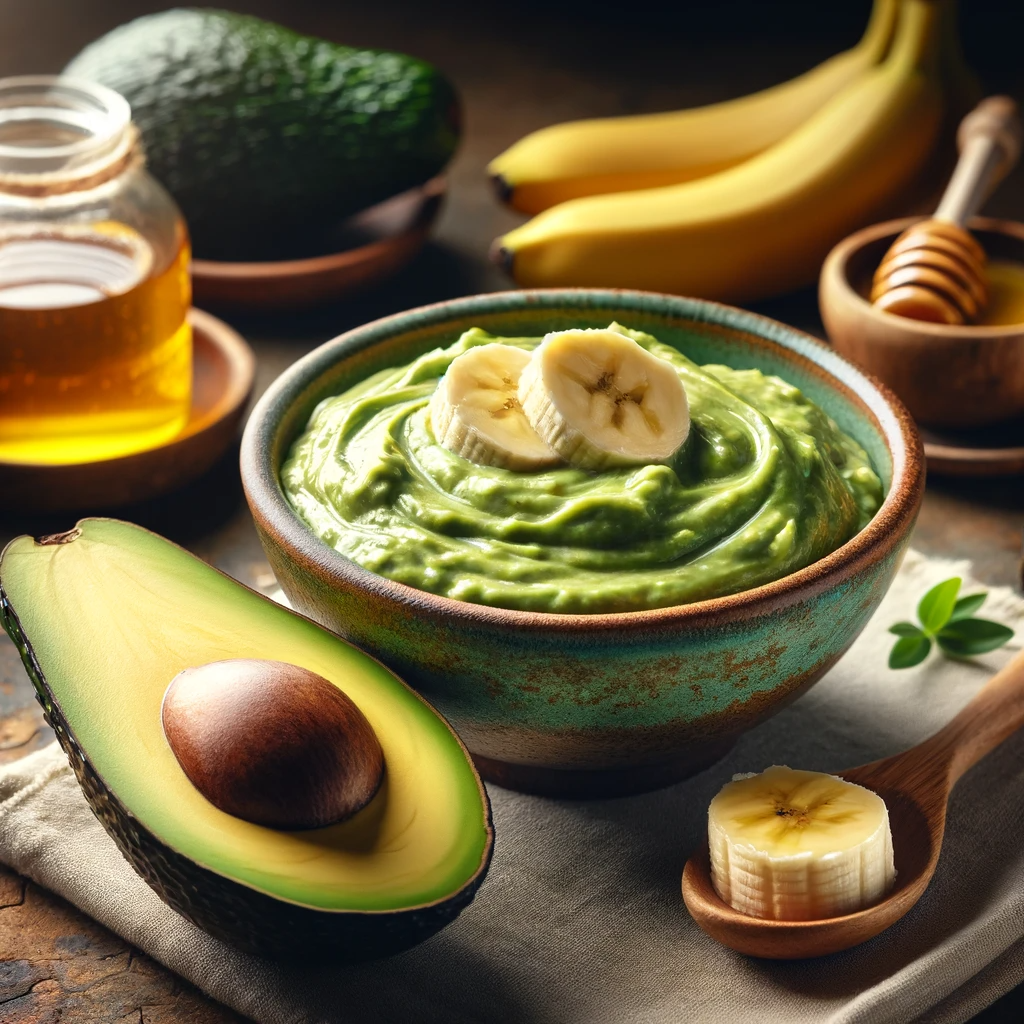
In the pursuit of healthy and vibrant hair, natural ingredients often provide the most nourishing solutions. This Avocado and Banana Hair Mask, enriched with shea butter and essential oils like tea tree and eucalyptus, is a powerhouse of nutrients and moisture for your hair. Ideal for all hair types, this mask aims to hydrate, strengthen, and revitalize your locks using the goodness of nature’s ingredients.
Things Needed
To prepare this hair mask, you will need:
- 2 Avocados: Rich in vitamins and minerals, great for moisturizing.
- 1-2 Bananas: Depending on hair length, for smoothness and shine.
- 2 teaspoons Shea Butter: Provides deep conditioning.
- 2-3 drops Tea Tree Oil: Known for its antimicrobial properties.
- 1 drop Eucalyptus Oil: Stimulates the scalp.
- Electric Blender or Food Processor: To create a smooth mixture.
- Bowl: For mixing the ingredients.
- Spoon: To stir in the oils.
- Wide-tooth Comb: To comb the mask through your hair.
- Mild Shampoo: For washing off the mask.
Steps to Prepare
1. Peel the avocados and bananas and place them in the electric blender or food processor. Add shea butter to the mix.
2. Blend the ingredients until you achieve a smooth, creamy consistency without any lumps.
3. Transfer the blended mixture into a bowl.
4. Add 2-3 drops of tea tree oil and 1 drop of eucalyptus oil to the avocado-banana mix. Stir well to ensure the oils are evenly distributed throughout the mask.
5. Apply the mask to your scalp and hair, massaging it in with your hands.
6. Use a wide-tooth comb to evenly distribute the mask through your hair.
7. Leave the mask on your hair for 5-10 minutes, allowing the nutrients to penetrate deeply.
8. Wash the mask out with a mild shampoo and gently pat your hair dry.
Benefits
The Avocado and Banana Hair Mask offers several advantages:
- Moisturizes Hair: Avocado provides deep hydration to the hair.
- Adds Shine and Smoothness: Banana helps in making the hair shiny and smooth.
- Strengthens Hair: Shea butter deeply conditions and strengthens hair.
- Scalp Health: Tea tree and eucalyptus oils promote a healthy scalp environment.
- Natural and Chemical-Free: This mask is a healthy, natural alternative to commercial hair care products.
Conclusion
Creating your own Avocado and Banana Hair Mask is a simple and effective way to nourish your hair using natural ingredients. Regular use of this mask can transform your hair, leaving it hydrated, strong, and shiny. Embrace this natural remedy and enjoy the benefits of a homemade, nutrient-rich hair treatment.
In a world where hair care often relies on chemical-laden products, turning to natural remedies can be a refreshing change. This Herbal Hair Growth Spray combines the goodness of lavender, rosemary, and clary sage essential oils with nettle leaf, aloe vera gel, and horsetail leaf. This blend is designed to promote hair growth, strengthen hair, and improve scalp health, making it a perfect solution for those seeking an organic approach to hair care.
Things Needed
To create this natural hair growth spray, you will need:
- 1 Cup of Distilled Water: The base for your herbal infusion.
- 10 Drops Lavender Essential Oil: Soothes the scalp and promotes hair growth.
- 2 Tablespoons Dried Nettle Leaf: Rich in nutrients that support hair health.
- 10 Drops Rosemary Essential Oil: Stimulates hair follicles.
- 2 Tablespoons Natural Aloe Vera Gel: Moisturizes and conditions the hair.
- 10 Drops Clary Sage Essential Oil: Strengthens hair and balances scalp oils.
- 2 Tablespoons Horsetail Leaf (Optional): Contains silica, which strengthens hair.
- Spray Bottle: For storing and applying the spray.
- Mesh Strainer or Cheesecloth: To strain the herbal mixture.
- Refrigerator: For storage.
Steps to Prepare
1. Bring 1 cup of distilled water to a boil in a pot.
2. Add 2 tablespoons each of dried nettle leaf and horsetail leaf (if using) to the boiling water.
3. Remove the pot from heat and let it sit until the water cools to room temperature.
4. Strain the leaves from the water using a mesh strainer or cheesecloth.
5. Pour the herbal-infused water into a spray bottle.
6. Add 10 drops each of lavender, rosemary, and clary sage essential oils, along with 2 tablespoons of aloe vera gel, to the spray bottle.
7. Shake the bottle vigorously to ensure all ingredients are well combined.
8. Store the spray bottle in the refrigerator for 3 months before using it to allow the ingredients to synergize.
Tip: Keep the spray stored in the refrigerator for optimal freshness.
9. Before each use, shake the bottle well. Spray liberally onto your hair roots 1-2 times daily.
Benefits
This Herbal Hair Growth Spray offers several benefits:
- Promotes Hair Growth: Essential oils like lavender, rosemary, and clary sage stimulate the scalp and encourage hair growth.
- Strengthens Hair: Nettle leaf and horsetail leaf provide essential nutrients and silica for hair strength.
- Moisturizes Scalp and Hair: Aloe vera gel adds moisture, reducing dryness and brittleness.
- Natural and Chemical-Free: This spray is a safe, natural alternative to commercial hair growth products.
Conclusion
Creating your own Herbal Hair Growth Spray is a simple and effective way to care for your hair using natural ingredients. Regular use of this spray can lead to healthier, stronger, and more vibrant hair. Embrace this organic solution and enjoy the benefits of nature’s bounty in your hair care routine.
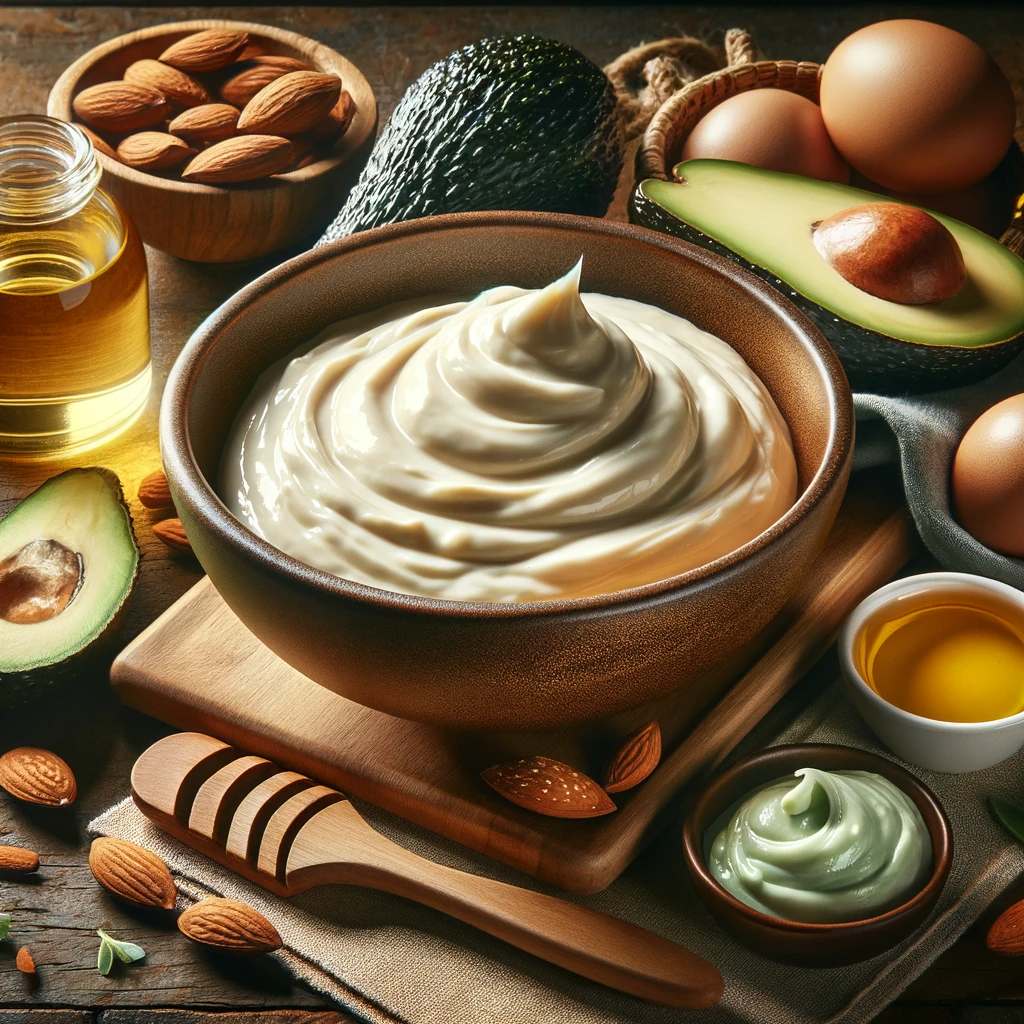
Healthy hair is often a reflection of the care we give it, and natural remedies are increasingly becoming the go-to solution for many. This hydrating and protein-rich hair mask, featuring a blend of peppermint oil, olive oil, egg, honey, avocado, and biotin powder, is designed to moisturize, strengthen, and promote hair growth. Known for its hygroscopic properties, this mask is a powerhouse of nutrients essential for healthy hair.
Things Needed
To prepare this nourishing hair mask, you will need:
- 5 drops Peppermint Oil: Stimulates the scalp and promotes hair growth.
- 1/4 Cup Olive Oil: Moisturizes and strengthens hair.
- 1 Egg (beaten): Provides protein, essential for hair strength.
- 1/8 Cup Honey: A natural humectant that retains moisture.
- 1 Avocado: Rich in vitamins and minerals, nourishing for the hair.
- 1 teaspoon Biotin Powder: Promotes hair growth and strength.
- Mixing Bowl: For combining the ingredients.
- Fork or Blender: To mix the ingredients into a smooth consistency.
- Shower Cap or Plastic Wrap: To cover hair during treatment.
- Mild Shampoo: For washing off the mask.
Steps to Prepare
1. In a mixing bowl, combine 5 drops of peppermint oil with 1/4 cup of olive oil.
2. Add the beaten egg, 1/8 cup of honey, the flesh of one avocado, and 1 teaspoon of biotin powder to the bowl.
3. Use a fork or a blender to mix the ingredients until a batter-like consistency is achieved.
4. Ensure your hair is damp before application for better absorption.
5. Apply a generous layer of the mask to your hair, making sure to cover from roots to ends.
6. Cover your hair with a shower cap or plastic wrap and leave the mask on for 30-60 minutes.
7. After the treatment time, wash your hair with a mild shampoo and gently pat it dry.
Benefits
The ingredients in this hair mask offer several benefits:
- Peppermint Oil: Enhances blood circulation to the scalp, promoting hair growth.
- Olive Oil & Avocado: Deeply moisturize the hair and scalp.
- Egg: Provides protein to repair and strengthen hair fibers.
- Honey: Acts as a humectant, keeping the hair moisturized and lustrous.
- Biotin: Supports overall hair health and growth.
Conclusion
This hydrating and protein-rich hair mask is a natural, effective way to care for your hair. Regular use can lead to stronger, healthier, and more vibrant hair. By incorporating this mask into your hair care routine, you can enjoy the benefits of its natural ingredients and give your hair the nourishment it needs to thrive.
In the world of natural hair care, the use of essential oils has become increasingly popular due to their potent benefits. This Revitalizing Scalp Treatment combines jojoba and grapeseed oils with lavender, rosemary, and thyme essential oils. This blend is designed to nourish the scalp, promote hair growth, and improve overall hair health. It’s an ideal choice for those looking for a natural, effective way to care for their scalp and hair.
Things Needed
To prepare this scalp treatment, you will need:
- ½ teaspoon Jojoba Oil: Acts as a carrier oil and mimics the scalp’s natural oils.
- 3 drops Lavender Essential Oil: Known for its calming and soothing properties.
- 2 drops Rosemary Essential Oil: Stimulates hair growth and improves scalp health.
- 2 drops Thyme Essential Oil: Promotes hair growth and reduces hair loss.
- 4 teaspoon Grapeseed Oil: A lightweight oil that moisturizes without being greasy.
- Applicator/Spray Bottle: For easy application.
- Warm Damp Towel: To enhance the treatment’s effectiveness.
- Mild Shampoo: For washing out the oil blend.
Steps to Prepare
1. In an applicator or spray bottle, combine ½ teaspoon of jojoba oil and 4 teaspoons of grapeseed oil.
2. Add 3 drops of lavender essential oil, 2 drops of rosemary essential oil, and 2 drops of thyme essential oil to the carrier oils.
3. Shake the bottle vigorously to ensure that all the oils are well mixed.
4. To apply, massage the oil blend into your scalp for 2 minutes. This helps to distribute the oil evenly and stimulates blood flow to the scalp.
5. Cover your hair with a warm damp towel. The heat helps in opening up the hair follicles, allowing the oils to penetrate deeper.
6. Leave the treatment on your scalp for 60 minutes.
7. Wash your hair with a mild shampoo and pat it dry.
Tip: For best results, use this treatment daily for 28 weeks.
Benefits
This Revitalizing Scalp Treatment offers several benefits:
- Stimulates Hair Growth: Rosemary and thyme essential oils are known to promote hair growth.
- Soothes the Scalp: Lavender oil provides a calming effect, reducing scalp irritation and dandruff.
- Moisturizes the Scalp: Jojoba and grapeseed oils deeply moisturize the scalp, preventing dryness.
- Strengthens Hair: Regular use can lead to stronger, healthier hair.
- Natural and Chemical-Free: This treatment is a safe, natural alternative to commercial hair care products.
Conclusion
Creating your own Revitalizing Scalp Treatment is a simple and effective way to harness the benefits of essential oils for hair care. This natural blend not only promotes hair growth but also maintains scalp health. Regular use of this treatment can lead to significant improvements in hair quality and scalp condition, showcasing the power of natural ingredients in hair care.
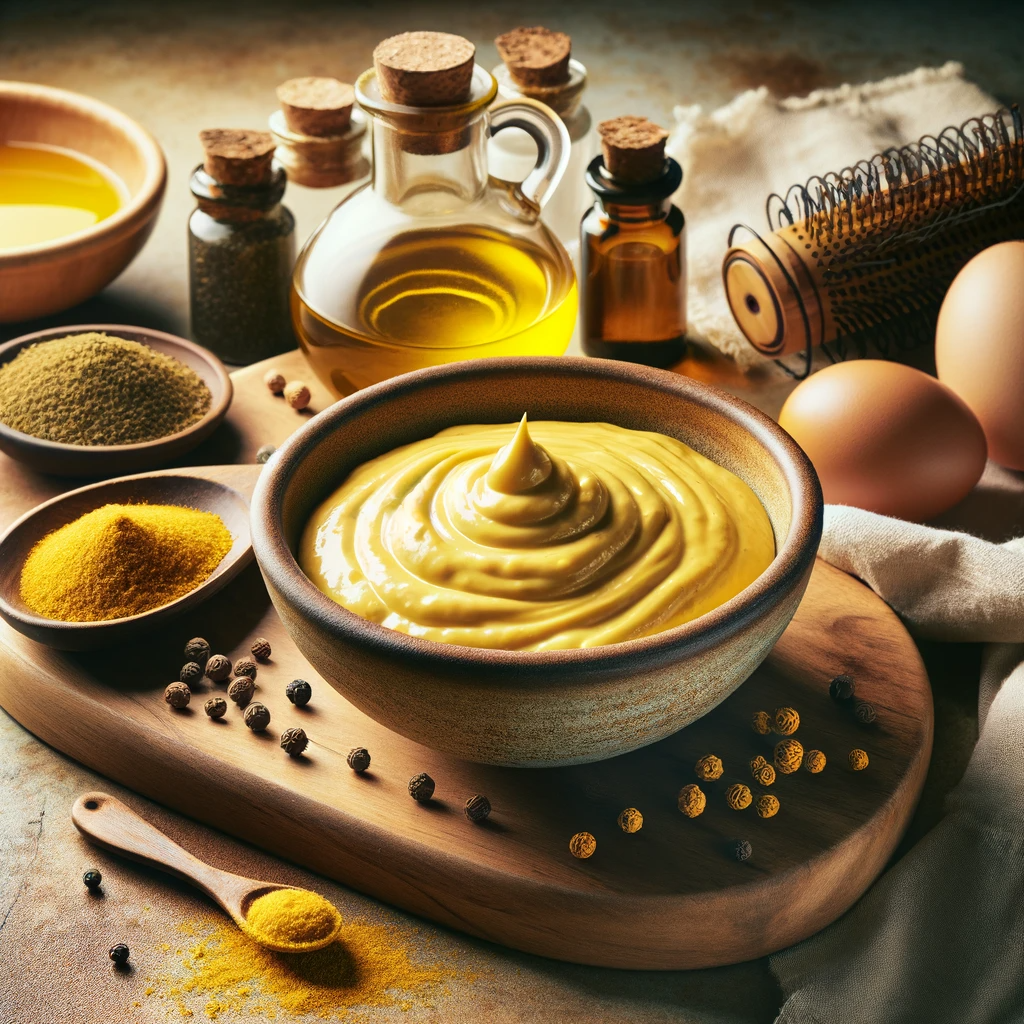
In the quest for natural hair growth solutions, certain ingredients stand out for their unique properties. One such remedy is the Mustard Hair Growth Mask. Combining mustard powder with olive oil, egg yolk, and sugar, this mask is designed to stimulate the scalp and promote hair growth. It’s a spicy, unconventional treatment for those looking to boost their hair health naturally.
Things Needed
To prepare this hair growth mask, gather the following items:
- 2 tablespoons Olive Oil: Moisturizes and nourishes the hair.
- 2 tablespoons Ground Mustard Powder: Stimulates blood flow to the scalp.
- 1 Egg Yolk: Provides protein and nutrients to hair.
- 2 teaspoons Sugar: Helps in exfoliating the scalp.
- 2 tablespoons Hot Water: Activates the mustard powder.
- Small Mixing Bowl: For preparing the mask.
- Spoon or Whisk: To mix the ingredients.
- Plastic Wrap or Cap: To cover hair during treatment.
- Hot Damp Towel (Optional): To enhance the mask’s effectiveness.
Steps to Prepare
1. In a small mixing bowl, combine 2 tablespoons of ground mustard powder with 2 tablespoons of hot water.
2. Add 1 egg yolk, 2 teaspoons of sugar, and 2 tablespoons of olive oil to the mustard mixture. Stir well until you achieve a smooth consistency.
3. Section your hair and apply the mask, focusing on massaging it into the scalp. Avoid applying it to the hair tips or ends.
4. Cover your hair with plastic wrap or a cap. For added heat, place a hot damp towel over the plastic wrap.
5. Leave the mask on for 15 to 60 minutes. You may feel a burning sensation, which is normal, but if it becomes unbearable or you suspect an allergic reaction, wash it off immediately.
6. After the treatment time, wash off the mask thoroughly with warm water and pat your hair dry.
7. Follow up with your regular shampoo.
Note: For maximum results, use this hair growth mask twice weekly for 4-8 weeks.
Benefits
The Mustard Hair Growth Mask offers several advantages:
- Stimulates Hair Growth: Mustard powder increases blood circulation to the scalp, promoting hair growth.
- Nourishes Hair Follicles: Olive oil and egg yolk provide essential nutrients and moisture.
- Scalp Exfoliation: Sugar helps in removing dead skin cells and unclogging hair follicles.
- Natural and Cost-Effective: This mask is a chemical-free, affordable alternative to commercial hair growth products.
Conclusion
The Mustard Hair Growth Mask is an innovative and natural approach to improving hair health. While it might not be a conventional treatment, its ingredients are known for their efficacy in stimulating hair growth and revitalizing the scalp. Regular use of this mask can lead to healthier, fuller, and more vibrant hair. Embrace this spicy solution and witness a noticeable difference in your hair’s growth and vitality.

In the search for natural hair growth remedies, some solutions stand out for their unique ingredients and preparation methods. The Cayenne Pepper and Tea Hair Treatment, enhanced with onion and garlic seed oils and biotin, is one such remedy. This unconventional blend aims to stimulate hair growth and improve scalp health. It’s a daring approach for those seeking a holistic alternative to conventional hair growth products.
Things Needed
To prepare this hair treatment, you will need:
- ½ Large Bottle of Cayenne Pepper: Known for stimulating hair follicles.
- 45 Cut Tea Bags: Tea contains antioxidants beneficial for hair health.
- 2-4 Drops Onion Seed Oil: Promotes hair growth and strengthens hair.
- 30 Biotin Pills, Blended: Biotin is essential for healthy hair growth.
- 1-2 Drops Garlic Seed Oil: Enhances blood circulation in the scalp.
- Mixing Bowl: For combining ingredients.
- Oven: For infusing ingredients.
- Cheesecloth or Mesh Strainer: To strain the mixture.
- Dark, Cool, and Dry Place: For storing the treatment.
Steps to Prepare
1. In a mixing bowl, combine the cayenne pepper, contents of the tea bags, and blended biotin pills.
2. Stir the mixture thoroughly to ensure even distribution of ingredients.
3. Infuse the mixture in an oven at a low temperature for 5 hours. This process will allow the ingredients to meld together and release their properties.
4. After infusion, remove the mixture from the oven and let it cool to room temperature, stirring occasionally.
5. Once cooled, use cheesecloth or a mesh strainer to strain out the solid parts, leaving behind the infused oil.
6. Add 2-4 drops of onion seed oil and 1-2 drops of garlic seed oil to the tea-infused mixture. Stir well to combine.
7. Transfer the final hair treatment oil to a container and store it in a dark, cool, and dry place.
Benefits
This Cayenne Pepper and Tea Hair Treatment offers several potential benefits:
- Stimulates Hair Growth: Cayenne pepper and onion seed oil are known to promote hair growth by increasing blood circulation to the scalp.
- Strengthens Hair: Biotin and tea antioxidants contribute to stronger hair strands.
- Improves Scalp Health: Garlic seed oil can enhance blood flow, bringing more nutrients to hair follicles.
- Natural Ingredients: The treatment uses natural ingredients, providing an alternative to synthetic hair growth products.
Conclusion
The Cayenne Pepper and Tea Hair Treatment is a bold approach to natural hair care, utilizing the stimulating effects of spicy and herbal ingredients. While it’s not a conventional method, it offers an interesting blend of natural components known for their hair growth properties. As with any natural remedy, results can vary, and it’s important to test for any sensitivities. Embracing this spicy solution might just be the key to unlocking your hair’s growth potential.


Leave a Reply