• Skip to main content
  • Skip to primary sidebar
  • HOME
  • SKIN CARE
  • HAIR CARE
  • HEALTH AND WELLNESS
  • CONTACT US

Sharvayoni

Unearth Nature's Magic - Your Path to Herbal Radiance and Wellnes

DIY

Coconut Milk and Yogurt Hair Conditioner: A Natural Path to Silky Locks

January 31, 2024 by sharvayonibeauty Leave a Comment

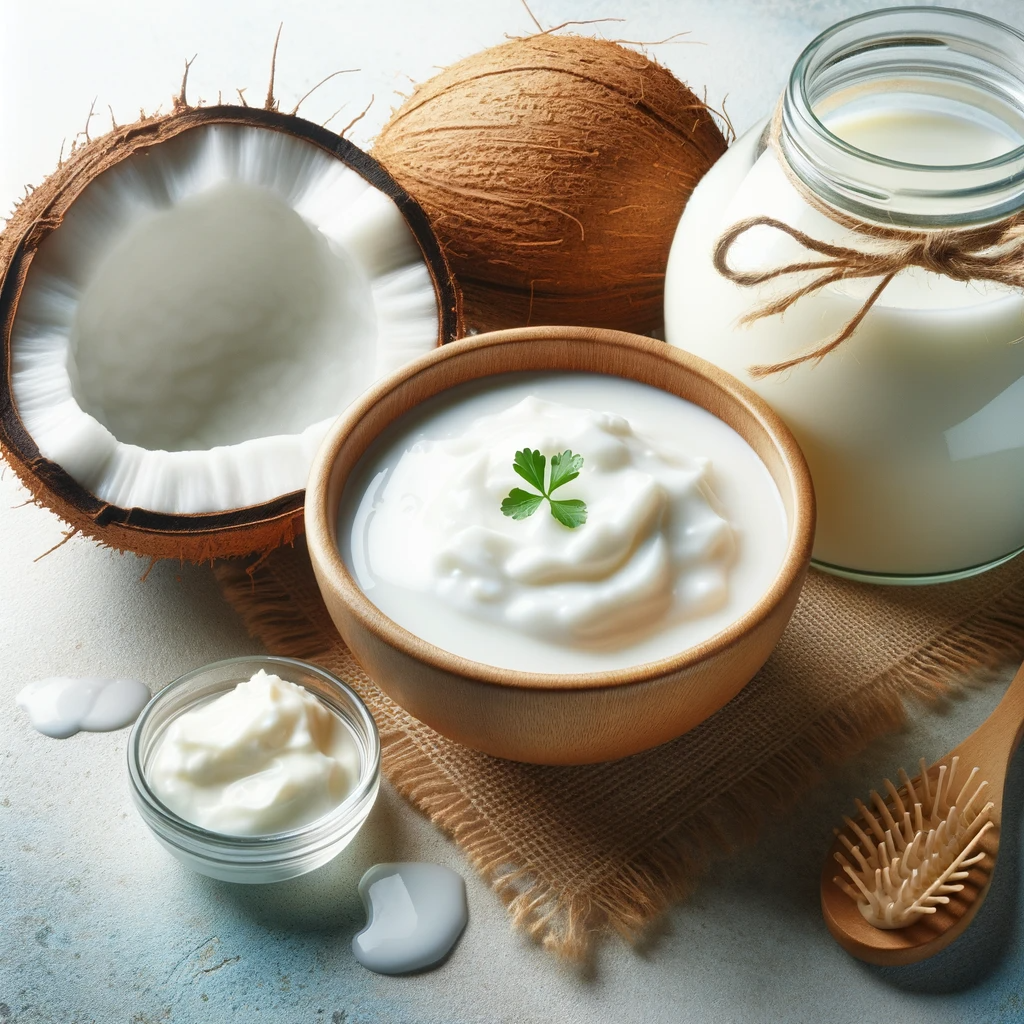
In the quest for luscious, healthy hair, natural ingredients often prove to be the most effective. This homemade hair conditioner, crafted with coconut milk, olive oil, yogurt, and eggs, is a powerhouse of nutrients, offering deep conditioning benefits. Suitable for all hair types, this conditioner deeply moisturizes, strengthens, and revitalizes hair, making it an ideal choice for those seeking a natural alternative to commercial hair products.

Things Needed

Before you begin, ensure you have the following items:

  1. Coconut Milk: ½ cup, for hydration and nourishment.
  2. Olive Oil: 2 tablespoons, for moisturizing and strengthening.
  3. Yogurt: 1 to 2 cups, depending on desired thickness.
  4. Eggs: 2, beaten, for protein and shine.
  5. Small Mixing Bowl: To combine the ingredients.
  6. Whisk or Spoon: For stirring the mixture.
  7. Shower Cap or Plastic Cap: To cover hair during treatment.
  8. Shampoo and Conditioner: For washing off the conditioner.
  9. Towel: To dry hair.

Steps to Prepare

Creating this coconut milk and yogurt hair conditioner is a simple process:

  1. Mix Oil and Eggs: In the small mixing bowl, combine 2 tablespoons of olive oil with two beaten eggs. The oil and eggs form the base of your conditioner.
  2. Add Coconut Milk and Yogurt: Stir in ½ cup of coconut milk. Gradually add 1 to 2 cups of yogurt until you reach the desired level of conditioner’s thickness.
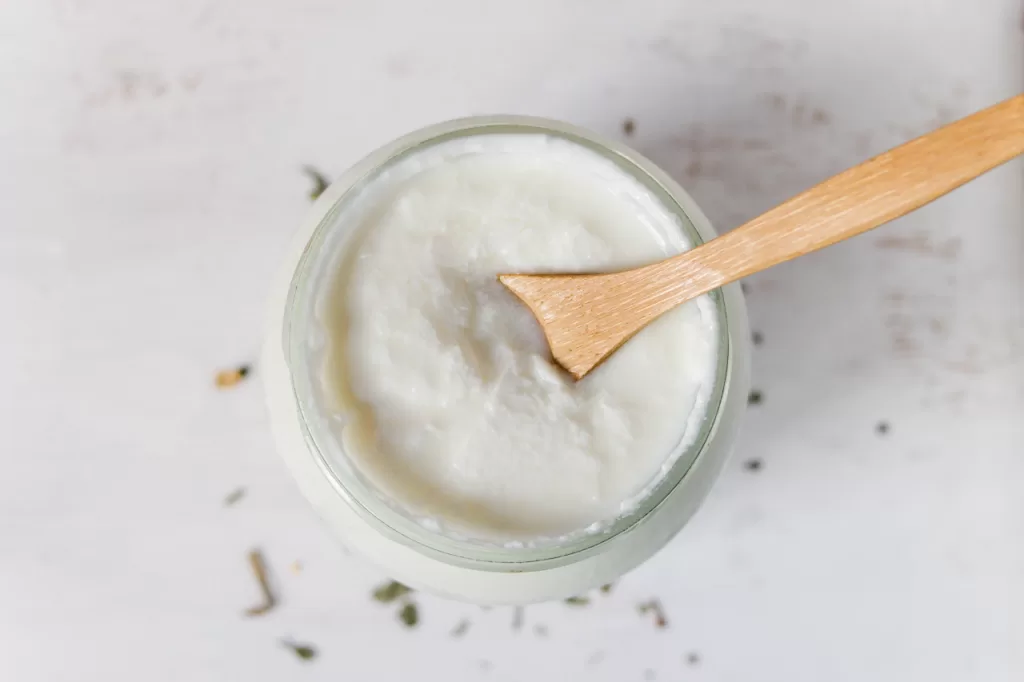
  3. Achieve Creamy Consistency: Whisk the mixture until it reaches a rich, creamy consistency. Ensure the ingredients are well combined.
  4. Apply to Hair: Apply the conditioner to your hair, focusing on covering each strand from roots to ends.
  5. Cover and Wait: Place a shower cap over your hair and leave the conditioner on for 30 to 60 minutes. This allows the nutrients to penetrate deeply.
  6. Rinse Thoroughly: Wash the conditioner out of your hair using shampoo, then follow up with your regular conditioner.
  7. Dry Gently: Pat your hair dry with a towel.

Benefits

This homemade hair conditioner offers numerous benefits:

  1. Deep Moisturization: Coconut milk and olive oil provide intense hydration, making it ideal for dry or brittle hair.
  2. Strengthens Hair: The protein in eggs helps strengthen hair strands, reducing breakage.
  3. Improves Hair Texture: Regular use leads to softer, more manageable hair.
  4. Scalp Health: Yogurt is beneficial for the scalp, helping to reduce dandruff and soothe irritation.
  5. Natural and Safe: Using kitchen ingredients ensures a chemical-free treatment, suitable for all hair types.
  6. Customizable: You can adjust the amount of yogurt to achieve the desired thickness and consistency.
  7. Cost-Effective: Making your own hair conditioner is more economical than purchasing high-end treatments.
  8. Eco-Friendly: Natural, biodegradable ingredients make this treatment environmentally friendly.

Conclusion

Incorporating this coconut milk and yogurt hair conditioner into your routine is an excellent way to naturally nourish and rejuvenate your hair. Its blend of natural ingredients ensures that your hair receives the moisture, nutrients, and care it deserves. Regular use of this conditioner can lead to healthier, stronger, and more vibrant hair, showcasing the beauty of natural hair care solutions.

Filed Under: Hair Care Tagged With: beauty tips, coconut milk, cost-effective, DIY, Eco-friendly, hair care, hair conditioner, Hair hydration, Healthy locks, Natural hair care, Strengthens hair, yogurt

Tomato and Lime/Lemon Face Pack: A Refreshing Natural Skincare Remedy

August 1, 2023 by sharvayonibeauty Leave a Comment

Tomatoes

Achieving glowing and radiant skin doesn’t always require expensive skincare products. Nature has provided us with numerous ingredients that can work wonders for our skin. One such powerful combination is the Tomato and Lime/Lemon face pack. This simple and effective DIY face mask can help you attain a bright and glowing complexion. In this post, we will explore the benefits of tomato and lime/lemon for the skin and learn how to prepare and use this face pack for maximum results.

Benefits of Tomato for the Skin

Tomatoes are not only a delicious addition to our meals but also a natural beauty enhancer. They are packed with essential nutrients, antioxidants, and vitamins that are highly beneficial for the skin.

  1. Rich in Antioxidants: Tomatoes are rich in antioxidants, such as lycopene, which help fight free radicals and protect the skin from oxidative stress, reducing the signs of aging.
  2. Natural Skin Brightener: The natural acidity in tomatoes helps to balance the skin’s pH level, resulting in a brighter and more even skin tone.
  3. Helps Control Oil: The natural astringent properties of tomatoes help in controlling excess oil secretion, making it ideal for those with oily and acne-prone skin.

Benefits of Lime/Lemon for the Skin

Lime or lemon juice is a potent ingredient that is widely used in skincare due to its numerous benefits.

  1. Vitamin C Boost: Lime or lemon juice is a rich source of vitamin C, which helps in collagen synthesis, promoting skin elasticity and reducing the appearance of wrinkles.
  2. Skin Exfoliation: The citric acid in lime/lemon acts as a natural exfoliant, sloughing off dead skin cells and revealing a fresher complexion.
  3. Natural Skin Brightener: The acidic nature of lime/lemon juice helps in lightening dark spots, hyperpigmentation, and acne scars, leading to a more radiant complexion.

Preparation and Application of Tomato and Lime/Lemon Face Pack

Before applying any face pack, it is essential to cleanse your face thoroughly. Follow these simple steps to prepare and use the Tomato and Lime/Lemon face pack:

Step 1: Gather the Ingredients

  • One ripe tomato
  • Freshly squeezed lime/lemon juice (few drops)

Step 2: Preparing the Face Pack

a) Tomato Juice: Cut the ripe tomato into small pieces and blend it until you get a smooth, lump-free tomato puree. Strain the puree to obtain fresh tomato juice.

b) Lime/Lemon Juice: Squeeze a few drops of fresh lime/lemon juice. Ensure that the juice is freshly squeezed to obtain maximum benefits.

Step 3: Mixing the Ingredients

In a clean bowl, mix one tablespoon of tomato juice with a few drops of lime/lemon juice. Stir well until the two ingredients are thoroughly combined.

Step 4: Application of the Face Pack

a) Cleanse: Start with a freshly cleansed face to ensure that no makeup or impurities are present on the skin.

b) Patch Test: Before applying the face pack, do a patch test on a small area of your skin to check for any allergies or sensitivity.

c) Even Application: Using a clean brush or your fingertips, apply the tomato and lime/lemon mixture evenly all over your face, avoiding the eye area.

d) Relax: Allow the face pack to dry for about 15 minutes. During this time, you may experience a mild tingling sensation due to the acidic nature of lime/lemon.

Step 5: Rinse Off

After 15 minutes, rinse off the face pack with lukewarm water. Gently pat your face dry with a soft towel.

Step 6: Moisturize

Finish off by applying a lightweight moisturizer suitable for your skin type. This will lock in the hydration and provide a smooth finish to your skin.

Frequency: For best results, repeat this process thrice a week. However, if you have sensitive skin, limit the usage to once or twice a week.

Precautions and Tips

  1. Lime/Lemon juice can make the skin more sensitive to sunlight. Therefore, it is crucial to apply sunscreen before stepping outside, even on cloudy days.
  2. Avoid using this face pack if you have open cuts, wounds, or severe skin irritations, as the acidity may cause discomfort.
  3. Lime/Lemon juice may not be suitable for extremely dry or sensitive skin types. In such cases, you can dilute the juice with water or use less acidic alternatives like cucumber juice.

Conclusion

The Tomato and Lime/Lemon face pack is a natural and affordable solution to achieve glowing and radiant skin. The combination of tomato and lime/lemon brings a plethora of skin benefits, from brightening the complexion to reducing the appearance of blemishes and acne scars. Incorporate this face pack into your skincare routine to enjoy the remarkable results of this natural beauty elixir.

Filed Under: Skin Care Tagged With: acne scars, beauty tips, blemishes, bright skin, complexion, DIY, face pack, glowing skin, homemade, homemade face mask, lemon, lime, natural beauty, radiant skin, skin benefits, skin care, skincare routine, tomato

Rose Water and Sandalwood Powder Face Mask for Fairer Skin

July 27, 2023 by sharvayonibeauty Leave a Comment

Achieving a fairer and radiant skin tone is a common desire for many individuals. While there are numerous skincare products available in the market, natural remedies have been proven to be effective and safe. One such powerful combination is the rose water and sandalwood powder face mask. This simple and affordable remedy can provide impressive results in a short span of time. In this post, we will explore the benefits of this face mask and how to use it for glowing and fairer skin.

Benefits of Rose Water and Sandalwood Powder for Skin

Before diving into the face mask recipe, let’s understand the individual benefits of rose water and sandalwood powder for the skin:

  1. Rose Water:
    • Hydrates and refreshes the skin.
    • Acts as a natural toner, maintaining the skin’s pH balance.
    • Soothes irritated and inflamed skin, reducing redness.
    • Possesses anti-inflammatory and antioxidant properties that combat free radicals.
    • Helps to tighten pores, reducing the chances of acne and blackheads.
    • Enhances skin complexion and promotes a natural glow.
  2. Sandalwood Powder:
    • Has cooling properties, making it perfect for soothing sunburns and skin rashes.
    • Acts as an excellent exfoliant, removing dead skin cells and impurities.
    • Reduces blemishes, acne scars, and pigmentation.
    • Provides relief from skin itching and irritation.
    • Delivers anti-aging benefits by minimizing fine lines and wrinkles.
    • Imparts a natural radiance and glow to the skin.

Preparation of Rose Water and Sandalwood Powder Face Mask

Now that we are aware of the fantastic benefits of both rose water and sandalwood powder, let’s learn how to create and use this powerful face mask.

Ingredients:

  • 1 teaspoon Sandalwood Powder
  • 1 teaspoon Turmeric Powder
  • Few drops of Rose Water

Instructions:

  1. In a small bowl, combine one teaspoon of sandalwood powder with one teaspoon of turmeric powder.
  2. Add a few drops of rose water to the mixture and mix well to form a smooth paste.
  3. Ensure that the paste has a spreadable consistency.

Application of the Face Mask:

  1. Start with a freshly cleansed face to allow better absorption of the mask’s benefits.
  2. Using clean fingers or a soft brush, apply the face mask evenly on your face and neck. Avoid the delicate area around the eyes.
  3. Relax and let the mask sit for about 15 minutes. You may feel a cooling sensation due to the soothing properties of sandalwood and rose water.
  4. Once the mask is dry, but not overly so, wash it off gently with lukewarm water. Avoid using hot water, as it may strip the skin of its natural oils.
  5. Pat your face dry with a soft towel and follow up with your favorite moisturizer to lock in the skin’s hydration.

Frequency: For best results, use this rose water and sandalwood powder face mask every alternate day. Consistent use will lead to visible improvements in your skin tone and overall complexion.

Safety Precautions:

  • Conduct a patch test before applying the mask all over your face, especially if you have sensitive skin or allergies to any of the ingredients.
  • Turmeric may stain the skin slightly, but this will fade within a few hours. To avoid staining, you can reduce the amount of turmeric or use Kasturi turmeric, which is non-staining.
  • If you experience any irritation or discomfort during or after using the mask, discontinue use and consult a dermatologist.

Conclusion:

Embrace the natural goodness of rose water and sandalwood powder with this DIY face mask. The combination of these two potent ingredients will leave your skin feeling refreshed, nourished, and with a radiant glow. Remember to maintain consistency with the application, and in no time, you will notice the transformation of your skin to a fairer and more youthful appearance. Enjoy the benefits of this age-old remedy for beautiful, glowing skin!

Filed Under: Skin Care Tagged With: beauty, beauty tips, complexion, DIY, face mask, fairer skin, glowing skin, Natural remedy, radiant skin, rose water, sandalwood powder, skin care, skincare

Naturally Glowing Skin: The Magic of Yogurt Face Masks

July 24, 2023 by sharvayonibeauty Leave a Comment

When it comes to skincare, many of us are on the lookout for natural and effective remedies to achieve a radiant and flawless complexion. Yogurt, a staple in many households, not only makes a delicious snack but also works wonders for your skin. Packed with beneficial nutrients and lactic acid, yogurt can be used in various face masks to improve skin tone, reduce dark spots, and enhance overall complexion. In this post, we will explore the power of yogurt face masks and how you can incorporate them into your skincare routine for glowing and hydrated skin.

Plain Yogurt Face Mask

Yogurt, in its purest form, offers numerous benefits for the skin. It contains lactic acid, a natural alpha hydroxy acid, which gently exfoliates the skin, removing dead skin cells and promoting cell turnover. To use plain yogurt as a face mask, follow these simple steps:

  • Gently rub plain yogurt on your skin, ensuring an even application.
  • Leave it on for a few minutes to allow the lactic acid to work its magic.
  • Wash it off with lukewarm water.

Consistency is key when using this face mask. For optimal results, incorporate this routine into your daily skincare regimen for several weeks, and you will notice a significant change in your complexion. Your skin will feel smoother, more hydrated, and have a natural glow.

Honey and Yogurt Face Mask

Combining yogurt with honey takes the benefits of this face mask to another level. Honey is a natural humectant, meaning it attracts and retains moisture, keeping your skin hydrated and supple. Along with a touch of lemon juice and some oatmeal, this mask becomes a nourishing and skin-brightening treat. Here’s how you can create this magical potion:

  • Mix yogurt and honey in equal parts to form a base for the mask.
  • Add a few drops of lemon juice for its brightening properties.
  • Incorporate oatmeal into the mixture until it forms a thick paste.

Apply the yogurt and honey face mask to your clean face, and let it sit for approximately 15 minutes. Once the time is up, rinse it off with water. Regular application of this mask can improve your skin tone and overall complexion, leaving you with a natural, healthy radiance.

Orange Peel and Yogurt Face Mask

Orange peels are rich in vitamin C and antioxidants, making them an excellent choice for brightening and rejuvenating the skin. By mixing dried and ground orange peels powder with yogurt, you create a potent face mask that can help lighten spots and other marks on your skin. Follow these steps to prepare and use this mask:

  • Mix dried and ground orange peels powder with yogurt to form a paste.
  • Apply the paste to your face, making sure to cover the desired areas.
  • Leave the mask on for 15 to 20 minutes before washing it off with water.

To avoid overusing this mask, apply it twice a week, but no more than that. Orange peels have powerful properties, and using them too frequently may lead to excessive exfoliation, which could irritate the skin.

A Word of Caution

When using ingredients with lemon, it is essential to exercise caution. The acidic nature of lemon juice may cause irritation, especially if you have open wounds on your skin. If you have sensitive skin or are allergic to lemons, it is best to avoid using lemon juice in your face masks.

In conclusion, yogurt is a versatile and natural ingredient that can do wonders for your skin. Whether used on its own or combined with other nourishing components, yogurt face masks can help you achieve the radiant and hydrated skin you desire. Remember to be consistent with your skincare routine and always perform a patch test before trying a new face mask. With regular use, these yogurt-based face masks will undoubtedly become your go-to solution for a glowing and healthy complexion. So why wait? Head to your kitchen and pamper your skin with the goodness of yogurt today!

Filed Under: Skin Care Tagged With: beauty tips, DIY, glowing skin, honey and yogurt mask, hydrated skin, natural beauty, natural remedies, orange peel and yogurt mask, radiant complexion, skin care, skin care tips, yogurt face masks

Primary Sidebar

Looking for something?

Connect with us online

  • Email
  • Facebook

Popular Posts!

Vegetable Glycerin Hair Moisturizer: A Natural Solution for Lustrous Locks

Natural Remedies for Hair Care: Harnessing the Power of Egg Yolks and Whites

Organic Hot Hair Oil Treatment with Castor and Olive Oil

Teeth whitening with carrots

Revitalize Your Hair with an Apple Cider Vinegar Hair Detox: A Natural and Effective Solution

Categories

  • Hair Care
  • Health and Wellness
  • Skin Care

Tags

beauty benefits beauty tips Chemical-Free Hair Care coconut oil curd curry leaves dark circles DIY Hair Care egg exfoliation eye care glowing skin hair care Hair Care Routine hair care tips hair growth Hair health Hair Health Improvement hair loss Hair Nourishment Hair Strengthening health and wellness honey hydration lemon lemon juice milk natural beauty natural conditioner natural face mask Natural hair care Natural Hair Growth Natural Hair Remedies natural ingredients natural remedies Natural remedy natural skincare olive oil radiant complexion radiant skin scalp health Scalp Nourishment skin care skincare skincare routine

© 2025 · Sharvayoni · Privacy Policy · Disclaimer