• Skip to main content
  • Skip to primary sidebar
  • HOME
  • SKIN CARE
  • HAIR CARE
  • HEALTH AND WELLNESS
  • CONTACT US

Sharvayoni

Unearth Nature's Magic - Your Path to Herbal Radiance and Wellnes

nourishing blend

Papaya and Honey Face Pack: A Natural Radiance Booster

August 12, 2023 by sharvayonibeauty Leave a Comment

Experience the magic of nature with a rejuvenating face pack that combines the goodness of papaya and honey. As the papaya pulp works to exfoliate and nourish, the honey adds its moisturizing and antibacterial prowess. If you’re seeking a natural solution to revive your skin’s radiance, look no further than this papaya and honey face pack.

Crafting Your Papaya and Honey Face Pack

Ingredients You’ll Need:

  • 2 pieces of ripe papaya
  • 1 teaspoon of honey

Step-by-Step Guide:

  1. Preparing the Papaya: Begin by peeling and removing the seeds from the papaya. Chop the papaya into smaller pieces to facilitate blending.
  2. Blending the Papaya: In a blender or food processor, blend the papaya pieces until they form a smooth pulp. The consistency should be uniform and free of any lumps.
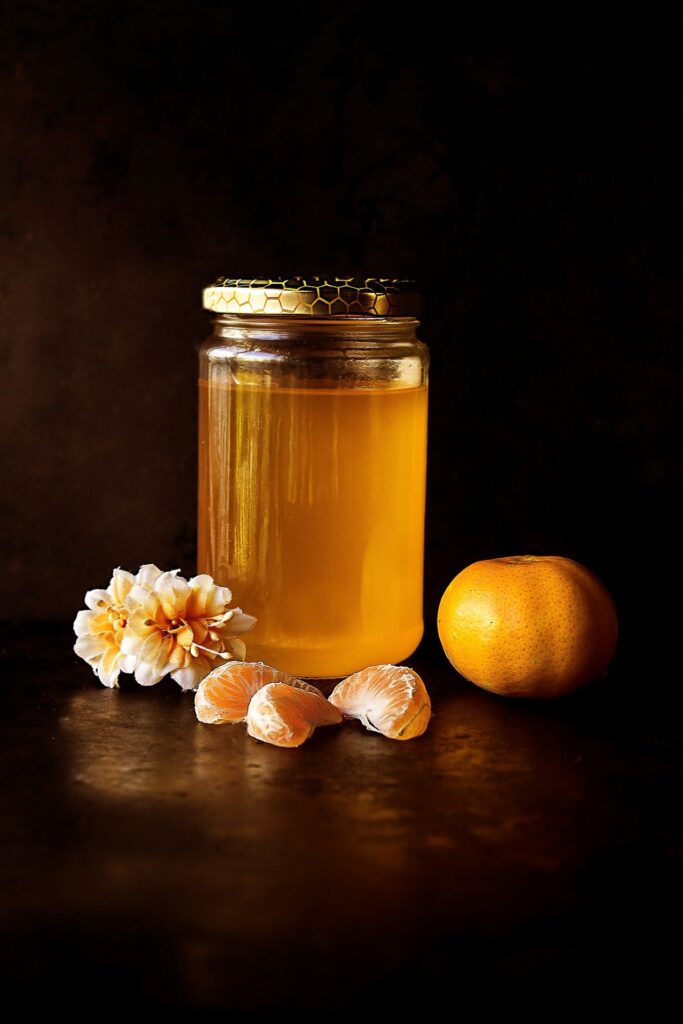
  3. Incorporating Honey: Once you have the papaya pulp ready, add a teaspoon of honey to it. Honey not only enhances the pack’s moisturizing properties but also contributes its antibacterial benefits.
  4. Mixing Thoroughly: Gently mix the papaya pulp and honey to ensure that they are well combined. The resulting mixture should be a harmonious blend of these natural ingredients.
  5. Application Process: With clean hands or a brush, generously apply the papaya and honey mixture onto your clean and dry face. Ensure that your face is evenly covered, avoiding the delicate eye and lip areas.
  6. The Restful Interval: Allow the face pack to rest on your skin for approximately 15 to 20 minutes. During this time, the papaya’s enzymes work to exfoliate dead skin cells while the honey hydrates and soothes.
  7. Rinsing Off: As the restful interval comes to an end, rinse off the face pack with lukewarm water. Gently massage your skin in circular motions as you rinse to aid in the exfoliation process.

The Beauty Benefits of Papaya and Honey

Exfoliation and Nourishment: Papaya’s natural enzymes gently exfoliate your skin, revealing a fresh layer of cells underneath. Simultaneously, the fruit’s vitamins and minerals nourish your skin, leaving it supple and revitalized.

Moisturizing Elixir: Honey’s emollient properties lock in moisture, ensuring that your skin remains hydrated even after exfoliation. This is particularly beneficial for those with dry or dehydrated skin.

Antibacterial Shield: Honey’s antibacterial qualities help combat acne-causing bacteria, making this face pack suitable for individuals struggling with occasional breakouts.

Tailoring the Papaya and Honey Face Pack

For Oily Skin: If you have oily skin, you can add a few drops of lemon juice to the mixture. Lemon’s astringent properties help regulate oil production and minimize the appearance of pores.

For Sensitive Skin: Individuals with sensitive skin can replace honey with yogurt. Yogurt’s soothing nature provides gentle exfoliation while maintaining the skin’s pH balance.

Integrating Papaya and Honey into Your Routine

Usage Frequency: Depending on your skin’s sensitivity, you can use the papaya and honey face pack once a week. Monitor your skin’s response and adjust the frequency as needed.

Patch Test: Before applying the face pack to your entire face, conduct a patch test on a small area of your skin to ensure compatibility and prevent any adverse reactions.

Post-Pack Ritual: Following the face pack, apply a lightweight moisturizer to lock in the benefits and maintain your skin’s hydration levels.

Embrace Natural Radiance: Incorporate the nourishing embrace of papaya and honey into your skincare routine and witness the gradual transformation of your skin. Embrace the beauty of these natural ingredients and unveil a radiant complexion that emanates health and vitality.

Filed Under: Skin Care Tagged With: beauty tips, healthy glow, natural radiance, nourishing blend, papaya and honey face pack, Rejuvenation, skin care, skincare routine

Revitalize Your Skin with an Egg Face Pack: A Complete Guide

August 10, 2023 by sharvayonibeauty Leave a Comment

Egg face packs have been cherished for centuries for their remarkable skin benefits. This simple yet potent remedy harnesses the power of natural ingredients to offer a plethora of advantages for your skin. If you’re looking to enhance your skin’s health, texture, and radiance, an egg face pack might be your perfect solution.

Crafting Your Egg Face Pack

Ingredients You’ll Need:

  • 1 egg white
  • 1 tablespoon of gram flour
  • Few drops of lemon juice

Step-by-Step Guide:

  1. Preparing the Egg White: Start by carefully separating the egg white from the yolk. Place the egg white in a clean bowl and discard the yolk.
  2. Beating the Egg White: Using a fork or a whisk, beat the egg white vigorously until it becomes frothy and slightly thickened. This step ensures that the egg white is well-prepared for blending with the other ingredients.
  3. Adding the Goodness: Incorporate 1 tablespoon of gram flour into the frothy egg white. This flour, also known as besan, not only serves as a binding agent but also brings its exfoliating and cleansing properties to the mix. Add a few drops of lemon juice to enhance the face pack’s brightening effects.
  4. Mixing the Ingredients: Blend the egg white, gram flour, and lemon juice thoroughly until you achieve a smooth and consistent paste. The mixture should be of medium consistency, allowing it to spread easily on your face.
  5. Application Process: With clean hands or a face pack applicator, gently apply the egg face pack to your freshly cleansed face. Take care to avoid the delicate areas around your eyes and lips.
  6. Waiting Game: Allow the face pack to dry naturally on your skin. This process typically takes around 10 to 15 minutes. As the pack dries, you’ll feel a tightening sensation on your skin.
  7. Rinsing Off: Once the egg face pack is dry and has worked its magic, it’s time to rinse it off. Begin by splashing your face with lukewarm water. This initial rinse helps loosen the pack and makes the removal process smoother.
  8. Final Rinse: Follow up with a final rinse using cool water. This not only ensures that all traces of the pack are removed but also helps close your pores, leaving your skin refreshed.

The Magic of Egg Face Pack Unleashed

Skin Tightening: One of the most noticeable effects of an egg face pack is its skin-tightening properties. As the egg white dries, it contracts, creating a temporary lift and firmness that contributes to a youthful appearance.

Oil Control: The addition of gram flour to the egg white helps absorb excess oil, making this face pack particularly beneficial for individuals with oily or combination skin. It leaves your skin feeling refreshed and mattified.

Exfoliation and Cleansing: Gram flour’s natural exfoliating properties gently slough away dead skin cells, unveiling a smoother and more refined complexion. This exfoliation also helps unclog pores, preventing breakouts and promoting clear skin.

Brightening and Even Tone: Lemon juice’s natural bleaching properties, when combined with the egg white, contribute to a more even skin tone. Over time, this face pack can help fade pigmentation, blemishes, and dark spots, revealing a brighter complexion.

Customizing the Egg Face Pack

For Dry Skin: If you have dry skin, consider adding a teaspoon of honey to the face pack mixture. Honey brings its moisturizing and hydrating properties to the mix, ensuring that your skin remains nourished and supple.

Integrating Egg Face Pack into Your Routine

Usage Frequency: To experience the full benefits without overstimulating your skin, incorporate the egg face pack into your skincare routine 1 to 2 times a week. This frequency allows your skin to reap the rewards while avoiding overuse.

Patch Test: As a precaution, perform a patch test before applying the egg face pack to your entire face. This ensures that you’re not allergic to any of the ingredients and helps prevent adverse reactions.

Hydration is Key: After rinsing off the face pack, follow up with a lightweight moisturizer to lock in hydration. This step complements the skin-nourishing effects of the egg face pack.

Consistency Yields Results: While the immediate effects of the egg face pack are undeniable, lasting benefits emerge with consistent use over time. Incorporate this natural remedy into your routine and allow your skin to flourish.

Elevate Your Beauty Regimen with Egg Face Pack

Embrace the wholesome goodness of an egg face pack and unveil a revitalized and radiant complexion. With the perfect blend of egg white, gram flour, and lemon juice, this face pack addresses a spectrum of skin concerns, from tightening to brightening. Explore the transformative effects of this natural concoction and witness your skin’s journey towards enhanced beauty.

Filed Under: Skin Care Tagged With: beauty tips, egg face pack, gram flour, lemon juice, natural beauty, nourishing blend, radiant complexion, skin care, skin rejuvenation, skincare routine

Unveil Radiant Beauty: The Ultimate Besan Face Pack Guide

August 9, 2023 by sharvayonibeauty Leave a Comment

Besan, also known as gram flour, has been a cherished beauty secret in households for generations. Derived from ground chickpeas, this versatile ingredient boasts impressive benefits for the skin. Packed with natural goodness, besan offers exfoliating, cleansing, and nourishing properties that can rejuvenate your complexion.

Crafting Your Besan Face Pack

Creating your own besan face pack is a simple yet profound way to treat your skin to the pampering it deserves. Here’s how you can prepare this elixir of radiance:

Ingredients You’ll Need:

  • 2 tablespoons of besan (gram flour)
  • 1 tablespoon of milk cream (or rose water)
  • Few drops of lemon juice
  • A pinch of turmeric

Step-by-Step Guide:

  1. Mixing the Ingredients: In a clean bowl, combine 2 tablespoons of besan, 1 tablespoon of milk cream (or rose water), a few drops of lemon juice, and a pinch of turmeric. Blend these ingredients thoroughly until you achieve a smooth and consistent paste. If you have dairy sensitivities, opt for rose water as a nourishing alternative.
  2. Applying the Pack: With clean hands or a face pack applicator, gently spread the besan mixture onto your freshly cleansed face and neck. Ensure an even layer for uniform coverage.
  3. Waiting Game: Allow the besan face pack to dry naturally on your skin. This typically takes around 15 to 20 minutes. During this time, the pack’s ingredients work harmoniously to address various skin concerns.
  4. Rinsing Off: Once the pack has dried and completed its mission, it’s time to rinse it off. Splash your face with cool water, massaging the pack as you do so. This gentle motion aids in the exfoliation process, effectively removing dead skin cells and impurities.

The Magic of Besan Unveiled

Exfoliation and Cleansing: Besan’s slightly gritty texture makes it an excellent natural exfoliant. As you rinse off the face pack, the granules work to slough away dead skin cells, revealing a fresh and renewed complexion underneath. This exfoliating action also helps unclog pores, preventing breakouts and blackheads.

Oil Control: For those with oily or combination skin, besan acts as a natural absorbent. It helps regulate excess oil production, reducing that unwanted shine and promoting a balanced complexion.

Nourishment and Glow: The blend of milk cream or rose water in the face pack provides your skin with vital nutrients and hydration. This nourishing effect not only imparts a healthy glow but also soothes any irritation or dryness.

Anti-Blemish Benefits: Lemon juice, renowned for its natural bleaching properties, works in tandem with turmeric to combat blemishes, dark spots, and uneven skin tone. These ingredients help fade pigmentation and promote a more even complexion.

Embrace Besan Face Pack in Your Routine

Frequency Matters: To harness the full potential of the besan face pack, incorporate it into your skincare routine 1 to 2 times a week. Overusing it may lead to over-exfoliation, so moderation is key.

Patch Test: As with any new skincare regimen, perform a patch test before applying the besan face pack to your entire face. This helps ensure you’re not allergic to any of the ingredients.

Hydration is Key: After rinsing off the face pack, follow up with a gentle moisturizer to seal in the benefits. Hydration supports your skin’s natural healing and replenishing process.

Consistency is the Secret: While the besan face pack can unveil instant radiance, long-term benefits come with consistent use. Incorporate it into your routine and let the nourishing power of nature work its magic over time.

Conclusion

Elevating your skincare journey with a homemade besan face pack is a choice that echoes through generations. From exfoliation to nourishment, this natural concoction addresses a multitude of skin concerns. As you embark on this ancient beauty ritual, embrace the gentle touch of gram flour, the soothing caress of milk cream (or rose water), the zing of lemon juice, and the warm glow of turmeric. Welcome to a world where radiance meets tradition, and your skin flourishes with newfound vitality.

Filed Under: Skin Care Tagged With: beauty tips, besan face pack, glowing skin, gram flour, lemon juice, natural beauty, nourishing blend, radiant complexion, skin care, skincare routine, turmeric

Peach and Milk Face Pack: A Natural Elixir for Silky Smooth and Lustrous Skin

July 30, 2023 by sharvayonibeauty Leave a Comment

Indulge in the goodness of nature’s gift to your skin with the Peach and Milk face pack. This delightful blend of fresh peaches, creamy milk, and honey offers a rich combination of vitamins, minerals, and antioxidants that work wonders for your skin. Discover the beauty benefits of this revitalizing face pack and learn how to incorporate it into your skincare routine.

The Power of Peaches for Your Skin:

Peaches are not only delectable fruits but also a treasure trove of skincare benefits. Rich in vitamins A, C, and E, peaches nourish and revitalize the skin. These vitamins help combat free radicals, promoting youthful and radiant skin. Additionally, the natural acids in peaches gently exfoliate the skin, removing dead cells and revealing a smooth complexion.

The Nourishing Effects of Milk:

Milk has been a beauty staple for centuries, and for a good reason. Its high lactic acid content gently exfoliates the skin, while the proteins and amino acids help improve skin elasticity. The natural fats and lipids in milk provide deep hydration, leaving your skin soft and supple. Incorporating milk into your skincare routine can help achieve a glowing and even skin tone.

Honey’s Healing Touch:

Honey has been revered for its healing properties since ancient times. As a natural humectant, honey attracts and retains moisture, making it an excellent ingredient for dry and dull skin. Its antimicrobial properties also make it effective in fighting acne-causing bacteria, promoting a clear and blemish-free complexion.

How to Prepare the Peach and Milk Face Pack:

Step 1: Gather the Ingredients

  • 1/4 chopped pieces of fresh, ripe peach
  • Two tablespoons of milk (preferably raw or full-fat)
  • A few drops of pure honey

Step 2: Blend to Perfection In a blender, combine the chopped peaches and milk until you achieve a smooth and creamy paste. The consistency should be easy to spread on your face without dripping.

Step 3: Add a Touch of Honey Add a few drops of honey to the peach and milk mixture and gently mix it in. Honey will enhance the face pack’s moisturizing and antibacterial properties, making it even more beneficial for your skin.

Step 4: Application Time Before applying the face pack, ensure your face is clean and free from makeup or impurities. Using your fingertips or a face brush, apply the peach and milk face pack evenly on your face and neck, avoiding the delicate eye area.

Step 5: Relax and Rejuvenate Allow the face pack to work its magic for about 15 minutes. Find a comfortable spot to relax during this time and let the nourishing ingredients seep into your skin.

Step 6: Rinse Off After 15 minutes, gently wash off the face pack with plain water. Ensure there are no remnants of the pack left on your skin.

Step 7: Revel in the Results As you pat your face dry, you will immediately notice the silky smooth texture and radiant glow that the Peach and Milk face pack has bestowed upon your skin.

Incorporating the Peach and Milk Face Pack into Your Skincare Routine:

For best results, use the Peach and Milk face pack twice a week. This frequency allows your skin to enjoy the maximum benefits of these natural ingredients without overwhelming it.

Precautions:

  • If you are allergic to peaches or any other ingredient in the face pack, perform a patch test before applying it to your face.
  • Avoid using the face pack if you have any open wounds or cuts on your skin, as the acidity of peaches and milk may cause irritation.
  • If you experience any adverse reactions or irritation, discontinue use immediately and consult a dermatologist.

Conclusion:

Experience the magic of natural skincare with the Peach and Milk face pack. Packed with vitamins, minerals, and antioxidants, this delightful concoction of peaches, milk, and honey is a treat for your skin. Regular use of this face pack will leave your skin feeling velvety smooth, glowing, and lustrous. So, indulge in the goodness of nature’s elixir and unveil the best version of your skin with the Peach and Milk face pack.

Filed Under: Skin Care Tagged With: beauty tips, creamy milk, fresh peaches, glowing skin, honey, lustrous complexion, natural skincare, nourishing blend, Peach and Milk face pack, radiant glow, rejuvenating face pack, silky smooth skin, skin care

Achieve Thicker Hair with This Natural Beauty Tip: Egg Yolk, Honey, and Olive Oil

June 3, 2023 by sharvayonibeauty Leave a Comment

Achieving thick and voluminous hair is a desire shared by many. If you’re looking for a natural solution to enhance the thickness of your hair, try incorporating this simple beauty tip into your routine. By combining the power of egg yolk, honey, and olive oil, you can nourish your hair and promote a fuller appearance. Let’s delve into the details of this ancient beauty recipe and discover how it can transform your hair.

To begin, gather the following ingredients:

  • 1 egg yolk
  • 1 spoonful of honey
  • 1 spoonful of olive oil

Once you have your ingredients ready, follow these steps:

  1. In a bowl, combine the egg yolk, honey, and olive oil. Mix them thoroughly until you achieve a smooth and consistent mixture.
  2. Start by gently massaging the mixture into your scalp, ensuring that it reaches the roots of your hair. Continue massaging in circular motions to stimulate blood circulation and encourage hair follicle nourishment.
  3. Once you have applied the mixture to your scalp, work it through the length of your hair, making sure every strand is coated with the nourishing blend.
  4. Leave the mixture on your hair for approximately 30 minutes. During this time, the nutrients from the egg yolk, honey, and olive oil will penetrate your hair shafts, providing deep conditioning and promoting thickness.
  5. After the designated time, rinse your hair thoroughly with warm water. It’s important to use warm water as hot water can strip away the beneficial properties of the ingredients.

By following this beauty tip twice a month, you can experience the maximum effectiveness of the treatment. Consistency is key, allowing your hair to reap the benefits of the nourishing blend over time.

Now, let’s explore why these ingredients work so well together to enhance the thickness and volume of your hair.

Egg yolk is rich in proteins, vitamins, and fatty acids that provide essential nourishment to your hair follicles. These nutrients help strengthen the hair strands, making them appear thicker and fuller. Additionally, egg yolk contains biotin, a B-vitamin that promotes hair growth and improves overall hair health.

Honey is a natural humectant, which means it attracts and retains moisture. It helps to lock in hydration, making your hair appear more voluminous and healthier. Honey also contains antioxidants that protect your hair from damage caused by environmental factors.

Olive oil is renowned for its moisturizing properties. It deeply conditions the hair, providing hydration and reducing frizz. Additionally, olive oil contains vitamin E, which nourishes the hair follicles and promotes hair growth. It also helps to improve the elasticity and strength of your hair strands.

By combining these powerful ingredients, you create a potent blend that not only nourishes your hair but also promotes thickness and volume. Regular use of this natural hair care recipe can lead to noticeable improvements in your hair’s texture, manageability, and overall appearance.

Remember, natural remedies take time to show results, so patience is key. Stick to the recommended frequency of twice a month and enjoy the journey of transforming your hair into luscious, voluminous locks.

In conclusion, if you desire thicker hair with more volume, this ancient beauty tip is worth incorporating into your hair care routine. The combination of egg yolk, honey, and olive oil provides essential nutrients, hydration, and conditioning to your hair, resulting in a fuller and more voluminous appearance. Embrace the power of natural ingredients and enjoy the benefits of healthier, more beautiful hair.

Filed Under: Hair Care Tagged With: beauty tips, egg yolk, hair care, hair thickness, hair volume, honey, natural beauty tip, nourishing blend, olive oil, thicker hair, voluminous hair

Primary Sidebar

Looking for something?

Connect with us online

  • Email
  • Facebook

Popular Posts!

Get rid of Lice and Dandruff using Vasambu

Rejuvenate Your Skin at Home

Unlock Youthful Radiance: The Power of Steam Cleaning for Your Face

Royal Aroma Shampoo: A Luxurious Blend of Coconut and Vanilla

Adhatoda for the Dandruff problems

Categories

  • Hair Care
  • Health and Wellness
  • Skin Care

Tags

beauty benefits beauty tips Chemical-Free Hair Care coconut oil curd curry leaves dark circles DIY Hair Care egg exfoliation eye care glowing skin hair care Hair Care Routine hair care tips hair growth Hair health Hair Health Improvement hair loss Hair Nourishment Hair Strengthening health and wellness honey hydration lemon lemon juice milk natural beauty natural conditioner natural face mask Natural hair care Natural Hair Growth Natural Hair Remedies natural ingredients natural remedies Natural remedy natural skincare olive oil radiant complexion radiant skin scalp health Scalp Nourishment skin care skincare skincare routine

© 2026 · Sharvayoni · Privacy Policy · Disclaimer