• Skip to main content
  • Skip to primary sidebar
  • HOME
  • SKIN CARE
  • HAIR CARE
  • HEALTH AND WELLNESS
  • CONTACT US

Sharvayoni

Unearth Nature's Magic - Your Path to Herbal Radiance and Wellnes

radiant skin

Rose Water and Sandalwood Powder Face Mask for Fairer Skin

July 27, 2023 by sharvayonibeauty Leave a Comment

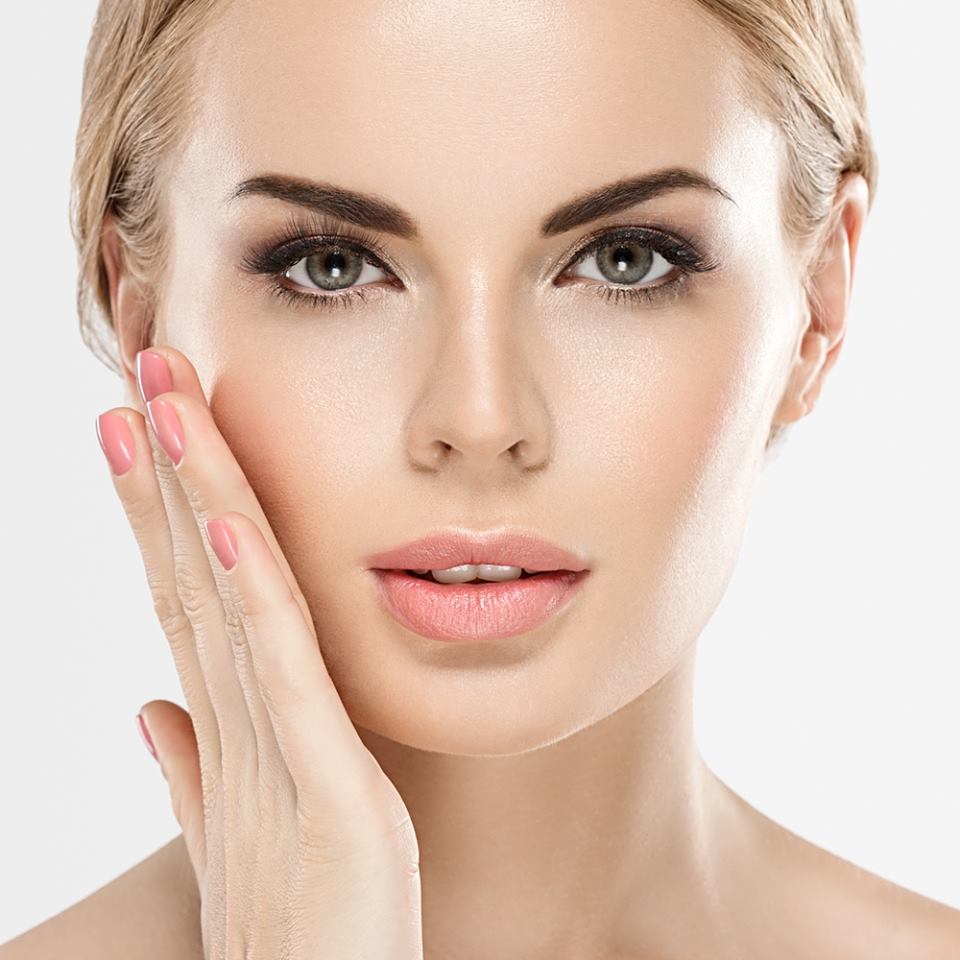
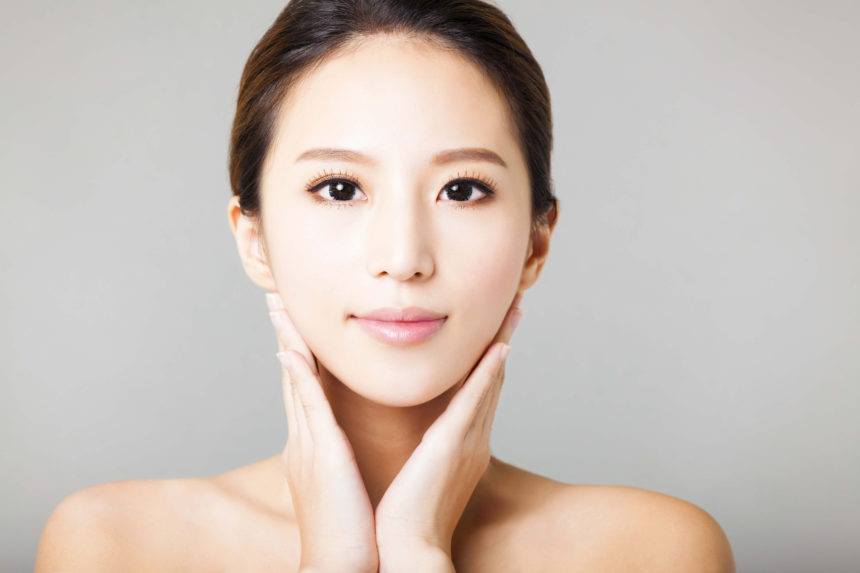
Achieving a fairer and radiant skin tone is a common desire for many individuals. While there are numerous skincare products available in the market, natural remedies have been proven to be effective and safe. One such powerful combination is the rose water and sandalwood powder face mask. This simple and affordable remedy can provide impressive results in a short span of time. In this post, we will explore the benefits of this face mask and how to use it for glowing and fairer skin.

Benefits of Rose Water and Sandalwood Powder for Skin

Before diving into the face mask recipe, let’s understand the individual benefits of rose water and sandalwood powder for the skin:

  1. Rose Water:
    • Hydrates and refreshes the skin.
    • Acts as a natural toner, maintaining the skin’s pH balance.
    • Soothes irritated and inflamed skin, reducing redness.
    • Possesses anti-inflammatory and antioxidant properties that combat free radicals.
    • Helps to tighten pores, reducing the chances of acne and blackheads.
    • Enhances skin complexion and promotes a natural glow.
  2. Sandalwood Powder:
    • Has cooling properties, making it perfect for soothing sunburns and skin rashes.
    • Acts as an excellent exfoliant, removing dead skin cells and impurities.
    • Reduces blemishes, acne scars, and pigmentation.
    • Provides relief from skin itching and irritation.
    • Delivers anti-aging benefits by minimizing fine lines and wrinkles.
    • Imparts a natural radiance and glow to the skin.

Preparation of Rose Water and Sandalwood Powder Face Mask

Now that we are aware of the fantastic benefits of both rose water and sandalwood powder, let’s learn how to create and use this powerful face mask.

Ingredients:

  • 1 teaspoon Sandalwood Powder
  • 1 teaspoon Turmeric Powder
  • Few drops of Rose Water

Instructions:

  1. In a small bowl, combine one teaspoon of sandalwood powder with one teaspoon of turmeric powder.
  2. Add a few drops of rose water to the mixture and mix well to form a smooth paste.
  3. Ensure that the paste has a spreadable consistency.

Application of the Face Mask:

  1. Start with a freshly cleansed face to allow better absorption of the mask’s benefits.
  2. Using clean fingers or a soft brush, apply the face mask evenly on your face and neck. Avoid the delicate area around the eyes.
  3. Relax and let the mask sit for about 15 minutes. You may feel a cooling sensation due to the soothing properties of sandalwood and rose water.
  4. Once the mask is dry, but not overly so, wash it off gently with lukewarm water. Avoid using hot water, as it may strip the skin of its natural oils.
  5. Pat your face dry with a soft towel and follow up with your favorite moisturizer to lock in the skin’s hydration.

Frequency: For best results, use this rose water and sandalwood powder face mask every alternate day. Consistent use will lead to visible improvements in your skin tone and overall complexion.

Safety Precautions:

  • Conduct a patch test before applying the mask all over your face, especially if you have sensitive skin or allergies to any of the ingredients.
  • Turmeric may stain the skin slightly, but this will fade within a few hours. To avoid staining, you can reduce the amount of turmeric or use Kasturi turmeric, which is non-staining.
  • If you experience any irritation or discomfort during or after using the mask, discontinue use and consult a dermatologist.

Conclusion:

Embrace the natural goodness of rose water and sandalwood powder with this DIY face mask. The combination of these two potent ingredients will leave your skin feeling refreshed, nourished, and with a radiant glow. Remember to maintain consistency with the application, and in no time, you will notice the transformation of your skin to a fairer and more youthful appearance. Enjoy the benefits of this age-old remedy for beautiful, glowing skin!

Filed Under: Skin Care Tagged With: beauty, beauty tips, complexion, DIY, face mask, fairer skin, glowing skin, Natural remedy, radiant skin, rose water, sandalwood powder, skin care, skincare

The Importance of Exfoliation: Scrubbing Twice a Week

July 18, 2023 by sharvayonibeauty Leave a Comment

Exfoliation is a vital step in any skincare routine, as it helps to remove dead skin cells, unclog pores, and reveal a brighter and smoother complexion. One effective way to exfoliate is through the use of scrubs. By incorporating scrubbing into your skincare regimen twice a week, you can achieve noticeable results within a few months. In this article, we will explore different homemade scrub recipes and their benefits, along with tips on how to use them effectively for optimal results.

Sugar and Coffee Scrub with Olive Oil, Glycerin, and Lemon

The combination of sugar and coffee grounds makes for an invigorating and effective scrub. Here’s how to create this scrub:

Ingredients:

  • 2 tablespoons of sugar and coffee grounds
  • 1 teaspoon of olive oil
  • 1 teaspoon of glycerin
  • 1 teaspoon of lemon juice

Instructions:

  1. In a small bowl, mix together the sugar and coffee grounds.
  2. Add the olive oil, glycerin, and lemon juice to the mixture and stir well to combine.
  3. Apply the scrub to your face or body, gently massaging in circular motions for a few minutes.
  4. Leave the scrub on for about 10 minutes to allow the ingredients to penetrate the skin.
  5. Rinse off the scrub with water and pat dry.

Sugar, Salt, Baking Soda, and Lemon Scrub

This scrub combines the exfoliating properties of sugar, salt, and baking soda with the brightening effects of lemon. Follow these steps to create the scrub:

Ingredients:

  • 2 tablespoons of sugar
  • 2 tablespoons of salt
  • 1 tablespoon of baking soda
  • Juice of a whole lemon

Instructions:

  1. In a bowl, mix together the sugar, salt, and baking soda.
  2. Squeeze the juice of a whole lemon into the mixture and stir well to form a paste.
  3. Apply the scrub to your body, massaging it in gentle circular motions for about 5 minutes.
  4. Leave the scrub on your skin for an additional 10 minutes to allow the ingredients to work their magic.
  5. Rinse off the scrub with water and moisturize your skin afterwards.

Simple Olive Oil and Sugar Scrub

If you’re looking for a quick and easy scrub, this simple recipe using olive oil and sugar is perfect:

Ingredients:

  • Olive oil
  • Sugar

Instructions:

  1. In a small bowl, pour a generous amount of olive oil.
  2. Add enough sugar to create a thick paste.
  3. Gently massage the scrub onto your face or body, using circular motions.
  4. Continue massaging for a few minutes to exfoliate the skin.
  5. Rinse off the scrub with water and pat dry.

The Benefits of Regular Scrubbing

By incorporating regular scrubbing into your skincare routine, you can enjoy numerous benefits:

  1. Improved Skin Texture: Scrubbing helps to remove dead skin cells, revealing a smoother and more radiant complexion.
  2. Unclogged Pores: Exfoliation helps to unclog pores, preventing the formation of blackheads and whiteheads.
  3. Enhanced Absorption of Skincare Products: By removing dead skin cells, exfoliation allows for better absorption of serums, moisturizers, and other skincare products.
  4. Stimulated Blood Circulation: The massaging action involved in scrubbing promotes blood circulation, leading to a healthy and vibrant complexion.
  5. Even Skin Tone: Regular exfoliation can help fade dark spots, hyperpigmentation, and acne scars, resulting in a more even skin tone.

Tips for Effective Scrubbing

To make the most out of your scrubbing routine, keep the following tips in mind:

  1. Choose the Right Scrub: Select a scrub that is suitable for your skin type and concerns. Consider the ingredients, texture, and exfoliating strength.
  2. Gentle Yet Firm: While scrubbing, apply gentle pressure to avoid irritating the skin. Be firm enough to exfoliate but avoid being too rough.
  3. Be Consistent: Consistency is key when it comes to seeing results. Stick to a regular scrubbing schedule of twice a week to maintain the benefits of exfoliation.
  4. Follow with Moisturization: After scrubbing, moisturize your skin to replenish moisture and maintain its hydration levels.
  5. Listen to Your Skin: Pay attention to how your skin reacts to the scrub. If you experience any irritation or discomfort, adjust the frequency or switch to a milder scrub.

Conclusion

Incorporating scrubbing into your skincare routine twice a week can lead to significant improvements in the texture, appearance, and overall health of your skin. Whether you choose the sugar and coffee scrub, the sugar, salt, baking soda, and lemon scrub, or the simple olive oil and sugar scrub, each recipe offers uniquebenefits and can be easily prepared at home. Remember to be gentle yet firm while scrubbing, and always follow up with moisturization to keep your skin hydrated. Consistency is key, so make sure to stick to your scrubbing schedule to achieve the desired results within three months. By following these tips and incorporating regular scrubbing into your skincare routine, you can enjoy a smoother, brighter, and more youthful-looking complexion. So, don’t wait any longer—start scrubbing twice a week and experience the transformative effects on your skin!

Filed Under: Skin Care Tagged With: beauty tips, coffee scrub, exfoliation, homemade scrubs, lemon scrub, olive oil scrub, radiant skin, salt scrub, scrubbing, skin care, skincare routine, smoother complexion, sugar scrub, twice a week

Delaying Wrinkles with Proper Skincare: The Power of Cream and Honey Face Mask

July 12, 2023 by sharvayonibeauty Leave a Comment

Wrinkles are a natural part of the aging process, and while it’s impossible to prevent them completely, there are ways to delay their appearance and maintain youthful-looking skin. In this article, we will explore a simple yet effective skincare remedy using two common household ingredients: cream and honey. By incorporating a cream and honey face mask into your skincare routine, you can provide your skin with the nourishment and care it needs to stay supple and radiant.

Understanding Wrinkles and Skincare

Wrinkles are the result of various factors, including age, genetics, sun exposure, and lifestyle choices. While we cannot halt the aging process, we can adopt a skincare regimen that helps minimize the signs of aging and delay the formation of wrinkles. Adequate and consistent care is essential to maintain the health and appearance of our skin.

The Power of Cream in Skincare

Cream is a rich and moisturizing skincare ingredient that can provide numerous benefits to the skin. It helps hydrate and nourish the skin, improve its elasticity, and reduce the appearance of fine lines and wrinkles. The emollient properties of cream help create a protective barrier, preventing moisture loss and keeping the skin supple and smooth.

The Benefits of Honey for Skin

Honey is a natural ingredient known for its various skincare benefits. It has moisturizing properties that help retain the skin’s moisture and improve its texture. Honey is also rich in antioxidants, which can help fight against free radicals and reduce oxidative stress on the skin. Additionally, honey has antibacterial properties that can promote a healthy complexion and prevent acne breakouts.

Creating the Cream and Honey Face Mask

To create a simple yet effective cream and honey face mask, you will need one tablespoon of cream and one tablespoon of honey. Ensure that you use high-quality, organic ingredients for the best results.

  1. Start by combining the cream and honey in a clean bowl. Mix them well until they form a smooth and consistent mixture.
  2. Before applying the face mask, cleanse your face thoroughly to remove any impurities and makeup residue. This will allow the mask to penetrate the skin more effectively.
  3. Using clean fingertips or a clean brush, apply the cream and honey mixture evenly to your face, avoiding the delicate eye area. Gently massage the mask into your skin using circular motions, ensuring that it covers all areas.
  4. Allow the mask to sit on your skin for approximately 20 minutes. During this time, the cream and honey will work their magic, providing hydration, nourishment, and potential anti-aging benefits.
  5. After 20 minutes, rinse off the mask with lukewarm water. Pat your face dry with a clean towel.
  6. Follow up with your favorite moisturizer to seal in the moisture and further enhance the benefits of the mask.

Incorporating the Cream and Honey Face Mask into Your Skincare Routine

For optimal results, incorporate the cream and honey face mask into your skincare routine once or twice a week. It is important to be consistent with your skincare practices to see lasting effects. Consider setting aside a specific time each week to pamper your skin and give it the care it deserves.

Conclusion

While it is impossible to prevent wrinkles altogether, taking proactive steps and implementing a consistent skincare routine can delay their appearance and maintain youthful-looking skin. The cream and honey face mask offers a simple and cost-effective solution for nourishing and caring for your skin. By harnessing the hydrating and anti-aging properties of cream and the moisturizing and antioxidant benefits of honey, you can give your skin the love it needs. Embrace this natural skincare remedy and enjoy the potential long-term benefits of a healthier, more radiant complexion. Remember, your skin is unique, so listen to its needs and adjust your skincare routine accordingly for the best results.

Filed Under: Skin Care Tagged With: aging process, anti-aging, antioxidants, beauty tips, cream, delay wrinkles, face mask, fine lines, honey, hydration, moisturizing, natural skincare, radiant skin, skin care, skincare, skincare routine, wrinkles

Delaying Wrinkles: Rice Flour and Honey Face Mask

July 11, 2023 by sharvayonibeauty Leave a Comment

Wrinkles are an inevitable part of the natural aging process, and it’s important to embrace the beauty that comes with growing older. However, with proper care and attention, we can take steps to delay the onset of wrinkles and maintain youthful-looking skin for longer. In this post, we will explore a simple yet effective face mask recipe using rice flour and honey. While we cannot prevent wrinkles entirely, this natural face mask can contribute to healthier, more radiant skin and help in delaying the appearance of wrinkles for years.

Understanding Wrinkles and Skincare

Before we delve into the details of the face mask recipe, let’s briefly understand wrinkles and the role of skincare in their prevention. Wrinkles are lines and creases that develop on the skin as a result of various factors, including age, genetics, sun exposure, and lifestyle choices. While we cannot completely prevent wrinkles, adopting a regular skincare routine and using natural ingredients can contribute to the overall health and appearance of our skin.

The Benefits of Rice Flour for Skin

Rice flour has long been used in skincare due to its numerous benefits. Here are some of the advantages of incorporating rice flour into your beauty regimen:

  1. Exfoliation: Rice flour acts as a gentle exfoliant, helping to remove dead skin cells and promote a smoother complexion.
  2. Oil Control: It has natural oil-absorbing properties, making it ideal for individuals with oily or combination skin types.
  3. Brightening: Rice flour contains natural enzymes that can help brighten the skin, reduce dark spots, and even out skin tone.
  4. Anti-Aging: Rich in antioxidants, rice flour can help fight free radicals and protect the skin from premature aging.

The Nourishing Power of Honey

Honey is a renowned ingredient in skincare due to its nourishing and moisturizing properties. When used in a face mask, honey can provide the following benefits:

  1. Moisturization: Honey is a natural humectant, meaning it helps retain moisture in the skin, keeping it hydrated and supple.
  2. Antioxidant Protection: The antioxidants present in honey help combat free radicals, preventing damage to the skin cells and reducing signs of aging.
  3. Soothing and Healing: Honey has anti-inflammatory properties that can soothe irritated skin and promote healing.

Creating the Rice Flour and Honey Face Mask

Now that we understand the benefits of rice flour and honey for the skin, let’s proceed to the step-by-step guide to creating the face mask:

Step 1: Gather Your Ingredients

To prepare the face mask, you will need the following:

  • 1 teaspoon of rice flour
  • 1/2 teaspoon of honey (preferably raw or organic)

Step 2: Mixing the Ingredients

In a small bowl, combine the rice flour and honey. Mix them well until you achieve a smooth and consistent paste-like texture. If needed, you can adjust the quantities to achieve the desired consistency.

Step 3: Applying the Face Mask

Before applying the face mask, ensure your face is clean and free from any makeup or impurities. Using clean fingertips or a cosmetic brush, apply a thin, even layer of the mask to your face, avoiding the delicate eye area.

Step 4: Relax and Let It Work

Once the mask is applied, allow it to sit on your skin for approximately 30 minutes. During this time, find a comfortable position and relax. You can use this opportunity to practice deep breathing exercises or listen to calming music to enhance the overall experience.

Step 5: Rinse and Moisturize

After the recommended 30 minutes, gently rinse off the mask with lukewarm water. Pat your skin dry using a soft towel and follow up with your favorite moisturizer to lock in hydration and nourishment.

Incorporating the Face Mask into Your Skincare Routine

For best results, it is recommended to incorporate this rice flour and honey face mask into your skincare routine once or twice a week. Consistency is key when it comes to skincare, so make it a habit to set aside some time for self-care and give your skin the attention it deserves.

Conclusion

While we cannot prevent wrinkles entirely, we can take proactive steps to delay their appearance and maintain youthful-looking skin. This simple yet effective rice flour and honey face mask can be a valuable addition to your skincare routine. Embrace the natural goodness of these ingredients and enjoy the nourishing benefits they offer. Remember, skincare is a journey, and by giving your skin the care it deserves, you can enhance its health, radiance, and overall well-being for years to come.

Filed Under: Skin Care Tagged With: beauty tips, delay wrinkles, face mask, homemade skincare, honey, natural ingredients, radiant skin, rice flour, skin care, skincare routine, wrinkles, youthful-looking skin

Peeling for Face and Body: A Homemade Recipe for Glowing Skin

July 3, 2023 by sharvayonibeauty Leave a Comment

beauty-instant-glowing-skin

Exfoliation plays a vital role in maintaining healthy and radiant skin. If you’re looking for a natural and effective peeling treatment for both your face and body, we have just the solution for you. This homemade peeling recipe combines simple yet powerful ingredients to help remove dead skin cells, improve skin tone, and promote a healthy glow. In this post, we will guide you through the process of creating this peeling mixture and share tips on how to use it for maximum benefits. Let’s dive in!

Ingredients

To create the peeling mixture, gather the following ingredients:

  1. One tablespoon of flour
  2. One tablespoon of Marjoram
  3. One soup spoon of turmeric (known for its antiseptic and toning properties)
  4. One tablespoon of powdered rose petals
  5. One tablespoon of liquid (milk for dry skin, herbal tea for normal skin, yogurt for oily skin)

These ingredients work together to exfoliate the skin gently and provide additional benefits based on your skin type.

Preparation

Follow these simple steps to prepare the peeling mixture:

  1. In a bowl, combine one tablespoon of flour, one tablespoon of Marjoram, one soup spoon of turmeric, and one tablespoon of powdered rose petals. Ensure that the dry ingredients are well mixed.
  2. Once the dry ingredients are combined, add one tablespoon of the appropriate liquid based on your skin type. Choose milk for dry skin, herbal tea for normal skin, or yogurt for oily skin. The liquid will help bind the ingredients and create a creamy paste consistency.
  3. Stir the mixture thoroughly until all the ingredients are well incorporated, forming a smooth and creamy paste. Adjust the consistency by adding more liquid if needed.

Application

Here’s how to use the peeling mixture on your face and body:

  1. Start by cleansing your face and body to remove any dirt or impurities. This will ensure that the peeling treatment can penetrate effectively and deliver the desired results.
  2. Take a small amount of the peeling mixture and apply it to your face and body. Use gentle, circular motions to massage the mixture into your skin. Focus on areas that may be more prone to dryness or roughness, such as elbows, knees, and heels.
  3. As you massage the peeling mixture, be mindful of the pressure you apply. Avoid excessive force or scrubbing, as it may irritate the skin. The goal is to exfoliate gently and stimulate circulation.
  4. After gently massaging the peeling mixture onto your face and body, allow it to sit for a few minutes. This will give the ingredients time to work their magic and effectively remove dead skin cells.
  5. Rinse off the peeling mixture with lukewarm water. Ensure that all traces of the mixture are thoroughly removed.
  6. After rinsing, gently pat your skin dry with a soft towel. Avoid rubbing, as it may cause irritation.
  7. Finish the treatment by applying a nourishing cream or moisturizer to seal in the hydration and protect your newly revealed, glowing skin.

Tips for Maximum Benefits

Consider the following tips to make the most of your peeling treatment:

  1. Perform a patch test before applying the peeling mixture to your entire face and body, especially if you have sensitive skin. Apply a small amount of the mixture to a small area and wait for any adverse reactions. If there is no irritation or discomfort, proceed with the treatment as directed.
  2. Adjust the amount of liquid used to achieve the desired consistency. You want the peeling mixture to be creamy and easy to apply, but not too runny.
  3. Use the peeling mixture once or twice a week for best results. Over-exfoliation can cause skin irritation, so it’s important to give your skin enough time to regenerate between treatments.
  4. Be gentle when massaging the peeling mixture onto your skin. The goal is to exfoliate, not to scrub vigorously. Applying too much pressure can lead to irritation and redness.

Conclusion

Creating your own peeling mixture for the face and body is a cost-effective and natural way to achieve glowing and healthy-looking skin. By combining ingredients such as flour, Marjoram, turmeric, powdered rose petals, and a suitable liquid for your skin type, you can create a customized peeling treatment. Remember to massage gently, rinse thoroughly, and follow up with a nourishing cream. Embrace the benefits of this homemade peeling recipe and enjoy the renewed radiance of your skin.

Filed Under: Skin Care Tagged With: application tips, beauty tips, dead skin cells, flour, healthy glow, homemade peeling, marjoram, natural exfoliating treatment, peeling for face and body, powdered rose petals, radiant skin, skin care, turmeric

  • « Go to Previous Page
  • Page 1
  • Page 2
  • Page 3
  • Go to Next Page »

Primary Sidebar

Looking for something?

Connect with us online

  • Email
  • Facebook

Popular Posts!

Brighten Your Smile Naturally: Apple Cider Vinegar for Teeth Whitening

Naturally Glowing Skin: The Magic of Yogurt Face Masks

The Power of Punugu: A Natural Remedy for Pimple Relief and Clear Skin

skin-care-Slider1

Revitalize Your Skin with a Homemade Body Scrub

Turmeric

17 Beauty Benefits of Turmeric for Skin

Categories

  • Hair Care
  • Health and Wellness
  • Skin Care

Tags

beauty benefits beauty tips Chemical-Free Hair Care coconut oil curd curry leaves dark circles DIY Hair Care egg exfoliation eye care glowing skin hair care Hair Care Routine hair care tips hair growth Hair health Hair Health Improvement hair loss Hair Nourishment Hair Strengthening health and wellness honey hydration lemon lemon juice milk natural beauty natural conditioner natural face mask Natural hair care Natural Hair Growth Natural Hair Remedies natural ingredients natural remedies Natural remedy natural skincare olive oil radiant complexion radiant skin scalp health Scalp Nourishment skin care skincare skincare routine

© 2025 · Sharvayoni · Privacy Policy · Disclaimer