• Skip to main content
  • Skip to primary sidebar
  • HOME
  • SKIN CARE
  • HAIR CARE
  • HEALTH AND WELLNESS
  • CONTACT US

Sharvayoni

Unearth Nature's Magic - Your Path to Herbal Radiance and Wellnes

relaxation

Hair Oil Massage & Hot Oil Treatment: Revitalizing Your Scalp and Hair

April 3, 2024 by sharvayonibeauty Leave a Comment

Hair loss, dryness, and scalp issues are common concerns that many people face in their hair care journey. To combat these problems effectively, it’s essential to prioritize scalp and hair moisturization. One highly beneficial method is the Hair Oil Massage, which involves using a combination of nourishing oils to massage the scalp. This step not only moisturizes the scalp but also stimulates hair growth, promotes relaxation, and reduces scalp tension. Additionally, the use of a Hot Oil Treatment enhances the effectiveness of these oils, providing faster results. In this comprehensive guide, we will explore the process of preparing and using hair oils, the benefits they offer, and essential tips for maintaining a healthy scalp and luscious locks.

Things Needed

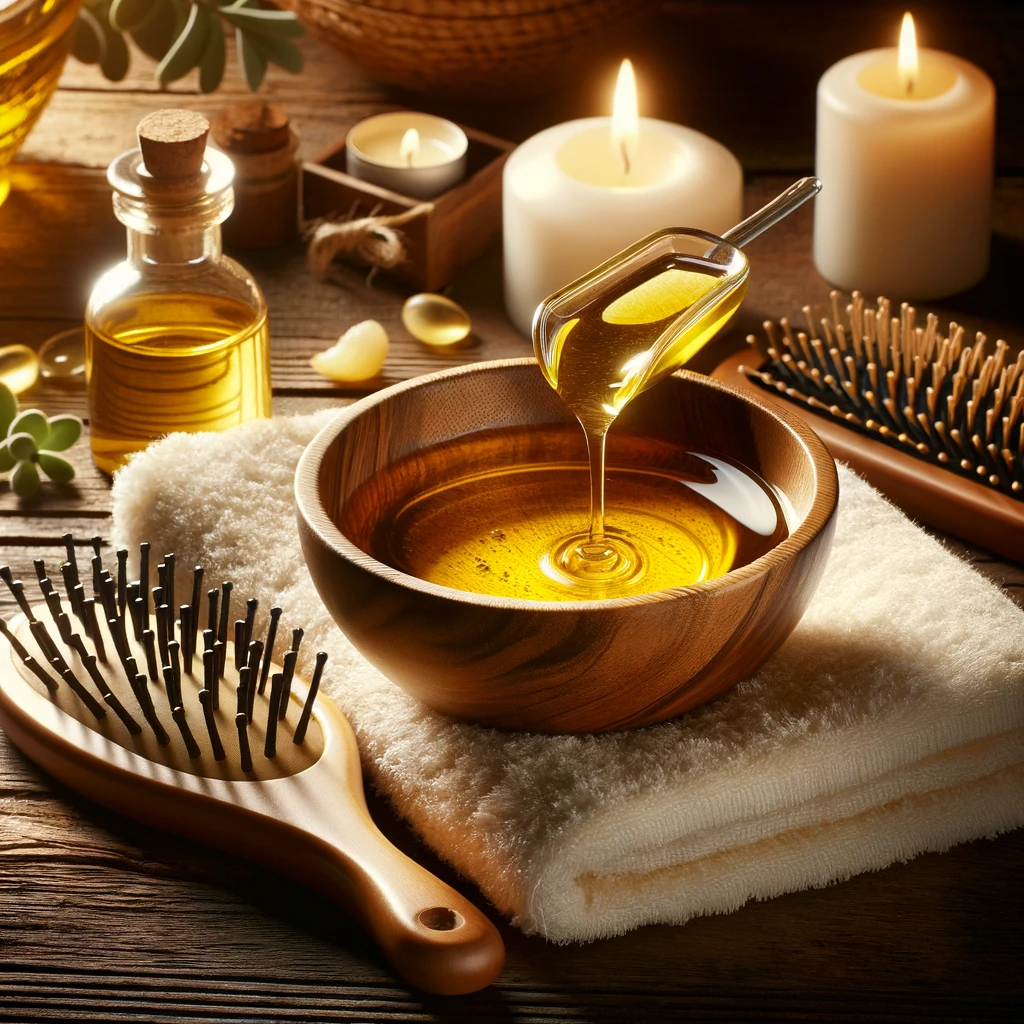
Before we delve into the process of preparing and using hair oils for a rejuvenating Hair Oil Massage and Hot Oil Treatment, let’s gather all the essential items you’ll need:

  1. Hair Oils: You can choose from a variety of hair oils, such as extra virgin olive oil, coconut oil, sesame oil, wheat germ oil, almond oil, and castor oil. When using castor oil, it should be mixed with a carrier oil, such as jojoba oil, almond oil, avocado oil, or sesame oil, due to its thickness.
  2. Other Ingredients: You’ll require a combination of these nourishing oils for your Hair Oil Massage and Hot Oil Treatment. For instance:
  • 3 tablespoons of castor oil
  • 3 tablespoons of sesame oil
  • 3 tablespoons of extra virgin olive oil
  • 3 tablespoons of basil oil
  • 3 tablespoons of peanut oil
  • 3 tablespoons of wheat germ oil
  • 3 teaspoons of rosemary oil

Now that you have the ingredients ready, let’s proceed with the steps to prepare and use these hair oils effectively.

Steps to Prepare

Follow these comprehensive steps to create and apply the Hair Oil Massage and Hot Oil Treatment:

Step 1: Oil Mixture Preparation

  1. Heat all the oils in a top of a double boiler until they become warm. Ensure that the oils are not too hot to avoid burning your scalp.

Step 2: Application

  1. Sit on a chair and bend your head forward to apply the oil mixture directly to your hair and scalp.

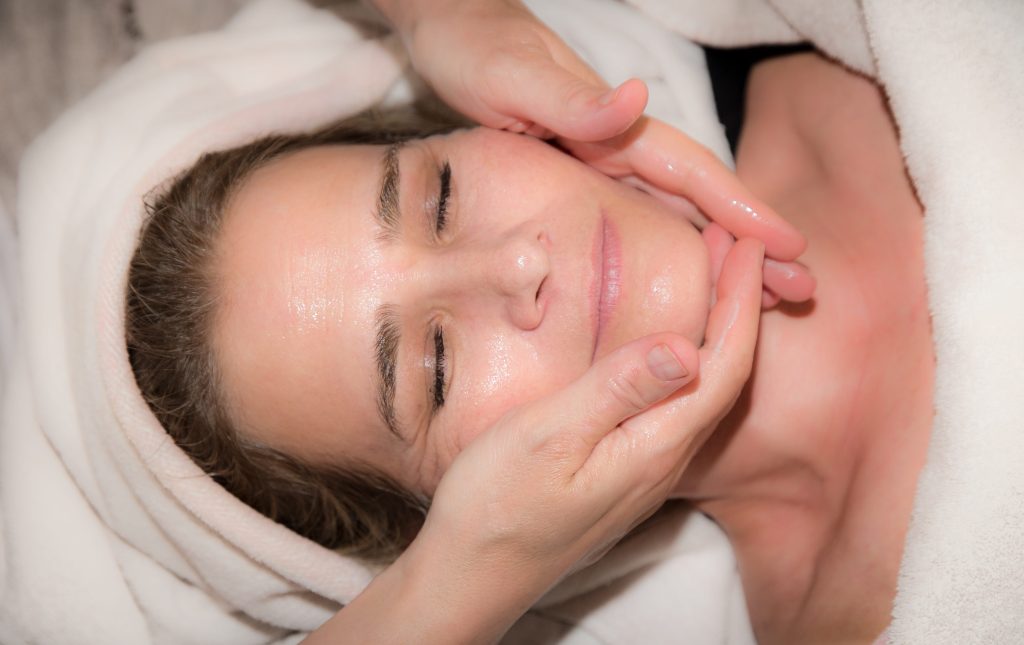
Step 3: Scalp Massage

  1. Gently massage your scalp with circular movements using your fingertips. Scalp massage improves blood flow to hair follicles, stimulates healthy hair growth, and provides relaxation while reducing scalp tension.

Step 4: Hot Oil Treatment

  1. For a Hot Oil Treatment, you have two options:
  • Use a hair steamer for 20 minutes.
  • Alternatively, cover your hair with a plastic cap and then wrap your head with a dry towel for two to three hours.

Step 5: Hair Wash

  1. After the treatment, wash your hair with an SLS-free shampoo to remove excess oil.

Step 6: Enjoy the Benefits

  1. The oil mixture strengthens hair follicles, reduces hair loss, accelerates hair growth, and softens your hair.

Benefits

Incorporating Hair Oil Massage and Hot Oil Treatment into your hair care routine offers numerous benefits for your scalp and hair:

1. Scalp and Hair Moisturization

The oils deeply moisturize your scalp and hair, preventing dryness and associated issues.

2. Improved Blood Circulation

Scalp massage enhances blood flow to hair follicles, promoting healthy hair growth.

3. Relaxation and Stress Reduction

Scalp massages provide relaxation and reduce tension, contributing to overall well-being.

4. Hair Strengthening

The oil mixture strengthens hair follicles, reducing hair loss and breakage.

5. Accelerated Hair Growth

Improved scalp health and circulation accelerate the hair growth cycle, resulting in faster growth.

6. Soft and Manageable Hair

The oils leave your hair soft, manageable, and easy to style.

Conclusion

Prioritizing scalp and hair moisturization through Hair Oil Massage and Hot Oil Treatment is a crucial step in achieving and maintaining healthy, luscious locks. By choosing nourishing oils and following the correct application method, you can enjoy numerous benefits, including reduced hair loss, improved hair growth, and enhanced scalp health. Remember to follow essential tips, such as not leaving oils on the scalp for more than 8 hours and using oils specifically designed for hair care. With the right approach, you can rejuvenate your scalp and hair, promoting a revitalized and vibrant look for your locks. Make these treatments a regular part of your hair care regimen, and witness the transformation of your hair and scalp.

Filed Under: Hair Care Tagged With: beauty tips, hair care, Hair Care Routine, hair growth, Hair Loss Prevention, hair oil massage, Healthy locks, Hot Oil Treatment, nourishing oils, relaxation, scalp health

Gentle Indian Facial Massage: A Soothing Journey to Relaxation and Rejuvenation

July 13, 2023 by sharvayonibeauty Leave a Comment

Gentle Indian facial massage is a wonderfully relaxing and rejuvenating practice that can be performed in just a few minutes. Whether it’s in the morning, afternoon, or evening, this massage technique can help relieve stress and promote the regeneration of the skin. Using high-quality oils like grapeseed or sesame oil enhances the sliding of the hands, ensuring a smooth and nourishing experience. In this article, we will explore a step-by-step guide to performing a gentle Indian facial massage, focusing on specific areas of the face to promote relaxation and rejuvenation.

Relieving Forehead Wrinkles

One of the areas where stress tends to manifest is the forehead, often in the form of wrinkles. To “open up” this area and promote relaxation, follow these steps:

  1. Place your hands horizontally across the forehead, with the forefinger and middle finger positioned directly above the eyebrows.
  2. Slowly and gently pull your hands outwards, applying gentle pressure. Repeat this motion several times to release tension and promote relaxation.

Stimulating the Third Eye and Eyebrows

The third eye, located between the eyebrows, is a significant energy center in Ayurvedic medicine. To stimulate this area and promote relaxation, follow these steps:

  1. Position your index finger and middle finger on the third eye point between the eyebrows.
  2. With gentle pressure, stroke from the center of the eyebrows outward, following the entire length of the eyebrows.
  3. When reaching the outer point of the eyebrows, increase the pressure slightly and finish with a few circular movements.

Nourishing the Cheeks

The cheeks are an essential area to focus on during a facial massage. To nourish and revitalize the cheeks, follow these steps:

  1. Place both hands horizontally on the cheeks, with all eight fingers facing inward.
  2. Slowly and gently pull your hands toward the cheekbones, applying gentle pressure. Repeat this motion to stimulate circulation and promote relaxation.

Uplifting the Mouth and Chin

The mouth and chin area can hold tension and stress. To uplift and relax this area, follow these steps:

  1. Position your index finger and middle finger horizontally on the corners of your mouth.
  2. Gently pull the skin outward and upward, creating a smiling mouth shape.
  3. Continue the movement towards the ears, gently pulling the earlobes in various directions.
  4. Finally, massage the earlobes with circular movements, starting from the bottom and moving upward.

Releasing Tension in the Chin

The chin area can often accumulate tension. To release tension and promote relaxation in the chin, follow these steps:

  1. Place your fingers on your chin, with the forefinger and middle finger positioned above the chin and the remaining fingers, including the thumb, underneath.
  2. With gentle pressure, pull the fingers outward towards the earlobes.
  3. Finish this movement by covering your eyes with the palm of your hands, allowing yourself to relax and feel the energy.

Conclusion

A gentle Indian facial massage is a simple yet effective way to relieve stress, promote relaxation, and rejuvenate the skin. By focusing on specific areas of the face, such as the forehead, eyebrows, cheeks, mouth, chin, and ears, you can release tension and nourish the skin. Remember to use high-quality oils for a smooth sliding experience. Incorporate this relaxing practice into your daily skincare routine and embrace the rejuvenating benefits it offers. Take a few moments each day to treat yourself to a gentle Indian facial massage and experience the serenity and radiance it brings to both your body and mind.

Filed Under: Skin Care Tagged With: beauty tips, gentle Indian facial massage, high-quality oils, nourish skin, promote circulation, Rejuvenation, relaxation, serenity, skin care, skincare routine, specific areas, step-by-step guide, stress relief

Vanilla Honey Bubble Bath: A Luxurious and Fragrant Recipe for Silky Smooth Skin

July 1, 2023 by sharvayonibeauty Leave a Comment

Indulging in a luxurious bubble bath is an excellent way to relax and rejuvenate your body and mind. If you’re looking for a fragrant recipe that can be enjoyed throughout the year, particularly during cold winter days, the Vanilla Honey Bubble Bath is a perfect choice. This delightful concoction not only nourishes your skin but also uplifts your mood with its subtle and seductive scent. In this post, we will guide you through the simple steps of creating this aromatic bubble bath that will leave your skin feeling silky smooth. Let’s dive in!

Ingredients

To prepare the Vanilla Honey Bubble Bath, gather the following ingredients:

  1. A cup of extra virgin oil (options include wheat germ oil, grape seed oil, almond oil, avocado oil, etc.)
  2. Half a cup of honey
  3. Half a cup of liquid or fragrance-free shower gel
  4. A tablespoon of vanilla extract

The combination of honey and vanilla will not only moisturize your skin but also provide a delightful fragrance that will make your bathing experience truly indulgent.

Preparation

Follow these steps to create your own Vanilla Honey Bubble Bath:

  1. Begin by gathering a clean bottle for storing the bubble bath. It is best to use a dark glass bottle to preserve the quality of the ingredients.
  2. In the bottle, combine all the ingredients: a cup of extra virgin oil, half a cup of honey, half a cup of liquid or fragrance-free shower gel, and a tablespoon of vanilla extract. Make sure to mix them thoroughly to create a well-blended solution.
  3. Once all the ingredients are mixed, seal the bottle tightly with a well-occlusive cover or a cork stopper. This will help preserve the freshness of the bubble bath.
  4. For an added touch, you can decorate the bottle if you plan to give it as a gift. Consider using colored glass bottles, sealing them with corks, and embellishing them with beads or glass marbles using hot glue. This personalized packaging will make it a delightful present for loved ones.

Application

To enjoy the fragrance and benefits of the Vanilla Honey Bubble Bath, follow these simple instructions:

  1. Before each use, make sure to shake the bottle well to ensure that all the ingredients are properly mixed.
  2. When you’re ready for a relaxing bath, fill your bathtub with warm water.
  3. Under the running water, pour approximately a quarter cup of the Vanilla Honey Bubble Bath directly into the bathtub. The running water will help create a luxurious foam.
  4. Immerse yourself in the fragrant bubbles and soak for as long as you desire. Let the warm water and the enticing scent envelop your senses, allowing you to unwind and find tranquility.
  5. The quantity prepared with these measurements is sufficient for about eight full baths, providing you with multiple opportunities to indulge in this delightful experience.

Conclusion

Creating your own Vanilla Honey Bubble Bath is a simple and rewarding process that yields remarkable results. The combination of nourishing oils, honey, and the sweet scent of vanilla will leave your skin feeling silky smooth and delicately perfumed. Whether you choose to enjoy this luxurious bubble bath during the cold winter days or any other season, it is sure to uplift your mood and provide a blissful bathing experience. So go ahead, prepare your own batch of Vanilla Honey Bubble Bath, and pamper yourself with a little indulgence that will leave you feeling refreshed and rejuvenated.

Filed Under: Skin Care Tagged With: bath recipe, beauty tips, fragrance recipe, homemade beauty, honey, luxurious bubble bath, nourishing oils, relaxation, self-care., silky smooth skin, skin care, vanilla extract, Vanilla Honey Bubble Bath

The Blissful Retreat: Creating Your Own Soaking Bath Salts

June 27, 2023 by sharvayonibeauty Leave a Comment

Indulging in a luxurious bath is a cherished ritual for many. It’s a time to relax, unwind, and rejuvenate both the body and mind. One way to enhance this tranquil experience is by using soaking bath salts. While there are numerous options available in the market, creating your own bath salts allows you to customize the ingredients and scents according to your preferences. In this post, we will guide you through a simple and delightful recipe for homemade soaking bath salts, turning your bath time into a blissful retreat.

Gathering the Ingredients

Before we dive into the recipe, let’s gather the ingredients you’ll need. The star ingredient is Epsom salt, renowned for its therapeutic properties. You can easily find Epsom salt in your local store or order it online. Additionally, you’ll need a .5-ounce bottle of your preferred skin-friendly oil, commonly found in candle stores, bath shops, or craft markets. To add a delightful aroma and visual appeal, consider incorporating dried flowers of your choice. Lastly, if you desire extra nourishment for your skin, dried milk can be a wonderful addition to your blend.

Step 1: Mixing the Salts

Begin by combining a bottle of Epsom salts with the .5-ounce of skin-friendly oil. You can use a deep ceramic roasting pan to ensure thorough mixing. Gently stir the mixture until the oil is evenly distributed among the salts. This will infuse the salts with the aromatic and moisturizing properties of the oil, making your bath experience even more delightful.

Step 2: Incorporating Dried Flowers

To elevate the visual appeal and add a touch of nature’s beauty to your bath salts, consider including dried flowers. Take the dried flowers of your choice, ensuring they are free from any mold or mildew. If necessary, you can gently dry them in a warm oven. For a soothing and aromatic blend, whole herbs, roses, and carnations work exceptionally well. Remove the stems and petals from the flowers, and if you’re using roses, remember to include the rosehips as well. As you mix the dried flowers with the salts, they will impart their subtle fragrance and create a visually pleasing bath experience.

Step 3: Optional Addition of Dried Milk

For an extra touch of luxury and skin-nourishing properties, you can incorporate dried milk into your bath salt blend. Dried milk has long been known for its soothing effects on the skin. It will leave your skin feeling soft, supple, and moisturized after your bath. Gently mix the dried milk with the salts and flowers, ensuring an even distribution of all the ingredients.

Step 4: Packaging and Storage

Once you have thoroughly mixed all the ingredients, allow the bath salts to dry for several hours before packaging them. Quarter glass bottles are an ideal option for storing the bath salts, as they are convenient to use and display. The attractive combination of colors and textures will make these bottles a beautiful addition to your bathroom decor.

Creating a Relaxing Ambiance

To fully immerse yourself in the tranquil ambiance of your bath time retreat, it’s essential to set the mood. Dim the lights and opt for the soft glow of candles. Choose your favorite calming scents, such as lavender, chamomile, or jasmine, and light scented candles throughout your bathroom. The flickering candlelight and soothing aromas will create an atmosphere of serenity, enhancing the overall experience.

Conclusion

By following this simple recipe, you can create your own personalized soaking bath salts, tailored to your preferences and needs. These homemade bath salts offer a multitude of benefits, from relaxation to nourishment for your skin. Allow yourself the luxury of a blissful retreat in your own bathroom, where you can unwind, rejuvenate, and indulge in the soothing and aromatic experience of a homemade bath. Treat yourself to a little self-care and create your own oasis of tranquility with these delightful soaking bath salts.

Filed Under: Skin Care Tagged With: bath salt, bath time ritual, beauty tips, DIY bath salts, dried flowers, epsom salt, homemade bath salts, homemade beauty products, relaxation, self-care, skin care, skin-friendly oils, soaking bath salts, tranquility

Soothe Your Feet with Foot Soaks: A Simple Home Remedy for Foot Pain

May 23, 2023 by sharvayonibeauty Leave a Comment

Our feet carry us through life, supporting our weight and helping us navigate the world. Yet, they are often the most neglected part of our body when it comes to self-care. Foot pain, or footsore, is a common issue that can arise due to various reasons, affecting people of all ages. From incorrect shoe sizes to health conditions like sprains or fractures, there are multiple causes for foot pain. Fortunately, there is a simple and effective at-home remedy to alleviate footsore and promote relaxation. In this article, we will explore the benefits of foot soaks and guide you through a soothing foot soak routine to relieve pain and reduce stress.

The Power of Foot Soaks

Foot soaks offer a natural and accessible solution for foot pain relief. In addition to easing discomfort, foot soaks provide a relaxing and rejuvenating experience. They can be a beneficial practice for reducing stress and promoting overall well-being.

Preparing a Foot Soak

To create a soothing foot soak, you will need the following:

  • Half bucket of lukewarm water
  • 3 tablespoons of Epsom salt

Instructions for a Foot Soak

  1. Fill half of a bucket with lukewarm water.
  2. Add 3 tablespoons of Epsom salt to the water.
  3. Submerge your feet in the foot soak and allow them to soak for approximately 10 minutes.
  4. During this time, find a peaceful and comfortable space to relax.

Benefits and Results

Foot soaks provide several benefits for foot pain relief and overall relaxation. Soaking your feet in a warm Epsom salt solution can help alleviate pain, reduce inflammation, and provide an instant energy boost. Additionally, foot soaks can help relax muscles and joints, making them particularly beneficial for individuals with conditions like arthritis.

Incorporating Foot Soaks into Your Routine: You can perform a foot soak whenever you feel your feet are stressed, tired, or in pain. It is a versatile remedy that can be incorporated into your self-care routine at any time of the day.

Understanding the Mechanism

While the theory of Epsom salt entering the body through the skin has not been proven, soaking your feet in warm water alone can help relax muscles and loosen stiff joints. People have used Epsom salt baths as a home treatment for pain and swelling associated with conditions like arthritis.

Don’t neglect your feet any longer. Embrace the healing power of foot soaks and give your feet the care they deserve. By incorporating a simple foot soak routine into your self-care regimen, you can soothe foot pain, promote relaxation, and reduce stress. Remember, a little bit of pampering for your feet can go a long way in enhancing your overall well-being.

Filed Under: Health and Wellness Tagged With: arthritis, beauty tips, energy boost, epsom salt, foot pain, foot soaks, footsore, health and wellness, home remedy, lukewarm water, muscles, pain relief, relaxation, self-care, stress reduction, swelling, well-being

Primary Sidebar

Looking for something?

Connect with us online

  • Email
  • Facebook

Popular Posts!

After Wash White Vinegar Rinse: A Crucial Step for Scalp Health

Getting rid of pimples and acne with Onions

Neem, Turmeric, and Multani Mitti Face Mask: The Ultimate Elixir for Flawless Skin

Potato-Based Dark Circle Treatment: Natural and Effective

Dye your hair using Home-made Natural paste

Categories

  • Hair Care
  • Health and Wellness
  • Skin Care

Tags

beauty benefits beauty tips Chemical-Free Hair Care coconut oil curd curry leaves dark circles DIY Hair Care egg exfoliation eye care glowing skin hair care Hair Care Routine hair care tips hair growth Hair health Hair Health Improvement hair loss Hair Nourishment Hair Strengthening health and wellness honey hydration lemon lemon juice milk natural beauty natural conditioner natural face mask Natural hair care Natural Hair Growth Natural Hair Remedies natural ingredients natural remedies Natural remedy natural skincare olive oil radiant complexion radiant skin scalp health Scalp Nourishment skin care skincare skincare routine

© 2026 · Sharvayoni · Privacy Policy · Disclaimer