• Skip to main content
  • Skip to primary sidebar
  • HOME
  • SKIN CARE
  • HAIR CARE
  • HEALTH AND WELLNESS
  • CONTACT US

Sharvayoni

Unearth Nature's Magic - Your Path to Herbal Radiance and Wellnes

sharvayonibeauty

Onion Juice & Honey Recipe: A Natural Solution for Hair Health

April 6, 2024 by sharvayonibeauty Leave a Comment

Hair care has always been a priority for those seeking to enhance their appearance and confidence. When it comes to nurturing healthy and luscious locks, nature often provides some of the best solutions. Onion juice, rich in sulfur, has been recognized for its ability to reduce hair loss, promote hair growth, stimulate blood flow to hair follicles, and regenerate hair follicles. On the other hand, honey, known for its benefits in skincare and haircare, contains essential vitamins, minerals, enzymes, and antioxidants that are vital for healthy hair growth. Its antibacterial and anti-fungal properties make it effective in preventing dandruff and scalp acne. When combined, onion juice and honey create a potent remedy that not only combats hair loss and thinning but also promotes long, healthy hair growth and eliminates dandruff. In this comprehensive guide, we will explore the Onion Juice & Honey Recipe, its preparation, and the numerous benefits it offers for your hair and scalp.

Things Needed

Before we delve into the process of preparing and using the Onion Juice & Honey Recipe, let’s gather all the essential items you’ll need:

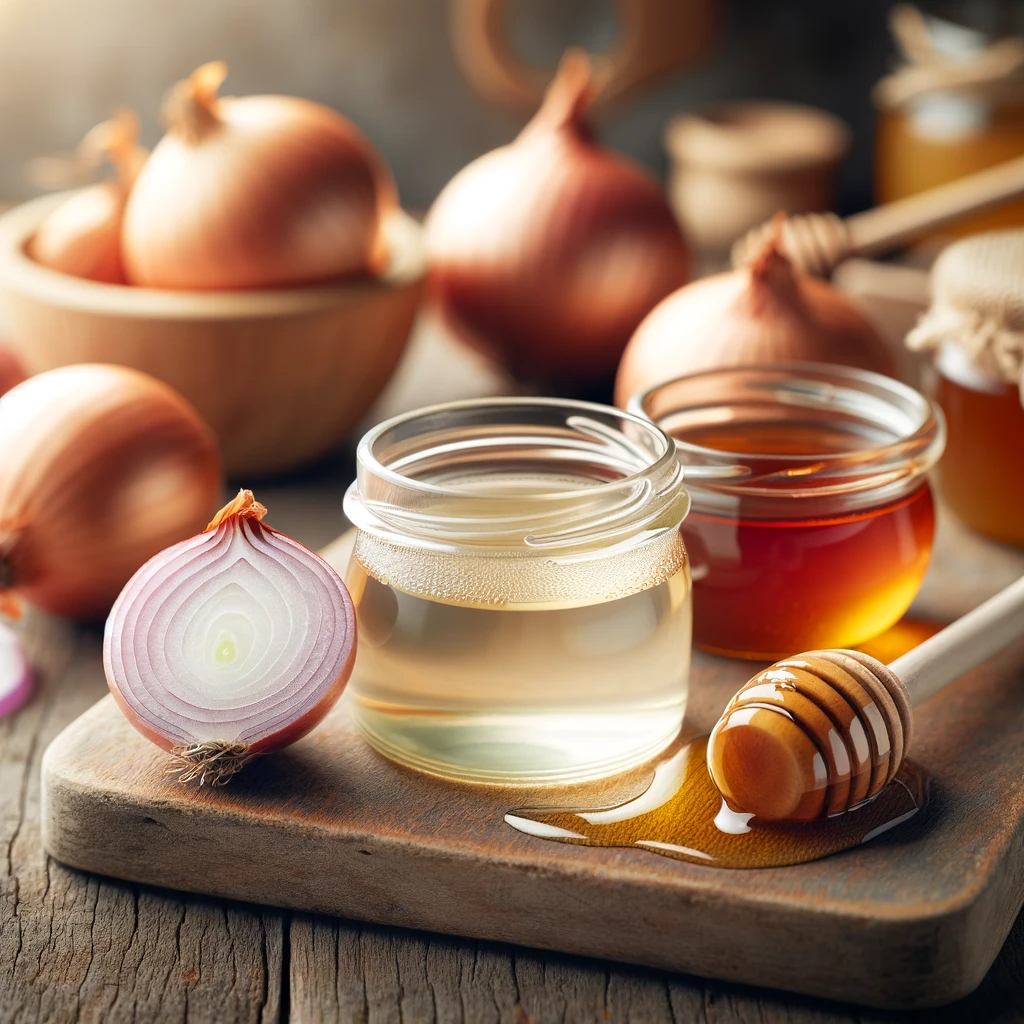
  1. Red Onion Juice: You’ll require one cup of freshly extracted red onion juice. Ensure it is free from any additives or preservatives.
  2. Pure Honey (Optional): For added benefits and sweetness, gather two teaspoons of pure honey. Make sure it is free from any additives or artificial sweeteners.

Now that you have the ingredients ready, let’s proceed with the steps to prepare and apply the Onion Juice & Honey Recipe.

Steps to Prepare

Follow these detailed steps to create and apply the Onion Juice & Honey mixture for promoting hair health:

Step 1: Mixing Ingredients

  1. In a bowl, mix one cup of red onion juice with two teaspoons of pure honey. Ensure the mixture is well-blended.

Step 2: Application

  1. Without heating the mixture, apply it directly to your scalp or to the areas where your hair appears thin.

Step 3: Covering Your Hair

  1. Cover your hair and scalp with a plastic cap to create a warm and conducive environment for the mixture to work its magic.

Step 4: Using a Dry Towel

  1. On top of the plastic cap, wrap a dry towel around your hair. This additional layer helps maintain the warmth and enhances the effectiveness of the remedy.

Step 5: Waiting Period

  1. Leave the mixture on your scalp for at least a couple of hours. This allows sufficient time for the ingredients to penetrate your hair follicles and provide their nourishing benefits.

Step 6: Hair Wash

  1. After the designated waiting time, wash your hair thoroughly with a good-quality shampoo. Rinse until all traces of the mixture are removed.

For the best results, repeat the Onion Juice & Honey Recipe 2 to 3 times a week for several weeks.

Benefits

Incorporating the Onion Juice & Honey Recipe into your hair care routine offers a multitude of benefits for your scalp and hair:

1. Reduced Hair Loss

The sulfur content in onion juice helps reduce hair loss, ensuring that you keep more of your precious locks.

2. Promoted Hair Growth

Onion juice stimulates blood flow to hair follicles, promoting healthy hair growth and encouraging the regeneration of dormant follicles.

3. Nourished Scalp

Honey’s vitamins, minerals, enzymes, and antioxidants provide essential nourishment to your scalp, creating an ideal environment for hair growth.

4. Dandruff Prevention

The antibacterial and anti-fungal properties of honey effectively combat dandruff, ensuring a healthy and flake-free scalp.

5. Enhanced Hair Thickness

Consistent use of this recipe can lead to thicker, more voluminous hair that exudes vitality and strength.

Conclusion

The Onion Juice & Honey Recipe offers a natural and effective solution for promoting hair health. Harnessing the power of sulfur-rich onion juice and the nourishing properties of honey, this remedy reduces hair loss, stimulates hair growth, prevents dandruff, and enhances the thickness and vitality of your locks. Say goodbye to hair woes and embrace this holistic approach to hair care. Make this recipe a regular part of your hair care regimen, and watch your hair transform into a healthy, luscious mane that radiates confidence and beauty.

Filed Under: Hair Care Tagged With: beauty tips, dandruff control, hair care, hair growth, Hair health, Hair Loss Prevention, holistic hair care, Natural hair care, Onion Juice & Honey Recipe, thicker hair, vibrant locks

Fenugreek (Methi) Hair Mask: A Natural Solution for Stronger, Healthier Hair

April 5, 2024 by sharvayonibeauty Leave a Comment

Fenugreek, also known as Methi, is a versatile herb known for its numerous health benefits. Not only does it contribute to overall well-being, but it also plays a significant role in enhancing hair health. Fenugreek seeds are highly effective in strengthening hair from the roots, addressing follicular issues, reducing hair loss, minimizing gray hair, and preventing damage and dandruff. These tiny seeds are packed with essential nutrients, including protein, vitamin C, iron, potassium, nicotinic acid, and lecithin. Additionally, fenugreek seeds contain hormone antecedents, which act as growth hormones and promote hair growth. In this comprehensive guide, we will explore how to harness the power of fenugreek seeds to stimulate hair growth and improve the overall health of your hair.

Things Needed

Before we dive into the process of preparing and using the Fenugreek Hair Mask, let’s gather all the essential items you’ll need:

  1. Fenugreek Seeds: You’ll require one cup of fenugreek seeds, which are readily available in most grocery stores.
  2. Pure Water: Prepare one cup of pure water for soaking the fenugreek seeds.
  3. Olive Oil: You’ll need two tablespoons of olive oil, preferably extra virgin olive oil, known for its nourishing properties.
  4. Lemon Juice: Gather one tablespoon of lemon juice, which adds shine and helps balance the scalp’s pH.

Now that you have the ingredients ready, let’s proceed with the steps to prepare and apply the Fenugreek Hair Mask.

Steps to Prepare

Follow these detailed steps to create and apply the Fenugreek Hair Mask for stronger, healthier hair:

Step 1: Soaking Fenugreek Seeds

  1. Begin by soaking one cup of fenugreek seeds in one cup of pure water overnight. This allows the seeds to soften and become more manageable for blending.

Step 2: Blending the Fenugreek Seeds

  1. In the morning, blend the soaked fenugreek seeds with two tablespoons of olive oil and one tablespoon of lemon juice. Blend until you achieve a smooth paste-like consistency.

Step 3: Application

  1. Apply the Fenugreek Hair Mask paste to the roots of your hair, ensuring it covers your scalp thoroughly.

Step 4: Covering with a Shower Cap

  1. After applying the paste, cover your hair with a shower cap. This helps create a warm environment that aids in better absorption of the mask’s nutrients.

Step 5: Waiting Period

  1. Allow the mask to sit on your hair and scalp for a couple of hours. This period allows the nutrients to penetrate your hair follicles and provide their nourishing benefits.

Step 6: Hair Wash

  1. After the designated waiting time, wash your hair with a mild shampoo and conditioner. Rinse thoroughly to remove any residue.

Benefits

Incorporating the Fenugreek Hair Mask into your hair care routine offers a multitude of benefits for your scalp and hair:

1. Strengthened Hair Roots

Fenugreek seeds work to strengthen hair from the roots, reducing the risk of hair loss and promoting healthy hair growth.

2. Follicular Health

This mask helps address follicular problems, ensuring your hair follicles remain healthy and active.

3. Reduced Hair Loss

The mask’s nourishing properties reduce hair loss, making your hair appear fuller and thicker.

4. Gray Hair Minimization

Fenugreek aids in minimizing premature graying, allowing you to maintain a youthful appearance.

5. Damage Prevention

Regular use of this hair mask helps prevent damage caused by environmental factors and styling.

6. Dandruff Control

The Fenugreek Hair Mask helps combat dandruff, keeping your scalp clean and healthy.

Conclusion

The Fenugreek (Methi) Hair Mask is a natural, effective solution for achieving stronger, healthier hair. Packed with essential nutrients and vitamins, fenugreek seeds stimulate hair growth, reduce hair loss, and prevent damage. This simple yet powerful hair mask can be easily incorporated into your hair care routine, offering a wide range of benefits, from strengthening your hair roots to minimizing gray hair and controlling dandruff. Say goodbye to hair woes and embrace the natural goodness of fenugreek for a head of vibrant, flourishing locks. Make this hair mask a regular part of your hair care regimen, and watch your hair transform into the luscious, radiant mane you’ve always desired.

Filed Under: Hair Care Tagged With: beauty tips, dandruff control, Fenugreek Hair Mask, hair care, hair growth, Hair Loss Prevention, hair mask, healthier hair, holistic hair care, Natural hair care, Stronger Hair, vibrant locks

Faster Hair Growth Formula: Unlocking the Secret to Rapid Hair Growth

April 4, 2024 by sharvayonibeauty Leave a Comment

Long, luscious locks have always been a symbol of beauty and vitality. However, many individuals struggle with slow hair growth, leaving them feeling frustrated and dissatisfied with the appearance of their hair. If you’ve been dreaming of faster hair growth, look no further. In this comprehensive guide, we’ll unveil a powerful formula designed to accelerate your hair’s growth rate. This unique blend of nourishing oils and natural ingredients is the key to unlocking the secret of rapid hair growth. Say goodbye to sluggish hair growth and hello to a head of vibrant, flourishing locks.

Things Needed

Before we embark on the journey to prepare the Faster Hair Growth Formula, let’s gather all the essential items you’ll need:

  1. Soy Oil: You’ll require 1/4 cup of soy oil, a rich source of essential fatty acids that nourish the hair and promote growth.
  2. Sesame Oil: Prepare 1/4 cup of sesame oil, known for its hair-strengthening properties and ability to improve hair texture.
  3. Extra Virgin Olive Oil: You’ll need 1/4 cup of extra virgin olive oil, a natural conditioner that enhances hair softness and shine.
  4. Lavender Oil: Include 2 tablespoons of lavender oil, which not only promotes hair growth but also provides a soothing and pleasant fragrance.
  5. Dry Rosemary Leaves: Prepare 1 tablespoon of dry rosemary leaves, a powerful herb known for its hair-stimulating properties.
  6. Chamomile Flower: Gather 1 tablespoon of chamomile flower, a soothing ingredient that adds a calming touch to the formula.

Now that you have the ingredients ready, let’s proceed with the steps to prepare and apply the Faster Hair Growth Formula.

Steps to Prepare

Follow these detailed steps to create and apply the Faster Hair Growth Formula:

Step 1: Warming the Oils

  1. Warm all the oils in a double boiler for approximately 3 minutes. This gentle warming process ensures that the oils blend seamlessly and can be applied effectively.

Step 2: Adding Rosemary and Chamomile

  1. Incorporate the dry rosemary leaves and chamomile flower into the warmed oils. Allow these natural ingredients to infuse their beneficial properties into the oil blend.

Step 3: Boiling the Ingredients

  1. Boil the mixture of oils, rosemary, and chamomile for a few additional minutes. This step ensures that the oils fully absorb the beneficial compounds from the added herbs.

Step 4: Cooling and Filtering

  1. Remove the mixture from heat and allow it to cool until it reaches a lukewarm temperature. Once cooled, filter the mixture through gauze to remove any solid particles.

Step 5: Application

  1. Use the lukewarm Faster Hair Growth Formula by pouring it directly onto your scalp. Ensure that the entire scalp is covered evenly with the oil.

Step 6: Covering and Waiting

  1. Cover your oiled hair and scalp with a plastic wrap or shower cap. Leave the formula in place for a couple of hours to allow it to work its magic.

Step 7: Shampooing

  1. After the designated waiting period, shampoo your hair thoroughly to remove the oil. Use a gentle, sulfate-free shampoo for the best results.

Benefits

Incorporating the Faster Hair Growth Formula into your hair care routine offers a multitude of benefits for your scalp and hair:

1. Accelerated Hair Growth

The carefully chosen blend of oils and natural ingredients stimulates hair follicles, promoting faster and healthier hair growth.

2. Strengthened Hair

Soy, sesame, and olive oils provide essential nutrients to strengthen the hair shaft, reducing breakage and improving overall hair health.

3. Improved Hair Texture

Sesame oil enhances hair texture, leaving your locks feeling soft, smooth, and manageable.

4. Soothing Sensation

Lavender oil and chamomile flower bring a soothing and calming effect to your scalp, creating a spa-like experience.

5. Natural Fragrance

The combination of lavender, rosemary, and chamomile imparts a delightful, natural fragrance to your hair.

Conclusion

Achieving faster hair growth is not an elusive dream but a reality you can attain with the Faster Hair Growth Formula. This powerful blend of nourishing oils and natural ingredients offers a holistic approach to hair care, addressing not only growth but also strength, texture, and overall health. Say goodbye to slow hair growth and hello to a head of vibrant, flourishing locks. Make this formula a regular part of your hair care regimen, and watch as your hair transforms into the luscious, radiant mane you’ve always desired.

Filed Under: Hair Care Tagged With: beauty tips, faster hair growth, hair care, Hair Care Routine, hair growth formula, hair strength, hair texture, luscious locks, natural ingredients, nourishing oils, rapid hair growth

Hair Oil Massage & Hot Oil Treatment: Revitalizing Your Scalp and Hair

April 3, 2024 by sharvayonibeauty Leave a Comment

Hair loss, dryness, and scalp issues are common concerns that many people face in their hair care journey. To combat these problems effectively, it’s essential to prioritize scalp and hair moisturization. One highly beneficial method is the Hair Oil Massage, which involves using a combination of nourishing oils to massage the scalp. This step not only moisturizes the scalp but also stimulates hair growth, promotes relaxation, and reduces scalp tension. Additionally, the use of a Hot Oil Treatment enhances the effectiveness of these oils, providing faster results. In this comprehensive guide, we will explore the process of preparing and using hair oils, the benefits they offer, and essential tips for maintaining a healthy scalp and luscious locks.

Things Needed

Before we delve into the process of preparing and using hair oils for a rejuvenating Hair Oil Massage and Hot Oil Treatment, let’s gather all the essential items you’ll need:

  1. Hair Oils: You can choose from a variety of hair oils, such as extra virgin olive oil, coconut oil, sesame oil, wheat germ oil, almond oil, and castor oil. When using castor oil, it should be mixed with a carrier oil, such as jojoba oil, almond oil, avocado oil, or sesame oil, due to its thickness.
  2. Other Ingredients: You’ll require a combination of these nourishing oils for your Hair Oil Massage and Hot Oil Treatment. For instance:
  • 3 tablespoons of castor oil
  • 3 tablespoons of sesame oil
  • 3 tablespoons of extra virgin olive oil
  • 3 tablespoons of basil oil
  • 3 tablespoons of peanut oil
  • 3 tablespoons of wheat germ oil
  • 3 teaspoons of rosemary oil

Now that you have the ingredients ready, let’s proceed with the steps to prepare and use these hair oils effectively.

Steps to Prepare

Follow these comprehensive steps to create and apply the Hair Oil Massage and Hot Oil Treatment:

Step 1: Oil Mixture Preparation

  1. Heat all the oils in a top of a double boiler until they become warm. Ensure that the oils are not too hot to avoid burning your scalp.

Step 2: Application

  1. Sit on a chair and bend your head forward to apply the oil mixture directly to your hair and scalp.

Step 3: Scalp Massage

  1. Gently massage your scalp with circular movements using your fingertips. Scalp massage improves blood flow to hair follicles, stimulates healthy hair growth, and provides relaxation while reducing scalp tension.

Step 4: Hot Oil Treatment

  1. For a Hot Oil Treatment, you have two options:
  • Use a hair steamer for 20 minutes.
  • Alternatively, cover your hair with a plastic cap and then wrap your head with a dry towel for two to three hours.

Step 5: Hair Wash

  1. After the treatment, wash your hair with an SLS-free shampoo to remove excess oil.

Step 6: Enjoy the Benefits

  1. The oil mixture strengthens hair follicles, reduces hair loss, accelerates hair growth, and softens your hair.

Benefits

Incorporating Hair Oil Massage and Hot Oil Treatment into your hair care routine offers numerous benefits for your scalp and hair:

1. Scalp and Hair Moisturization

The oils deeply moisturize your scalp and hair, preventing dryness and associated issues.

2. Improved Blood Circulation

Scalp massage enhances blood flow to hair follicles, promoting healthy hair growth.

3. Relaxation and Stress Reduction

Scalp massages provide relaxation and reduce tension, contributing to overall well-being.

4. Hair Strengthening

The oil mixture strengthens hair follicles, reducing hair loss and breakage.

5. Accelerated Hair Growth

Improved scalp health and circulation accelerate the hair growth cycle, resulting in faster growth.

6. Soft and Manageable Hair

The oils leave your hair soft, manageable, and easy to style.

Conclusion

Prioritizing scalp and hair moisturization through Hair Oil Massage and Hot Oil Treatment is a crucial step in achieving and maintaining healthy, luscious locks. By choosing nourishing oils and following the correct application method, you can enjoy numerous benefits, including reduced hair loss, improved hair growth, and enhanced scalp health. Remember to follow essential tips, such as not leaving oils on the scalp for more than 8 hours and using oils specifically designed for hair care. With the right approach, you can rejuvenate your scalp and hair, promoting a revitalized and vibrant look for your locks. Make these treatments a regular part of your hair care regimen, and witness the transformation of your hair and scalp.

Filed Under: Hair Care Tagged With: beauty tips, hair care, Hair Care Routine, hair growth, Hair Loss Prevention, hair oil massage, Healthy locks, Hot Oil Treatment, nourishing oils, relaxation, scalp health

Apple Cider Vinegar Rinse: Your Essential Scalp and Hair Detox

April 2, 2024 by sharvayonibeauty Leave a Comment

Your hair and scalp often bear the brunt of products build-up, excess sebum, and dirt, which can lead to issues like hair loss, clogged pores, itchy scalp, slow hair growth, and hair breakage. To counteract these problems and prepare your hair and scalp for other treatments, the first step is the Apple Cider Vinegar (ACV) Rinse. This recipe is a vital component in your hair care routine as it helps remove impurities and create a clean canvas for subsequent treatments. In this article, we’ll guide you through the process of preparing and using an ACV Rinse to ensure your hair and scalp respond positively to further care.

Things Needed

Before we embark on the journey of preparing and using the Apple Cider Vinegar Rinse, let’s gather all the essential items you’ll need:

  1. Warm Water: You’ll require 600 ml of warm water, which will serve as the base for your rinse.
  2. Apple Cider Vinegar: You’ll need 2 tablespoons of apple cider vinegar (ACV), known for its cleansing and clarifying properties.

Now that you have the ingredients ready, let’s proceed with the steps to prepare and use this crucial scalp and hair detox.

Steps to Prepare

Follow these simple steps to create and use the Apple Cider Vinegar Rinse:

Step 1: Mixing the Ingredients

In a container, mix the 2 tablespoons of apple cider vinegar with 600 ml of warm water. Ensure that the ingredients are well combined.

Step 2: Hair Preparations

After shampooing your hair, gently dry it with a soft towel or a microfiber towel until it is damp.

Step 3: Application

Apply the ACV mixture directly to your hair and scalp. Massage your scalp gently with your fingertips to ensure the rinse covers all areas of your scalp.

Step 4: Shower Cap and Waiting Time

Once applied, wrap your hair with a shower cap to trap heat and enhance the effectiveness of the rinse. Leave the rinse on for 15 to 20 minutes.

Step 5: Rinsing

After the waiting time, thoroughly rinse your hair with a generous amount of water. There’s no need to use shampoo again in this step.

Step 6: Conditioning and Moisturizing

Use your regular conditioner or apply a deep hair mask to replenish moisture to your hair. Finish by applying your favorite moisturizer.

Benefits

Incorporating the Apple Cider Vinegar Rinse into your hair care routine offers numerous benefits for your scalp and hair:

1. Removal of Build-Up

The ACV rinse effectively removes product build-up, excess sebum, and dirt from your hair and scalp, creating a clean slate for further treatments.

2. Improved Scalp Health

By unclogging pores and eliminating impurities, this rinse promotes a healthier scalp, reducing the risk of issues like hair loss and itchiness.

3. Enhanced Hair Growth

A clean and revitalized scalp provides a conducive environment for hair growth, encouraging a faster and more robust hair growth cycle.

4. Reduced Hair Breakage

Removing residue and impurities can strengthen your hair, reducing breakage and damage caused by build-up.

Conclusion

Don’t underestimate the power of the Apple Cider Vinegar Rinse in your hair care routine. This essential step helps remove product build-up, sebum, and dirt, creating a healthy foundation for subsequent treatments. With its ability to promote scalp health, hair growth, and reduced breakage, the ACV rinse is a crucial component in achieving and maintaining gorgeous, healthy locks. Make it a regular part of your hair care regimen and unlock the potential for revitalized, radiant hair and a clean, itch-free scalp.

Filed Under: Hair Care Tagged With: Apple Cider Vinegar Rinse, beauty tips, excess sebum, hair breakage, hair build-up, hair care, hair growth, Hair health, healthy hair routine, scalp cleansing, scalp detox

  • « Go to Previous Page
  • Page 1
  • Interim pages omitted …
  • Page 11
  • Page 12
  • Page 13
  • Page 14
  • Page 15
  • Interim pages omitted …
  • Page 111
  • Go to Next Page »

Primary Sidebar

Looking for something?

Connect with us online

  • Email
  • Facebook

Popular Posts!

Salad for fighting wrinkles

Battle Dandruff Naturally with Apple Juice: A Simple Hair Pack Solution

Essential Oil Hair Blend for Hair Loss: A Natural Solution

skin-care-Slider1

Revitalize Your Skin with a Homemade Body Scrub

Reducing Wrinkles Naturally: A Guide to Using Cabbage, Yeast, and Honey

Categories

  • Hair Care
  • Health and Wellness
  • Skin Care

Tags

beauty benefits beauty tips Chemical-Free Hair Care coconut oil curd curry leaves dark circles DIY Hair Care egg exfoliation eye care glowing skin hair care Hair Care Routine hair care tips hair growth Hair health Hair Health Improvement hair loss Hair Nourishment Hair Strengthening health and wellness honey hydration lemon lemon juice milk natural beauty natural conditioner natural face mask Natural hair care Natural Hair Growth Natural Hair Remedies natural ingredients natural remedies Natural remedy natural skincare olive oil radiant complexion radiant skin scalp health Scalp Nourishment skin care skincare skincare routine

© 2026 · Sharvayoni · Privacy Policy · Disclaimer