• Skip to main content
  • Skip to primary sidebar
  • HOME
  • SKIN CARE
  • HAIR CARE
  • HEALTH AND WELLNESS
  • CONTACT US

Sharvayoni

Unearth Nature's Magic - Your Path to Herbal Radiance and Wellnes

milk

Rejuvenate Your Skin with a Luxurious Rose Petals Face Pack

August 7, 2023 by sharvayonibeauty Leave a Comment

In the realm of natural skincare remedies, few ingredients offer the same level of elegance and effectiveness as rose petals. These delicate blooms, revered for their enchanting fragrance and potent skincare properties, have been cherished for centuries. One of the most delightful ways to harness the benefits of roses is through a rose petals face pack. In this article, we will explore the rejuvenating qualities of a rose petals face pack and learn how to create this luxurious treatment in the comfort of your home.

The Enchanting Allure of Rose Petals

Roses have held a special place in history, symbolizing love, beauty, and luxury. But beyond their romantic symbolism, rose petals offer a myriad of skincare benefits. Packed with antioxidants, vitamins, and natural oils, roses help nourish, hydrate, and revitalize the skin. Incorporating rose petals into your skincare routine can lead to a complexion that radiates health and vitality.

Creating Your Rose Petals Face Pack

The rose petals face pack is a simple yet indulgent way to pamper your skin. To craft this rejuvenating treatment, you’ll need the following ingredients:

  • 2 tablespoons of sandalwood powder
  • 2 tablespoons of milk
  • A few fresh rose petals

Let’s dive into the steps of creating and applying this luxurious face pack:

  1. Gathering the Ingredients

Begin by collecting high-quality sandalwood powder, fresh rose petals, and milk. The sandalwood powder enhances the face pack’s cooling and soothing effects, while milk contributes its natural moisturizing properties. The rose petals infuse the pack with their enchanting fragrance and beneficial compounds.

  1. Preparing the Rose Petals

Gently rinse the rose petals to remove any dirt or impurities. Pat them dry with a soft cloth, ensuring they are clean and ready for use. Fresh rose petals provide a burst of natural goodness that works wonders for the skin.

  1. Creating the Face Pack

In a bowl, combine the sandalwood powder and milk. Gradually mix the ingredients to form a smooth paste. The sandalwood powder acts as a natural exfoliant and skin brightener, while milk adds hydration and a creamy texture to the pack.

  1. Adding the Rose Petals

As the sandalwood-milk mixture comes together, delicately add the fresh rose petals. Gently blend the petals into the mixture, allowing their essence to infuse into the pack. The petals not only enhance the pack’s aroma but also contribute their beneficial compounds to the blend.

  1. Application Process

With your rose petals face pack ready, it’s time to apply it to your skin. Here’s how:

  • Begin by cleansing your face to ensure it’s free from dirt and makeup.
  • Using your fingertips or a brush, evenly apply the rose petals face pack to your face and neck. Avoid the sensitive area around the eyes.
  • As you apply the pack, take a moment to inhale the soothing aroma of the rose petals. Let their fragrance calm your senses as the pack works its magic.
  • Relax and allow the pack to dry for about 15 to 20 minutes. During this time, the pack will gently exfoliate, hydrate, and rejuvenate your skin.
  • Once the pack is dry, rinse it off with cool water. Gently massage your skin in circular motions as you remove the pack, allowing the rose petals to provide a gentle exfoliation.
  1. Post-Pack Care

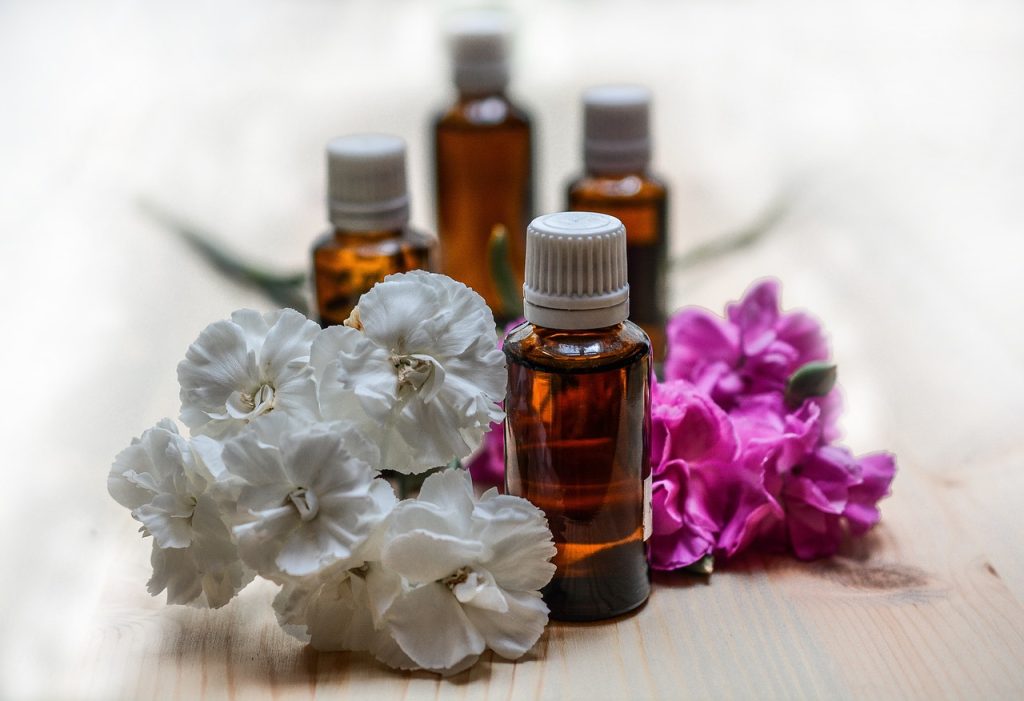
After rinsing off the face pack, pat your skin dry with a clean towel. You’ll likely notice an immediate difference in your skin’s texture and appearance. To seal in the benefits, consider applying a light moisturizer or a few drops of rose water to your skin.

Frequency of Use

For optimal results, incorporate the rose petals face pack into your skincare routine twice a week. Regular use will help maintain the health and radiance of your skin.

Conclusion

Embrace the luxurious beauty of rose petals with this rejuvenating face pack. With its blend of sandalwood powder, milk, and the magic of fresh rose petals, this treatment offers a holistic approach to skincare. As you indulge in the enchanting aroma and experience the transformative effects, you’ll find that the rose petals face pack becomes an essential element of your self-care ritual. Elevate your skincare journey and discover the timeless allure of roses for a complexion that glows with natural radiance.

Filed Under: Skin Care Tagged With: beauty tips, DIY skincare, fresh rose petals, homemade face pack, milk, natural beauty, nourishing skincare, radiant complexion, rejuvenating skincare, rose petals face pack, rose-infused treatment, sandalwood powder, skin care

Bengal Gram Flour (Besan) and Milk Face Mask: A Natural Path to Glowing Skin

July 27, 2023 by sharvayonibeauty Leave a Comment

Glowing Skin

In the quest for flawless and radiant skin, the beauty industry is flooded with various skincare products. However, the secret to achieving healthy and glowing skin lies in natural ingredients. Bengal gram flour (Besan) and milk face mask is a tried and tested remedy that has been used for generations to attain smooth and glowing skin. This powerful combination of Besan and milk offers a multitude of skin benefits, making it a go-to solution for many skincare enthusiasts. In this comprehensive guide, we will explore the wonders of this face mask and how you can incorporate it into your skincare routine for a luminous complexion.

Why Bengal Gram Flour and Milk?

Before diving into the preparation and application of the Bengal gram flour and milk face mask, it is essential to understand the benefits of these two key ingredients:

  1. Bengal Gram Flour (Besan):

Bengal gram flour, commonly known as Besan in India, is a versatile and age-old beauty remedy. This fine flour is derived from ground chickpeas and is a staple in Indian kitchens. Its numerous benefits for the skin have made it a beloved ingredient in various face masks. Some of the key advantages of Besan for the skin include:

  • Exfoliation: The gentle exfoliating properties of Besan help remove dead skin cells, dirt, and impurities, unclogging pores and promoting a clearer complexion.
  • Oil Control: Besan acts as a natural absorbent, reducing excess oil production and combating greasiness, making it an ideal choice for individuals with oily skin.
  • Skin Brightening: It contains enzymes that aid in brightening the skin and improving overall complexion, giving it a radiant glow.
  • Anti-Inflammatory: Besan possesses anti-inflammatory properties that help soothe and calm irritated skin, reducing redness and inflammation.
  1. Milk:

Milk has been cherished as a skincare elixir since ancient times. The natural goodness of milk offers a wide array of benefits for the skin, making it a perfect complement to Besan in the face mask. Some of the skin benefits of milk are as follows:

  • Hydration: Milk is an excellent natural moisturizer that nourishes and hydrates the skin, keeping it supple and soft.
  • Skin Soothing: The proteins and amino acids in milk soothe and heal the skin, providing relief from irritation and redness.
  • Anti-Aging: The lactic acid in milk gently exfoliates the skin, reducing the appearance of fine lines and promoting a youthful complexion.
  • Skin Tone Improvement: Regular application of milk can help even out the skin tone and fade dark spots and blemishes, giving a more uniform complexion.

Preparation of Bengal Gram Flour and Milk Face Mask

Now that we are acquainted with the benefits of Bengal gram flour and milk, let’s explore how to create the perfect face mask for your skin:

  1. Gather the Ingredients:

To make the Bengal gram flour and milk face mask, you will need the following:

  • Two tablespoons of Bengal gram flour (Besan)
  • One tablespoon of turmeric powder (optional, for added skin brightening effects)
  • Two tablespoons of raw milk
  • A small bowl for mixing
  • A spoon for stirring
  1. Mix the Ingredients:

In a mixing bowl, combine the Bengal gram flour, turmeric powder (if using), and raw milk. Stir the mixture well until you achieve a smooth and consistent paste. If the paste appears too dry, you can add a few drops of milk or honey to achieve the desired consistency.

  1. Application:

Before applying the face mask, cleanse your face thoroughly to remove any dirt or makeup. For better results, consider exfoliating your skin gently to unclog pores and enhance the mask’s effectiveness. Once your face is clean and exfoliated, proceed with the following steps:

  • Apply the face mask evenly all over your face and neck using your fingers or a soft brush. Avoid the delicate area around the eyes and lips.
  • Allow the mask to sit on your skin for approximately 15 to 20 minutes. During this time, the potent combination of Bengal gram flour and milk will work its magic, providing your skin with essential nutrients and benefits.
  • As the mask dries, you may feel a slight tightening sensation, indicating that the mask is working to absorb excess oil and impurities from your skin.
  • After the recommended time has elapsed, rinse off the face mask with lukewarm water. Using lukewarm water will help to open up your pores, making it easier to remove the mask effectively.
  • Finish by splashing your face with cold water. This will help to close your pores and seal in the goodness of the mask.
  1. Moisturize:

Following the application of the face mask, it is crucial to moisturize your skin to retain its moisture and keep it hydrated. Choose a light, non-comedogenic moisturizer suitable for your skin type to lock in the benefits of the mask.

Incorporating Bengal Gram Flour and Milk Face Mask into Your Skincare Routine

To maximize the benefits of the Bengal gram flour and milk face mask, it is essential to incorporate it into your regular skincare routine. Follow these tips to make the most of this natural remedy:

  • Frequency: Depending on your skin type and concerns, you can use this face mask two to three times a week. For oily or acne-prone skin, consider applying the mask more frequently to manage excess oil and prevent breakouts.
  • Patch Test: Before applying the mask to your entire face, perform a patch test on a small area of your skin to check for any adverse reactions or allergies.
  • Consistency: Like all skincare routines, consistency is key. Regular and continued use of the Bengal gram flour and milk face mask will yield visible improvements in your skin’s texture and appearance over time.
  • Sun Protection: After using the face mask, ensure you apply sunscreen with adequate sun protection factor (SPF) before stepping out. Sunscreen will shield your skin from harmful UV rays and prevent further skin damage.

Conclusion

The Bengal gram flour and milk face mask is a time-tested natural remedy that holds the power to transform your skin. With its exfoliating, oil-controlling, and brightening properties, Besan offers remarkable benefits, while milk soothes, hydrates, and nourishes the skin. By integrating this easy-to-make face mask into your skincare routine, you can achieve radiant, supple, and healthy-looking skin. Embrace the wonders of nature and experience the magic of this age-old beauty secret for yourself. Start your journey to glowing skin today!

Filed Under: Skin Care Tagged With: beauty tips, Bengal gram flour, Besan, brightening properties, exfoliation, face mask, glowing skin, milk, Natural remedy, oil control, skin care, skincare routine

The Benefits of Pumpkin Seeds for Healthy Weight Gain

July 10, 2023 by sharvayonibeauty Leave a Comment

In today’s society, the pressure to achieve the ideal body figure is hard to resist. The media bombards us with images of models and fitness enthusiasts flaunting their perfectly sculpted bodies, leading many to desire weight loss. However, it is important to recognize that being underweight is also a concern that needs attention. Achieving a healthy weight gain is just as important as weight loss, and relying on safe and natural methods is key to long-term success. In this article, we will explore the benefits of pumpkin seeds for gradual weight gain and how incorporating them into your diet can promote a healthy and sustainable increase in body weight.

Understanding Body Mass Index (BMI)

Body Mass Index (BMI) is a widely used tool to determine whether an individual is underweight, overweight, or within a healthy weight range. A BMI below 18.5 is considered underweight. While there are various ways to gain weight, not all methods are safe or effective in the long run. Opting for a slow and natural approach is crucial for overall well-being.

The Power of Pumpkin Seeds for Weight Gain

Pumpkin seeds are a nutritional powerhouse packed with essential nutrients that can aid in healthy weight gain. Here’s how they can help:

  1. Nutrient-Dense: Pumpkin seeds are rich in B vitamins, magnesium, iron, and protein, making them an excellent addition to a weight gain regimen. These nutrients play a vital role in supporting overall health and promoting healthy weight gain.
  2. Anti-Inflammatory Effects: Pumpkin seeds contain natural compounds with anti-inflammatory properties. This can help reduce inflammation in the body, which is essential for overall well-being.
  3. Rich in Essential Minerals: Pumpkin seeds are a great source of essential minerals such as magnesium, copper, and zinc. These minerals contribute to various bodily functions and help support a healthy metabolism, which is crucial for weight gain.

Incorporating Pumpkin Seeds into Your Diet

Now that you understand the benefits of pumpkin seeds for weight gain, here’s a simple method to incorporate them into your daily routine:

  1. Gather the Required Ingredients: You will need one tablespoon of pumpkin seeds and one cup of fresh cow’s milk.
  2. Prepare the Pumpkin Seed Milk: Take the pumpkin seeds in a bowl and add them to a small pot with one cup of fresh cow’s milk. Bring the mixture to a boil and let it simmer until the milk reduces to half a cup.
  3. Consume Before Bedtime: Take this pumpkin seed milk every night before bed. The gradual consumption of pumpkin seed milk can contribute to healthy weight gain over time.

Why Pumpkin Seeds Work for Weight Gain

Pumpkin seeds offer a range of benefits that contribute to healthy weight gain:

  1. Nutrient Density: Pumpkin seeds are packed with essential nutrients, including B vitamins, magnesium, iron, and protein. These nutrients support overall health and aid in weight gain.
  2. Cardiovascular Health: Pumpkin seeds contain compounds that help maintain healthy blood vessels and lower harmful cholesterol levels. This is crucial for overall cardiovascular well-being.
  3. Immune System Support: The rich mineral content in pumpkin seeds, including zinc, helps support the body’s immune system. A strong immune system is essential for overall health and well-being.

Conclusion

Achieving a healthy weight gain is just as important as weight loss. By incorporating pumpkin seeds into your diet, you can enjoy the benefits of their nutrient density and various health-promoting properties. Remember, healthy weight gain takes time, so be patient and consistent with your approach. With regular consumption of pumpkin seed milk, along with a balanced diet and lifestyle, you can gradually achieve a healthy weight and improve your overall well-being. Embrace the power of pumpkin seeds and enjoy the journey towards a healthier you.

Filed Under: Health and Wellness Tagged With: beauty tips, health and wellness, milk, natural food for weight gain, pumpkin seeds

Nourish and Hydrate: Moisturize Dry Skin with Essential Oils

June 24, 2023 by sharvayonibeauty Leave a Comment

Dry skin can be a common challenge, causing discomfort and dullness. However, with the right skincare routine and ingredients, you can effectively combat dryness and restore hydration to your skin. One powerful solution is to incorporate essential oils into your moisturizing routine. In this article, we will explore the benefits of using essential oils to moisturize dry skin and provide a step-by-step guide on how to create a rejuvenating essential oil blend. Say goodbye to dryness and hello to a hydrated and radiant complexion.

Understanding Essential Oils for Dry Skin:

  1. The Role of Essential Oils: Essential oils are natural extracts derived from plants and possess various therapeutic properties. When it comes to dry skin, certain essential oils can help replenish moisture, nourish the skin, and promote a healthier complexion.
  2. Astringent Properties: Juniper, cypress, mandarin, and grapefruit essential oils are particularly beneficial for dry skin. These oils possess astringent properties that help tighten the skin, reducing the appearance of fine lines and wrinkles while giving your skin a firmer and more toned look.

Creating Your Essential Oil Blend:

  1. Choosing the Right Carrier Oil: If your skin is extra dry, it’s recommended to dilute the essential oils with a carrier oil to enhance their moisturizing effects. Mineral oil is a popular choice as a carrier oil due to its ability to deeply penetrate the skin and lock in moisture.
  2. The Perfect Essential Oil Blend: To create your moisturizing essential oil blend, combine a few drops of juniper, cypress, mandarin, and grapefruit essential oils with a teaspoon of carrier oil (mineral oil). This blend will provide a potent combination of hydration and astringent properties.

Enhancing Moisturization:

  1. Adding Milk: For an added boost of moisturization, consider mixing your essential oil blend with ΒΌ cup of milk. Milk contains proteins, fats, and lactic acid, which help soothe and hydrate dry skin, leaving it feeling soft and supple.
  2. Incorporating Honey: Alternatively, you can add a tablespoon of honey to your essential oil blend. Honey is a natural humectant that attracts and retains moisture, making it an excellent ingredient for dry skin. It will provide additional hydration and nourishment, leaving your skin glowing and revitalized.

Application and Results:

  1. Applying the Essential Oil Blend: Gently massage the essential oil blend onto clean, dry skin. Focus on areas that are particularly dry or prone to tightness. The oils will penetrate deep into the skin, replenishing moisture and restoring vitality.
  2. Enjoying the Benefits: Allow the essential oil blend to absorb into your skin for optimal results. The astringent properties of the oils will help tighten the skin, while the added moisture from milk or honey will provide long-lasting hydration. Over time, you will notice your skin becoming smoother, plumper, and more radiant.

Conclusion:

Moisturizing dry skin is essential for maintaining a healthy complexion. By incorporating essential oils into your skincare routine, you can nourish and hydrate your skin effectively. The combination of juniper, cypress, mandarin, and grapefruit essential oils will provide astringent properties and leave your skin feeling tighter. Don’t forget to enhance the moisturizing benefits by adding milk or honey to your essential oil blend. Embrace this natural and rejuvenating skincare solution, and enjoy the transformation of your dry skin into a glowing, hydrated, and revitalized canvas.

Filed Under: Skin Care Tagged With: astringent properties, beauty tips, carrier oil, cypress essential oil, essential oils, grapefruit essential oil, honey, hydration, juniper essential oil, mandarin essential oil, milk, mineral oil, moisturize dry skin, nourishment, skin care, skincare routine

The Magic of Rice Water: An Effective Home Remedy for Dark Circles

June 19, 2023 by sharvayonibeauty Leave a Comment

Dark circles can be a common beauty concern, and many people seek natural remedies to alleviate their appearance. One such remedy that has gained popularity is rice water. Rice water is known for its toning properties, making it an excellent solution for reducing dark circles. In this article, we will explore a home remedy that combines rice water with raw milk to maximize its effects and help you achieve brighter, revitalized under-eye skin.

Understanding the Ingredients

Before diving into the remedy, let’s take a closer look at the key ingredients and their benefits:

Rice Water:

Rice water is the starchy liquid that remains after boiling or soaking rice. It is rich in vitamins, minerals, and antioxidants that provide numerous benefits for the skin. When used as a toner, rice water helps tone the skin and reduce the appearance of dark circles. It also improves blood circulation, stimulates cell growth, and contributes to a supple and bright complexion.

Raw Milk:

Raw milk is a natural cleanser that has been used in skincare routines for centuries. It contains lactic acid, which gently exfoliates the skin and removes impurities. When applied around the eyes, raw milk cleanses the delicate skin, leaving it soft and smooth.

Preparing the Rice Water and Raw Milk Mixture

Now that we understand the ingredients, let’s proceed with the step-by-step process of preparing and using this effective home remedy:

Step 1: Boil Rice

Start by taking one cup of rice and rinsing it thoroughly. Transfer the rice to a saucepan and add one cup of water. Boil the rice on medium heat for about 10 to 15 minutes until it becomes soft and cooked.

Step 2: Filter the Rice Water

Once the rice is cooked, strain the liquid using a fine-mesh sieve or cheesecloth. Collect the rice water in a clean bowl or container. Allow it to cool down to a comfortable temperature.

Step 3: Add Raw Milk

Take one teaspoon of raw milk and add it to the rice water. Mix the two ingredients well to ensure they are evenly combined. The addition of raw milk enhances the cleansing properties of the remedy, providing additional nourishment to the delicate under-eye skin.

Applying the Rice Water and Raw Milk Mixture

Now that the mixture is prepared, it’s time to apply it to the under-eye area to treat dark circles effectively:

Step 1: Cleanse the Area

Start by cleansing your face and the area around your eyes to remove any dirt or makeup. Pat the skin dry gently using a clean towel.

Step 2: Apply the Mixture

Using a clean cotton pad or your fingertips, gently apply the rice water and raw milk mixture in and around the eyes. Ensure that the mixture covers the entire under-eye area. For optimal results, leave the mixture on for 30 minutes. However, if you prefer, you can apply it before bedtime and leave it overnight.

Step 3: Rinse Thoroughly

After the desired time has passed, rinse off the mixture thoroughly with lukewarm water. Pat your skin dry with a soft towel.

Why It Works: The Science Behind It

Rice water’s toning properties contribute to reducing the appearance of dark circles by toning and tightening the skin. This action helps minimize the appearance of wrinkles and fine lines, resulting in a more youthful look. Additionally, rice water improves blood circulation, which helps reduce puffiness and revitalizes the under-eye area.

Raw milk acts as a gentle cleanser for the skin, effectively removing impurities and leaving it soft and smooth. It works in conjunction with rice water to provide a comprehensive solution for dark circles, offering both toning and cleansing benefits.

Conclusion

Dark circles can be a frustrating beauty concern, but with the natural remedy of rice water and raw milk, you can effectively reduce their appearance. The toning properties of rice water combined with the cleansing properties of raw milk create a powerful solution for brighter, revitalized under-eye skin. Incorporate this remedy into your skincare routine, and with regular use, you may notice a significant improvement in the appearance of your dark circles. Embrace the magic of rice water and say goodbye to tired-looking eyes!


Filed Under: Skin Care Tagged With: beauty benefits, beauty tips, cleansing properties, dark circles, home remedy, milk, natural solution, raw milk, rice, rice water, skin care, toning properties, under-eye skin

  • Page 1
  • Page 2
  • Page 3
  • Interim pages omitted …
  • Page 5
  • Go to Next Page »

Primary Sidebar

Looking for something?

Connect with us online

  • Email
  • Facebook

Popular Posts!

Naturally Glowing Skin: The Magic of Yogurt Face Masks

Curry Leaves Hair Mask: A Natural Remedy for Stronger, Healthier Hair

Ginseng: The Chinese Herbal Powerhouse for Hair Regrowth and Strength

Natural Refreshing Shampoo: Tea Tree, Peppermint, and Jojoba Oil Blend

Prevent Head Baldness Naturally using Garlic and Honey

Categories

  • Hair Care
  • Health and Wellness
  • Skin Care

Tags

beauty benefits beauty tips Chemical-Free Hair Care coconut oil curd curry leaves dark circles DIY Hair Care egg exfoliation eye care glowing skin hair care Hair Care Routine hair care tips hair growth Hair health Hair Health Improvement hair loss Hair Nourishment Hair Strengthening health and wellness honey hydration lemon lemon juice milk natural beauty natural conditioner natural face mask Natural hair care Natural Hair Growth Natural Hair Remedies natural ingredients natural remedies Natural remedy natural skincare olive oil radiant complexion radiant skin scalp health Scalp Nourishment skin care skincare skincare routine

© 2026 · Sharvayoni · Privacy Policy · Disclaimer