• Skip to main content
  • Skip to primary sidebar
  • HOME
  • SKIN CARE
  • HAIR CARE
  • HEALTH AND WELLNESS
  • CONTACT US

Sharvayoni

Unearth Nature's Magic - Your Path to Herbal Radiance and Wellnes

Rejuvenation

Gentle Indian Facial Massage: A Soothing Journey to Relaxation and Rejuvenation

July 13, 2023 by sharvayonibeauty Leave a Comment

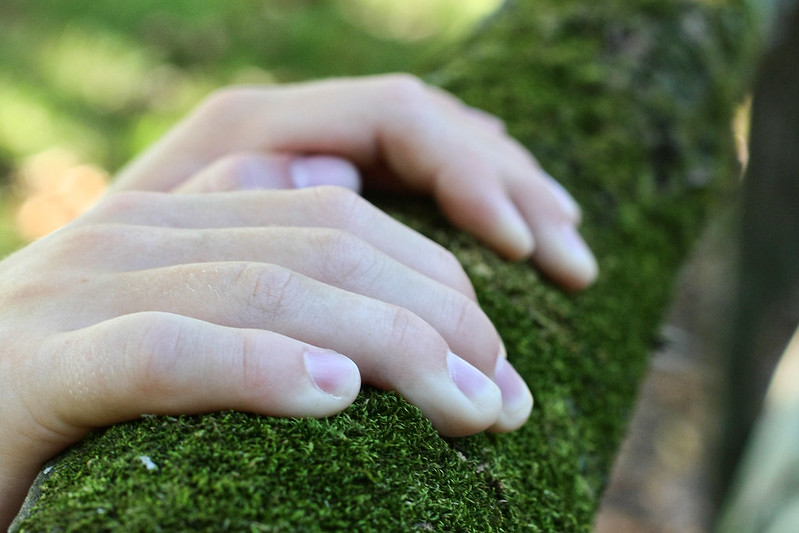
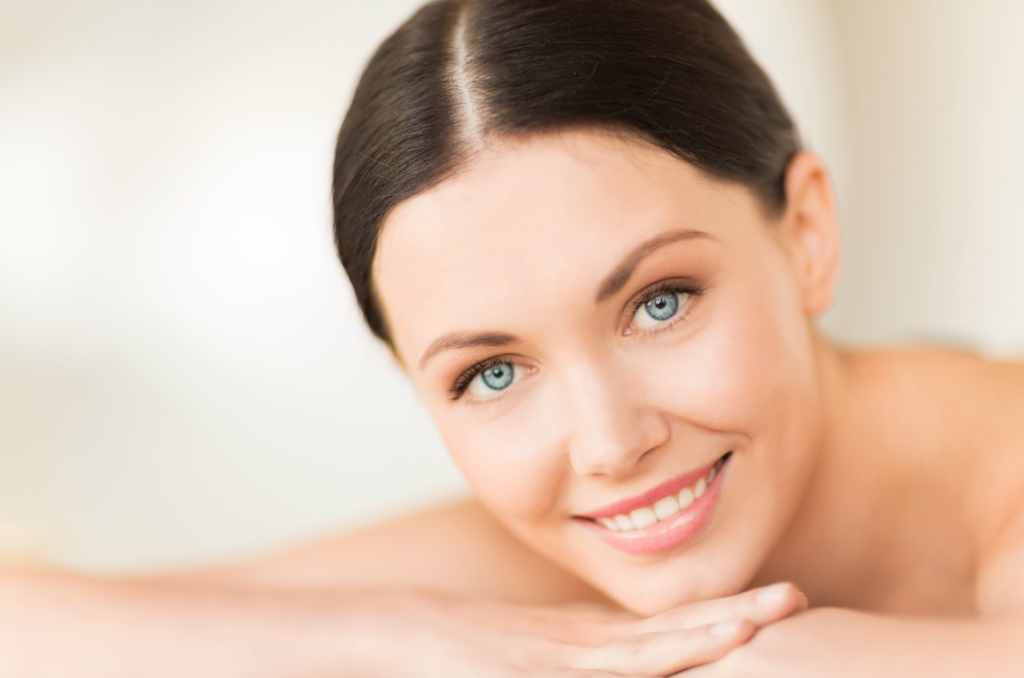
Gentle Indian facial massage is a wonderfully relaxing and rejuvenating practice that can be performed in just a few minutes. Whether it’s in the morning, afternoon, or evening, this massage technique can help relieve stress and promote the regeneration of the skin. Using high-quality oils like grapeseed or sesame oil enhances the sliding of the hands, ensuring a smooth and nourishing experience. In this article, we will explore a step-by-step guide to performing a gentle Indian facial massage, focusing on specific areas of the face to promote relaxation and rejuvenation.

Relieving Forehead Wrinkles

One of the areas where stress tends to manifest is the forehead, often in the form of wrinkles. To “open up” this area and promote relaxation, follow these steps:

  1. Place your hands horizontally across the forehead, with the forefinger and middle finger positioned directly above the eyebrows.
  2. Slowly and gently pull your hands outwards, applying gentle pressure. Repeat this motion several times to release tension and promote relaxation.

Stimulating the Third Eye and Eyebrows

The third eye, located between the eyebrows, is a significant energy center in Ayurvedic medicine. To stimulate this area and promote relaxation, follow these steps:

  1. Position your index finger and middle finger on the third eye point between the eyebrows.
  2. With gentle pressure, stroke from the center of the eyebrows outward, following the entire length of the eyebrows.
  3. When reaching the outer point of the eyebrows, increase the pressure slightly and finish with a few circular movements.

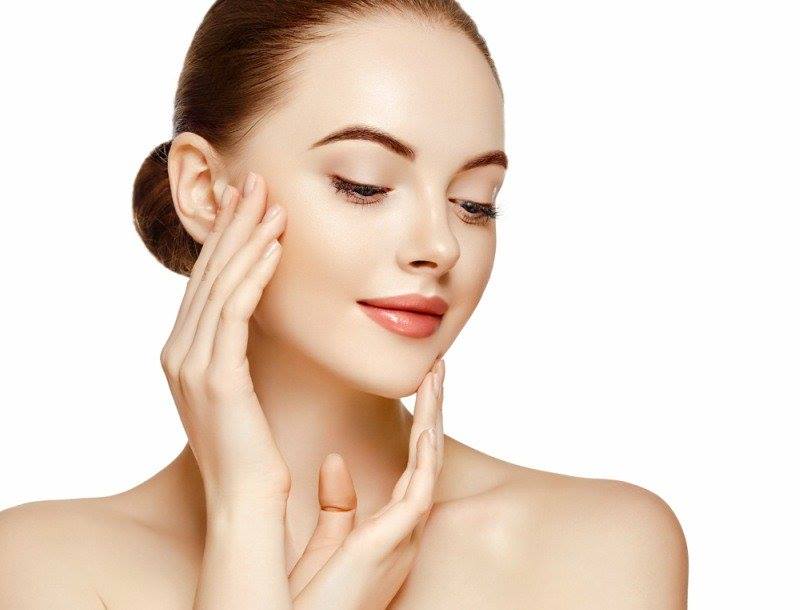
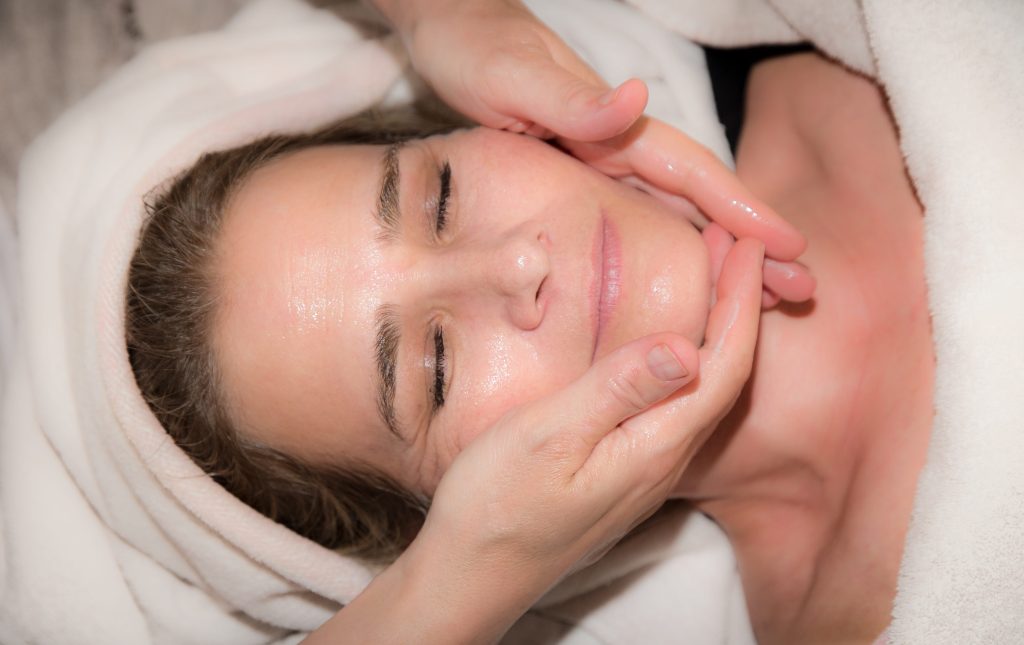
Nourishing the Cheeks

The cheeks are an essential area to focus on during a facial massage. To nourish and revitalize the cheeks, follow these steps:

  1. Place both hands horizontally on the cheeks, with all eight fingers facing inward.
  2. Slowly and gently pull your hands toward the cheekbones, applying gentle pressure. Repeat this motion to stimulate circulation and promote relaxation.

Uplifting the Mouth and Chin

The mouth and chin area can hold tension and stress. To uplift and relax this area, follow these steps:

  1. Position your index finger and middle finger horizontally on the corners of your mouth.
  2. Gently pull the skin outward and upward, creating a smiling mouth shape.
  3. Continue the movement towards the ears, gently pulling the earlobes in various directions.
  4. Finally, massage the earlobes with circular movements, starting from the bottom and moving upward.

Releasing Tension in the Chin

The chin area can often accumulate tension. To release tension and promote relaxation in the chin, follow these steps:

  1. Place your fingers on your chin, with the forefinger and middle finger positioned above the chin and the remaining fingers, including the thumb, underneath.
  2. With gentle pressure, pull the fingers outward towards the earlobes.
  3. Finish this movement by covering your eyes with the palm of your hands, allowing yourself to relax and feel the energy.

Conclusion

A gentle Indian facial massage is a simple yet effective way to relieve stress, promote relaxation, and rejuvenate the skin. By focusing on specific areas of the face, such as the forehead, eyebrows, cheeks, mouth, chin, and ears, you can release tension and nourish the skin. Remember to use high-quality oils for a smooth sliding experience. Incorporate this relaxing practice into your daily skincare routine and embrace the rejuvenating benefits it offers. Take a few moments each day to treat yourself to a gentle Indian facial massage and experience the serenity and radiance it brings to both your body and mind.

Filed Under: Skin Care Tagged With: beauty tips, gentle Indian facial massage, high-quality oils, nourish skin, promote circulation, Rejuvenation, relaxation, serenity, skin care, skincare routine, specific areas, step-by-step guide, stress relief

Revitalize Your Hands with a Nourishing Hand Mask

July 6, 2023 by sharvayonibeauty Leave a Comment

Our hands often bear the brunt of daily activities, leaving them dry, rough, and in need of some extra care. A hand mask is a wonderful way to nourish and rejuvenate your hands, providing them with the hydration and pampering they deserve. In this article, we will guide you through the process of creating and using a homemade hand mask. By combining plain yogurt, milk powder, almond oil, lavender oil, and palmarosa oil, you can indulge in a luxurious treatment that will leave your hands feeling soft, moisturized, and revitalized. Let’s dive in!

Ingredients for the Hand Mask

To create the nourishing hand mask, gather the following ingredients:

  • One cup of plain yogurt
  • One tablespoon of milk powder
  • One tablespoon of almond oil
  • One drop of lavender oil (known for its regenerating properties)
  • One drop of palmarosa oil (antiseptic and stimulating)

Each ingredient plays a vital role in providing hydration, nourishment, and rejuvenation to your hands.

Preparation of the Hand Mask

Follow these simple steps to prepare the hand mask:

  1. In a mixing bowl, combine one cup of plain yogurt and one tablespoon of milk powder. Stir well to ensure the milk powder is fully incorporated into the yogurt.
  2. Add one tablespoon of almond oil to the mixture. Almond oil is rich in vitamins and fatty acids, which deeply moisturize and nourish the skin.
  3. Next, add one drop of lavender oil and one drop of palmarosa oil to the mixture. These essential oils not only add a delightful fragrance but also provide additional benefits such as regeneration, antiseptic properties, and stimulation.
  4. Stir all the ingredients thoroughly until they are well combined and form a smooth, creamy consistency. Make sure there are no lumps or clumps in the mixture.

Application of the Hand Mask

Now that your hand mask is ready, it’s time to pamper your hands:

  1. Start by washing your hands with warm water and a gentle cleanser. Pat them dry with a soft towel.
  2. Take a generous amount of the hand mask mixture and apply it to the back of your hands. Gently massage the mask onto your skin, ensuring that it is evenly distributed.
  3. Allow the mask to sit on your hands for approximately ten minutes. During this time, the nourishing ingredients will deeply penetrate your skin, providing hydration and rejuvenation.
  4. After the designated time, rinse your hands thoroughly with plenty of lukewarm water. Ensure that all traces of the mask are removed.
  5. Pat your hands dry with a clean towel, and you will immediately notice the softness and moisturization that the hand mask provides.

Moisturize Your Hands

To complete the hand treatment, follow these steps to moisturize your hands:

  1. After rinsing off the hand mask, take a small amount of your favorite hand cream or lotion.
  2. Gently massage the cream into your hands, focusing on dry areas and cuticles.
  3. Allow the moisturizer to fully absorb into your skin, leaving your hands feeling silky smooth and nourished.

Conclusion

A nourishing hand mask is a wonderful way to rejuvenate and pamper your hands. By utilizing simple yet effective ingredients such as plain yogurt, milk powder, almond oil, lavender oil, and palmarosa oil, you can create a luxurious treatment that provides deep hydration and regeneration. Treat yourself to this indulgent hand mask, and experience the joy of soft, moisturized hands. Your hands will thank you for the extra care and attention!

Filed Under: Skin Care Tagged With: almond oil, beauty tips, hand mask, homemade, hydration, lavender oil, milk powder, moisturized hands, nourishing, palmarosa oil, plain yogurt, Rejuvenation, skin care, soft hands

Nourish and Rejuvenate Your Hands with a Honey Scrub

July 5, 2023 by sharvayonibeauty Leave a Comment

Our hands are constantly exposed to environmental factors and daily activities, which can leave them feeling dry and rough. If you’re looking for a natural and effective way to nourish and rejuvenate your hands, a honey scrub is a fantastic option. With the combination of honey, coarse salt, and fresh herbs, this homemade scrub will leave your hands feeling soft, smooth, and revitalized. In this article, we will guide you through the process of creating and using a honey scrub for your hands, as well as provide a bonus hand mask recipe for an extra treat. Let’s dive in!

Ingredients for the Honey Scrub

To create the honey scrub, gather the following ingredients:

  • One tablespoon of honey
  • Two tablespoons of coarse salt
  • A sprig of fresh thyme
  • A sprig of fresh mint

These ingredients work together to exfoliate, moisturize, and rejuvenate your hands, leaving them feeling refreshed and renewed.

Preparation of the Honey Scrub

Follow these simple steps to prepare the honey scrub:

  1. In a porcelain pot or bowl, combine one tablespoon of honey and two tablespoons of coarse salt. Stir well to ensure the salt is evenly distributed throughout the honey.
  2. Take the sprig of fresh thyme and fresh mint and remove the leaves from the stems. Add the herb leaves to the honey and salt mixture.
  3. Mix all the ingredients together, ensuring that the herb leaves are well incorporated into the scrub. The combination of honey, salt, and herbs will create a nourishing and aromatic scrub for your hands.

Application of the Honey Scrub

Now that your honey scrub is ready, here’s how to use it effectively:

  1. Begin by wetting your hands with warm water. This will help to open up the pores and prepare your skin for exfoliation.
  2. Take a small amount of the honey scrub and gently massage it onto the top and bottom of your hands. Use circular motions to work the scrub into your skin, focusing on areas that are rough or in need of extra attention.
  3. Continue massaging the scrub for a few minutes, allowing the coarse salt to exfoliate and remove dead skin cells while the honey and herbs moisturize and nourish your hands.
  4. After thoroughly massaging the scrub, rinse your hands with warm water to remove any residue.
  5. Pat your hands dry with a clean towel, and feel the immediate difference in the texture and appearance of your skin.

Hand Mask for Extra Hydration

To further pamper your hands, try this simple hand mask:

  1. After rinsing off the honey scrub, take a small amount of your favorite hand cream or lotion and apply it generously to your hands.
  2. Gently massage the cream into your skin, focusing on any areas that are particularly dry or in need of extra hydration.
  3. Once the cream is applied, slip on a pair of cotton gloves or wrap your hands in plastic wrap.
  4. Allow the mask to work its magic for about 15-20 minutes, giving the cream ample time to deeply moisturize your hands.
  5. After the designated time, remove the gloves or plastic wrap and gently massage any remaining cream into your skin.

Conclusion

With the help of a honey scrub and a nourishing hand mask, you can effectively nourish and rejuvenate your hands. The combination of honey, coarse salt, and fresh herbs provides exfoliation, moisturization, and a refreshing scent. Give your hands the attention they deserve and indulge in the natural goodness of this homemade treatment. Say goodbye to dry, rough hands and hello to soft, smooth, and revitalized skin!

Filed Under: Skin Care Tagged With: beauty tips, coarse salt, exfoliation, fresh herbs, hand mask, hands, homemade, honey scrub, hydration, Moisturization, natural ingredients, Rejuvenation, skin care, smooth hands, soft hands

Revitalize Your Skin with a Homemade Body Scrub

July 4, 2023 by sharvayonibeauty Leave a Comment

skin-care-Slider1

A body scrub is an excellent way to pamper yourself and revitalize your skin. By using natural ingredients, you can create a luxurious body scrub right in the comfort of your own home. In this article, we will share a simple yet effective recipe for a homemade body scrub that will leave your skin feeling smooth and rejuvenated. Prepare to indulge in a self-care session and discover the power of poppy seeds, yogurt, avocado oil, peppermint oil, lavender oil, and chamomile oil. Let’s dive in!

Ingredients for the Body Scrub

To create this invigorating body scrub, gather the following ingredients:

  • Three tablespoons of poppy seeds
  • One cup of natural yogurt
  • One tablespoon of avocado oil
  • Three drops of peppermint oil (known for its anti-inflammatory, soothing, and healing properties)
  • Five drops of lavender oil (stimulates cell formation)
  • One drop of chamomile oil (anti-inflammatory)

Each ingredient plays a crucial role in providing exfoliation, hydration, and a calming effect to your skin.

Preparation of the Body Scrub

Follow these steps to prepare the body scrub:

  1. In a mixing bowl, combine three tablespoons of poppy seeds, one cup of natural yogurt, and one tablespoon of avocado oil. Mix well until all the ingredients are evenly incorporated.
  2. Next, add three drops of peppermint oil, five drops of lavender oil, and one drop of chamomile oil to the mixture. These essential oils will not only add a delightful fragrance but also provide additional benefits to your skin.
  3. Stir the mixture thoroughly to ensure all the ingredients are well blended, forming a creamy paste-like consistency. If the mixture feels too dry, you can add a little more yogurt to achieve the desired texture.

Application of the Body Scrub

Now that your body scrub is ready, it’s time to enjoy the rejuvenating experience:

  1. Start by wetting your body in the shower or bath. The warm water will help soften your skin and prepare it for the exfoliation process.
  2. Take a generous amount of the body scrub and gently massage it onto your wet skin using circular motions. Focus on areas that tend to be rough or dry, such as elbows, knees, and feet. The poppy seeds will gently exfoliate and remove dead skin cells, revealing a smoother complexion.
  3. Continue massaging the scrub onto your body for a few minutes, allowing the natural ingredients to work their magic. The combination of yogurt, avocado oil, and essential oils will nourish, hydrate, and soothe your skin.
  4. Rinse off the body scrub with warm water, ensuring that all traces of the scrub are thoroughly removed.
  5. After rinsing, pat your skin dry with a soft towel. Avoid rubbing, as it may cause irritation.
  6. Finish the treatment by applying a moisturizing cream or body lotion to lock in the hydration and leave your skin feeling soft and supple.

Additional Tips

Consider the following tips to enhance your body scrub experience:

  1. Perform a patch test before using the body scrub, especially if you have sensitive skin or any known allergies. Apply a small amount of the scrub to a small area and wait for any adverse reactions. If there is no irritation or discomfort, proceed with using the scrub as directed.
  2. Customize the scent of your body scrub by using different essential oils. If you prefer a different fragrance, you can replace or combine essential oils based on your personal preference.
  3. Use the body scrub once or twice a week for best results. Over-exfoliating can irritate the skin, so it’s important to give your skin enough time to recover between treatments.

Conclusion

By incorporating a homemade body scrub into your skincare routine, you can achieve smooth, rejuvenated skin in the comfort of your own home. The combination of poppy seeds, yogurt, avocado oil, and essential oils creates a luxurious and effective scrub that exfoliates, hydrates, and soothes your skin. Treat yourself to a self-care session and indulge in the goodness of natural ingredients. Your body will thank you for it!

Filed Under: Skin Care Tagged With: avocado oil, beauty tips, body scrub, essential oils, exfoliation, homemade body scrub, hydration, natural ingredients, poppy seeds, Rejuvenation, skin care, skincare, yogurt

Natural Facial Scrub with Honey, Green Tea, and Sugar for Glowing Skin

June 29, 2023 by sharvayonibeauty Leave a Comment

When it comes to skincare, many of us are constantly on the lookout for natural and effective solutions. One such solution that has gained popularity is a homemade facial scrub using honey, green tea, and sugar. This simple yet powerful combination can work wonders for your skin, providing exfoliation, hydration, and a boost of antioxidants. In this post, we will explore the benefits of each ingredient and learn how to create this rejuvenating facial scrub at home.

The Ingredients and Their Benefits

  1. Green Tea:
    • Green tea is not only a popular beverage, but it also offers numerous benefits for the skin. It is rich in antioxidants, particularly catechins, which help combat free radicals and reduce inflammation.
    • Green tea is known for its anti-aging properties, as it promotes collagen production and helps maintain the skin’s elasticity. Additionally, it possesses antimicrobial properties that can help fight acne-causing bacteria.
  2. Honey:
    • Honey has been used for centuries in skincare due to its natural healing and moisturizing properties. It acts as a humectant, drawing moisture to the skin and keeping it hydrated.
    • Honey is also known for its antibacterial and antifungal properties, making it an excellent ingredient for natural skin disinfection. It can help soothe and calm irritated skin, reduce inflammation, and promote the healing of wounds.
  3. Sugar:
    • Sugar serves as a natural exfoliant in this facial scrub, helping to remove dead skin cells and reveal a smoother complexion. The granules gently slough off the top layer of dead skin, allowing for better absorption of skincare products and promoting cell turnover.
    • Sugar is also a natural source of glycolic acid, which can enhance skin radiance and improve overall skin texture.

Creating Your Homemade Facial Scrub

To make this invigorating facial scrub, follow these simple steps:

  1. Prepare the Green Tea:
    • Begin by brewing a cup of green tea and allowing it to cool completely. You can do this by steeping a green tea bag in hot water for a few minutes, then refrigerating it until it reaches room temperature.
  2. Mix the Ingredients:
    • In a bowl, combine one tablespoon of cooled green tea with one tablespoon of honey and one tablespoon of sugar.
    • Mix well until you achieve a thick consistency.
    • The amount of sugar can be adjusted to your preference, depending on how thick you want the mixture to be.
  3. Cleanse Your Face:
    • Before applying the scrub, cleanse your face with a gentle cleanser to remove any dirt or impurities.
  4. Apply and Massage:
    • Apply the scrub to your damp face and gently massage it in a circular motion.
    • Focus on areas that need extra exfoliation, such as the T-zone or areas with rough skin texture.
    • Be careful around the delicate eye area.
  5. Rinse and Moisturize:
    • After massaging for a few minutes, rinse off the scrub with lukewarm water. Pat your face dry and follow up with a moisturizer to lock in hydration.

The Benefits of the Honey, Green Tea, and Sugar Facial Scrub

  1. Exfoliation:
    • The sugar in this facial scrub acts as a natural exfoliant, sloughing off dead skin cells and revealing a brighter complexion.
    • Regular exfoliation can improve skin texture, promote cell turnover, and enhance the effectiveness of other skincare products.
  2. Hydration:
    • Honey is a natural humectant, attracting and retaining moisture in the skin. It helps to keep the skin hydrated, nourished, and supple.
  3. Antioxidant Boost:
    • Green tea is packed with antioxidants that help protect the skin from free radicals, which can cause premature aging and damage.
    • Regular use of green tea can help fight signs of aging, reduce inflammation, and promote a youthful glow.
  4. Acne-Fighting Properties:
    • Both green tea and honey have antimicrobial properties that can help combat bacteria and fungi, making this facial scrub a natural choice for acne-prone skin.
    • Green tea’s anti-inflammatory properties can also soothe redness and irritation.

Storage and Shelf Life

Since honey acts as a natural preservative, you can store any excess scrub mixture in a sealed container in the refrigerator for several weeks. This way, you can prepare a larger batch and use it as needed without worrying about spoilage. However, it’s important to check for any signs of spoilage, such as changes in color, texture, or smell, before each use.

Conclusion

Incorporating natural ingredients into your skincare routine can bring about remarkable benefits, and the honey, green tea, and sugar facial scrub is a perfect example. By harnessing the power of green tea’s antioxidants, honey’s disinfecting properties, and sugar’s exfoliating abilities, you can enjoy a revitalizing and rejuvenating skincare experience. So why not give this homemade facial scrub a try? Your skin will thank you for it.

Filed Under: Skin Care Tagged With: antioxidants, Bacteria-fighting, beauty tips, DIY recipe, exfoliation, Facial scrub, glowing skin, green tea, Homemade scrub, honey, natural skincare, Rejuvenation, skin care, sugar

  • « Go to Previous Page
  • Page 1
  • Page 2
  • Page 3
  • Go to Next Page »

Primary Sidebar

Looking for something?

Connect with us online

  • Email
  • Facebook

Popular Posts!

Removing Pimples or Pimple Scars: A Natural Solution with Curry Leaves and Lemon Juice

Naturally Glowing Skin: The Magic of Yogurt Face Masks

Understanding Wrinkles: Causes and Prevention

Styling Cream Moisturizer: Your Hair’s New Best Friend

Eliminating Head Lice Naturally with Dark Thulasi (Holy Basil)

Categories

  • Hair Care
  • Health and Wellness
  • Skin Care

Tags

beauty benefits beauty tips Chemical-Free Hair Care coconut oil curd curry leaves dark circles DIY Hair Care egg exfoliation eye care glowing skin hair care Hair Care Routine hair care tips hair growth Hair health Hair Health Improvement hair loss Hair Nourishment Hair Strengthening health and wellness honey hydration lemon lemon juice milk natural beauty natural conditioner natural face mask Natural hair care Natural Hair Growth Natural Hair Remedies natural ingredients natural remedies Natural remedy natural skincare olive oil radiant complexion radiant skin scalp health Scalp Nourishment skin care skincare skincare routine

© 2026 · Sharvayoni · Privacy Policy · Disclaimer