• Skip to main content
  • Skip to primary sidebar
  • HOME
  • SKIN CARE
  • HAIR CARE
  • HEALTH AND WELLNESS
  • CONTACT US

Sharvayoni

Unearth Nature's Magic - Your Path to Herbal Radiance and Wellnes

hair care

Coconut Milk and Mango Butter Hair Mask: A Luxurious Deep Conditioning Treatment

January 25, 2024 by sharvayonibeauty Leave a Comment

In the pursuit of luscious, healthy hair, natural remedies often provide the most rewarding results. This homemade hair mask, featuring coconut milk, mango butter, and honey, is a luxurious treat for your hair. Designed to deeply condition and nourish, this mask caters to those seeking an all-natural approach to hair care. The combination of these ingredients provides intense hydration, repairs damage, and leaves your hair feeling soft, shiny, and rejuvenated.

Things Needed

Before you begin, ensure you have the following items for your hair mask:

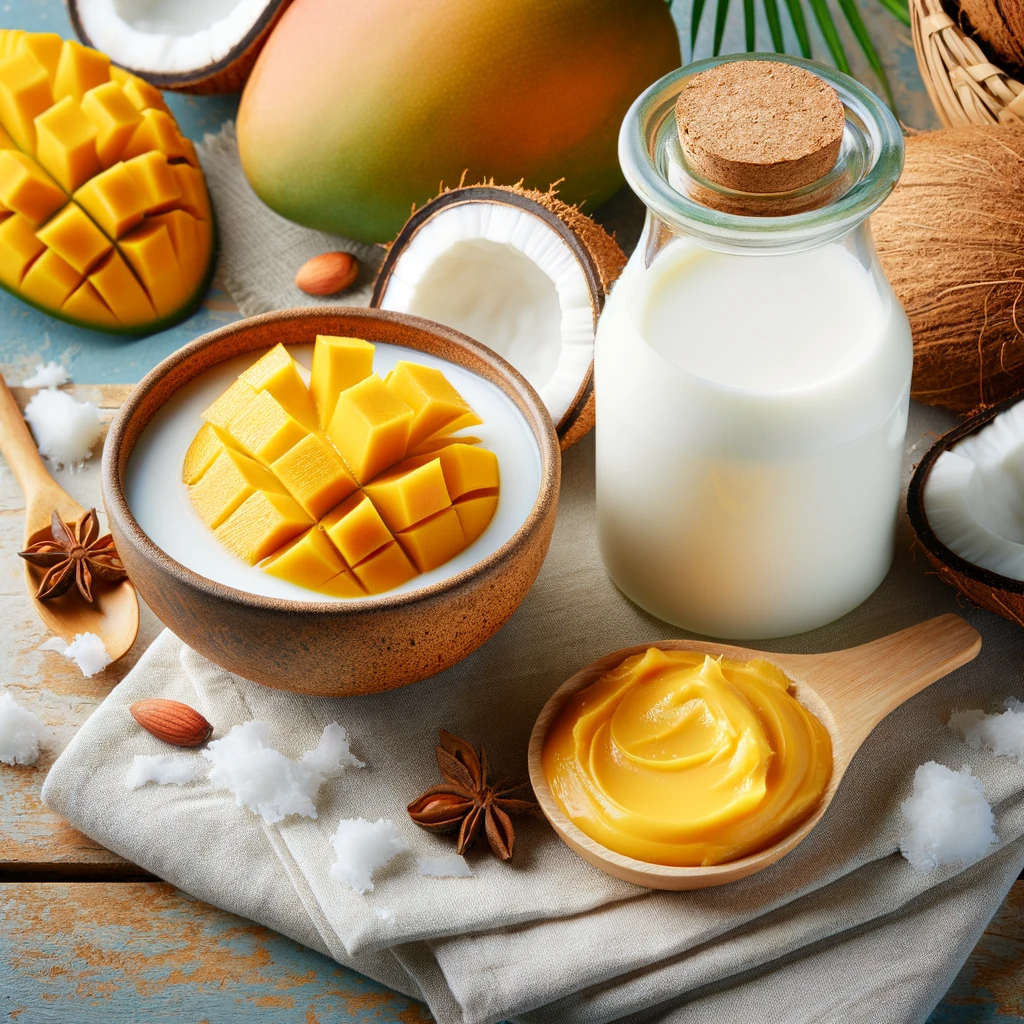
  1. Coconut Milk: 1 cup, for its hydrating and nourishing properties.
  2. Mango Butter/Oil: 2 tablespoons, for moisture and shine.
  3. Honey: ¼ cup, as a natural humectant.
  4. Mixing Bowl: To blend the ingredients.
  5. Pot: For warming the mixture.
  6. Whisk or Spoon: For stirring the ingredients.
  7. Shower Cap: To cover your hair during treatment.
  8. Shampoo and Conditioner: For washing off the mask.
  9. Towel: To pat your hair dry.

Steps to Prepare

Creating this coconut milk and mango butter hair mask is a simple process:

  1. Mix Ingredients: In a mixing bowl, combine 1 cup of coconut milk, 2 tablespoons of mango butter or oil, and ¼ cup of honey.
  2. Stir Well: Use a whisk or spoon to mix the ingredients until well combined. Ensure that the honey and mango butter are fully incorporated into the coconut milk.
  3. Warm the Mixture: Transfer the mixture into a pot and warm it slightly over medium-low heat. Avoid overheating to preserve the natural properties of the ingredients.
  4. Apply to Hair: After washing your hair, apply the slightly warm mask to slightly damp hair. Ensure that the mask is distributed evenly from roots to ends.
  5. Cover Hair: Once applied, cover your hair with a plastic shower cap. This helps to trap heat and enhance the mask’s effectiveness.
  6. Leave-In Time: Leave the mask on for 30 to 60 minutes to allow the nutrients to penetrate deeply into the hair strands.
  7. Rinse and Wash: After the treatment, wash your hair thoroughly with shampoo and conditioner. This removes any residue and leaves your hair clean and nourished.
  8. Dry Gently: Pat your hair dry with a towel, avoiding rough rubbing to prevent damage.

Benefits

The coconut milk and mango butter hair mask offers numerous benefits:

  1. Deep Hydration: Coconut milk and mango butter provide intense moisture, making this mask ideal for dry and brittle hair.
  2. Damage Repair: The natural ingredients help in repairing hair damage caused by heat, styling, and environmental factors.
  3. Enhances Shine: Regular use of this mask adds a natural shine and softness to your hair.
  4. Improves Hair Health: The nutrients in coconut milk, mango butter, and honey strengthen hair, promoting overall health and preventing breakage.
  5. Scalp Nourishment: This mask also benefits the scalp, preventing dryness and dandruff.
  6. All-Natural Care: Free from harsh chemicals, this hair mask is a safe and healthy option for all hair types.
  7. Cost-Effective: Homemade masks are an economical alternative to expensive salon treatments.
  8. Eco-Friendly: Using natural ingredients reduces the environmental impact associated with many commercial hair products.

Conclusion

This coconut milk and mango butter hair mask is a delightful, effective way to care for your hair naturally. By dedicating some time to this treatment, you can transform your hair into a healthier, more radiant state. Whether your hair is dry, damaged, or simply in need of some extra love, this homemade mask is a perfect solution to bring out the best in your locks.

Filed Under: Hair Care Tagged With: beauty tips, Coconut Milk for Hair, DIY Hair Mask, Eco-Friendly Hair Care, hair care, Homemade Hair Care, Honey in Hair Products, Hydrating Hair Mask, Luxurious Hair Treatments, Mango Butter Hair Treatment, Natural Deep Conditioning, Repairing Hair Damage

Herbal Hair Rinse for Healthy Scalp and Shiny Hair

January 24, 2024 by sharvayonibeauty Leave a Comment

In the realm of natural hair care, herbal hair rinses have gained popularity for their ability to restore the natural balance of the scalp and enhance hair health. This easy-to-make herbal rinse is designed to balance your scalp’s pH, reduce product buildup, and improve hair shine and manageability. Depending on your hair type, whether it’s normal, dry, thinning, oily, or dandruff-prone, specific herbs can be used to target these concerns effectively.

Importance of Herbal Rinse

Herbal rinses offer several benefits, including:

  1. Anti-Inflammatory Properties: Helps to fight against and heal scalp inflammation.
  2. Healing from Chemical Treatments: Aids in recovering from skin problems caused by chemical and synthetic hair treatments.
  3. Dandruff Treatment: Acts as a natural remedy for dandruff.
  4. Oil Control: Helps in reducing excess grease in hair.

Things Needed

To prepare this herbal hair rinse, you will need:

  1. Herbs: Depending on your hair type (Chamomile and Lavender for normal-dry hair; Peppermint and Rosemary for thinning, oily hair, or dandruff).
  2. Distilled Water: 2 cups, for brewing the herbs.
  3. Dark Glass Container: To store the herbal rinse.
  4. Pot: For boiling the herbal infusion.
  5. Mesh Strainer or Cheesecloth: For straining the herbs.
  6. Mixing Bowl: To combine herbs and water.

Steps to Prepare

Creating your herbal hair rinse involves a few simple steps:

  1. Herb Selection: Choose and combine 3 tablespoons each of the appropriate herbs in a mixing bowl.
  2. Brew the Herbs: Pour 2 cups of distilled water over the herbs. Transfer this mixture to a pot and bring to a boil over medium-high heat.
  3. Steep the Herbs: Once boiled, remove the pot from the heat and set it aside for 60 minutes, allowing the herbs to release their flavors and benefits.
  4. Strain the Infusion: Use a mesh strainer or cheesecloth to strain the liquid, removing all the herb particles.
  5. Transfer to Container: Pour the strained herbal rinse into a dark glass bottle for storage.
  6. Application: Gently rub the rinse into your hair and scalp with your hands during your shower routine.
  7. Rinse Out: After massaging it into your scalp and hair, wash it out and pat your hair dry.

Benefits

This herbal hair rinse provides various benefits:

  1. pH Balance: Restores the natural pH balance of your scalp, promoting overall scalp health.
  2. Reduces Buildup: Helps remove buildup from hair care products, leaving hair clean and refreshed.
  3. Enhances Shine: Natural herbs impart a natural shine to your hair.
  4. Improves Manageability: Regular use makes hair more manageable and easier to style.
  5. Natural Remedy for Scalp Issues: Herbs like rosemary and peppermint are effective in treating dandruff and scalp inflammation.
  6. Cost-Effective: Making your own hair rinse is more economical than purchasing commercial products.
  7. Chemical-Free: Free from harmful chemicals found in many hair care products.

Conclusion

Incorporating a herbal hair rinse into your hair care routine is an effective way to harness the benefits of nature for your hair. Not only does it improve the health of your scalp and hair, but it also leaves your hair looking shiny and feeling soft. The simplicity and effectiveness of this natural remedy make it an excellent choice for anyone looking to switch to a more natural hair care regimen.

Filed Under: Hair Care Tagged With: beauty tips, Chamomile for Hair, dandruff treatment, DIY Herbal Hair Rinse, Eco-Friendly Hair Care, hair care, Hair shine enhancement, Homemade Hair Products, Lavender Hair Benefits, Natural hair care, Rosemary for Scalp Health, Scalp pH Balance

Jojoba Oil Hair Serum: A Simple Solution for Frizz-Free Hair

January 23, 2024 by sharvayonibeauty Leave a Comment

In the quest for smooth, manageable hair, natural solutions often prove to be the most effective and gentle. Jojoba oil, a natural oil that closely resembles the sebum produced by our scalp, is an excellent remedy for taming frizz and flyaways. This simple hair serum recipe using just a few drops of jojoba oil can transform your hair, making it more manageable, shiny, and healthy-looking. It’s a quick, cost-effective, and natural way to achieve frizz-free hair.

Things Needed

To prepare this jojoba oil hair serum, you will need only a few items:

  1. Jojoba Oil: 2-3 drops, known for its hair-nourishing properties.
  2. Your Palms: For applying the oil to your hair.
  3. Mirror: To help you see and manage the application process.

Steps to Prepare

Follow these straightforward steps to use jojoba oil as a hair serum:

  1. Dispense the Oil: Pour 2-3 drops of jojoba oil onto the palm of your hand. The amount may vary slightly depending on the length and thickness of your hair.
  2. Warm the Oil: Rub your palms together in a circular motion. This warms the oil slightly, making it easier to apply and helping it penetrate the hair more effectively.
  3. Apply to Hair: Gently run your oiled hands over your hair, focusing on the mid-lengths to the ends, where frizz and flyaways are most common. Avoid applying too much oil near the scalp to prevent greasiness.
  4. Style as Usual: Once the oil is applied, style your hair as you normally would. The jojoba oil will help to smooth out frizz and add a subtle shine.

Benefits

Using jojoba oil as a hair serum offers several advantages:

  1. Controls Frizz: Jojoba oil effectively tames frizzy hair and flyaways, giving your hair a smoother appearance.
  2. Moisturizes Hair: The oil hydrates your hair, preventing dryness which is often a cause of frizz.
  3. Mimics Natural Oils: Jojoba oil is similar to the natural oils produced by your scalp, making it an excellent choice for maintaining hair health.
  4. Adds Shine: It imparts a healthy shine to your hair without making it look greasy.
  5. Suitable for All Hair Types: Jojoba oil is lightweight and suitable for all hair types, including oily, dry, or combination hair.
  6. Chemical-Free: This natural oil is free from harmful chemicals and preservatives found in many commercial hair serums.
  7. Easy to Use: The simplicity of this treatment makes it easy to incorporate into your daily hair care routine.
  8. Cost-Effective: Jojoba oil is a budget-friendly alternative to expensive hair serums and treatments.

Conclusion

Incorporating jojoba oil into your hair care routine as a serum is an effective, natural way to combat frizz and flyaways. Its simplicity, coupled with its numerous hair benefits, makes it an excellent choice for those seeking a natural, easy-to-use solution for smoother, healthier hair. Try this quick remedy and enjoy the immediate difference it makes in the appearance and feel of your hair.

Filed Under: Hair Care Tagged With: beauty tips, Chemical-Free Hair Care, DIY Hair Serum, Easy Hair Management, Flyaway Taming, Frizz Control, hair care, Hair Smoothing, Jojoba Oil Hair Serum, Natural hair care, Natural Shine Enhancer, Simple Hair Solutions

Homemade Herbal Hair Conditioner: A Customized Treat for Your Locks

January 22, 2024 by sharvayonibeauty Leave a Comment

Taking care of your hair with natural, homemade products is not only eco-friendly but also ensures that you are using ingredients that are best suited for your hair type. This homemade herbal hair conditioner recipe is designed to be adaptable for different hair types, using specific carrier oils and essential oils that cater to your hair’s unique needs. The combination of emulsifying wax, vegetable glycerin, and vitamin E creates a nourishing base, while the herbal infusion adds a personalized touch to this hair care essential.

Things Needed

Before you begin, gather the following materials for your conditioner:

  1. Herbal Infusion or Distilled Water: ½ cup, customized to your hair type.
  2. Carrier Oil: 1 tsp, selected based on your hair type (refer to the provided table).
  3. Emulsifying Wax: 1 tbsp (8g), to bind oil and water.
  4. Essential Oils: Tailored for your hair type.
  5. Vitamin E: ½ teaspoon, as a natural antioxidant.
  6. Pure Grape Seed Extract (GSE): 5 drops, for preservation.
  7. Vegetable Glycerin: 1 tsp, for added moisture.
  8. Small Bowl: For mixing ingredients.
  9. Glass Jar: To melt the mixture.
  10. Pot: For a water bath to melt the wax.
  11. Whisk: For stirring.
  12. Dark Bottle (8 oz): For storing the conditioner.
  13. Measuring Tools: For precise ingredient portions.

Steps to Prepare

Follow these steps to create your conditioner:

  1. Combine Base Ingredients: In a small bowl, mix together glycerin, emulsifying wax, and your chosen carrier oil.
  2. Melt the Mixture: Place the glass jar with the mixture into a pot partly filled with water. Melt the mixture over low heat, stirring occasionally.
  3. Add Vitamin E: Once the wax is completely melted, remove from heat. Stir in the vitamin E.
  4. Warm the Herbal Infusion: In a separate pot or in a microwave, warm your herbal infusion or distilled water until lukewarm. This step is crucial for achieving the right consistency in your conditioner.
  5. Combine with Wax Mixture: Slowly pour the lukewarm herbal infusion into the wax mixture, continuously stirring with a whisk. Aim for a thick, smooth, and creamy consistency.
  6. Cool the Mixture: Set the mixture aside to cool. It will thicken as it cools.
  7. Add GSE and Essential Oils: Once the mixture is cool, stir in the pure GSE and your blend of essential oils.
  8. Transfer to Bottle: Pour the conditioner into an 8 oz dark bottle. Do not cover immediately.
  9. Shake During Cooling: As the mixture cools, occasionally shake the bottle to prevent ingredient separation.
  10. Store Properly: Keep the conditioner in a dark, dry, cool place.

Benefits

This homemade herbal hair conditioner offers various benefits:

  1. Customized Care: Tailoring the conditioner to your hair type ensures that your hair receives the specific nourishment it needs.
  2. Moisturizing: Vegetable glycerin and carrier oils provide deep hydration, leaving your hair soft and smooth.
  3. Strengthening: Vitamin E and essential oils contribute to hair strength and health.
  4. Natural Preservatives: Grape seed extract extends the shelf life of your conditioner naturally.
  5. Chemical-Free: Free from synthetic chemicals, this conditioner is gentle on your hair and scalp.
  6. Eco-Friendly: Homemade conditioners reduce plastic waste and are more environmentally sustainable.

Note

  • If your hair feels greasy after using the conditioner, reduce the amount of carrier oil or opt for a lighter oil like grapeseed oil.
  • Remember to shake the bottle during cooling to prevent separation.
  • The conditioner should be stored in a cool, dark place to preserve its freshness.

Conclusion

Crafting your own herbal hair conditioner is a rewarding way to take control of your hair care routine. This personalized approach ensures that your hair gets the specific treatment it needs, using natural, nourishing ingredients. Embrace this homemade conditioner and enjoy healthier, more vibrant hair.

Filed Under: Hair Care Tagged With: beauty tips, Carrier Oils for Hair, Customizable Conditioner, DIY Hair Conditioner, Emulsifying Wax in Hair Products, Essential Oils for Hair, Grape Seed Extract, hair care, Homemade Herbal Conditioner, Moisturizing Hair Conditioner, Natural hair care, Vitamin E for Hair

Natural Herbal Hair Conditioner: Tailored for Every Hair Color

January 21, 2024 by sharvayonibeauty Leave a Comment

Embracing natural beauty solutions is a delightful way to care for your hair, and making your own herbal hair conditioner is a perfect example of this. This recipe is not just about conditioning your hair; it’s about enhancing its natural color and improving its overall health. Whether you have blonde, dark, red, or gray hair, there’s a special blend of herbs tailored just for you. Each blend is designed to brighten and enhance your natural hair color while providing the nourishment your hair needs.

Things Needed

To create your customized herbal hair conditioner, you will need:

  1. Herbs: Depending on your hair color (calendula, chamomile, lemon peel for blonde hair; black tea, rosemary, cloves for dark hair; calendula, hibiscus, cinnamon bark for red hair; sage, rosemary, thyme for gray hair).
  2. Distilled Water: ¼ cup, to infuse with the herbs.
  3. Mixing Bowl: For combining herbs and water.
  4. Pot: For boiling the herbal mixture.
  5. Mesh Strainer or Cheesecloth: For straining the herbal infusion.
  6. Storage Container: To store the herbal infusion.
  7. Measuring Tools: To accurately measure herbs and water.

Steps to Prepare

Follow these steps to prepare your herbal hair conditioner:

  1. Herb Selection: Choose and combine three tablespoons of the appropriate herb blend based on your hair color in a mixing bowl.
  2. Add Water: Pour ¼ cup of distilled water into the bowl with the herbs.
  3. Heat the Mixture: Transfer the herb and water mixture to a pot. Bring it to a boil over medium heat.
  4. Steep the Herbs: After boiling, remove the pot from heat. Let the mixture sit for about 60 minutes to allow the herbs to release their flavors and properties.
  5. Strain the Infusion: Use a mesh strainer or cheesecloth to strain out the herbs. Preserve the herbal-infused liquid; this will be your hair conditioner.
  6. Store the Infusion: Transfer the herbal infusion to a storage container. If you’re not using it immediately, keep it in a cool, dry place.

Benefits

Each herbal blend offers unique benefits for different hair colors:

For Blonde Hair

  • Calendula, Chamomile, Lemon Peel: These herbs are known for their lightening properties, making them ideal for brightening blonde hair. Chamomile, in particular, adds shine and softness.

For Dark Hair

  • Black Tea, Rosemary, Cloves: Black tea enhances darker tones, while rosemary and cloves stimulate the scalp and add depth to dark hair colors.

For Red Hair

  • Calendula, Hibiscus, Cinnamon Bark: This blend enhances red tones and adds vibrancy. Hibiscus, especially, is known for its color-boosting properties.

For Gray Hair

  • Sage, Rosemary, Thyme: These herbs are excellent for maintaining the health and shine of gray hair. Sage can help in reducing the appearance of gray strands.

Note

The herbal infusion for gray hair has a strong herbal scent, but its benefits are significant, especially with consistent use over a few weeks. The natural properties of these herbs work together to enhance the health and appearance of your hair.

Conclusion

Creating a natural herbal hair conditioner tailored to your hair color is not only a step towards healthier hair but also a way to embrace the beauty of nature’s gifts. This conditioner offers a chemical-free, personalized approach to hair care, ensuring that your hair not only looks its best but is also nourished and strengthened. Regular use of this herbal infusion will reveal the true potential of your hair, making it worth every effort.

Filed Under: Hair Care Tagged With: beauty tips, Blonde Hair Herbs, Dark Hair Herbs, DIY Herbal Conditioner, Eco-Friendly Hair Care, Gray Hair Herbs, hair care, Hair Color Enhancement, Herbal Remedies for Hair, Homemade Hair Conditioner, Natural hair care, Red Hair Herbs

  • « Go to Previous Page
  • Page 1
  • Interim pages omitted …
  • Page 23
  • Page 24
  • Page 25
  • Page 26
  • Page 27
  • Interim pages omitted …
  • Page 56
  • Go to Next Page »

Primary Sidebar

Looking for something?

Connect with us online

  • Email
  • Facebook

Popular Posts!

Matilda’s Organic Curls Cream: A Natural Hair Care Elixir

Dye your hair naturally at home using Lemon juice and Honey

Egg Yolk Hair Mask: A Nutrient-Rich Treatment for Healthy Hair

Unlock Youthful Radiance: The Power of Steam Cleaning for Your Face

How to Naturally Care for Your Skin: Unlocking the Secrets of a Brighter Complexion

Categories

  • Hair Care
  • Health and Wellness
  • Skin Care

Tags

beauty benefits beauty tips Chemical-Free Hair Care coconut oil curd curry leaves dark circles DIY Hair Care egg exfoliation eye care glowing skin hair care Hair Care Routine hair care tips hair growth Hair health Hair Health Improvement hair loss Hair Nourishment Hair Strengthening health and wellness honey hydration lemon lemon juice milk natural beauty natural conditioner natural face mask Natural hair care Natural Hair Growth Natural Hair Remedies natural ingredients natural remedies Natural remedy natural skincare olive oil radiant complexion radiant skin scalp health Scalp Nourishment skin care skincare skincare routine

© 2026 · Sharvayoni · Privacy Policy · Disclaimer