• Skip to main content
  • Skip to primary sidebar
  • HOME
  • SKIN CARE
  • HAIR CARE
  • HEALTH AND WELLNESS
  • CONTACT US

Sharvayoni

Unearth Nature's Magic - Your Path to Herbal Radiance and Wellnes

hair care

Baking Soda and Vinegar Shampoo: A Natural Shift in Hair Care

January 11, 2024 by sharvayonibeauty Leave a Comment

In an era where natural and eco-friendly alternatives are increasingly valued, many are turning to homemade solutions for hair care. One such solution is the baking soda and vinegar shampoo – a simple, yet effective way to cleanse your hair without the harsh chemicals found in commercial products. This shampoo utilizes the cleansing properties of baking soda and the conditioning effect of vinegar to maintain the hair’s natural oil balance. It’s important to note that transitioning to this natural shampoo requires an adjustment period for your hair to re-balance its natural oils.

Things Needed

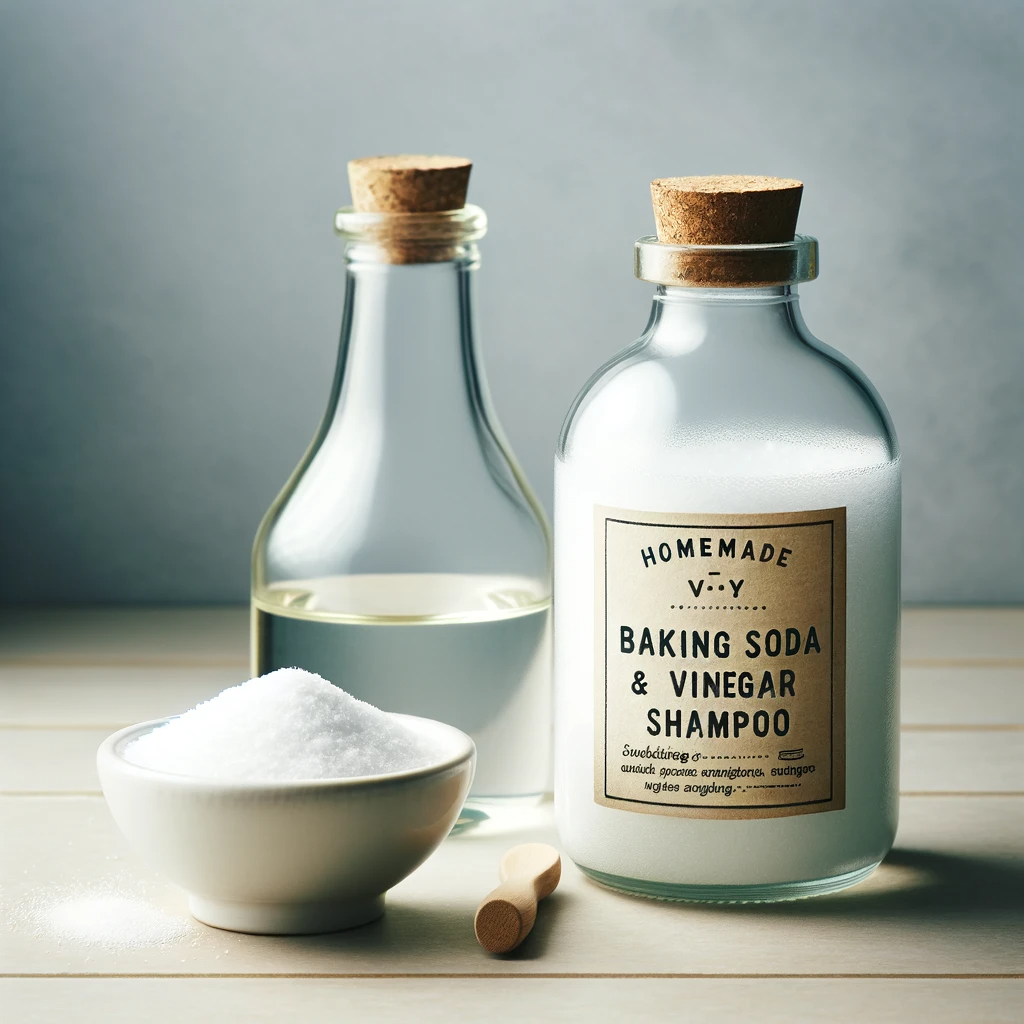
To create your baking soda and vinegar shampoo, you’ll need:

  1. Baking Soda: Acts as a natural cleanser.
  2. Apple Cider Vinegar or White Vinegar: Used for conditioning the hair.
  3. Water: To dilute the ingredients.
  4. Measuring Cup: For accurate ingredient measurements.
  5. Mixing Bowl or Container: For preparing the baking soda solution.
  6. Plastic or Glass Container: For storing the mixture.
  7. Whisk or Spoon: For mixing the ingredients.

Steps to Prepare

The preparation process is straightforward:

  1. Prepare Baking Soda Solution: Combine ½ cup of baking soda with 3 cups of warm water in a mixing bowl or container. Stir until the baking soda is thoroughly dissolved.
  2. Transfer to Container: Pour the baking soda solution into a plastic or glass container for easy application.
  3. Shake Well Before Use: Ensure to shake the container well before each use to remix the solution.
  4. Apply the Shampoo: Wet your hair thoroughly. Apply the baking soda shampoo by scrubbing it into your scalp. Be sure to cover all areas for effective cleansing.
  5. Rinse with Vinegar: After washing with the baking soda shampoo, rinse your hair with either apple cider vinegar or white vinegar. This acts as a natural conditioner and helps to balance the pH of your scalp.
  6. Adjust Ratios as Needed: You can tweak the ratios of baking soda and water depending on your hair type and preferences. Some may require a stronger solution, while others might need a more diluted one.

Benefits

Switching to baking soda and vinegar shampoo offers several advantages:

  1. Natural Cleansing: Baking soda effectively cleanses the hair and scalp, removing dirt and buildup without stripping natural oils.
  2. Balances Hair pH: Vinegar helps to balance the pH of your hair and scalp, promoting health and preventing irritation.
  3. Cost-Effective: This homemade shampoo is significantly more affordable than most commercial hair care products.
  4. Reduces Chemical Exposure: By avoiding commercial shampoos, you reduce your exposure to potentially harmful chemicals.
  5. Environmentally Friendly: This natural approach is better for the environment, as it reduces the use of plastic packaging and harmful chemicals.
  6. Customizable: You can adjust the ingredient ratios to suit your specific hair type and needs.
  7. Adds Shine: Vinegar rinses can add a natural shine to your hair.

TIP

It’s important to remember that everyone’s hair is different, and what works for one person may not work for another. Feel free to experiment with the ingredient ratios to find the perfect balance for your hair.

NOTE

Transitioning to baking soda and vinegar shampoo can take 2-4 weeks. During this period, your hair may feel different as it adjusts from the regular use of commercial shampoos. These products often strip the hair of its natural oils, so when you switch to this natural shampoo, your hair might initially feel thicker or oilier. This is a normal part of the adjustment process as your scalp learns to regulate its oil production naturally.

Conclusion

Embracing baking soda and vinegar as a natural hair care solution can be a rewarding and health-conscious choice. While the transition period may require some patience and experimentation, the long-term benefits of a more natural and balanced approach to hair care are substantial. This simple, eco-friendly method not only promotes healthier hair and scalp but also aligns with a sustainable lifestyle. Remember, every hair type is unique, so take the time to discover what works best for you and enjoy the journey to healthier, naturally cared-for hair.

Filed Under: Hair Care Tagged With: Baking Soda Shampoo, beauty tips, Chemical-Free Hair Care, DIY Shampoo, Eco-Friendly Shampoo, hair care, Hair pH Balance, Homemade Hair Solutions, Natural hair care, scalp health, sustainable hair care, Vinegar Hair Rinse

Homemade Foaming Castile Soap Shampoo: A Luxurious Lather for Your Hair

January 10, 2024 by sharvayonibeauty Leave a Comment

In the pursuit of a more natural and gentle approach to hair care, many are turning to homemade solutions. Among these, a homemade foaming Castile soap shampoo stands out for its impressive lather and simplicity. Ideal for those looking to steer clear of harsh chemicals and additives, this shampoo combines the natural cleansing properties of Castile soap with the nourishing benefits of light vegetable oils. This guide will walk you through the process of making your own foaming shampoo, ensuring a delightful and effective hair cleansing experience.

Things Needed

To create your foaming Castile soap shampoo, you’ll need a few key ingredients and tools:

  1. Liquid Castile Soap: Choose unscented or your favorite scent.
  2. Distilled Water: To avoid the minerals present in tap water.
  3. Light Vegetable Oil: Grapeseed or jojoba oil are excellent choices.
  4. Foaming Bottle or Flip Cap Bottle: For easy dispensing.
  5. Measuring Cup: For accurate ingredient proportions.
  6. Mixing Tool: A spoon or whisk for combining ingredients.

Steps to Prepare

The preparation of this shampoo is straightforward and enjoyable:

  1. Measure Ingredients: Pour ¼ cup of liquid Castile soap and ¼ cup of distilled water into a mixing bowl. Add ½ teaspoon of your chosen light vegetable oil. Grapeseed oil works well for normal to oily hair, while jojoba oil is better for dry or damaged hair.
  2. Mix Together: Whisk or stir the mixture thoroughly to ensure all components are well combined. The goal is to create a uniform mixture that will foam effectively.
  3. Transfer to Bottle: Carefully pour the mixture into a foaming bottle or a flip cap bottle. The type of bottle you choose can affect the lathering experience. A foaming bottle will produce a richer lather right away, while a flip cap bottle will require a bit more work in your hands to create lather.
  4. Shake Before Use: Always shake the bottle well before each use. This is important to recombine any ingredients that may have separated.
  5. Application Method: To apply, tilt the bottle slightly over your head and squeeze or pump the desired amount. The lather should be rich and luxurious, providing a thorough cleanse and enjoyable experience.

Benefits

The homemade foaming Castile soap shampoo offers several benefits:

  1. Impressive Lather: Despite being a natural product, this shampoo produces a rich lather, making it comparable to traditional shampoos in terms of user experience.
  2. Gentle Cleansing: Castile soap offers a gentle yet effective cleansing, making it suitable for various hair types and even sensitive scalps.
  3. Customizable: You can tailor the shampoo to your hair’s needs by choosing different scents of Castile soap and types of vegetable oils.
  4. Moisturizing Properties: The addition of light vegetable oils helps in moisturizing the hair, leaving it soft and manageable.
  5. Chemical-Free: This shampoo is free from sulfates, parabens, and other harsh chemicals found in many commercial shampoos.
  6. Eco-Friendly: Using natural ingredients and reusable bottles makes this shampoo an environmentally friendly choice.
  7. Cost-Effective: Homemade shampoos can be more economical in the long run compared to purchasing commercial products.
  8. Simple and Safe Ingredients: Knowing exactly what goes into your shampoo can be reassuring, especially for those with allergies or sensitivities.

Conclusion

Creating your own foaming Castile soap shampoo is a rewarding and straightforward process. This natural shampoo not only offers a luxurious lathering experience but also nurtures your hair with gentle, moisturizing ingredients. Personalize it to suit your hair type and enjoy the benefits of a chemical-free, eco-friendly hair care routine. As with any new hair care product, it’s advisable to do a patch test first to ensure compatibility with your skin. Embrace the simplicity and effectiveness of homemade shampoo, and enjoy the journey to healthier, happier hair.

Filed Under: Hair Care Tagged With: beauty tips, Customizable Shampoo, DIY Shampoo, Eco-Friendly Hair Products, Foaming Castile Soap, Gentle Hair Cleansing, hair care, Homemade Shampoo, Light Vegetable Oils, Moisturizing Shampoo, Natural hair care, Sulfate-Free Shampoo

Homemade Castile Soap Shampoo: A Natural Approach to Hair Care

January 9, 2024 by sharvayonibeauty Leave a Comment

In the quest for a more natural and gentle approach to hair care, homemade shampoos have gained popularity. Among these, Castile soap-based shampoos are celebrated for their simplicity and effectiveness. This article guides you through creating your own Castile soap shampoo, a blend that can be tailored to suit various hair types and preferences. It’s important to note that while this natural shampoo can work wonders for some, others might experience different results based on their hair type and the water quality in their area.

Things Needed

To prepare your homemade Castile soap shampoo, gather the following items:

  1. Liquid Castile Soap: A gentle, natural soap base.
  2. Water: Preferably distilled or filtered to avoid hard water minerals.
  3. Oil: Options include grapeseed, olive, or jojoba oil, depending on hair type.
  4. Mixing Bowl: For combining the ingredients.
  5. Whisk or Spoon: To mix the ingredients thoroughly.
  6. Plastic or Glass Bottle: For storing the shampoo.
  7. Measuring Cup and Spoons: For accurate measurements.

Steps to Prepare

Creating your Castile soap shampoo is straightforward:

  1. Measure the Ingredients: Use a measuring cup to measure ¼ cup of liquid Castile soap and ¼ cup of water. Measure ½ teaspoon of your chosen oil.
  2. Combine Ingredients: In the mixing bowl, combine the liquid Castile soap, water, and oil. Choose the oil based on your hair type – grapeseed oil is lightweight and suitable for oily hair, olive oil is great for dry hair, and jojoba oil is a versatile option for all hair types.
  3. Mix Well: Use a whisk or spoon to mix the ingredients until they are well combined.
  4. Transfer to Bottle: Pour the mixture into your chosen bottle. A bottle with a narrow opening or a pump dispenser can make application easier.
  5. Shake Before Use: Shake the bottle well before each use to ensure the ingredients are well mixed.

Benefits

Using a homemade Castile soap shampoo offers several advantages:

  1. Natural and Gentle: Castile soap is free from harsh chemicals, making it a gentle option for hair care.
  2. Customizable: You can tailor the shampoo to your hair type by choosing different oils.
  3. Moisturizing: The added oils help to moisturize the hair, leaving it soft and nourished.
  4. Eco-Friendly: This homemade shampoo is environmentally friendly, especially if you use organic and sustainably sourced ingredients.
  5. Cost-Effective: Making your own shampoo can be more economical than buying commercial products.
  6. Simple Ingredients: The shampoo contains only a few, easily recognizable ingredients, making it a great choice for those looking to avoid additives and preservatives.

NOTE

It’s crucial to remember that individual results can vary greatly when using this shampoo. Factors such as hair type, texture, color, and the hardness of the water can affect the shampoo’s effectiveness and the way it leaves your hair feeling. Some people may find that this shampoo leaves a film on their hair. This can often be mitigated by using a vinegar rinse (like apple cider vinegar diluted with water) after shampooing, which helps to remove buildup and balance the hair’s pH levels.

Conclusion

Homemade Castile soap shampoo offers a natural, customizable, and eco-friendly alternative to traditional hair care products. While it provides numerous benefits, it’s essential to consider your specific hair type and the quality of water you use to ensure the best results. Experimenting with different oils can help you find the perfect blend for your hair. As with any new hair care regimen, give your hair time to adjust and experiment to find the right balance for your needs. Embrace the simplicity and natural goodness of homemade Castile soap shampoo for a gentle and effective approach to hair care.

Filed Under: Hair Care Tagged With: beauty tips, Castile Soap, Customizable Hair Care, DIY Shampoo, Eco-Friendly Hair Care, Gentle Shampoo Recipe, hair care, Hair Type Adaptation, Homemade Shampoo, Moisturizing Shampoo, Natural hair care, Personalized Hair Solutions

Ginseng: The Chinese Herbal Powerhouse for Hair Regrowth and Strength

January 8, 2024 by sharvayonibeauty Leave a Comment

Ginseng, revered in traditional Chinese medicine for its extensive health benefits, has also carved its niche in the world of hair care. Known for its potent properties in combating hair loss and promoting hair regrowth, Ginseng stands as a natural remedy for those seeking a holistic approach to hair health. It not only nourishes the hair but also enhances its strength, making it a favored ingredient in many hair tonics and shampoos. This herb’s effectiveness in treating baldness and revitalizing hair has garnered attention globally, making it a sought-after solution for various hair concerns.

Things Needed

To create a Ginseng-infused hair treatment, you will need:

  1. Ginseng Root or Extract: Available in health stores or online.
  2. Carrier Oil: Such as coconut oil, jojoba oil, or olive oil for infusion.
  3. Glass Jar with a Tight Lid: For storing the oil infusion.
  4. Strainer or Cheesecloth: To filter out the Ginseng particles.
  5. Small Saucepan: For heating the oil.
  6. Dark, Cool Storage Space: To preserve the oil’s potency.
  7. Measuring Tools: Cups and spoons for accurate measurements.

Steps to Prepare

The preparation of a Ginseng hair treatment oil is straightforward:

  1. Prepare the Ginseng: If using fresh Ginseng root, chop it finely. If using Ginseng extract, measure out the appropriate amount (usually a few tablespoons).
  2. Heat the Carrier Oil: Gently heat your chosen carrier oil in a small saucepan, but avoid boiling it.
  3. Infuse the Ginseng: Add the Ginseng root or extract to the warm oil. Allow the mixture to simmer on low heat for about 30 to 60 minutes, facilitating the infusion of Ginseng’s nutrients into the oil.
  4. Cool and Strain: Let the mixture cool down, then strain it using a cheesecloth or strainer to remove all Ginseng residues.
  5. Store the Oil: Transfer the strained oil into a glass jar. Store it in a cool, dark place to maintain its efficacy.

Application

  • Apply to the Scalp: Use your fingertips or a dropper to apply the Ginseng-infused oil to your scalp, focusing on areas with thinning hair.
  • Massage Gently: Massaging the scalp for a few minutes increases blood circulation and promotes better absorption.
  • Leave it On: Allow the oil to work its magic for at least 30 minutes or overnight for a deeper treatment.
  • Rinse Off: Wash your hair with a gentle shampoo to remove the oil.

Benefits

Incorporating Ginseng into your hair care routine offers several benefits:

  1. Stimulates Hair Growth: Ginseng is known for its ability to promote hair growth by nourishing the hair follicles and scalp.
  2. Prevents Hair Loss: Its natural properties help in reducing hair loss, making it an effective remedy for baldness.
  3. Strengthens Hair: Ginseng boosts the strength of the hair, preventing breakage and thinning.
  4. Enhances Hair Health: Regular use of Ginseng oil can improve the overall health and texture of your hair.
  5. Nourishes the Scalp: Its nourishing properties ensure a healthy scalp, which is vital for healthy hair growth.
  6. Natural and Safe: Ginseng is a natural, chemical-free alternative to many commercial hair care products.
  7. Widely Used in Hair Products: Its popularity in hair tonics and shampoos underscores its effectiveness in hair care.

Conclusion

Ginseng, with its rich heritage in Chinese medicine, presents a natural, effective solution for hair regrowth, strength, and overall health. Its ability to nourish and invigorate the scalp and hair makes it a valuable addition to any hair care regimen. Whether struggling with hair loss, thinning, or simply seeking to enhance hair vitality, Ginseng offers a time-tested, holistic approach. As with any herbal treatment, it’s advisable to perform a patch test first and consult a healthcare provider for any underlying scalp or hair conditions. Embrace the ancient wisdom of Ginseng and experience a transformation in your hair’s health and appearance.

Filed Under: Hair Care Tagged With: beauty tips, Chinese Herbal Remedies, DIY Hair Care, Ginseng Benefits, Ginseng for Hair, hair care, Hair Regrowth, Hair Strengthening, Herbal Hair Tonics, Natural Hair Solutions, Natural Treatment for Baldness, Scalp Nourishment

Saw Palmetto and Stinging Nettle: A Potent Duo for Combating Baldness

January 7, 2024 by sharvayonibeauty Leave a Comment

Saw Palmetto, a small palm native to the southeastern United States, has long been recognized for its medicinal properties, particularly in treating baldness and hair loss. Its ability to inhibit the conversion of testosterone to dihydrotestosterone (DHT), a key factor in hair loss, makes it an invaluable resource in hair care. When combined with the hair-strengthening qualities of stinging nettle, this duo forms a powerful natural remedy for reducing hair thinning and receding hairlines, offering a beacon of hope for those grappling with hair loss.

Things Needed

To harness the benefits of Saw Palmetto and stinging nettle for hair health, you will need:

  1. Saw Palmetto Berries or Extract: Available in health stores or online.
  2. Dried Stinging Nettle Leaves: Can be purchased online or from herbal stores.
  3. Carrier Oil: Such as olive oil or coconut oil, to infuse the herbs.
  4. Glass Jar with a Tight Lid: For storing the oil infusion.
  5. Strainer or Cheesecloth: To filter the herbs from the oil.
  6. Small Saucepan: For heating the oil and herbs.
  7. Dark, Cool Storage Space: To store the infused oil.
  8. Measuring Cups and Spoons: For accurate measurements.

Steps to Prepare

Creating a Saw Palmetto and stinging nettle hair treatment involves a simple infusion process:

  1. Prepare the Herbs: Measure a cup of dried stinging nettle leaves and a similar amount of Saw Palmetto berries or a few spoons of its extract.
  2. Heat the Carrier Oil: In a small saucepan, heat the carrier oil without boiling it. Warm oil helps in extracting the active compounds from the herbs more effectively.
  3. Infuse the Herbs: Add the Saw Palmetto and stinging nettle to the warm oil. Let the mixture simmer on low heat for about an hour.
  4. Cool and Strain: After the infusion, let the oil cool down. Strain the oil using a cheesecloth or strainer to remove all the herbal residues.
  5. Store the Oil: Transfer the strained oil into a glass jar. Store it in a cool, dark place to maintain its potency.

Application

  • Apply to the Scalp: Use the fingertips or a dropper to apply the oil mixture to the scalp, especially focusing on the areas with thinning hair.
  • Gently Massage: Massage the scalp for several minutes to enhance blood circulation and promote absorption.
  • Leave it On: Allow the oil to sit for at least 30 minutes or overnight for a deeper treatment.
  • Rinse Off: Wash your hair with a mild shampoo to remove the oil.

Benefits

The combination of Saw Palmetto and stinging nettle offers a range of benefits for hair health:

  1. Inhibits DHT Production: Saw Palmetto is known for its ability to prevent the conversion of testosterone into DHT, the androgen responsible for male and female pattern baldness.
  2. Reduces Hair Thinning and Baldness: The duo works effectively in reducing hair thinning and receding hairlines, common signs of baldness.
  3. Strengthens Hair Follicles: Stinging nettle provides essential nutrients to the hair follicles, strengthening them and promoting healthier hair growth.
  4. Improves Scalp Health: Both herbs possess anti-inflammatory properties, which help in soothing the scalp and reducing issues like dandruff and scalp irritation.
  5. Natural and Safe: This herbal treatment is a natural alternative to chemical-based hair products and treatments, making it safer for long-term use.
  6. Enhances Hair Texture: Regular use of this oil infusion can improve the overall texture and health of the hair.

Conclusion

Saw Palmetto and stinging nettle together form a potent natural remedy for addressing the common concerns of hair thinning, baldness, and scalp health. This herbal combination offers a holistic approach to hair care, leveraging the power of nature to combat hair loss effectively. Incorporating this natural treatment into your hair care regimen can lead to significant improvements in hair density, strength, and overall health. As with any natural remedy, it’s advisable to conduct a patch test first to check for any allergic reactions and consult a healthcare provider for any underlying scalp or hair conditions. Embrace the herbal pathway to healthier, fuller hair with Saw Palmetto and stinging nettle.

Filed Under: Hair Care Tagged With: beauty tips, DHT Inhibition, DIY Hair Care, hair care, Hair Thinning Solutions, Herbal Hair Growth, Herbal Remedies for Baldness, Natural Hair Loss Treatment, Natural Scalp Treatment, Saw Palmetto for Hair, scalp health, Stinging Nettle Benefits

  • « Go to Previous Page
  • Page 1
  • Interim pages omitted …
  • Page 26
  • Page 27
  • Page 28
  • Page 29
  • Page 30
  • Interim pages omitted …
  • Page 56
  • Go to Next Page »

Primary Sidebar

Looking for something?

Connect with us online

  • Email
  • Facebook

Popular Posts!

Effective Home Remedies for Alopecia Areata (Puzhuvettu)

Get Glowing Skin with Carrots

Get rid of Dandruff by using aroma oil

Coconut Oil Hair Conditioner: Natural Nourishment for Your Tresses

Nourish and Hydrate: Moisturize Dry Skin with Essential Oils

Categories

  • Hair Care
  • Health and Wellness
  • Skin Care

Tags

beauty benefits beauty tips Chemical-Free Hair Care coconut oil curd curry leaves dark circles DIY Hair Care egg exfoliation eye care glowing skin hair care Hair Care Routine hair care tips hair growth Hair health Hair Health Improvement hair loss Hair Nourishment Hair Strengthening health and wellness honey hydration lemon lemon juice milk natural beauty natural conditioner natural face mask Natural hair care Natural Hair Growth Natural Hair Remedies natural ingredients natural remedies Natural remedy natural skincare olive oil radiant complexion radiant skin scalp health Scalp Nourishment skin care skincare skincare routine

© 2026 · Sharvayoni · Privacy Policy · Disclaimer