• Skip to main content
  • Skip to primary sidebar
  • HOME
  • SKIN CARE
  • HAIR CARE
  • HEALTH AND WELLNESS
  • CONTACT US

Sharvayoni

Unearth Nature's Magic - Your Path to Herbal Radiance and Wellnes

hair care

Burdock Root and Olive Oil: A Potent Blend for Hair Health

January 3, 2024 by sharvayonibeauty Leave a Comment

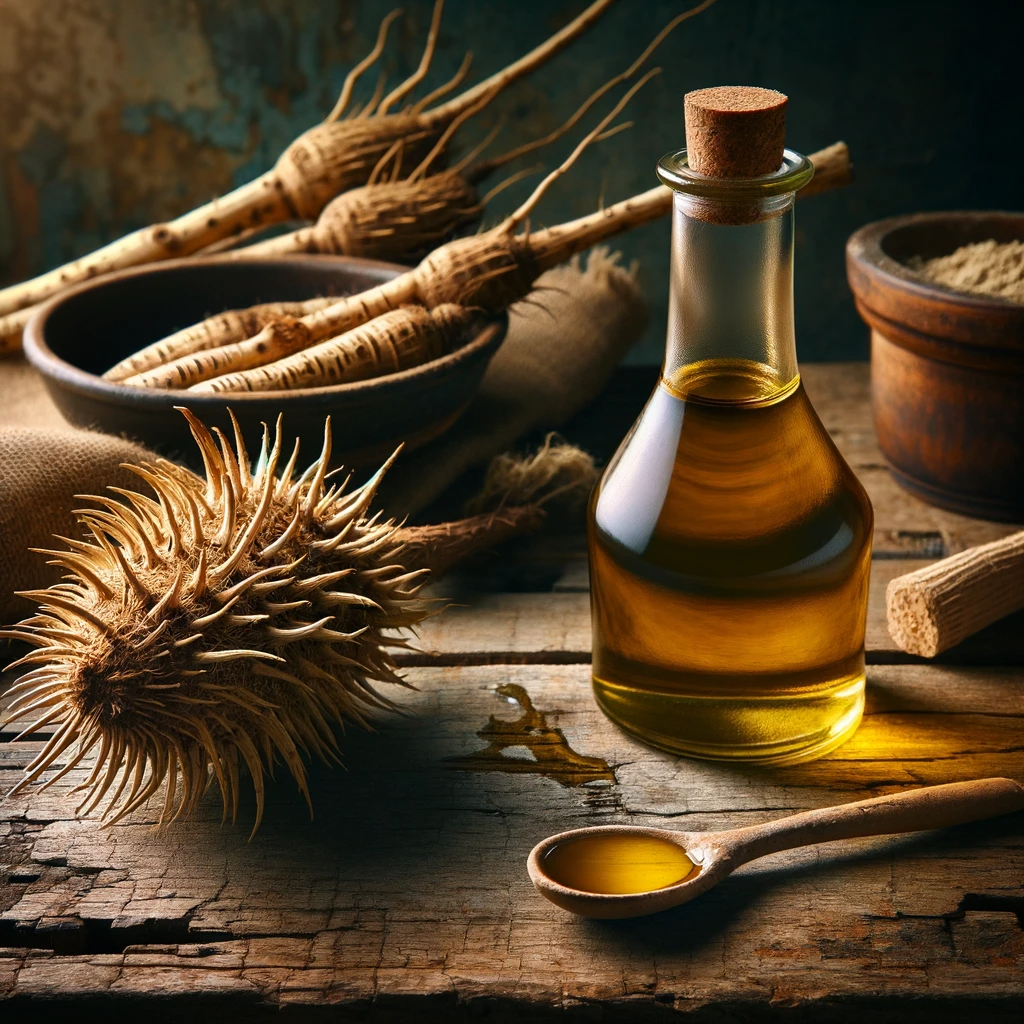
Burdock root, scientifically known as Arctium Lappa, has long been esteemed in herbal medicine for its myriad of health benefits, particularly for hair. This powerful herb is renowned for its ability to reduce hair loss and improve scalp health. When infused with olive oil, burdock root creates a potent mixture that enhances blood circulation in the scalp and nourishes hair follicles, making it an invaluable resource for those seeking to revitalize their hair.

Things Needed

To create a burdock root and olive oil hair treatment, you will need the following:

  1. Dried Burdock Root: Easily available in health food stores or online.
  2. Olive Oil: A natural oil that acts as a base for the infusion.
  3. Glass Jar with a Tight Lid: For storing and infusing the mixture.
  4. Strainer or Cheesecloth: To filter out the burdock root after infusion.
  5. Dark, Cool Storage Space: To preserve the potency of the oil.

Steps to Prepare

The process of preparing a burdock root and olive oil infusion is straightforward:

  1. Measure the Burdock Root: Take a few tablespoons of dried burdock root. The amount can be adjusted based on the quantity of oil you plan to make.
  2. Prepare the Olive Oil: Heat the olive oil slightly, but do not let it boil. Warm oil helps to extract the nutrients from the burdock root more effectively.
  3. Combine Ingredients: Place the dried burdock root in the glass jar, and pour the warm olive oil over it. Ensure that the root is completely submerged.
  4. Seal and Store the Jar: Tightly seal the jar and store it in a cool, dark place. This step is crucial to protect the oil from light and heat, which can degrade its quality.
  5. Let it Infuse: Allow the mixture to infuse for about three to four weeks. This duration lets the olive oil absorb the active compounds from the burdock root.
  6. Strain the Oil: After the infusion period, use a strainer or cheesecloth to filter out the burdock root, leaving the enriched oil.
  7. Store the Infused Oil: Transfer the strained oil into a clean bottle or jar for easy use.

Application

  • Apply to Scalp and Hair: Use your fingers or an applicator bottle to apply the oil to your scalp and hair. Focus on areas with thinning hair.
  • Massage Gently: Massage the oil into your scalp for several minutes to enhance blood flow and absorption.
  • Leave it On: For best results, leave the oil on your scalp for at least 30 minutes or overnight.
  • Rinse Out: Wash your hair with a gentle shampoo to remove the oil.

Benefits

The combination of burdock root and olive oil offers numerous benefits for hair health:

  1. Improves Scalp Circulation: Burdock root enhances blood flow to the scalp, supplying more nutrients and oxygen to the hair follicles.
  2. Reduces Hair Loss: The phytosterol compounds in burdock root help in reducing hair loss and promoting hair growth.
  3. Reverses Hair Thinning: High levels of fatty acids in burdock root are effective in reversing hair thinning and strengthening hair strands.
  4. Nourishes Hair Follicles: Regular use of burdock-infused oil provides deep nourishment to the hair follicles, promoting healthier hair growth.
  5. Balances Scalp Health: The anti-inflammatory properties of burdock root help in maintaining a healthy scalp, reducing issues like dandruff and itchiness.
  6. Natural and Chemical-Free: This herbal remedy is a safe and natural alternative to chemical-laden hair products.
  7. Adds Shine and Softness: Olive oil in the mixture leaves hair soft, shiny, and manageable.

Conclusion

Burdock root and olive oil together create a powerful natural remedy for enhancing hair health. This easy-to-make, cost-effective solution addresses common hair concerns like hair loss, thinning, and poor scalp circulation. Incorporating this treatment into your regular hair care routine can lead to visible improvements in hair texture, strength, and overall health. Always remember to do a patch test first and consult a healthcare provider for any underlying scalp or hair conditions. Embrace the power of nature with burdock root and olive oil for a transformative hair care experience.

Filed Under: Hair Care Tagged With: beauty tips, Burdock Root for Hair, DIY Hair Oil, hair care, Hair Follicle Nourishment, healthy hair growth, Herbal Remedies for Hair Loss, Natural Hair Care Solutions, Olive Oil Hair Treatment, Phytosterol Benefits, Reducing Hair Thinning, Scalp Circulation Improvement

Aloe Vera and Coconut Milk: A Natural Duo for Hair Revitalization

January 2, 2024 by sharvayonibeauty Leave a Comment

In the realm of natural hair care, Aloe Vera stands as a beacon of hope for those struggling with hair loss and scalp health issues. Known for its soothing properties and rich nutritional content, Aloe Vera has been used for centuries in various cultures for promoting hair health. When combined with coconut milk, known for its hydrating and strengthening qualities, it forms a powerful duo that not only stimulates hair growth but also maintains the overall health of the scalp and hair.

Things Needed

To harness the benefits of Aloe Vera and coconut milk for your hair, you need:

  1. Fresh Aloe Vera Gel: Extracted from the leaves of the Aloe Vera plant.
  2. Coconut Milk: Can be homemade or purchased, but ensure it’s pure and free from additives.
  3. Mixing Bowl: For blending the ingredients.
  4. Spoon or Whisk: To mix the ingredients thoroughly.
  5. Strainer: If using homemade coconut milk, to remove any chunks.
  6. Application Brush or Bottle: For easy application to the scalp and hair.
  7. Shower Cap or Towel: To cover hair during the treatment.

Steps to Prepare

Creating an Aloe Vera and coconut milk hair treatment is simple:

  1. Extract Aloe Vera Gel: Slice an Aloe Vera leaf and scoop out the gel with a spoon. For one application, about two tablespoons of gel should suffice.
  2. Prepare Coconut Milk: If you’re using homemade coconut milk, blend coconut flesh with water and strain. For the hair mask, you need about half a cup.
  3. Blend the Ingredients: In a mixing bowl, combine the Aloe Vera gel with the coconut milk. Stir or whisk until you achieve a smooth, creamy consistency.
  4. Optional Additions: For extra nourishment, you can add a few drops of essential oils like lavender or rosemary.
  5. Store the Mixture: If not using immediately, store the mixture in the refrigerator in an airtight container for up to a week.

Application

  • Apply to Scalp and Hair: Use the application brush or your fingers to apply the mixture to your scalp and hair. Ensure that the scalp is thoroughly covered.
  • Massage Gently: Massage the mixture into your scalp for a few minutes to enhance blood circulation.
  • Cover Your Hair: Use a shower cap or a warm towel to cover your hair. This traps heat, aiding the penetration of the nutrients.
  • Leave it On: Let the treatment sit for at least 30 minutes or up to an hour for deep conditioning.
  • Rinse Thoroughly: Wash your hair with a mild shampoo and follow with a conditioner, if desired.

Benefits

The combination of Aloe Vera and coconut milk offers a multitude of benefits for hair health:

  1. Promotes Hair Growth: Aloe Vera improves blood circulation to the scalp, which stimulates the growth of new hair follicles.
  2. Balances pH Levels: The natural pH of Aloe Vera helps maintain the pH balance of the hair and scalp, creating a healthy environment for hair growth.
  3. Opens Blocked Pores: Aloe Vera effectively cleanses the scalp, opening up blocked pores and allowing hair follicles to breathe.
  4. Strengthens Hair: Coconut milk is rich in vitamins and fatty acids that strengthen the hair from the roots, reducing breakage and hair loss.
  5. Deeply Moisturizes: Both Aloe Vera and coconut milk are excellent natural moisturizers, keeping the hair hydrated and preventing dryness and frizz.
  6. Soothes the Scalp: The cooling effect of Aloe Vera soothes irritation and itchiness on the scalp, making it ideal for sensitive or inflamed scalps.
  7. Natural and Safe: This combination is free from harsh chemicals, making it safe for all hair types and frequent use.
  8. Adds Shine and Softness: Regular use leaves hair soft, shiny, and manageable.

Conclusion

The natural synergy of Aloe Vera and coconut milk creates a potent remedy for those seeking to improve their hair health naturally. This easy-to-make, cost-effective solution addresses a range of hair issues from hair loss to scalp health, offering a holistic approach to hair care. Incorporating this treatment into your regular hair care routine can lead to visibly healthier, stronger, and more vibrant hair. As with any natural remedy, it’s advisable to do a patch test first and consult a healthcare provider for any underlying scalp or hair conditions. Embrace the power of nature with Aloe Vera and coconut milk for a transformative hair care experience.

Filed Under: Hair Care Tagged With: Aloe Vera for Hair, beauty tips, Coconut Milk Hair Treatment, DIY Hair Remedies, hair care, Hair pH Balance, Herbal Hair Care, Moisturizing Hair Treatments, Natural Hair Growth, Preventing Hair Loss, Scalp Nourishment, Soothing Scalp Care

Peppermint Oil: A Natural Boost for Healthy Hair Growth

January 1, 2024 by sharvayonibeauty Leave a Comment

Peppermint oil, renowned for its refreshing scent and cooling sensation, has been an integral part of herbal remedies for centuries. Beyond its invigorating aroma, peppermint oil is highly valued in the realm of hair care. Its stimulating properties not only soothe the scalp but also significantly improve hair growth. This natural oil has emerged as a popular solution for those seeking to combat hair loss and enhance the health and vitality of their hair.

Things Needed

Creating a peppermint oil treatment for hair growth requires a few basic items:

  1. High-Quality Peppermint Oil: Ensure it’s pure and free from additives.
  2. Carrier Oil: Such as jojoba oil, coconut oil, or olive oil, to dilute the peppermint oil.
  3. Glass Dropper Bottle: For easy application and storage.
  4. Mixing Bowl and Spoon: To blend the oils.
  5. Dark, Cool Storage Space: To preserve the quality of the oil.

Steps to Prepare

Preparing a peppermint oil hair treatment is simple and can be done at home:

  1. Select a Carrier Oil: Carrier oils are essential to dilute the peppermint oil, making it safe for scalp application. Choose an oil that suits your hair type; for instance, coconut oil is great for dry hair, while jojoba oil works well for oily hair.
  2. Mix the Oils: In a mixing bowl, combine a few drops of peppermint oil with about a tablespoon of your chosen carrier oil. The general rule is to use a 2-5% peppermint oil concentration, which translates to 2-5 drops of peppermint oil per teaspoon of carrier oil.
  3. Transfer to a Bottle: Pour the mixture into a glass dropper bottle for easy and precise application.
  4. Shake Well Before Use: Ensure to shake the bottle before each use to mix the oils thoroughly.

Application

  • Apply to Scalp: Using the dropper, apply the oil mixture directly onto your scalp, especially focusing on areas with thinning hair.
  • Massage Gently: Use your fingertips to massage the oil into the scalp. This stimulates blood flow and encourages hair growth.
  • Leave it On: Allow the oil to sit on your scalp for at least 30 minutes or overnight for deeper penetration.
  • Rinse Thoroughly: Wash your hair with a gentle shampoo to remove the oil.

Benefits

Peppermint oil’s benefits for hair are numerous and well-documented:

  1. Stimulates Hair Follicles: The menthol in peppermint oil is a natural vasodilator, which means it improves blood flow. Increased circulation to the scalp ensures better oxygen and nutrient delivery, vital for healthy hair growth.
  2. Prevents Hair Loss: Regular application strengthens hair roots and promotes a healthy scalp environment, reducing hair fall.
  3. Soothing Scalp Treatment: The cooling effect of peppermint oil soothes itchiness and irritation, making it excellent for dealing with dry and flaky scalps.
  4. Enhances Hair Growth: Studies have shown that peppermint oil can promote hair growth more effectively than minoxidil, a common hair growth treatment.
  5. Natural and Safe: As a natural product, peppermint oil is a safer alternative to chemical hair treatments, especially when properly diluted with a carrier oil.
  6. Improves Hair Health: Apart from boosting growth, it adds a fresh scent and leaves hair feeling refreshed and revitalized.

Conclusion

Peppermint oil is a versatile and powerful natural remedy for enhancing hair health and promoting growth. Its stimulating properties not only invigorate the scalp but also contribute to stronger, healthier hair. By incorporating this simple yet effective treatment into your hair care routine, you can experience the myriad benefits of this age-old herbal remedy. Remember to perform a patch test before full application to ensure you have no allergies, and consult a healthcare provider for any underlying scalp or hair conditions. Embrace the cooling, refreshing path to healthier hair with peppermint oil!

Filed Under: Hair Care Tagged With: beauty tips, DIY Hair Care, hair care, Hair Follicle Stimulation, Hair Growth Solutions, Herbal Remedies, Natural Hair Growth, Natural Hair Treatments, Peppermint Oil for Hair, Preventing Hair Loss, scalp health, Soothing Scalp Treatment

Rosemary and Olive Oil: A Timeless Remedy for Luscious Hair

December 31, 2023 by sharvayonibeauty Leave a Comment

In the realm of natural hair care, rosemary stands out as a historical and effective solution for various hair concerns. Revered for centuries, this aromatic herb is not just a culinary staple but a powerful tool against hair loss, thinning, and balding. When paired with the nourishing goodness of olive oil, rosemary transforms into a potent elixir that promotes scalp health and hair growth. This combination has been a secret to maintaining healthy, vibrant hair for generations.

Things Needed

To create this age-old hair remedy, you need a few simple ingredients:

  1. Fresh or Dried Rosemary Leaves: Known for their hair rejuvenating properties.
  2. Olive Oil: Acts as a carrier oil, rich in antioxidants and hydrating properties.
  3. Glass Jar with a Tight Lid: Essential for infusing the oil.
  4. Strainer or Cheesecloth: For separating the infused oil from the leaves.
  5. Dark, Cool Storage Space: To store the oil while it infuses and after preparation.

Steps to Prepare

Creating your rosemary-infused olive oil is a straightforward process:

  1. Gather Rosemary: You can use either fresh or dried rosemary leaves. Fresh rosemary is more potent but dried rosemary is easier to source and store.
  2. Prepare the Jar: Fill your glass jar with rosemary leaves. There’s no strict measurement, but ensure there’s ample room for olive oil.
  3. Add Olive Oil: Pour olive oil into the jar, covering the rosemary leaves completely. Olive oil not only extracts the beneficial properties of rosemary but also nourishes the hair and scalp on its own.
  4. Seal and Store the Jar: Securely close the jar and store it in a dark, cool place. This protects the oil from light and heat, which can degrade its quality.
  5. Wait and Shake: Let the mixture sit for at least two to three weeks, shaking it occasionally to help the infusion process.
  6. Strain the Oil: After the infusion period, strain the oil using a strainer or cheesecloth to remove all plant material.
  7. Store the Infused Oil: Transfer the oil into a clean bottle or container for easy use.

Application

  • Direct Scalp Massage: Apply the oil directly to your scalp, massaging it in to stimulate circulation. This helps the nutrients penetrate deep into the hair follicles.
  • Regular Use: Consistent application is key. Use it at least once a week for noticeable results.

Benefits

The combination of rosemary and olive oil offers numerous benefits for hair health:

  1. Promotes Hair Growth: Rosemary improves blood circulation to the scalp, encouraging hair growth and revitalizing hair follicles.
  2. Prevents Hair Thinning and Balding: Regular use strengthens hair from the roots, reducing hair fall and thinning.
  3. Delays Premature Graying: The antioxidant properties of rosemary help in preserving the natural color of your hair, delaying the onset of grays.
  4. Treats Scalp Issues: It’s effective against dry, flaky scalp conditions, providing essential moisture and nutrients.
  5. Strengthens Hair: Rosemary and olive oil together nourish and fortify hair right from the shaft, resulting in stronger, healthier hair.
  6. Safe and Natural: Being an all-natural remedy, it’s a safer alternative to chemical treatments, suitable for all hair types.

Conclusion

The rosemary and olive oil remedy is a testament to the enduring power of natural ingredients in hair care. This easy-to-make, cost-effective solution not only combats common hair issues but also nurtures your hair, leaving it strong, healthy, and vibrant. Embrace this timeless natural remedy and witness the transformation in your hair’s health and appearance. As always, it’s advisable to do a patch test to ensure you have no allergies to the ingredients and consult a healthcare provider for any underlying scalp conditions. Let nature’s magic work wonders on your hair with rosemary and olive oil.

Filed Under: Hair Care Tagged With: beauty tips, DIY Hair Oil, hair care, Hair Growth Remedies, Hair Loss Solutions, Herbal Hair Care, Natural hair care, Olive Oil for Hair, Preventing Graying Hair, Rosemary Hair Treatment, scalp health, Stronger Hair

Harnessing the Power of Stinging Nettle for Hair Growth

December 31, 2023 by sharvayonibeauty Leave a Comment

In the quest for natural remedies for hair growth and hair loss prevention, one often overlooks the treasures hidden in nature. Among these, the stinging nettle, scientifically known as Urtica Diocia, emerges as a potent solution. This plant, commonly found in North America, has been a part of traditional medicine for centuries, revered for its numerous health benefits. Notably, its efficacy in promoting hair growth and preventing hair loss has garnered significant attention in recent times.

Things Needed

To harness the benefits of stinging nettle for hair growth, a simple set of ingredients and tools are required:

  1. Stinging Nettle Leaves: Fresh or dried, these are the primary ingredient.
  2. Olive Oil: Acts as a carrier oil, facilitating the infusion of stinging nettle benefits.
  3. Glass Jar with a Tight Lid: Essential for the infusion process.
  4. Cool, Dark Place: For storing the mixture, such as a cupboard or pantry.
  5. Strainer or Cheesecloth: For separating the oil from the leaves after infusion.

Steps to Prepare

Creating your stinging nettle hair growth oil involves a straightforward infusion process. Here’s how you can do it:

  1. Collect Stinging Nettle Leaves: If using fresh leaves, ensure they are clean and dry. Dried leaves are also an excellent option.
  2. Prepare the Jar: Fill the glass jar with the stinging nettle leaves. The quantity doesn’t have to be exact, but ensure there’s enough room left for the olive oil.
  3. Add Olive Oil: Pour olive oil into the jar, completely submerging the stinging nettle leaves. This oil serves as the base for the infusion, extracting the nutrients from the leaves.
  4. Seal and Store the Jar: Tightly seal the jar to prevent any contaminants from entering. Place it in a cool, dark place, away from direct sunlight. This is crucial as light and heat can degrade the quality of the oil.
  5. Wait for Three Weeks: Patience is key. Allow the mixture to infuse for about three weeks. During this time, the olive oil will slowly absorb the essence and nutrients of the stinging nettle leaves.
  6. Strain the Oil: After three weeks, use a strainer or cheesecloth to separate the oil from the leaves. Ensure all plant matter is removed to avoid any scalp irritation.
  7. Store the Infused Oil: Transfer the strained oil into a clean bottle or jar for easy application.

Application

  • Direct Application: Apply the oil directly to the scalp and hair. Massage gently to ensure the scalp is well-coated. This stimulates blood flow and aids in the absorption of the oil’s nutrients.
  • Regular Use: For best results, use the oil regularly. Consistency is key in witnessing visible improvements in hair growth and quality.

Benefits

The use of stinging nettle for hair growth is backed by its rich nutritional profile and specific mechanisms:

  1. Rich in Nutrients: Stinging nettle is packed with vitamins A, C, K, and several B vitamins, along with minerals like iron, magnesium, and omega-3 fatty acids. These nutrients are essential for healthy hair growth.
  2. DHT Blocker: One of the primary causes of hair loss, especially in men, is the conversion of testosterone into dihydrotestosterone (DHT). Stinging nettle helps in preventing this conversion, effectively reducing hair loss.
  3. Scalp Health: The anti-inflammatory and antimicrobial properties of stinging nettle help in maintaining scalp health, reducing issues like dandruff and scalp irritation.
  4. Natural Conditioner: When used regularly, stinging nettle oil can impart a natural shine and softness to the hair, acting as a conditioner.
  5. Stimulates Hair Follicles: The oil’s nutrients and its massaging application stimulate hair follicles, promoting healthier and faster hair growth.
  6. Safe and Natural: Being a natural remedy, stinging nettle oil is generally safe for most people and is a great alternative to chemical-laden hair care products.

Conclusion

Stinging nettle, with its rich composition and hair growth-promoting properties, is a remarkable natural remedy for those struggling with hair loss and seeking healthier hair. By following the simple steps of infusing stinging nettle in olive oil, you can create a potent hair growth elixir. Regular use of this homemade oil can lead to visible improvements, making your hair journey both natural and effective. As with any natural remedy, it’s always advisable to conduct a patch test to rule out any allergic reactions and consult a healthcare provider if you have any underlying health conditions. Embrace the power of nature with stinging nettle, and let your hair flourish.

Filed Under: Hair Care Tagged With: beauty tips, DIY Hair Oil, hair care, hair growth, Hair Loss Prevention, Herbal Hair Care, natural remedies, Nutrient-Rich Hair Treatment, Olive Oil for Hair, scalp health, Stinging Nettle, Urtica Diocia

  • « Go to Previous Page
  • Page 1
  • Interim pages omitted …
  • Page 28
  • Page 29
  • Page 30
  • Page 31
  • Page 32
  • Interim pages omitted …
  • Page 56
  • Go to Next Page »

Primary Sidebar

Looking for something?

Connect with us online

  • Email
  • Facebook

Popular Posts!

Natural remedy for ringworm

How To Remove Unwanted Facial Hair Naturally

Revitalize Your Skin Naturally: The Tomato and Honey Anti-Wrinkle Remedy

Jojoba Oil Hair Serum: A Simple Solution for Frizz-Free Hair

Aloe Vera and Honey: A Natural Solution for Youthful Skin

Categories

  • Hair Care
  • Health and Wellness
  • Skin Care

Tags

beauty benefits beauty tips Chemical-Free Hair Care coconut oil curd curry leaves dark circles DIY Hair Care egg exfoliation eye care glowing skin hair care Hair Care Routine hair care tips hair growth Hair health Hair Health Improvement hair loss Hair Nourishment Hair Strengthening health and wellness honey hydration lemon lemon juice milk natural beauty natural conditioner natural face mask Natural hair care Natural Hair Growth Natural Hair Remedies natural ingredients natural remedies Natural remedy natural skincare olive oil radiant complexion radiant skin scalp health Scalp Nourishment skin care skincare skincare routine

© 2026 · Sharvayoni · Privacy Policy · Disclaimer