• Skip to main content
  • Skip to primary sidebar
  • HOME
  • SKIN CARE
  • HAIR CARE
  • HEALTH AND WELLNESS
  • CONTACT US

Sharvayoni

Unearth Nature's Magic - Your Path to Herbal Radiance and Wellnes

skin care

The Power of Honey and Cinnamon: An Effective Face Scrub for Radiant Skin

June 30, 2023 by sharvayonibeauty Leave a Comment

When it comes to skincare, natural ingredients can work wonders. One such powerful combination is honey and cinnamon. Not only are they known for their weight loss benefits, but they also offer remarkable advantages for the skin. This homemade face scrub can help remove impurities, bacteria, and dead cells from the face, making it an excellent solution for combating pimples and achieving a radiant complexion. In this article, we will explore the incredible benefits of honey and cinnamon for the skin and provide you with a step-by-step guide on how to make and use this rejuvenating face scrub.

The Honey and Cinnamon Face Scrub Recipe

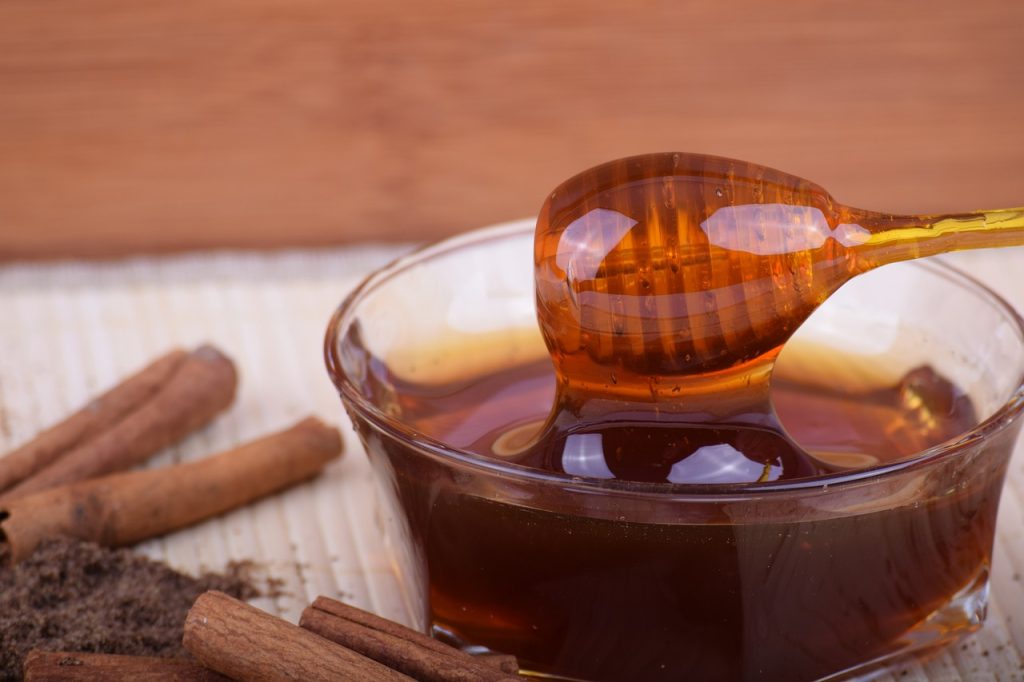
To create this face scrub, you will need the following ingredients:

  • 1 teaspoon of cinnamon
  • 1 tablespoon of honey

Step 1: Mixing the Ingredients

Begin by preparing a small bowl to mix the ingredients. Add one teaspoon of cinnamon and one tablespoon of honey to the bowl. It is essential to use high-quality, organic honey and pure cinnamon powder for the best results. Mix the two ingredients thoroughly until they form a smooth paste. The consistency of the paste may vary depending on the density of the honey used. If you prefer a thicker paste, you can add a bit more cinnamon.

Step 2: Applying the Scrub

Before applying the scrub, cleanse your face thoroughly with a gentle cleanser. This step ensures that your skin is free from any dirt or impurities, allowing the scrub to work more effectively. Once your face is clean, take a small amount of the honey and cinnamon paste and gently apply it to your face using circular motions. Be sure to avoid the delicate areas around your eyes.

Step 3: Massaging and Resting

Once you have applied the scrub, it’s time to massage it into your skin. Using your fingertips, gently massage the mixture into your face in circular motions for about 2-3 minutes. This massaging action helps exfoliate the skin, removing dead cells and promoting blood circulation.

After massaging, let the scrub sit on your face for approximately 30 minutes. This allows the beneficial properties of honey and cinnamon to penetrate the skin and work their magic. During this time, you may feel a slight warming or tingling sensation, which is normal and indicates that the ingredients are working.

Step 4: Rinsing and Moisturizing

Once the 30 minutes have passed, it’s time to rinse off the scrub. Use lukewarm water to gently wash away the mixture from your face. Ensure that all traces of the scrub are removed, and pat your face dry with a clean towel. You will immediately notice the difference in your skin’s texture and appearance.

To complete the skincare routine, apply a moisturizer suitable for your skin type. Moisturizing is crucial to maintain the skin’s hydration and lock in the benefits of the scrub. Choose a moisturizer that is lightweight, non-comedogenic, and preferably enriched with natural ingredients.

The Benefits of Honey and Cinnamon for Your Skin

  1. Pimple Treatment: Both honey and cinnamon possess antibacterial properties that can effectively combat pimples. Honey helps reduce inflammation and soothes the skin, while cinnamon fights against bacteria, preventing breakouts and reducing the appearance of existing pimples.
  2. Dark Spot and Scar Removal: The combination of honey and cinnamon can also help fade dark spots and scars, giving your skin a more even tone and texture. Over time, consistent use of this face scrub can visibly reduce the appearance of post-acne marks and other blemishes.
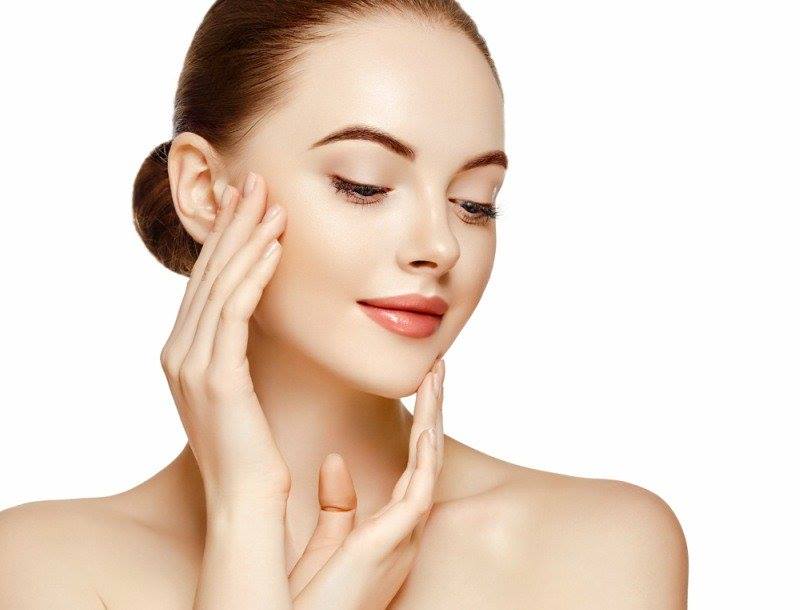
  3. Skin Brightening: Honey is known for its natural bleaching properties, which can help brighten the complexion. Regular use of this face scrub can result in a radiant and glowing skin tone.
  4. Exfoliation and Blood Circulation: The gentle exfoliating action of this scrub helps remove dead skin cells, allowing new and healthy skin cells to emerge. Moreover, the massaging motion improves blood circulation, promoting a youthful and vibrant appearance.

Conclusion

Harnessing the power of natural ingredients like honey and cinnamon can revolutionize your skincare routine. This homemade face scrub offers an effective solution for combating pimples, removing impurities, and achieving radiant and glowing skin. By incorporating this simple yet potent recipe into your skincare regimen, you can experience the remarkable benefits of honey and cinnamon firsthand. So, why not give it a try? Your skin will thank you for it!

Filed Under: Skin Care Tagged With: beauty tips, benefits of honey and cinnamon for skin, combat pimples, homemade face scrub, honey and cinnamon face scrub, natural skincare, radiant skin, remove impurities, skin care

Natural Facial Scrub with Honey, Green Tea, and Sugar for Glowing Skin

June 29, 2023 by sharvayonibeauty Leave a Comment

When it comes to skincare, many of us are constantly on the lookout for natural and effective solutions. One such solution that has gained popularity is a homemade facial scrub using honey, green tea, and sugar. This simple yet powerful combination can work wonders for your skin, providing exfoliation, hydration, and a boost of antioxidants. In this post, we will explore the benefits of each ingredient and learn how to create this rejuvenating facial scrub at home.

The Ingredients and Their Benefits

  1. Green Tea:
    • Green tea is not only a popular beverage, but it also offers numerous benefits for the skin. It is rich in antioxidants, particularly catechins, which help combat free radicals and reduce inflammation.
    • Green tea is known for its anti-aging properties, as it promotes collagen production and helps maintain the skin’s elasticity. Additionally, it possesses antimicrobial properties that can help fight acne-causing bacteria.
  2. Honey:
    • Honey has been used for centuries in skincare due to its natural healing and moisturizing properties. It acts as a humectant, drawing moisture to the skin and keeping it hydrated.
    • Honey is also known for its antibacterial and antifungal properties, making it an excellent ingredient for natural skin disinfection. It can help soothe and calm irritated skin, reduce inflammation, and promote the healing of wounds.
  3. Sugar:
    • Sugar serves as a natural exfoliant in this facial scrub, helping to remove dead skin cells and reveal a smoother complexion. The granules gently slough off the top layer of dead skin, allowing for better absorption of skincare products and promoting cell turnover.
    • Sugar is also a natural source of glycolic acid, which can enhance skin radiance and improve overall skin texture.

Creating Your Homemade Facial Scrub

To make this invigorating facial scrub, follow these simple steps:

  1. Prepare the Green Tea:
    • Begin by brewing a cup of green tea and allowing it to cool completely. You can do this by steeping a green tea bag in hot water for a few minutes, then refrigerating it until it reaches room temperature.
  2. Mix the Ingredients:
    • In a bowl, combine one tablespoon of cooled green tea with one tablespoon of honey and one tablespoon of sugar.
    • Mix well until you achieve a thick consistency.
    • The amount of sugar can be adjusted to your preference, depending on how thick you want the mixture to be.
  3. Cleanse Your Face:
    • Before applying the scrub, cleanse your face with a gentle cleanser to remove any dirt or impurities.
  4. Apply and Massage:
    • Apply the scrub to your damp face and gently massage it in a circular motion.
    • Focus on areas that need extra exfoliation, such as the T-zone or areas with rough skin texture.
    • Be careful around the delicate eye area.
  5. Rinse and Moisturize:
    • After massaging for a few minutes, rinse off the scrub with lukewarm water. Pat your face dry and follow up with a moisturizer to lock in hydration.

The Benefits of the Honey, Green Tea, and Sugar Facial Scrub

  1. Exfoliation:
    • The sugar in this facial scrub acts as a natural exfoliant, sloughing off dead skin cells and revealing a brighter complexion.
    • Regular exfoliation can improve skin texture, promote cell turnover, and enhance the effectiveness of other skincare products.
  2. Hydration:
    • Honey is a natural humectant, attracting and retaining moisture in the skin. It helps to keep the skin hydrated, nourished, and supple.
  3. Antioxidant Boost:
    • Green tea is packed with antioxidants that help protect the skin from free radicals, which can cause premature aging and damage.
    • Regular use of green tea can help fight signs of aging, reduce inflammation, and promote a youthful glow.
  4. Acne-Fighting Properties:
    • Both green tea and honey have antimicrobial properties that can help combat bacteria and fungi, making this facial scrub a natural choice for acne-prone skin.
    • Green tea’s anti-inflammatory properties can also soothe redness and irritation.

Storage and Shelf Life

Since honey acts as a natural preservative, you can store any excess scrub mixture in a sealed container in the refrigerator for several weeks. This way, you can prepare a larger batch and use it as needed without worrying about spoilage. However, it’s important to check for any signs of spoilage, such as changes in color, texture, or smell, before each use.

Conclusion

Incorporating natural ingredients into your skincare routine can bring about remarkable benefits, and the honey, green tea, and sugar facial scrub is a perfect example. By harnessing the power of green tea’s antioxidants, honey’s disinfecting properties, and sugar’s exfoliating abilities, you can enjoy a revitalizing and rejuvenating skincare experience. So why not give this homemade facial scrub a try? Your skin will thank you for it.

Filed Under: Skin Care Tagged With: antioxidants, Bacteria-fighting, beauty tips, DIY recipe, exfoliation, Facial scrub, glowing skin, green tea, Homemade scrub, honey, natural skincare, Rejuvenation, skin care, sugar

The Blissful Retreat: Creating Your Own Soaking Bath Salts

June 27, 2023 by sharvayonibeauty Leave a Comment

Indulging in a luxurious bath is a cherished ritual for many. It’s a time to relax, unwind, and rejuvenate both the body and mind. One way to enhance this tranquil experience is by using soaking bath salts. While there are numerous options available in the market, creating your own bath salts allows you to customize the ingredients and scents according to your preferences. In this post, we will guide you through a simple and delightful recipe for homemade soaking bath salts, turning your bath time into a blissful retreat.

Gathering the Ingredients

Before we dive into the recipe, let’s gather the ingredients you’ll need. The star ingredient is Epsom salt, renowned for its therapeutic properties. You can easily find Epsom salt in your local store or order it online. Additionally, you’ll need a .5-ounce bottle of your preferred skin-friendly oil, commonly found in candle stores, bath shops, or craft markets. To add a delightful aroma and visual appeal, consider incorporating dried flowers of your choice. Lastly, if you desire extra nourishment for your skin, dried milk can be a wonderful addition to your blend.

Step 1: Mixing the Salts

Begin by combining a bottle of Epsom salts with the .5-ounce of skin-friendly oil. You can use a deep ceramic roasting pan to ensure thorough mixing. Gently stir the mixture until the oil is evenly distributed among the salts. This will infuse the salts with the aromatic and moisturizing properties of the oil, making your bath experience even more delightful.

Step 2: Incorporating Dried Flowers

To elevate the visual appeal and add a touch of nature’s beauty to your bath salts, consider including dried flowers. Take the dried flowers of your choice, ensuring they are free from any mold or mildew. If necessary, you can gently dry them in a warm oven. For a soothing and aromatic blend, whole herbs, roses, and carnations work exceptionally well. Remove the stems and petals from the flowers, and if you’re using roses, remember to include the rosehips as well. As you mix the dried flowers with the salts, they will impart their subtle fragrance and create a visually pleasing bath experience.

Step 3: Optional Addition of Dried Milk

For an extra touch of luxury and skin-nourishing properties, you can incorporate dried milk into your bath salt blend. Dried milk has long been known for its soothing effects on the skin. It will leave your skin feeling soft, supple, and moisturized after your bath. Gently mix the dried milk with the salts and flowers, ensuring an even distribution of all the ingredients.

Step 4: Packaging and Storage

Once you have thoroughly mixed all the ingredients, allow the bath salts to dry for several hours before packaging them. Quarter glass bottles are an ideal option for storing the bath salts, as they are convenient to use and display. The attractive combination of colors and textures will make these bottles a beautiful addition to your bathroom decor.

Creating a Relaxing Ambiance

To fully immerse yourself in the tranquil ambiance of your bath time retreat, it’s essential to set the mood. Dim the lights and opt for the soft glow of candles. Choose your favorite calming scents, such as lavender, chamomile, or jasmine, and light scented candles throughout your bathroom. The flickering candlelight and soothing aromas will create an atmosphere of serenity, enhancing the overall experience.

Conclusion

By following this simple recipe, you can create your own personalized soaking bath salts, tailored to your preferences and needs. These homemade bath salts offer a multitude of benefits, from relaxation to nourishment for your skin. Allow yourself the luxury of a blissful retreat in your own bathroom, where you can unwind, rejuvenate, and indulge in the soothing and aromatic experience of a homemade bath. Treat yourself to a little self-care and create your own oasis of tranquility with these delightful soaking bath salts.

Filed Under: Skin Care Tagged With: bath salt, bath time ritual, beauty tips, DIY bath salts, dried flowers, epsom salt, homemade bath salts, homemade beauty products, relaxation, self-care, skin care, skin-friendly oils, soaking bath salts, tranquility

Revitalize Your Skin with a Peppermint-Honey Almond Body Wash

June 26, 2023 by sharvayonibeauty Leave a Comment

Are you searching for a rejuvenating body wash that will leave your skin feeling clean and smooth? Look no further! In this article, we’ll introduce you to an amazing Share Ambrosia remedy known as the Peppermint-Honey Almond body wash. This delightful treatment not only exfoliates your skin but also nourishes it, leaving you with a refreshed and revitalized feeling. Say goodbye to dull and rough skin and hello to a luxurious bathing experience.

Gather Your Ingredients

To create this invigorating body wash, you’ll need the following ingredients:

  • 4 teaspoons of almond oil
  • 2 teaspoons of Jojoba oil
  • 4 tablespoons of honey
  • 5 drops of Peppermint essential oil
  • A 4 oz cobalt or amber glass container (preferably)

Let’s Get Started

Step 1: Combine the Oils

Begin by adding 4 teaspoons of almond oil and 2 teaspoons of Jojoba oil into your glass container. These oils provide excellent moisturizing properties and help to nourish and soften your skin.

Step 2: Add the Honey and Peppermint Essential Oil

Next, incorporate 4 tablespoons of honey into the container. Honey is a natural humectant that helps to lock in moisture, leaving your skin hydrated and supple. Then, add 5 drops of Peppermint essential oil for a refreshing and invigorating aroma. Peppermint oil also has soothing and cooling properties that can provide a pleasant sensation on your skin.

Step 3: Blend Thoroughly

Mix all the ingredients together in the container until they are well combined. Ensure that the honey is evenly distributed throughout the oils, creating a cohesive mixture. The resulting blend will have a delightful almond and peppermint fragrance.

How to Use the Body Wash

Now that your Peppermint-Honey Almond body wash is ready, here’s how to incorporate it into your bathing routine:

Step 1: Cleanse Your Skin

Start by cleansing your body using your regular soap or cleanser. This will remove any surface impurities and prepare your skin for the exfoliating treatment.

Step 2: Apply the Body Wash

Take about a tablespoon of the body wash and apply it to wet skin. Gently massage the scrub onto your body using circular motions. Be mindful not to apply excessive pressure, as this could harm the delicate capillaries in your skin. Focus on one area at a time, excluding the delicate eye tissue.

Step 3: Rinse and Reveal Smooth Skin

Once you’ve thoroughly scrubbed your body, rinse off the almond meal scrub with warm water. As you rinse, you’ll notice how the almond meal exfoliates and polishes your skin, leaving it smoother and brighter. Make sure to remove all traces of the scrub, and pat your skin dry with a clean towel.

Step 4: Tone and Moisturize

To complete your skincare routine, apply a toner or hydrosol to your skin using a cotton pad. This will help remove any remaining residue and balance your skin’s pH levels. Finally, apply your favorite moisturizer to lock in hydration and keep your skin soft and supple.

Frequency and Benefits

For optimal results, use this Peppermint-Honey Almond body wash once a week. Regular exfoliation helps to remove dead skin cells, improve circulation, and promote cell turnover, resulting in smoother and healthier-looking skin. Additionally, the combination of almond oil, Jojoba oil, honey, and Peppermint essential oil provides nourishment, hydration, and a refreshing sensation to your skin.

Experience the Delight of Refreshed Skin

Indulge in the luxurious experience of the Peppermint-Honey Almond body wash and transform your bathing routine into a spa-like escape. With the natural goodness of almond oil, Jojoba oil, honey, and Peppermint essential oil, your skin will feel revitalized and rejuvenated. Say goodbye to dry, rough skin and hello to a smoother, more radiant complexion. Treat yourself to this delightful body wash and enjoy the amazing benefits it brings to your skincare regimen.

Filed Under: Skin Care Tagged With: almond oil, almonds, beauty tips, DIY skincare, Exfoliating body wash, honey, Jojoba oil, Natural body wash recipe, Nourishing ingredients, peppermint, Peppermint essential oil, Peppermint-Honey Almond body wash, Revitalize skin, skin care

Nourish and Hydrate: Moisturize Dry Skin with Essential Oils

June 24, 2023 by sharvayonibeauty Leave a Comment

Dry skin can be a common challenge, causing discomfort and dullness. However, with the right skincare routine and ingredients, you can effectively combat dryness and restore hydration to your skin. One powerful solution is to incorporate essential oils into your moisturizing routine. In this article, we will explore the benefits of using essential oils to moisturize dry skin and provide a step-by-step guide on how to create a rejuvenating essential oil blend. Say goodbye to dryness and hello to a hydrated and radiant complexion.

Understanding Essential Oils for Dry Skin:

  1. The Role of Essential Oils: Essential oils are natural extracts derived from plants and possess various therapeutic properties. When it comes to dry skin, certain essential oils can help replenish moisture, nourish the skin, and promote a healthier complexion.
  2. Astringent Properties: Juniper, cypress, mandarin, and grapefruit essential oils are particularly beneficial for dry skin. These oils possess astringent properties that help tighten the skin, reducing the appearance of fine lines and wrinkles while giving your skin a firmer and more toned look.

Creating Your Essential Oil Blend:

  1. Choosing the Right Carrier Oil: If your skin is extra dry, it’s recommended to dilute the essential oils with a carrier oil to enhance their moisturizing effects. Mineral oil is a popular choice as a carrier oil due to its ability to deeply penetrate the skin and lock in moisture.
  2. The Perfect Essential Oil Blend: To create your moisturizing essential oil blend, combine a few drops of juniper, cypress, mandarin, and grapefruit essential oils with a teaspoon of carrier oil (mineral oil). This blend will provide a potent combination of hydration and astringent properties.

Enhancing Moisturization:

  1. Adding Milk: For an added boost of moisturization, consider mixing your essential oil blend with ¼ cup of milk. Milk contains proteins, fats, and lactic acid, which help soothe and hydrate dry skin, leaving it feeling soft and supple.
  2. Incorporating Honey: Alternatively, you can add a tablespoon of honey to your essential oil blend. Honey is a natural humectant that attracts and retains moisture, making it an excellent ingredient for dry skin. It will provide additional hydration and nourishment, leaving your skin glowing and revitalized.

Application and Results:

  1. Applying the Essential Oil Blend: Gently massage the essential oil blend onto clean, dry skin. Focus on areas that are particularly dry or prone to tightness. The oils will penetrate deep into the skin, replenishing moisture and restoring vitality.
  2. Enjoying the Benefits: Allow the essential oil blend to absorb into your skin for optimal results. The astringent properties of the oils will help tighten the skin, while the added moisture from milk or honey will provide long-lasting hydration. Over time, you will notice your skin becoming smoother, plumper, and more radiant.

Conclusion:

Moisturizing dry skin is essential for maintaining a healthy complexion. By incorporating essential oils into your skincare routine, you can nourish and hydrate your skin effectively. The combination of juniper, cypress, mandarin, and grapefruit essential oils will provide astringent properties and leave your skin feeling tighter. Don’t forget to enhance the moisturizing benefits by adding milk or honey to your essential oil blend. Embrace this natural and rejuvenating skincare solution, and enjoy the transformation of your dry skin into a glowing, hydrated, and revitalized canvas.

Filed Under: Skin Care Tagged With: astringent properties, beauty tips, carrier oil, cypress essential oil, essential oils, grapefruit essential oil, honey, hydration, juniper essential oil, mandarin essential oil, milk, mineral oil, moisturize dry skin, nourishment, skin care, skincare routine

  • « Go to Previous Page
  • Page 1
  • Interim pages omitted …
  • Page 10
  • Page 11
  • Page 12
  • Page 13
  • Page 14
  • Interim pages omitted …
  • Page 43
  • Go to Next Page »

Primary Sidebar

Looking for something?

Connect with us online

  • Email
  • Facebook

Popular Posts!

Coconut Milk and Mango Butter Hair Mask: A Luxurious Deep Conditioning Treatment

Saw Palmetto and Stinging Nettle: A Potent Duo for Combating Baldness

Brighten Your Skin Using Banana

Natural Hair Oil Blend for Twists and Braids: A Nourishing Elixir

Natural Home Remedy for Clearing Acne: Wheat Flour and Sugar Paste

Categories

  • Hair Care
  • Health and Wellness
  • Skin Care

Tags

beauty benefits beauty tips Chemical-Free Hair Care coconut oil curd curry leaves dark circles DIY Hair Care egg exfoliation eye care glowing skin hair care Hair Care Routine hair care tips hair growth Hair health Hair Health Improvement hair loss Hair Nourishment Hair Strengthening health and wellness honey hydration lemon lemon juice milk natural beauty natural conditioner natural face mask Natural hair care Natural Hair Growth Natural Hair Remedies natural ingredients natural remedies Natural remedy natural skincare olive oil radiant complexion radiant skin scalp health Scalp Nourishment skin care skincare skincare routine

© 2026 · Sharvayoni · Privacy Policy · Disclaimer