• Skip to main content
  • Skip to primary sidebar
  • HOME
  • SKIN CARE
  • HAIR CARE
  • HEALTH AND WELLNESS
  • CONTACT US

Sharvayoni

Unearth Nature's Magic - Your Path to Herbal Radiance and Wellnes

skin care

Peeling for Face and Body: A Homemade Recipe for Glowing Skin

July 3, 2023 by sharvayonibeauty Leave a Comment

beauty-instant-glowing-skin

Exfoliation plays a vital role in maintaining healthy and radiant skin. If you’re looking for a natural and effective peeling treatment for both your face and body, we have just the solution for you. This homemade peeling recipe combines simple yet powerful ingredients to help remove dead skin cells, improve skin tone, and promote a healthy glow. In this post, we will guide you through the process of creating this peeling mixture and share tips on how to use it for maximum benefits. Let’s dive in!

Ingredients

To create the peeling mixture, gather the following ingredients:

  1. One tablespoon of flour
  2. One tablespoon of Marjoram
  3. One soup spoon of turmeric (known for its antiseptic and toning properties)
  4. One tablespoon of powdered rose petals
  5. One tablespoon of liquid (milk for dry skin, herbal tea for normal skin, yogurt for oily skin)

These ingredients work together to exfoliate the skin gently and provide additional benefits based on your skin type.

Preparation

Follow these simple steps to prepare the peeling mixture:

  1. In a bowl, combine one tablespoon of flour, one tablespoon of Marjoram, one soup spoon of turmeric, and one tablespoon of powdered rose petals. Ensure that the dry ingredients are well mixed.
  2. Once the dry ingredients are combined, add one tablespoon of the appropriate liquid based on your skin type. Choose milk for dry skin, herbal tea for normal skin, or yogurt for oily skin. The liquid will help bind the ingredients and create a creamy paste consistency.
  3. Stir the mixture thoroughly until all the ingredients are well incorporated, forming a smooth and creamy paste. Adjust the consistency by adding more liquid if needed.

Application

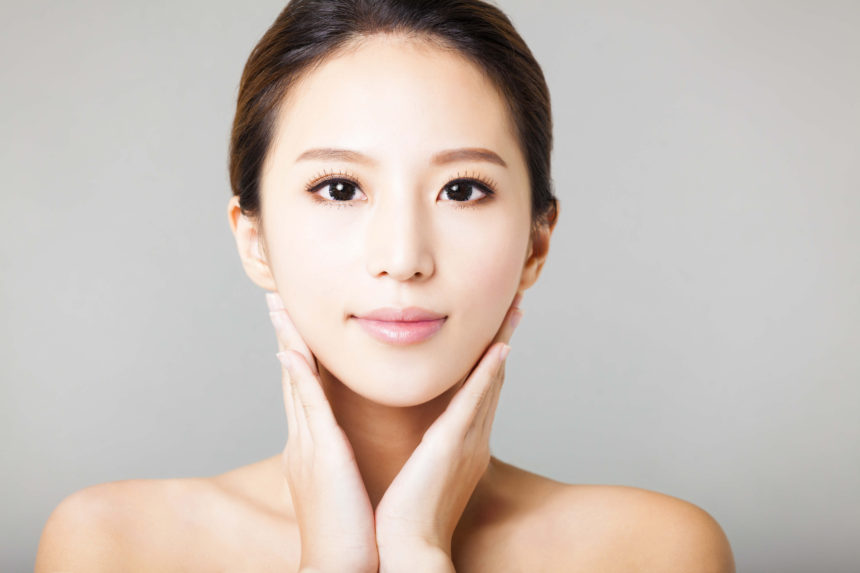
Here’s how to use the peeling mixture on your face and body:

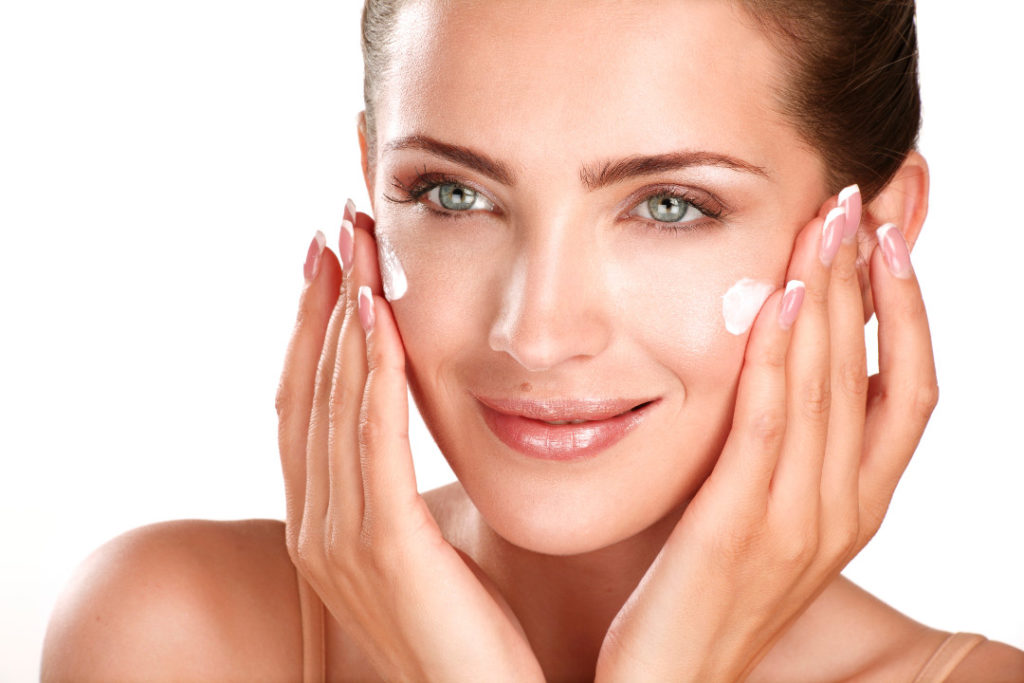
  1. Start by cleansing your face and body to remove any dirt or impurities. This will ensure that the peeling treatment can penetrate effectively and deliver the desired results.
  2. Take a small amount of the peeling mixture and apply it to your face and body. Use gentle, circular motions to massage the mixture into your skin. Focus on areas that may be more prone to dryness or roughness, such as elbows, knees, and heels.
  3. As you massage the peeling mixture, be mindful of the pressure you apply. Avoid excessive force or scrubbing, as it may irritate the skin. The goal is to exfoliate gently and stimulate circulation.
  4. After gently massaging the peeling mixture onto your face and body, allow it to sit for a few minutes. This will give the ingredients time to work their magic and effectively remove dead skin cells.
  5. Rinse off the peeling mixture with lukewarm water. Ensure that all traces of the mixture are thoroughly removed.
  6. After rinsing, gently pat your skin dry with a soft towel. Avoid rubbing, as it may cause irritation.
  7. Finish the treatment by applying a nourishing cream or moisturizer to seal in the hydration and protect your newly revealed, glowing skin.

Tips for Maximum Benefits

Consider the following tips to make the most of your peeling treatment:

  1. Perform a patch test before applying the peeling mixture to your entire face and body, especially if you have sensitive skin. Apply a small amount of the mixture to a small area and wait for any adverse reactions. If there is no irritation or discomfort, proceed with the treatment as directed.
  2. Adjust the amount of liquid used to achieve the desired consistency. You want the peeling mixture to be creamy and easy to apply, but not too runny.
  3. Use the peeling mixture once or twice a week for best results. Over-exfoliation can cause skin irritation, so it’s important to give your skin enough time to regenerate between treatments.
  4. Be gentle when massaging the peeling mixture onto your skin. The goal is to exfoliate, not to scrub vigorously. Applying too much pressure can lead to irritation and redness.

Conclusion

Creating your own peeling mixture for the face and body is a cost-effective and natural way to achieve glowing and healthy-looking skin. By combining ingredients such as flour, Marjoram, turmeric, powdered rose petals, and a suitable liquid for your skin type, you can create a customized peeling treatment. Remember to massage gently, rinse thoroughly, and follow up with a nourishing cream. Embrace the benefits of this homemade peeling recipe and enjoy the renewed radiance of your skin.

Filed Under: Skin Care Tagged With: application tips, beauty tips, dead skin cells, flour, healthy glow, homemade peeling, marjoram, natural exfoliating treatment, peeling for face and body, powdered rose petals, radiant skin, skin care, turmeric

How to make Herbal Compact Powder at Home

July 2, 2023 by sharvayonibeauty Leave a Comment

gorgeous-skin-herbal-compact-powder

Discover the secret of making herbal compact powder at home that rivals artificial products in quality and effectiveness. In this post, we will unveil a simple recipe for creating a cost-effective herbal compact powder using easily available ingredients. Say goodbye to expensive commercial compact powders and embrace the natural goodness of this homemade alternative, which guarantees the same results without any side effects.

Beauty Benefits of Multani Mitti

Multani Mitti, also known as Fuller’s Earth, offers a range of beauty benefits. Explore its incredible effects on the skin:

  • Makes Your Face Glow: Multani Mitti helps remove impurities and dead skin cells, leaving your face radiant and glowing.
  • Controls Oil Production: If you struggle with oily skin, Multani Mitti can regulate sebum production and keep your skin looking fresh.
  • Controls Acne: Its antibacterial properties make it an effective remedy for acne and blemishes.
  • Fades Blemishes: Multani Mitti lightens scars and blemishes, giving you a more even complexion.
  • Removes Blackheads and Whiteheads: Say goodbye to stubborn blackheads and whiteheads with the help of Multani Mitti.

Beauty Benefits of Sandal Powder

Sandal powder, derived from the fragrant sandalwood tree, offers numerous benefits for your skin. Let’s explore its beauty-enhancing properties:

  • Removes Blemishes and Warts: Sandal powder has a natural astringent effect that can help fade blemishes and even treat warts.
  • Prevents and Cures Pimples: Its antimicrobial properties make sandal powder effective in preventing and treating pesky pimples.
  • Removes Sun Tan: Bid farewell to sun tan as sandal powder can lighten and brighten your skin, restoring its natural glow.
  • Reduces Wrinkles and Signs of Aging: Sandal powder’s anti-aging properties help minimize wrinkles and fine lines, giving your skin a youthful appearance.
  • Heals Dry Skin: If you suffer from dry skin, sandal powder can moisturize and nourish, leaving your skin soft and supple.
  • Enhances Skin Brightness: Sandal powder promotes a brighter complexion, making your skin look fresh and vibrant.
  • Exfoliates the Skin: Enjoy the exfoliating benefits of sandal powder, which gently removes dead skin cells and reveals a smoother, healthier complexion.

How to Prepare Herbal Compact Powder

Follow these simple steps to prepare your very own herbal compact powder:

Step 1: Take 2 tablespoons of Multani Mitti in a bowl.

Step 2: Add 1 tablespoon of Sandal Powder to the bowl.

Step 3: Mix the ingredients well, maintaining a ratio of 2 parts Multani Mitti to 1 part Sandal Powder.

Step 4: Sprinkle a few drops of Rose Water into the mixture and stir thoroughly until a thick paste is formed.

Step 5: Transfer the paste to an airtight container and leave it overnight to dry.

Once dried, your herbal compact powder is ready for use. Apply a small portion of the powder to any part of the skin and gently buff it with a brush for a gorgeous, finished look.

Conclusion

Why spend a fortune on artificial compact powders when you can create your own herbal version at a fraction of the cost? Embrace the natural goodness of Multani Mitti and Sandal Powder to achieve flawless skin. With their remarkable beauty benefits and the simplicity of this homemade recipe, you can enjoy the same results without worrying about side effects. Give your skin the love it deserves with this herbal compact powder and unveil a radiant, healthy complexion.

Video on Detailed Explanation

Filed Under: Skin Care Tagged With: beauty benefits, beauty tips, commercial compact powders, cost-effective, herbal compact powder, homemade compact powder, multani mitti, natural ingredients, natural skincare, Sandal Powder, skin care, step-by-step guide

Lemon Sugar Honey Skincare Pack: Natural and Effective Beauty Solution

July 2, 2023 by sharvayonibeauty Leave a Comment

Skin_whitening

Lemons are not only deliciously refreshing, but they also offer a range of beauty benefits, especially when it comes to your skin. One of the most notable benefits of lemon is its natural skin bleaching properties. Lemons contain citric acid, which acts as a gentle bleaching agent. It can help lighten dark spots, blemishes, and hyperpigmentation, giving your skin a more even tone and a brighter appearance.

The acidic property of lemons is also beneficial in keeping the skin pure. It helps to balance the pH level of the skin, which is essential for maintaining healthy skin. By keeping the pH level in check, lemons can help prevent the growth of bacteria and other harmful microorganisms on the skin’s surface.

Furthermore, lemons are known for their astringent properties. They can help tighten the pores and reduce excess oil production, making them a valuable asset for those with oily or acne-prone skin. The antibacterial properties of lemons can also aid in keeping the skin free from pimples and acne breakouts.

Benefits of Sugar: Cleansing and Exfoliating

Sugar is not just a sweet treat for your taste buds; it can also work wonders for your skin. When used in skincare, sugar acts as a natural exfoliant and cleanser. Its granulated texture helps remove dead skin cells, dirt, and impurities that accumulate on the skin’s surface.

By gently scrubbing the skin with a sugar-based scrub, you can effectively unclog pores and reveal a fresher, smoother complexion. Regular exfoliation with sugar can also promote cell turnover, resulting in a more youthful and radiant appearance.

Additionally, sugar can help maintain the skin’s moisture balance. It acts as a humectant, drawing moisture from the environment and locking it into the skin. This hydration effect can leave your skin feeling soft, supple, and nourished.

Benefits of Honey: Nourishing, Anti-Aging, and More

Honey has been used for centuries in skincare due to its numerous benefits. It is a natural humectant, which means it attracts and retains moisture, making it an excellent ingredient for hydrating the skin. Its nourishing properties can help replenish dry, dull skin, leaving it smooth and revitalized.

Moreover, honey is known for its anti-aging properties. It is rich in antioxidants that help protect the skin from damage caused by free radicals, environmental factors, and the natural aging process. Regular use of honey on the skin can help reduce the appearance of fine lines, wrinkles, and age spots, promoting a more youthful complexion.

Honey also possesses anti-fungal properties, making it effective in combating fungal infections on the skin. Its antimicrobial properties can help alleviate allergies and soothe irritated skin, making it a beneficial ingredient for those with sensitive or reactive skin.

Steps to Make and Apply the Pack

Now that we understand the individual benefits of lemon, sugar, and honey, let’s learn how to create a homemade pack that combines these ingredients for a powerful skincare treatment.

Step 1: Take one tablespoon of sugar in a mixing jar and add a few drops of lemon juice to it. Mix well until the sugar is evenly coated with lemon juice.

Step 2: Grind the mixture to create a fine paste. This will enhance the exfoliating properties of the pack.

Step 3: Add one teaspoon of honey to the mixture and mix it well. Honey will provide nourishment and additional skincare benefits to the pack.

Step 4: Apply the mixture to your face evenly, gently massaging it into your skin using circular motions. Avoid the delicate eye area.

Step 5: Leave the pack on your face for 15-20 minutes to allow the ingredients to work their magic. Relax and enjoy some self-care time.

Step 6: After the desired time, rinse off the pack with cold water. Pat your skin dry and follow up with your regular skincare routine.

By following these simple steps, you can create a natural and effective skincare pack using lemon, sugar, and honey. Regular use of this pack can help cleanse, exfoliate, nourish, and rejuvenate your skin, giving you a healthy and glowing complexion.

In conclusion, harnessing the beauty benefits of lemon, sugar, and honey can transform your skincare routine. These natural ingredients offer a range of advantages, from skin bleaching and purification to cleansing, exfoliating, and anti-aging properties. By combining them in a homemade pack, you can create a powerful treatment that promotes healthy, radiant, and youthful-looking skin. Give it a try and experience the wonders of these natural ingredients for yourself.

Video on Detailed Explanation

Filed Under: Skin Care Tagged With: Acidic property for pure skin, Allergy alleviation, Anti-aging benefits, Anti-fungal properties, Deep cleansing, Flawless skin, Homemade skincare pack, lemon, Lemon sugar honey skincare pack, Lightens skin, Natural beauty solution, Nourishing agent, Pimple-free skin, radiant complexion, Skin bleaching agent, skin care, skin whitening, sugar, Sugar for skin impurities

Banana Honey Mask with Egg and Oatmeal: Nourishing and Soothing Care for Dry and Sensitive Skin

July 2, 2023 by sharvayonibeauty Leave a Comment

When it comes to skincare, natural ingredients often provide the best results. If you have dry and sensitive skin, the Banana Honey Mask with Egg and Oatmeal is a fantastic option for nourishing and soothing your complexion. This mask combines the healing and calming properties of oatmeal, the vitamin A-rich goodness of bananas, the lecithin found in eggs, and the pH-regulating power of honey. In this post, we will guide you through the process of creating this rejuvenating face mask and share tips on application for maximum benefits. Let’s dive in!

Ingredients

To create the Banana Honey Mask with Egg and Oatmeal, gather the following ingredients:

  1. Half a mashed banana
  2. A quarter cup of oatmeal boiled with a little milk
  3. One egg
  4. Half a tablespoon of honey

Each ingredient in this mask plays a crucial role in revitalizing and hydrating your skin, making it an ideal choice for those with dry and sensitive skin types.

Preparation of the Face Mask

Follow these simple steps to prepare the Banana Honey Mask with Egg and Oatmeal:

  1. In a bowl, carefully combine all the ingredients: half a mashed banana, a quarter cup of oatmeal boiled with a little milk, one egg, and half a tablespoon of honey. Ensure that the mixture is well-blended to form a smooth and consistent mask.
  2. Once the mask is ready, it’s time to apply it to your face. Using slow, circular massaging movements, gently spread the mask onto your skin. The circular motions will stimulate blood circulation and help the mask penetrate deeply for optimal results.
  3. After applying the mask, find a comfortable spot and relax for approximately 15 minutes. It is best to lie down during this time to allow the mask to work its magic. Close your eyes, play soothing music, or engage in deep breathing exercises to enhance the relaxation experience.
  4. Once the 15 minutes are up, rinse off the mask with warm water. Use gentle, upward motions to remove the mask thoroughly.
  5. After rinsing, pat your face dry with a soft towel. Avoid rubbing your skin, as it may cause irritation.

Application Tips for Maximum Benefits

To make the most of your Banana Honey Mask with Egg and Oatmeal, consider the following tips:

  1. Before applying the mask, cleanse your face thoroughly to remove any dirt, makeup, or impurities. This will ensure that the mask can penetrate effectively and deliver its nourishing properties to your skin.
  2. If you have sensitive skin, it’s always a good idea to perform a patch test before applying the mask to your entire face. Apply a small amount of the mask on a small area of your skin and wait for any adverse reactions. If there is no irritation or discomfort, proceed with applying the mask as directed.
  3. To enhance the soothing and calming effect of the mask, consider refrigerating it for a short while before application. The cool temperature can provide additional relief to irritated or inflamed skin.
  4. Incorporate this mask into your skincare routine once or twice a week for best results. Consistency is key when it comes to improving the condition of your skin.

Conclusion

The Banana Honey Mask with Egg and Oatmeal is a simple yet powerful solution for dry and sensitive skin. With the healing properties of oatmeal, the vitamin A content of bananas, the lecithin found in eggs, and the pH-regulating ability of honey, this mask nourishes, soothes, and revitalizes your complexion. By following the preparation instructions and applying the mask with slow, circular massaging movements, you can experience the full benefits of this rejuvenating treatment. Make time for self-care, relax for 15 minutes, and rinse off the mask to reveal a more hydrated and radiant-looking skin. Embrace the goodness of natural ingredients and enjoy the rejuvenating effects of the Banana Honey Mask with Egg and Oatmeal.

Filed Under: Skin Care Tagged With: Banana Honey Mask, bananas, beauty tips, dry skin, eggs, homemade face mask, honey, natural ingredients, nourishing skincare, oatmeal, radiant complexion, sensitive skin, skin care, soothing mask

Vanilla Honey Bubble Bath: A Luxurious and Fragrant Recipe for Silky Smooth Skin

July 1, 2023 by sharvayonibeauty Leave a Comment

Indulging in a luxurious bubble bath is an excellent way to relax and rejuvenate your body and mind. If you’re looking for a fragrant recipe that can be enjoyed throughout the year, particularly during cold winter days, the Vanilla Honey Bubble Bath is a perfect choice. This delightful concoction not only nourishes your skin but also uplifts your mood with its subtle and seductive scent. In this post, we will guide you through the simple steps of creating this aromatic bubble bath that will leave your skin feeling silky smooth. Let’s dive in!

Ingredients

To prepare the Vanilla Honey Bubble Bath, gather the following ingredients:

  1. A cup of extra virgin oil (options include wheat germ oil, grape seed oil, almond oil, avocado oil, etc.)
  2. Half a cup of honey
  3. Half a cup of liquid or fragrance-free shower gel
  4. A tablespoon of vanilla extract

The combination of honey and vanilla will not only moisturize your skin but also provide a delightful fragrance that will make your bathing experience truly indulgent.

Preparation

Follow these steps to create your own Vanilla Honey Bubble Bath:

  1. Begin by gathering a clean bottle for storing the bubble bath. It is best to use a dark glass bottle to preserve the quality of the ingredients.
  2. In the bottle, combine all the ingredients: a cup of extra virgin oil, half a cup of honey, half a cup of liquid or fragrance-free shower gel, and a tablespoon of vanilla extract. Make sure to mix them thoroughly to create a well-blended solution.
  3. Once all the ingredients are mixed, seal the bottle tightly with a well-occlusive cover or a cork stopper. This will help preserve the freshness of the bubble bath.
  4. For an added touch, you can decorate the bottle if you plan to give it as a gift. Consider using colored glass bottles, sealing them with corks, and embellishing them with beads or glass marbles using hot glue. This personalized packaging will make it a delightful present for loved ones.

Application

To enjoy the fragrance and benefits of the Vanilla Honey Bubble Bath, follow these simple instructions:

  1. Before each use, make sure to shake the bottle well to ensure that all the ingredients are properly mixed.
  2. When you’re ready for a relaxing bath, fill your bathtub with warm water.
  3. Under the running water, pour approximately a quarter cup of the Vanilla Honey Bubble Bath directly into the bathtub. The running water will help create a luxurious foam.
  4. Immerse yourself in the fragrant bubbles and soak for as long as you desire. Let the warm water and the enticing scent envelop your senses, allowing you to unwind and find tranquility.
  5. The quantity prepared with these measurements is sufficient for about eight full baths, providing you with multiple opportunities to indulge in this delightful experience.

Conclusion

Creating your own Vanilla Honey Bubble Bath is a simple and rewarding process that yields remarkable results. The combination of nourishing oils, honey, and the sweet scent of vanilla will leave your skin feeling silky smooth and delicately perfumed. Whether you choose to enjoy this luxurious bubble bath during the cold winter days or any other season, it is sure to uplift your mood and provide a blissful bathing experience. So go ahead, prepare your own batch of Vanilla Honey Bubble Bath, and pamper yourself with a little indulgence that will leave you feeling refreshed and rejuvenated.

Filed Under: Skin Care Tagged With: bath recipe, beauty tips, fragrance recipe, homemade beauty, honey, luxurious bubble bath, nourishing oils, relaxation, self-care., silky smooth skin, skin care, vanilla extract, Vanilla Honey Bubble Bath

  • « Go to Previous Page
  • Page 1
  • Interim pages omitted …
  • Page 9
  • Page 10
  • Page 11
  • Page 12
  • Page 13
  • Interim pages omitted …
  • Page 43
  • Go to Next Page »

Primary Sidebar

Looking for something?

Connect with us online

  • Email
  • Facebook

Popular Posts!

Garlic Scalp Lotion: A Natural Solution for Hair Health

Revitalizing Aloe Vera and Oil Hair Spray: A Homemade Solution

Nourishing Mango, Illipe, and Shea Butter Hair Cream: A Natural Hair Elixir

Removing Unwanted Body Hair Naturally: Alum and Rose Water Remedy

Delaying Wrinkles: Rice Flour and Honey Face Mask

Categories

  • Hair Care
  • Health and Wellness
  • Skin Care

Tags

beauty benefits beauty tips Chemical-Free Hair Care coconut oil curd curry leaves dark circles DIY Hair Care egg exfoliation eye care glowing skin hair care Hair Care Routine hair care tips hair growth Hair health Hair Health Improvement hair loss Hair Nourishment Hair Strengthening health and wellness honey hydration lemon lemon juice milk natural beauty natural conditioner natural face mask Natural hair care Natural Hair Growth Natural Hair Remedies natural ingredients natural remedies Natural remedy natural skincare olive oil radiant complexion radiant skin scalp health Scalp Nourishment skin care skincare skincare routine

© 2026 · Sharvayoni · Privacy Policy · Disclaimer