• Skip to main content
  • Skip to primary sidebar
  • HOME
  • SKIN CARE
  • HAIR CARE
  • HEALTH AND WELLNESS
  • CONTACT US

Sharvayoni

Unearth Nature's Magic - Your Path to Herbal Radiance and Wellnes

sharvayonibeauty

Ginseng: The Chinese Herbal Powerhouse for Hair Regrowth and Strength

January 8, 2024 by sharvayonibeauty Leave a Comment

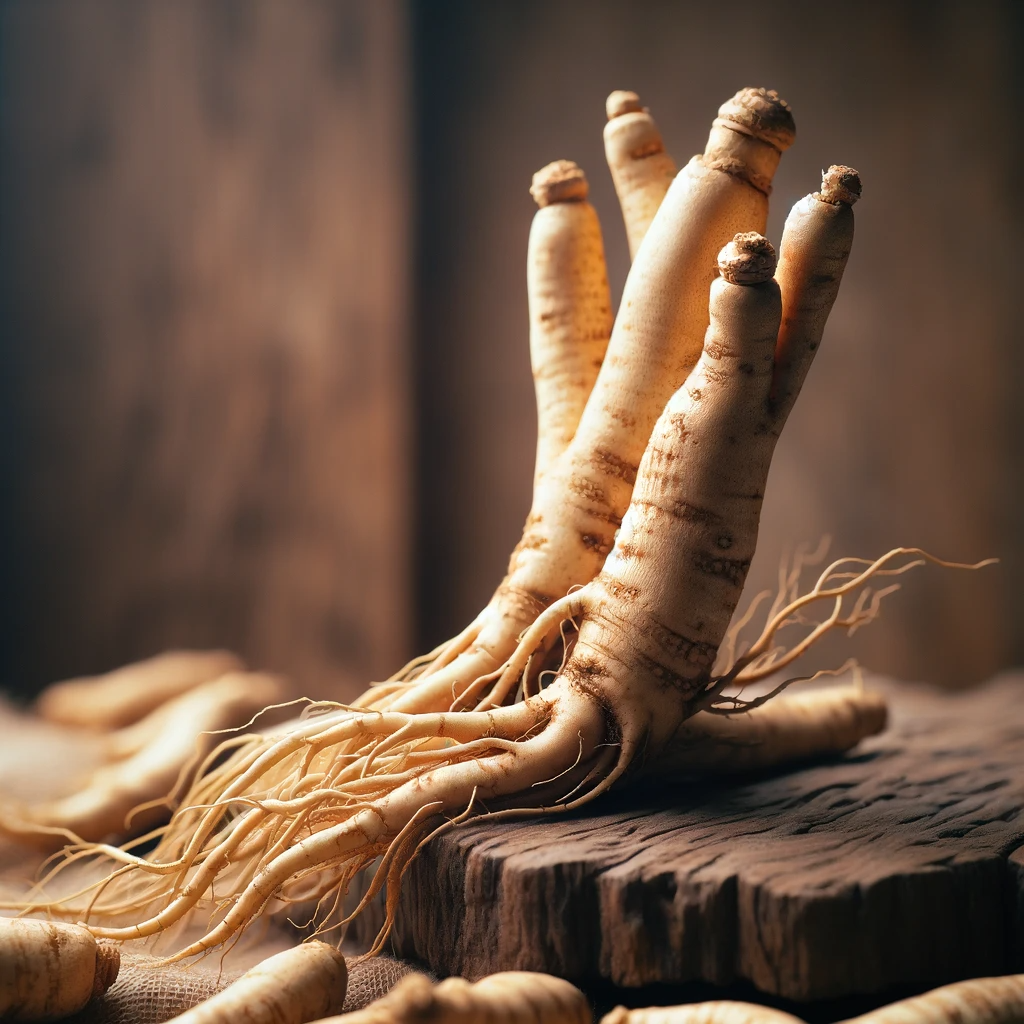
Ginseng, revered in traditional Chinese medicine for its extensive health benefits, has also carved its niche in the world of hair care. Known for its potent properties in combating hair loss and promoting hair regrowth, Ginseng stands as a natural remedy for those seeking a holistic approach to hair health. It not only nourishes the hair but also enhances its strength, making it a favored ingredient in many hair tonics and shampoos. This herb’s effectiveness in treating baldness and revitalizing hair has garnered attention globally, making it a sought-after solution for various hair concerns.

Things Needed

To create a Ginseng-infused hair treatment, you will need:

  1. Ginseng Root or Extract: Available in health stores or online.
  2. Carrier Oil: Such as coconut oil, jojoba oil, or olive oil for infusion.
  3. Glass Jar with a Tight Lid: For storing the oil infusion.
  4. Strainer or Cheesecloth: To filter out the Ginseng particles.
  5. Small Saucepan: For heating the oil.
  6. Dark, Cool Storage Space: To preserve the oil’s potency.
  7. Measuring Tools: Cups and spoons for accurate measurements.

Steps to Prepare

The preparation of a Ginseng hair treatment oil is straightforward:

  1. Prepare the Ginseng: If using fresh Ginseng root, chop it finely. If using Ginseng extract, measure out the appropriate amount (usually a few tablespoons).
  2. Heat the Carrier Oil: Gently heat your chosen carrier oil in a small saucepan, but avoid boiling it.
  3. Infuse the Ginseng: Add the Ginseng root or extract to the warm oil. Allow the mixture to simmer on low heat for about 30 to 60 minutes, facilitating the infusion of Ginseng’s nutrients into the oil.
  4. Cool and Strain: Let the mixture cool down, then strain it using a cheesecloth or strainer to remove all Ginseng residues.
  5. Store the Oil: Transfer the strained oil into a glass jar. Store it in a cool, dark place to maintain its efficacy.

Application

  • Apply to the Scalp: Use your fingertips or a dropper to apply the Ginseng-infused oil to your scalp, focusing on areas with thinning hair.
  • Massage Gently: Massaging the scalp for a few minutes increases blood circulation and promotes better absorption.
  • Leave it On: Allow the oil to work its magic for at least 30 minutes or overnight for a deeper treatment.
  • Rinse Off: Wash your hair with a gentle shampoo to remove the oil.

Benefits

Incorporating Ginseng into your hair care routine offers several benefits:

  1. Stimulates Hair Growth: Ginseng is known for its ability to promote hair growth by nourishing the hair follicles and scalp.
  2. Prevents Hair Loss: Its natural properties help in reducing hair loss, making it an effective remedy for baldness.
  3. Strengthens Hair: Ginseng boosts the strength of the hair, preventing breakage and thinning.
  4. Enhances Hair Health: Regular use of Ginseng oil can improve the overall health and texture of your hair.
  5. Nourishes the Scalp: Its nourishing properties ensure a healthy scalp, which is vital for healthy hair growth.
  6. Natural and Safe: Ginseng is a natural, chemical-free alternative to many commercial hair care products.
  7. Widely Used in Hair Products: Its popularity in hair tonics and shampoos underscores its effectiveness in hair care.

Conclusion

Ginseng, with its rich heritage in Chinese medicine, presents a natural, effective solution for hair regrowth, strength, and overall health. Its ability to nourish and invigorate the scalp and hair makes it a valuable addition to any hair care regimen. Whether struggling with hair loss, thinning, or simply seeking to enhance hair vitality, Ginseng offers a time-tested, holistic approach. As with any herbal treatment, it’s advisable to perform a patch test first and consult a healthcare provider for any underlying scalp or hair conditions. Embrace the ancient wisdom of Ginseng and experience a transformation in your hair’s health and appearance.

Filed Under: Hair Care Tagged With: beauty tips, Chinese Herbal Remedies, DIY Hair Care, Ginseng Benefits, Ginseng for Hair, hair care, Hair Regrowth, Hair Strengthening, Herbal Hair Tonics, Natural Hair Solutions, Natural Treatment for Baldness, Scalp Nourishment

Saw Palmetto and Stinging Nettle: A Potent Duo for Combating Baldness

January 7, 2024 by sharvayonibeauty Leave a Comment

Saw Palmetto, a small palm native to the southeastern United States, has long been recognized for its medicinal properties, particularly in treating baldness and hair loss. Its ability to inhibit the conversion of testosterone to dihydrotestosterone (DHT), a key factor in hair loss, makes it an invaluable resource in hair care. When combined with the hair-strengthening qualities of stinging nettle, this duo forms a powerful natural remedy for reducing hair thinning and receding hairlines, offering a beacon of hope for those grappling with hair loss.

Things Needed

To harness the benefits of Saw Palmetto and stinging nettle for hair health, you will need:

  1. Saw Palmetto Berries or Extract: Available in health stores or online.
  2. Dried Stinging Nettle Leaves: Can be purchased online or from herbal stores.
  3. Carrier Oil: Such as olive oil or coconut oil, to infuse the herbs.
  4. Glass Jar with a Tight Lid: For storing the oil infusion.
  5. Strainer or Cheesecloth: To filter the herbs from the oil.
  6. Small Saucepan: For heating the oil and herbs.
  7. Dark, Cool Storage Space: To store the infused oil.
  8. Measuring Cups and Spoons: For accurate measurements.

Steps to Prepare

Creating a Saw Palmetto and stinging nettle hair treatment involves a simple infusion process:

  1. Prepare the Herbs: Measure a cup of dried stinging nettle leaves and a similar amount of Saw Palmetto berries or a few spoons of its extract.
  2. Heat the Carrier Oil: In a small saucepan, heat the carrier oil without boiling it. Warm oil helps in extracting the active compounds from the herbs more effectively.
  3. Infuse the Herbs: Add the Saw Palmetto and stinging nettle to the warm oil. Let the mixture simmer on low heat for about an hour.
  4. Cool and Strain: After the infusion, let the oil cool down. Strain the oil using a cheesecloth or strainer to remove all the herbal residues.
  5. Store the Oil: Transfer the strained oil into a glass jar. Store it in a cool, dark place to maintain its potency.

Application

  • Apply to the Scalp: Use the fingertips or a dropper to apply the oil mixture to the scalp, especially focusing on the areas with thinning hair.
  • Gently Massage: Massage the scalp for several minutes to enhance blood circulation and promote absorption.
  • Leave it On: Allow the oil to sit for at least 30 minutes or overnight for a deeper treatment.
  • Rinse Off: Wash your hair with a mild shampoo to remove the oil.

Benefits

The combination of Saw Palmetto and stinging nettle offers a range of benefits for hair health:

  1. Inhibits DHT Production: Saw Palmetto is known for its ability to prevent the conversion of testosterone into DHT, the androgen responsible for male and female pattern baldness.
  2. Reduces Hair Thinning and Baldness: The duo works effectively in reducing hair thinning and receding hairlines, common signs of baldness.
  3. Strengthens Hair Follicles: Stinging nettle provides essential nutrients to the hair follicles, strengthening them and promoting healthier hair growth.
  4. Improves Scalp Health: Both herbs possess anti-inflammatory properties, which help in soothing the scalp and reducing issues like dandruff and scalp irritation.
  5. Natural and Safe: This herbal treatment is a natural alternative to chemical-based hair products and treatments, making it safer for long-term use.
  6. Enhances Hair Texture: Regular use of this oil infusion can improve the overall texture and health of the hair.

Conclusion

Saw Palmetto and stinging nettle together form a potent natural remedy for addressing the common concerns of hair thinning, baldness, and scalp health. This herbal combination offers a holistic approach to hair care, leveraging the power of nature to combat hair loss effectively. Incorporating this natural treatment into your hair care regimen can lead to significant improvements in hair density, strength, and overall health. As with any natural remedy, it’s advisable to conduct a patch test first to check for any allergic reactions and consult a healthcare provider for any underlying scalp or hair conditions. Embrace the herbal pathway to healthier, fuller hair with Saw Palmetto and stinging nettle.

Filed Under: Hair Care Tagged With: beauty tips, DHT Inhibition, DIY Hair Care, hair care, Hair Thinning Solutions, Herbal Hair Growth, Herbal Remedies for Baldness, Natural Hair Loss Treatment, Natural Scalp Treatment, Saw Palmetto for Hair, scalp health, Stinging Nettle Benefits

Eliminating Head Lice Naturally with Dark Thulasi (Holy Basil)

January 7, 2024 by sharvayonibeauty Leave a Comment

Head lice can be a common issue, often linked to poor hygiene, causing irritation to the scalp. Scratching due to this irritation can lead to secondary bacterial infections. While head lice are a nuisance, there are several homemade remedies available to effectively eliminate them, one of which is using Dark Thulasi (Holy Basil) leaves.

Things Required

  • A cup of Dark Thulasi (Holy Basil Leaves)

How to

  1. Take a cup of Thulasi leaves.
  2. Make it into a fine paste.
  3. Apply this mixture directly to your scalp and hair.
  4. Let it sit for 30 minutes.
  5. Wash it off thoroughly with plain water.
  6. Avoid using any shampoo or chemicals when washing your hair.

Why it Works

The anti-bacterial and anti-inflammatory properties of Thulasi help keep your scalp free from any infections while effectively addressing the issue of head lice. Regular application of this natural remedy can lead to a significant reduction in head lice infestation, providing relief from irritation and discomfort.

Conclusion

Dealing with head lice can be both uncomfortable and bothersome, but natural remedies like Dark Thulasi leaves can offer an effective and chemical-free solution. By consistently following this treatment, you can alleviate head lice infestations and enjoy a healthier scalp without the need for harsh chemicals or shampoos.

Filed Under: Hair Care Tagged With: beauty tips, chemical-free, Dark Thulasi, hair care, head lice, head lice treatment, Holy Basil leaves, homemade solution, Natural remedy, scalp irritation

Managing Acne During Pregnancy: Neem and Thulasi Remedy

January 7, 2024 by sharvayonibeauty Leave a Comment

Acne problems can be quite common during pregnancy, affecting about 2 out of 3 pregnant women. Hormonal fluctuations during pregnancy can lead to skin changes, and in some cases, acne may become severe. Unlike the acne experienced during teenage years, pregnancy-induced acne is unique and requires specific care and attention.

Causes of Acne During Pregnancy

The primary cause of acne during pregnancy is the fluctuation in hormone levels. The first trimester is particularly susceptible to these changes, leading to the development of acne. The higher levels of hormones in the body trigger increased sebum production, leading to blocked pores and the accumulation of dirt, resulting in acne breakouts. However, it’s challenging to predict who will experience acne during pregnancy, and in most cases, acne tends to subside by the third trimester or after delivery.

Treating Acne During Pregnancy

It’s essential to avoid chemical treatments or medications for acne during pregnancy, as they may have adverse effects on the developing fetus. Instead, opting for natural and home remedies is a safer and more effective approach to managing pregnancy-induced acne without any harm to the baby.

Using Neem and Thulasi (Holy Basil)

Things Required:

  • One small cup of Neem Leaves
  • One small cup of Thulasi Leaves (Holy Basil)
  • One spoon of Sandalwood Powder
  • One spoon of Rose Water (You can use Cucumber Juice if you don’t have rose water)

How to Prepare and Apply:

  1. Blend the Neem and Thulasi Leaves into a paste.
  2. Add the Sandalwood powder and rose water to the mixture.
  3. Mix well to form a smooth paste.
  4. Apply this mixture evenly on your face and neck.
  5. Let it dry for 20 minutes.
  6. Wash thoroughly with cold water.
  7. Repeat this treatment thrice a week, before shower.

Why it Works:

Neem and Thulasi possess powerful antibacterial properties that help eliminate acne-causing microbes and reduce inflammation. The cleansing properties of Thulasi gently purify the skin, unclog pores, and remove impurities, promoting a clearer complexion. The combination of Sandalwood powder and rose water provides nourishment to the skin, promoting an even and healthy appearance.

Conclusion

Acne problems during pregnancy can be challenging, but with the right approach and natural remedies like Neem and Thulasi, you can manage and alleviate these skin concerns effectively. Embracing natural remedies ensures the safety of both the mother and the developing baby, allowing you to achieve flawless and radiant skin during this beautiful phase of life.

Filed Under: Skin Care Tagged With: acne during pregnancy, flawless skin during pregnancy, managing acne during pregnancy, natural remedies for acne, Neem and Thulasi for acne, pregnancy acne, pregnancy care, pregnancy skincare, safe acne remedies, skin care

Treating Cuts, Burns, or Skin Problems with Curry Leaves

January 7, 2024 by sharvayonibeauty Leave a Comment

Dealing with cuts, burns, or various skin problems can be both painful and concerning. While there are numerous over-the-counter remedies available, nature provides us with simple and effective solutions. In this article, we will explore the use of curry leaves as a natural remedy for treating cuts, burns, or skin issues. Discover how the antibacterial and anti-inflammatory properties of curry leaves can aid in healing and preventing the spread of skin problems.

Things Needed

To create the Curry Leaves Healing Paste, you will only need one ingredient:

  • One cup of fresh curry leaves

Steps to Prepare

Preparing the Curry Leaves Healing Paste is a straightforward process. Follow these simple steps to harness the natural healing power of curry leaves:

1. Start by gathering fresh curry leaves. Ensure that they are clean and free from any dirt or impurities.

2. Smash the curry leaves to create a smooth and consistent paste. You can use a mortar and pestle or any suitable method for this.

3. Once you have obtained a paste-like consistency, you are ready to apply it to the affected parts of your skin.

4. Gently apply the curry leaves paste to the cuts, burns, or skin problems. Be thorough but gentle in your application to avoid further irritation.

5. Allow the paste to sit on the affected areas for a reasonable amount of time. This will vary depending on the severity of the issue, but leaving it for at least 10-15 minutes is typically effective.

6. After the designated time has passed, gently rinse off the paste with lukewarm water. It’s advisable to avoid using soap or harsh cleansers to prevent further irritation.

Benefits

The Curry Leaves Healing Paste offers several benefits for addressing cuts, burns, and skin problems:

  • Antibacterial Properties: Curry leaves contain natural antibacterial properties that can help prevent infection in cuts and burns, promoting faster healing.
  • Anti-Inflammatory Effects: The anti-inflammatory properties of curry leaves can reduce swelling and discomfort associated with skin problems.
  • Preventative Action: Applying this paste not only aids in healing but also helps prevent the issue from spreading or worsening.
  • Natural and Chemical-Free: This remedy relies on a single natural ingredient, making it a gentle and chemical-free solution for skin issues.

Conclusion

Treating cuts, burns, or skin problems with curry leaves is a time-tested natural remedy that harnesses the antibacterial and anti-inflammatory properties of this incredible herb. Nature provides us with simple yet effective solutions for our skincare needs, and curry leaves are no exception. By incorporating the Curry Leaves Healing Paste into your skincare routine when needed, you can promote faster healing and prevent the spread of skin problems. Embrace the power of nature and keep this gentle and chemical-free remedy in your toolkit for addressing common skin issues.

Filed Under: Skin Care Tagged With: anti-inflammatory, antibacterial properties, beauty tips, chemical-free skincare, curry leaves, Cuts and burns, DIY skincare, faster healing, healing paste, Natural remedy, skin care, skin care routine, skin problems

  • « Go to Previous Page
  • Page 1
  • Interim pages omitted …
  • Page 30
  • Page 31
  • Page 32
  • Page 33
  • Page 34
  • Interim pages omitted …
  • Page 111
  • Go to Next Page »

Primary Sidebar

Looking for something?

Connect with us online

  • Email
  • Facebook

Popular Posts!

Homemade Shaving Cream: Pamper Your Skin Naturally

Whiten Your Teeth Naturally with Apple Cider Vinegar

Rosemary Shampoo for Fine Hair: A Natural Boost

Styling Cream Moisturizer: Your Hair’s New Best Friend

Creating Herbal Hair Oil: A Natural Recipe for Enhanced Hair Health

Categories

  • Hair Care
  • Health and Wellness
  • Skin Care

Tags

beauty benefits beauty tips Chemical-Free Hair Care coconut oil curd curry leaves dark circles DIY Hair Care egg exfoliation eye care glowing skin hair care Hair Care Routine hair care tips hair growth Hair health Hair Health Improvement hair loss Hair Nourishment Hair Strengthening health and wellness honey hydration lemon lemon juice milk natural beauty natural conditioner natural face mask Natural hair care Natural Hair Growth Natural Hair Remedies natural ingredients natural remedies Natural remedy natural skincare olive oil radiant complexion radiant skin scalp health Scalp Nourishment skin care skincare skincare routine

© 2026 · Sharvayoni · Privacy Policy · Disclaimer