• Skip to main content
  • Skip to primary sidebar
  • HOME
  • SKIN CARE
  • HAIR CARE
  • HEALTH AND WELLNESS
  • CONTACT US

Sharvayoni

Unearth Nature's Magic - Your Path to Herbal Radiance and Wellnes

sharvayonibeauty

Tips for Growing Long Hair Naturally!

February 3, 2019 by sharvayonibeauty Leave a Comment

Long and Shiny hair

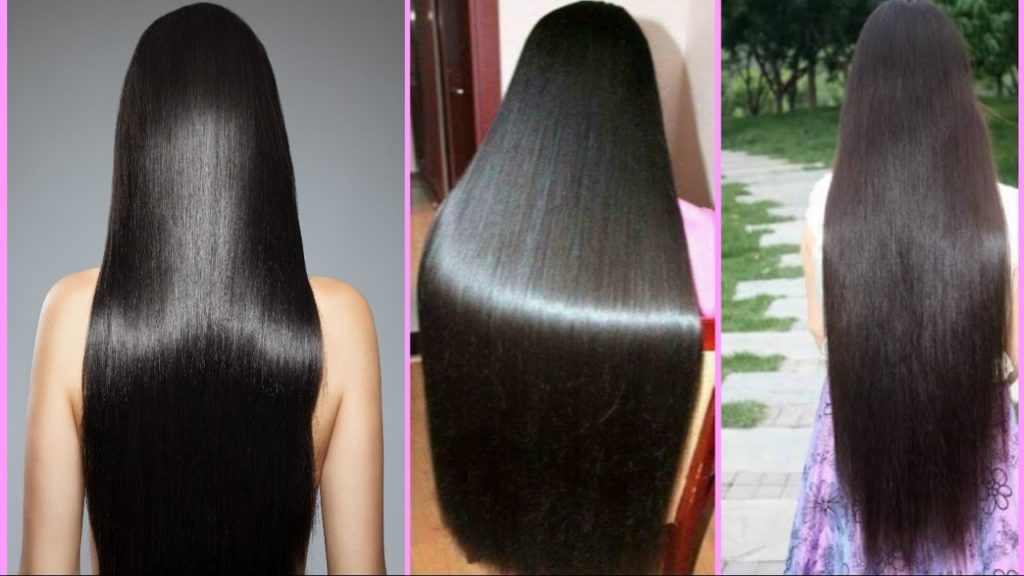
Ladies always wanted long hair. For some people, hair seems to be growing long and thick with less / no effort. But for others, it seems almost impossible to grow long hair.

During ancient time, people with long hair has been seen as noble and smart. People with shaven head or short hair are considered as outlaws, criminals or slave during the ancient period.

Almost everyone during the ancient period, King and Queen wanted to have long hair. But maintaining Long Hair was not easy. They spent time for their hair care and created many hair care regimes for maintaining long hair.

To maintain the hair, they created many natural hair care paste and masks which not only helps in growing hair longer but also nourishes hair from the scalp

As time goes by, people in this fast paced world, have no time for taking care of their hair. Eventually they face lots of hair problems and turn to artificial methods for quick recovery.

We have provided few Tips for growing long hair and also have provided a various natural hair packs which ancient people made use of.

Tips for growing Long hair

Avoid Shampoo

Shampoo now a days have so much chemicals mixed with it, it does more harm than it does any good. The chemicals used in the shampoo often makes the scalp dry and itchy leading to itching and hair fall.

Wash your hair with natural home made ingredients that does good to your hair. Natural ingredients gently rinse off your hair and nourishes scalp for hair growth.

You can make use of one given Hair Pack for Thick and Shiny Hair or you can make use of your own Natural Hair Pack.

Oiling your Hair Regularly

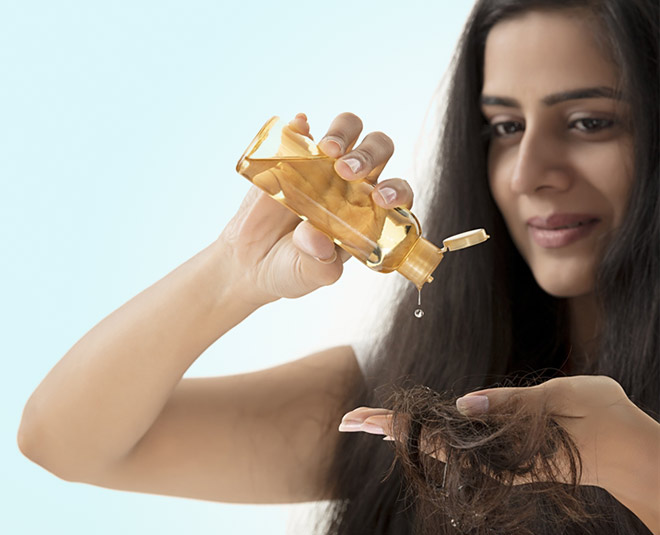
Oiling your hair is the best method to keep your

  • Prevents Dryness
  • Strengthens Hair Follicle
  • Avoids Split Ends
  • Scalp healthy
  • Avoid dandruff
  • Nourish scalp
  • Avoid hair fall

Oil in your hair also helps to keep your body cool. Hair fall and Dandruff problems will occur if your body becomes heat. In Tropical Countries like India, it is necessary to keep oil in your hair, to keep your body cool.

Always use Pure Home Made oils for oiling your hair. In this way you can be 100% sure that your Oil does not contain any synthetic ingredients added to it.

Trim Regularly

If you want to grow Long and Healthy hair, you should trim your hair regularly. Hair strands tend to develop split ends during long run and it is impervious to trim your split ends to grow long and healthy hair.

Avoid Chemical Treatments

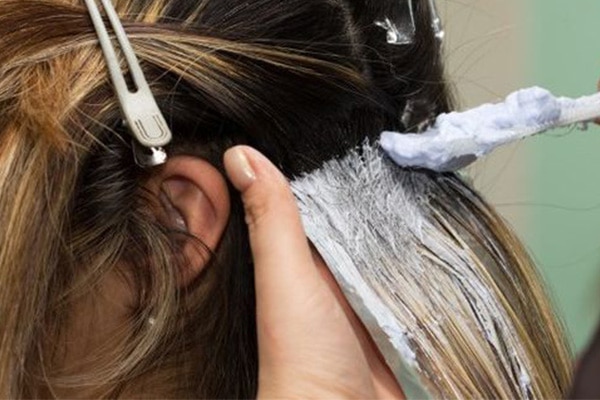
For many people, chemical treatments are regular part of their beauty regime. A trip to Salon does more than cutting your hair, it spends hours bleaching, changing texture or straightening hair.

These types of Chemical Treatments takes a heavy toll on your hair. These chemicals penetrate deep into your scalp often causing damage that are irreversible.

Avoiding these chemical treatments, gives your hair a chance to repair itself and to restore the shine and health to your hair.
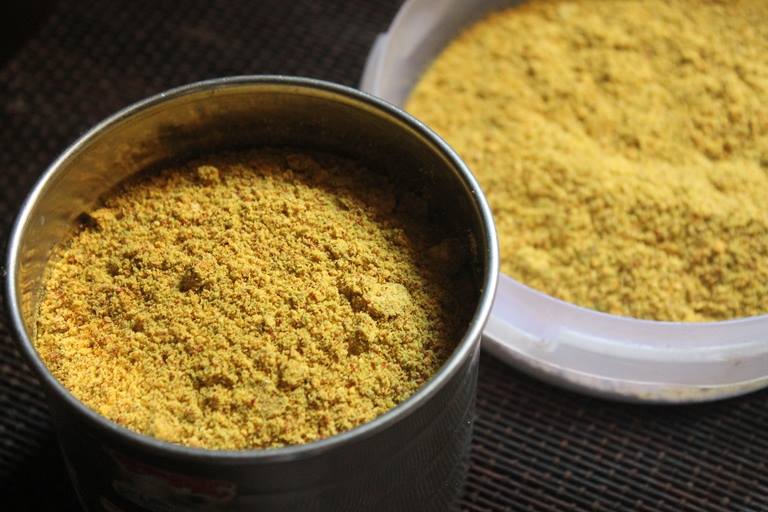
Herbal Hair Packs

Herbal hair packs helps in rejuvenating the hair follicles and nourish them from inside. They provide the required nourishment and vitamins that are required for healthy hair.

There are several herbal hair packs to choose from. You can choose from some of them below:

  • Ayurvedic Hair Powder for Thick and Shiny Hair
  • Grow Long and Shiny Hair Naturally
  • Ayurvedic Hair Pack to fight Hair Loss
  • Anti-Dandruff Hair Pack

Reduce Stress

In this fast paced life, stress is something that is inevitable. Stress can affect your mind, body, thoughts and behavior. But many people are unaware of this fact and often blame the illness for headaches, insomnia and decreases productivity at work.

Too much of stress on your body can result in hair loss, a condition known as telogen effluvium. Stress can disrupt the hormone levels in your body which in turn triggers the Hair Loss.

This Hair loss can be temporary or permanent based on the level of stress that people undergo. So, it is important to reduce stress for healthy hair.

You can try the below techniques to reduce stress.

  • Start a regular exercise program.
  • Learn relaxation techniques like meditation, deep breathing, and guided imagery.
  • Take time each day to relax by doing a fun activity or listening to soothing music.
  • Take a yoga class or practice postures at home.
  • Become more socially involved with friends and family rather than withdrawing because of stress.

Filed Under: Hair Care Tagged With: beauty tips, hair care, Long hair

Best Natural Methods to get White Teeth Naturally!

February 2, 2019 by sharvayonibeauty Leave a Comment

Having a beautiful white smile makes you feel much more confident in your appearance. Who doesn’t enjoy a white smile? It brings out the best in you.

But most people are unhappy with their teeth due to yellow color or stains in their teeth. This is because of our food style like taking too much coffee, tea, wine, sugary foods, smoking. The lack of oral hygiene is also a main reason for stained or yellow teeth.

Why do we get get stained Teeth?

Yellow teeth is caused by plaque and tartar buildup. And it’s harder to remove just by the brushing if its built up on the teeth over time.

There are numerous reasons for stained teeth:

  • Sugar is a large cause of yellow teeth. So, if you indulge in lots of sweets, stained teeth is unavoidable.
  • Lots of Coffee, tea.
  • Intake of Wine.
  • Smoking
  • Lack of oral hygiene

How to Get White Teeth?

Brushing

Brushing your teeth daily twice is an excellent way to take care of your teeth. It helps to prevent most of the oral problems including Yellow stains in your teeth.

If you have stains recently from not able to brush regularly, then brushing regularly will bring back white teeth in few weeks.

However, if your stains appeared over a long time, then brushing alone wont be of much help.

To fight tough stains, nature has provided us with various valuable ingredients to remove stains without much side effects.

Natural Methods to remove Stains

Whiten Your Teeth Naturally with Apple Cider Vinegar

Apple Cider Vinegar, known for its numerous beauty benefits for skin and hair, can also work wonders for whitening your teeth. This home remedy offers a natural and effective solution to achieve a brighter smile without resorting to expensive treatments or harsh chemicals. In this guide, we will explore how you can use Apple Cider Vinegar to whiten your teeth safely and efficiently.

Things Needed

Before you begin, gather the following essential item:

  • Apple Cider Vinegar

Steps to Prepare

Whitening your teeth with Apple Cider Vinegar is a straightforward process:

  1. Brush Your Teeth: Start by giving your teeth a thorough brushing with regular toothpaste.
  2. Apply Apple Cider Vinegar: After brushing, take a small amount of Apple Cider Vinegar and use it as a mouthwash. Swish it around your mouth for about 20-30 seconds.
  3. Rinse Well: Spit out the Apple Cider Vinegar and rinse your mouth thoroughly with water.
  4. Repeat as Needed: You can repeat this process a few times a week to gradually whiten your teeth. However, avoid using Apple Cider Vinegar more than twice a week to prevent enamel erosion.

How to Apply

Follow these simple steps to apply Apple Cider Vinegar for teeth whitening:

  1. Brush your teeth with regular toothpaste.
  2. Take a small amount of Apple Cider Vinegar and use it as a mouthwash.
  3. Swish the vinegar around your mouth for about 20-30 seconds.
  4. Spit out the Apple Cider Vinegar.
  5. Rinse your mouth thoroughly with water.

Precautions

While Apple Cider Vinegar is an effective teeth-whitening remedy, it’s essential to take precautions:

  • Limit Usage: Do not use Apple Cider Vinegar more than twice a week to prevent enamel erosion.

Tips

For optimal results and safety, keep these tips in mind:

  • Regular Use: Consistency is key. Repeat the process a few times a week for several months to see noticeable results.

Benefits

Whitening your teeth with Apple Cider Vinegar offers several benefits:

  • Natural Solution: Apple Cider Vinegar provides a natural and chemical-free way to whiten your teeth.
  • Bacterial Control: The acidic properties of Apple Cider Vinegar help fight against bacteria build-up in your teeth.

Conclusion

Achieving a whiter smile can be as simple as using Apple Cider Vinegar as a teeth-whitening remedy. This natural solution not only brightens your teeth but also offers various oral health benefits. By following the provided steps, precautions, and tips, you can harness the power of Apple Cider Vinegar to enhance your smile safely and effectively. Remember, moderation is key, so use this remedy wisely for a radiant and healthier smile.

Naturally Whiten Your Teeth with Orange Peel

Oranges are not just delicious fruits; they also offer a multitude of beauty benefits for your skin, hair, and even your teeth. The natural properties of orange peel can be harnessed to whiten your teeth and combat bacteria buildup in your mouth. In this article, we’ll explore how you can use orange peel for natural teeth whitening, offering you a brighter and healthier smile.

Things Needed

Before you embark on your journey to whiter teeth with orange peel, gather the following items:

  • Fresh Orange Peel (or)
  • Dried Orange Peel Powder

Steps to Prepare

Here’s a simple process to prepare your homemade orange peel teeth-whitening remedy:

  1. Obtaining Orange Peel: You can either use fresh orange peel by peeling an orange or acquire dried orange peel powder if fresh peel is unavailable.

How to Apply

Learn how to effectively apply orange peel for teeth whitening:

  1. Rubbing Teeth with Orange Peel: Before bedtime, rub your teeth gently with fresh orange peel. If fresh peel isn’t available, you can use dried orange peel powder.
  2. Regular Application: Consistency is key. Perform this routine every night for several weeks to see noticeable results.

Precautions

While using orange peel is generally safe, consider the following precautions:

  • Be gentle when rubbing your teeth with orange peel to avoid damaging your enamel.

Tips

Here are some additional tips to enhance your experience with orange peel teeth whitening:

  • Maintain good oral hygiene by brushing and flossing regularly in addition to using orange peel.

Benefits

Discover the numerous benefits of using orange peel for teeth whitening:

  • Vitamin C Power: The vitamin C in orange peel helps combat microorganisms in your mouth throughout the night.
  • Antibacterial Properties: Orange peel’s antibacterial properties fight current bacteria and inhibit future growth.
  • Calcium Enriched: The calcium in orange peel strengthens tooth enamel, contributing to a whiter and healthier smile.

Conclusion

Embrace the natural and effective teeth-whitening properties of orange peel to achieve a brighter and healthier smile. With consistent application and good oral hygiene practices, you can harness the vitamin C, antibacterial, and calcium-rich qualities of orange peel to enhance your oral health and appearance. Say goodbye to yellowing teeth and hello to a radiant smile!

A Natural Teeth-Whitening Solution: Salt’s Oral Health Benefits

Salt, a simple kitchen staple, has been an age-old remedy for maintaining oral health and promoting white teeth. Its natural cleansing properties and ability to combat bad breath have made it a trusted and effective solution for generations. In this comprehensive guide, we will explore a basic home remedy for achieving white teeth using salt. Discover how replacing your regular toothpaste with natural salt can work wonders for your teeth and overall oral hygiene.

Things Needed

To get started with this natural teeth-whitening remedy, you will need:

  • Salt (1 Spoon)

Steps to Prepare

Using salt for white teeth is a straightforward process. Here’s how to prepare and apply this simple remedy:

  1. Selecting the Salt: Begin by choosing regular table salt for this remedy. You can also opt for sea salt, which contains additional minerals.
  2. Using Salt as Tooth Powder: In the morning, instead of your regular toothpaste, take a spoonful of salt and use it as a tooth powder. Gently brush your teeth with the salt, ensuring that you cover all surfaces evenly.
  3. Mixing Salt with Charcoal: For an alternative approach, mix the salt with charcoal and use this mixture to brush your teeth regularly. Charcoal enhances the cleansing effect and contributes to whiter teeth.

How to Apply

Applying this natural teeth-whitening remedy is a straightforward process:

  • Replace your regular toothpaste with salt every morning.
  • Brush your teeth gently with the salt, ensuring that all surfaces are covered.
  • Rinse your mouth thoroughly after brushing.

Precautions

While salt is an effective teeth cleanser, it’s essential to use it with care to avoid potential gum problems. Be gentle when brushing your gums to prevent any irritation or damage.

Tips

Here are some additional tips for using salt to whiten your teeth:

  • Maintain regular oral hygiene practices alongside using salt for the best results.
  • Avoid excessive use of salt, as it can lead to gum irritation.
  • Be consistent in your routine to achieve and maintain white teeth.

Benefits

Using salt for teeth whitening offers several benefits:

  • Cleansing Properties: Salt is a natural teeth cleanser that helps remove stains and plaque buildup.
  • Combatting Bad Breath: Its antibacterial properties fight the bacteria responsible for bad breath, keeping your breath fresh.
  • Mineral Restoration: Salt helps restore the mineral content in your teeth, promoting a whiter appearance.

Conclusion

Salt, a readily available kitchen ingredient, serves as a powerful natural remedy for maintaining oral health and achieving white teeth. By incorporating salt into your daily oral hygiene routine, you can enjoy the benefits of a brighter smile and fresher breath. Remember to use salt with care to prevent gum problems and maintain regular oral hygiene practices for optimal results. Make this simple change in your dental care routine, and you’ll be on your way to a healthier and more radiant smile.

Turmeric for Teeth Whitening: A Natural Remedy

Whiter teeth can significantly enhance your smile and boost your confidence. While there are numerous teeth-whitening products available, natural remedies offer a safe and effective way to achieve a brighter smile. Turmeric, a common kitchen ingredient, is known for its anti-bacterial properties and is hailed as one of the best natural remedies for whitening stained or yellow teeth. In this guide, we will explore how to harness the teeth-whitening potential of turmeric, revealing the steps to prepare and apply it effectively.

Things Needed

Before you begin, gather the essential ingredients for this natural teeth-whitening remedy. You will need:

  • Turmeric Powder (1/2 teaspoon)
  • Salt (a pinch)
  • Lime Juice (1-2 drops)

Ensure you have these ingredients ready to embark on your teeth-whitening journey.

Steps to Prepare

Creating your turmeric-based teeth-whitening mixture is straightforward. Follow these steps to prepare it:

  1. Mixing Turmeric and Salt: Take 1/2 teaspoon of turmeric powder and a pinch of salt. Thoroughly mix these two ingredients in a bowl.
  2. Adding Lime Juice: Add 1-2 drops of lime juice to the mixture. Continue to blend until you achieve a consistent paste.

How to Apply

The application of this mixture is a crucial step in your teeth-whitening regimen. Follow these steps to apply it effectively:

  1. Gently Massaging Your Teeth: After brushing your teeth, use your fingertip or a soft toothbrush to apply the turmeric and salt mixture to your teeth. Ensure that you cover all areas evenly.
  2. Massage for One Minute: Gently massage your teeth with the mixture for about one minute. Be thorough but gentle to avoid damaging your enamel.
  3. Rinse Thoroughly: After massaging, rinse your mouth thoroughly with water. Make sure to remove all traces of the turmeric mixture from your teeth and gums.
  4. Repeat Regularly: To achieve visible results, use this turmeric-based teeth-whitening remedy consistently after brushing your teeth for one month.

Precautions

While turmeric is generally safe for teeth whitening, some precautions are worth considering:

  • Be Gentle: When massaging your teeth with the turmeric mixture, avoid excessive pressure to prevent enamel damage.
  • Monitor Tooth Sensitivity: If you experience increased tooth sensitivity or discomfort, discontinue use and consult a dentist.

Tips

Here are some additional tips to enhance your teeth-whitening experience with turmeric:

  • Brush Before Application: Always use the turmeric mixture after brushing your teeth with your regular toothpaste.
  • Limit Usage: Use this turmeric-based remedy once a day for optimal results. Overuse may lead to enamel erosion.

Benefits

The use of turmeric for teeth whitening offers several benefits:

  • Anti-Bacterial Action: Turmeric’s anti-bacterial properties help combat bacteria buildup in your mouth, reducing the risk of stains and cavities.
  • Teeth Whitening: The bleaching properties of lime juice in the mixture effectively whiten your teeth.
  • Gum Health: Turmeric promotes gum health by preventing bacterial growth and inflammation.
  • Cost-Effective: This natural remedy is an affordable alternative to commercial teeth-whitening products.

Conclusion

Turmeric is a powerful natural remedy for achieving whiter teeth. Its anti-bacterial properties, combined with the teeth-whitening effects of lime juice, offer a safe and cost-effective solution for improving your smile. Consistency is key to success, so make turmeric part of your daily oral care routine and enjoy the benefits of a brighter and healthier smile.

Achieve Whiter Teeth Naturally with Aloe Vera: A Comprehensive Guide

Aloe Vera, often hailed as the “wonder plant,” is renowned for its numerous skin benefits. However, it’s not just limited to skincare; Aloe Vera can also be a powerful ally in achieving whiter teeth. This natural remedy has been used for generations to brighten smiles and improve oral health. In this comprehensive guide, we will explore the step-by-step process of using Aloe Vera for teeth whitening, along with its benefits, precautions, and essential tips.

Things Needed

Before we delve into the process, let’s gather the essential ingredients and tools required for this natural teeth whitening remedy:

  1. Aloe Vera: Ensure you have fresh Aloe Vera gel or a trusted Aloe Vera product.
  2. Vegetable Glycerin: This ingredient will be mixed with Aloe Vera to create a toothpaste-like consistency.
  3. Baking Soda: A small amount of baking soda can be added to enhance the whitening effect. However, caution is necessary, as excessive use can affect tooth enamel.

Steps to Prepare

Creating an Aloe Vera-based toothpaste for whitening teeth is a straightforward process. Here’s how you can prepare it:

  1. Aloe Vera Extraction: If you have a fresh Aloe Vera plant, carefully extract the gel from one of its leaves. If using a store-bought Aloe Vera gel, ensure it is of high quality and does not contain additives.
  2. Mixing with Vegetable Glycerin: In a clean bowl, combine Aloe Vera gel with vegetable glycerin. The glycerin will help create a paste-like consistency and enhance the application.
  3. Add Baking Soda (Optional): If you choose to use baking soda, add a small amount to the mixture. Be cautious not to overdo it, as excessive baking soda can harm tooth enamel.

How to Apply

Now that you have prepared your Aloe Vera-based toothpaste, it’s time to learn how to apply it effectively:

  1. Brushing with Aloe Vera Paste: If you are accustomed to using regular toothpaste, start by brushing your teeth with your usual toothpaste. This will ensure that your teeth are properly cleaned before applying the Aloe Vera paste.
  2. Gentle Massage: After brushing, apply the Aloe Vera paste to your teeth and gums. Gently massage the paste onto your teeth using your finger or a soft toothbrush.
  3. Leave for a Few Minutes: Allow the Aloe Vera paste to sit on your teeth for a few minutes. This will give it time to work its magic.
  4. Rinse Thoroughly: Rinse your mouth thoroughly with water, ensuring that all traces of the paste are removed.

Precautions

While Aloe Vera is generally safe for dental use, there are a few precautions to keep in mind:

  • Moderation with Baking Soda: If you choose to add baking soda, use it sparingly. Excessive use can lead to enamel damage.
  • Quality Matters: Ensure you use high-quality Aloe Vera gel without additives or preservatives.
  • Allergic Reactions: While rare, some individuals may be allergic to Aloe Vera. Perform a patch test before using it on your teeth to check for any adverse reactions.

Tips

To make the most of your Aloe Vera teeth whitening routine, consider these additional tips:

  • Consistency is Key: Regular use of Aloe Vera paste is more likely to yield noticeable results. Make it a part of your daily oral care routine.
  • Balanced Diet: Maintain a balanced diet rich in fruits and vegetables to support overall oral health.
  • Oral Hygiene: Don’t neglect regular brushing, flossing, and dental check-ups while using Aloe Vera for teeth whitening.
  • Stay Hydrated: Drinking plenty of water helps flush away bacteria and maintain oral health.

Benefits

Using Aloe Vera for teeth whitening offers several benefits:

  • Natural Whitening: Aloe Vera’s natural properties help whiten teeth without harsh chemicals.
  • Anti-Inflammatory: Aloe Vera fights inflammatory bacteria, promoting oral health.
  • Cavity Prevention: It is effective against cavities and root canal issues.
  • Gentle on Enamel: When used in moderation, Aloe Vera is gentle on tooth enamel.
  • No Harsh Chemicals: Unlike commercial whitening products, Aloe Vera avoids harsh chemicals.

Conclusion

Achieving whiter teeth naturally with Aloe Vera is not only effective but also gentle on your oral health. This comprehensive guide has outlined the steps to prepare and apply Aloe Vera paste, along with essential precautions and tips. By incorporating this natural remedy into your dental care routine, you can enjoy a brighter and healthier smile without the use of harsh chemicals. Remember that consistency is key, and maintaining overall oral hygiene remains crucial. Embrace the natural benefits of Aloe Vera and revel in the confidence of a radiant smile.

Mint Leaves for Teeth Whitening: A Natural Remedy

Stained teeth can be a source of discomfort and self-consciousness, leading many individuals to explore teeth whitening solutions. While commercial products abound, natural remedies using readily available kitchen ingredients offer a cost-effective and chemical-free alternative. In this article, we’ll delve into the use of mint leaves for teeth whitening—an easy and natural method that can help restore your smile’s radiance.

Things Needed

Before embarking on your journey to whiter teeth using mint leaves, ensure you have the following items:

  • A cup of fresh mint leaves (known as Pudina in Tamil)

The freshness of the mint leaves is crucial for achieving the best results.

Steps to Prepare

The process of preparing mint leaves for teeth whitening is simple and can be accomplished as follows:

  1. Drying Mint Leaves: Begin by taking the cup of mint leaves and thoroughly drying them.
  2. Crushing into Powder: Once the mint leaves are dry, proceed to crush them into a fine powder. This powder will serve as a natural teeth whitening agent.

How to Apply

Applying mint leaves for teeth whitening is uncomplicated and can be done as follows:

  1. Brushing with Mint Leaves: Take a small amount of the mint leaf powder and use it to brush your teeth thoroughly.
  2. Combination with Toothpaste (Optional): If you prefer using toothpaste, you can start by brushing your teeth with toothpaste and then apply the mint leaf powder for an added whitening effect.

Precautions

While using mint leaves for teeth whitening is generally safe, there are some precautions to keep in mind:

  • Sensitive Teeth: Individuals with sensitive teeth should exercise caution when using mint leaves, as they may experience increased sensitivity. Consult your dentist if you have sensitive teeth before starting this method.
  • Allergic Reactions: To rule out any allergic reactions, conduct a patch test by applying a small amount of the mint leaf powder to a small area of your skin. Monitor for any signs of irritation or allergies before proceeding with teeth brushing.

Tips

To maximize the effectiveness of mint leaves for teeth whitening, consider the following tips:

  • Consistent Use: Incorporate this natural teeth whitening method into your daily oral hygiene routine for consistent and noticeable results.
  • Maintain Good Oral Hygiene: Continue practicing good oral hygiene habits, such as regular brushing, flossing, and dental check-ups, to ensure overall dental health.

Benefits

Utilizing mint leaves for teeth whitening offers numerous benefits:

  • Anti-Bacterial Properties: Mint leaves possess anti-bacterial and anti-inflammatory properties, helping combat bacterial build-up and reducing the risk of infections, thus promoting fresher breath.
  • Strengthening Tooth Enamel: The vitamins and minerals found in mint leaves contribute to stronger tooth enamel, enhancing overall dental health.
  • Natural Moisture: Mint leaves help maintain the moisture and freshness of your teeth and mouth, resulting in a clean and comfortable sensation.
  • Cost-Effective: This method is cost-effective, making it an accessible and budget-friendly solution for teeth whitening.

Conclusion

The use of mint leaves for teeth whitening is a natural and straightforward approach to tackling stained teeth while promoting dental health. By following the provided steps, precautions, and tips, you can embrace this natural remedy to attain a brighter and healthier smile. While consistency is key to achieving the desired results, it’s important to maintain good oral hygiene practices to ensure overall dental well-being.

Whitening Teeth Naturally with Charcoal

Are your teeth stained or marred by yellow spots, robbing you of a confident smile? Look no further than charcoal, a natural and effective solution to whiten your teeth. Charcoal has a long history of being used to achieve radiant smiles. In the modern age, people often turn to artificial remedies, overlooking the potent benefits of natural alternatives. Dental problems are increasingly prevalent today. In this article, we’ll explore how to use charcoal for natural teeth whitening, providing you with a safe and eco-friendly way to restore the brightness of your smile.

Things Needed

Before you embark on your journey to whiter teeth, gather the following essential items:

  • Charcoal powder or charcoal-based toothpaste

It’s crucial to ensure the quality of the charcoal powder or toothpaste you choose, as this will significantly impact the effectiveness of the whitening process.

Steps to Prepare

Creating your own charcoal-based teeth whitening paste is a straightforward process that you can easily incorporate into your daily routine:

  1. Charcoal Powder: If you’re using loose charcoal powder, take a small amount, approximately the size of a pea, and place it in a clean container or on your toothbrush.
  2. Charcoal-Based Toothpaste: If you prefer the convenience of a toothpaste, simply apply the toothpaste to your toothbrush as you would with your regular toothpaste.

Application Process

The application process is crucial to ensuring effective teeth whitening:

  1. Brushing: Gently brush your teeth with the charcoal powder or charcoal-based toothpaste. Pay special attention to areas with visible stains or discoloration.
  2. Brushing Technique: Use a gentle, circular brushing motion, ensuring that the charcoal paste covers all surfaces of your teeth. Be cautious not to scrub too vigorously to avoid enamel damage.
  3. Duration: Brush your teeth for two to three minutes, ensuring that the charcoal has sufficient contact with your teeth to lift stains effectively.
  4. Rinsing: Rinse your mouth thoroughly with water, ensuring that all charcoal residue is removed. Swish the water around in your mouth to dislodge any remaining particles.
  5. Frequency: To achieve and maintain desired results, incorporate charcoal-based teeth brushing into your oral hygiene routine. Brush your teeth with charcoal twice a day, ideally after your regular toothbrushing routine.

Benefits

Embracing charcoal as a natural teeth whitening method offers a range of advantages:

  • Effective Stain Removal: Charcoal is renowned for its stain-removing properties, particularly when it comes to combating yellow teeth.
  • Crystal-Based Whitening: Charcoal contains a powerful crystal-based chemical that effectively whitens teeth, leaving them looking brighter and more vibrant.
  • Plaque Absorption: Observations suggest that activated charcoal can absorb plaque and other compounds responsible for staining teeth. This process helps maintain a cleaner and brighter smile.
  • Gentle and Safe: Charcoal-based teeth whitening is gentle on your teeth when used correctly. Unlike some abrasive commercial whitening products, charcoal is less likely to harm tooth enamel.
  • Natural and Eco-Friendly: Charcoal is a natural and eco-friendly alternative to chemical-laden teeth whitening treatments. You can maintain a beautiful smile without negatively impacting the environment.
  • Cost-Effective: Charcoal powder or charcoal-based toothpaste is an affordable option compared to expensive dental procedures or commercial teeth whitening kits.

Conclusion

Achieving a brighter, whiter smile doesn’t have to involve harsh chemicals or expensive treatments. Charcoal offers a natural and effective solution to combat stained or discolored teeth. Its crystal-based chemical properties, combined with its ability to absorb plaque and stains, make it a potent ally in your quest for a radiant smile. By incorporating charcoal-based teeth brushing into your daily routine, you can enjoy the benefits of a gentle, eco-friendly, and cost-effective teeth whitening method. Remember that consistency is key, and over time, you’ll likely notice a remarkable improvement in the appearance of your teeth. Say goodbye to yellow stains and hello to the confidence that comes with a beautiful smile.

Filed Under: Skin Care Tagged With: white teeth

Unlock Your Radiance: Shining Skin Naturally with Cucumber and Raw Milk

December 27, 2018 by sharvayonibeauty Leave a Comment

Everyone desires smooth and shining skin, and Mother Nature has bestowed us with numerous ways to achieve it. Unfortunately, many people turn to artificial creams and cosmetics, overlooking the incredible power of natural remedies. Nature has all the necessary ingredients to nourish and make our skin silky smooth. By harnessing the power of herbs and natural ingredients, we can unlock the true potential of our skin’s radiance. In this post, we will explore a simple yet effective remedy for achieving shining skin naturally.

The Power of Natural Ingredients

Before diving into the remedy, let’s take a moment to understand the power of natural ingredients for skincare. Herbs and natural extracts contain a plethora of vitamins, minerals, and antioxidants that can work wonders for our skin. Unlike artificial products that often come with harmful side effects, natural remedies provide nourishment and care without any adverse consequences.

The Key Ingredients

The shining skin remedy requires two simple yet powerful ingredients – Cucumber Juice and Raw Milk. Cucumber is known for its hydrating and soothing properties, making it perfect for revitalizing dull skin. Raw Milk is rich in lactic acid, which acts as a natural exfoliant and helps remove dead skin cells, revealing a bright and radiant complexion.

The Recipe

To prepare the shining skin remedy, follow these steps:

  1. Take a small amount of fresh Cucumber Juice and mix it with an equal portion of Raw Milk.
  2. Thoroughly blend the mixture to ensure the ingredients are well combined.

Application Process

Now that you have prepared the shining skin mixture, it’s time to apply it:

  1. Gently apply the mixture all over your body, ensuring complete coverage.
  2. Allow the mixture to work its magic for at least 30 minutes.

Rinse and Refresh

After 30 minutes, it’s time to rinse off the mixture:

  1. Step into the shower or bathtub and wash off the mixture with cold water.
  2. Pat your skin dry gently with a soft towel.

The Power of Consistency

To achieve optimal results, consistency is key:

  1. Continue the shining skin remedy regularly for a few weeks.
  2. Be patient and allow the natural ingredients to work their magic on your skin.

Witness the Transformation

Over time, you will witness the incredible transformation of your skin:

  1. Experience your skin shining brilliantly like a diamond in the sun.
  2. Enjoy the smooth and radiant complexion nature has gifted you.

Embrace the Beauty of Nature

The shining skin remedy is a testament to the beauty of nature and its ability to provide us with everything we need for healthy and glowing skin. By embracing natural remedies, we can achieve the smooth and shining skin of our dreams without compromising on our well-being.

Conclusion

In conclusion, the quest for smooth and shining skin ends with the power of natural remedies. By using Cucumber Juice and Raw Milk, you can unlock the true potential of your skin’s radiance. Embrace the beauty of nature, and soon, you will be amazed by the glowing transformation of your skin. Say goodbye to artificial creams and embrace the natural magic that lies at your fingertips. Let the power of herbs and natural ingredients guide you towards a radiant and beautiful complexion!

Filed Under: Skin Care Tagged With: artificial creams, beauty of nature, beauty tips, cucumber juice, glowing complexion, natural ingredients, natural remedies, radiant complexion, raw milk, shining skin, skin care, smooth skin

Home Herbal Beauty Tips is now changed to Sharvayoni!

October 21, 2018 by sharvayonibeauty Leave a Comment

Dear valued customers,

We are thrilled to share an important announcement with you. Starting from October 20th, 2018, we have officially rebranded ourselves as Sharvayoni. This exciting change reflects our commitment to providing you with exceptional herbal beauty tips and services.

As part of this rebranding effort, our website’s domain name will now be sharvayoni.com, and our Facebook page will be renamed as Sharvayoni. Don’t worry, all the valuable content and herbal tips that you have come to love will still be available under the new name.

We would like to express our gratitude for your continued support throughout this transition. Despite the change in name, our dedication to delivering high-quality herbal tips remains unwavering. We are confident that our new brand, Sharvayoni, will continue to serve you with the same level of excellence and reliability that you have come to expect from us.

If you have any questions or concerns regarding this rebranding, please do not hesitate to reach out to us. We are here to assist you and ensure a seamless experience during this transition.

Thank you for your understanding, loyalty, and ongoing support. We look forward to sharing more valuable herbal tips and beauty advice with you as Sharvayoni.

Best regards,

The Sharvayoni Team

Filed Under: Hair Care, Health and Wellness, Skin Care

How to Prepare Bathing Powder Naturally at Home

August 16, 2018 by sharvayonibeauty Leave a Comment

Bathing Powder

Bathing is purifying, life promoting, a destroyer of fatigue, physically removes sweat and dirt, is resuscitative and a promoter of ojas or divine energy

Charaka Samhita Sutrasthana shloka on Dinacharya

As per ayurveda, it is described that everyone should bath every single day within the first few hours of sunrise. Bathing is considered as so sacred and good start of day especially in Tropical Countries like India. It is so essential that people will never eat, cook or do any chores without taking bath.

Sweat from our skin removes the toxins from our body. Our body sweats through the tiny pores present on the skin. Sweat contains oil, dead cells and other toxins present in our body. If this sweat is not removed or cleaned properly, it can lead to many implications.

But the synthetic or artificial soaps which we use now a days are harsh on the skin and closes this pores. Without these pores sweat is not removed and so the toxins from our body. These toxins get accumulated in our skin which gives rise to many problems.

To clean or cleanse this sweat, ayurveda describes many ayurvedic powders which cleanses our skin gently and opens up these sweat pores and encourages removal of sweat. Finally, when the skin is cleansed with water, you feel refreshed, energized and ready for the day.

Here we describe one such powder that is described in the ayurvedic texts. This powder can be prepared easily in your home with readily available ingredients from your kitchen. But the benefits from this powder are numerous.


How to Prepare Bathing Powder Naturally at Home

What you Need:

  • 100gms of Gram Flour (Home made Flour will be better)
  • 100gms of Green Gram Flour (Home made Flour will be better)

How to prepare:

  • Take the Gram Flour in a bowl.
  • Add the Green Gram Flour.
  • Mix it thoroughly till it mixes well.

Why it works:

Green gram flour is known for its gentle action of opening the pores of the skin which helps in sweat more and removes toxins from the body. Gram flour lightens the skin giving a glow to your skin.

Use this bathing powder regularly instead of soap. You will astonished when your skin becomes buttery smooth. You will have healthier skin and your overall health will be improved as the toxins are removed regularly from your body.

This Ayurvedic Bath, is an excellent daily rejuvenation, detoxifying and cleansing and purificatory ritual that is best done in the morning at a quiet time.

Filed Under: Skin Care Tagged With: bath powder, beauty tips, gram flour, green gram, skin care

  • « Go to Previous Page
  • Page 1
  • Interim pages omitted …
  • Page 107
  • Page 108
  • Page 109
  • Page 110
  • Page 111
  • Go to Next Page »

Primary Sidebar

Looking for something?

Connect with us online

  • Email
  • Facebook

Popular Posts!

How To Prepare an Anti-Acne Face Mask

Banish Dark Circles and Wrinkles with Banana and Rose Water

Avocado and Honey Hair Mask: A Natural Deep Conditioning Treatment

How To Make Face Pack For Dry Skin

Benefits of Curry Leaves for Hair and Body!

Categories

  • Hair Care
  • Health and Wellness
  • Skin Care

Tags

beauty benefits beauty tips Chemical-Free Hair Care coconut oil curd curry leaves dark circles DIY Hair Care egg exfoliation eye care glowing skin hair care Hair Care Routine hair care tips hair growth Hair health Hair Health Improvement hair loss Hair Nourishment Hair Strengthening health and wellness honey hydration lemon lemon juice milk natural beauty natural conditioner natural face mask Natural hair care Natural Hair Growth Natural Hair Remedies natural ingredients natural remedies Natural remedy natural skincare olive oil radiant complexion radiant skin scalp health Scalp Nourishment skin care skincare skincare routine

© 2026 · Sharvayoni · Privacy Policy · Disclaimer